Vol-026-4 Sanding With Micromesh Abrasives PcT Tutorial (Intro)
Video #165: “Those micro mesh sanding pads look very nice and easy to hold.” ~Jocelyn-C
More...

** This post is an introduction to one of our paid tutorials.
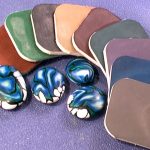
Nothing is more beautiful or professional looking than perfectly sanded and buffed polymer clay beads. Now you can get that silky smooth, glassy finish on your beads, with a lot less effort… using Micro-Mesh Cushioned Abrasives.
Founded in 1966 (a particularly good year, since I was born in ’66 LOL) Micro-Surface Finishing Products originally developed their finishing products for the art restoration industry. Based in Wilton, Iowa, USA, they have expanded over the years into commercial and industrial products for finishing, repairing and polishing many materials such as acrylic windows in airplanes, specialty metal engine parts, stone countertops, ceramics, wood products and even fingernails.
They have also created kits for Polymer Clay Artists… Yay!
Because Micro-Mesh is designed differently than regular wet/dry sandpaper, it is more efficient, more even and does a better job, faster. Which is something we all need when it comes to the dreaded job of sanding our polymer clay beads. Am I right?
jayne s
Cindy, where did you get the micro mesh discs you used in this Volume 026-3 Dichroic Glass video? They look as though they would be so much simpler to use.
lorrie a
Loved the “sanding” part… that will help me with some things I have already tried where the mica powder sort of “took over” the clay! Thanks for the tips Cindy!
beadbroad
I am most interested in the MicroMesh sanding pads. Where can I obtain these other than the website offered? Also, have you considered becoming a distributer for some of the more obscure tools/specialty items that you demonstrate in your fantastic how-to videos? Oh – and did I mention how much I look forward to Fridays.
Transcript coming soon...
Transcript coming soon...
Our goal is to translate these videos into as many languages as possible. If you are interested in helping with this initiative, then please do contact us and we will figure out a way to make it worth your while :)
Shareable Images


Want to chat about today’s post? That’s what the comment section below is for. Scroll Down… We’d love to hear from you!
Or... if you would like to request a topic for a future post, here is the link to do that… PcT Suggestion Box
Cindy and Posters,
I came across the micromesh tutorial in the last couple of days. I don’t mind sanding, I get a bit Zen when doing it, but I wouldn’t mind IN THE LEAST if it went a bit quicker!
I went onto the micro-surface web site to try to order the micromesh pads and the abrasive swabs. I do a lot of shaped pieces rather than “beads” and have problems sanding some of the intricate edges, so I thought that the abrasive swabs might be perfect. However, I can’t seem to select Canada as my country on their Shopping Cart. Does anyone know whether they have stopped shipping to Canada since this tutorial was originally posted back in 2010?
Thanks
This morning I found that Lee Valley carries the micromesh pads as a kit of 9 for $15.00 Canadian (about $12 US at the moment! ugh). I have them on order. However, they don’t carry the abrasive swabs (I’m going to contact them and ask them to please get them also, because I do a lot of shaped pieces).
Going through the posts about these pads, I found an old post that says that Firemountain carried them. I’m going there next.
Looking forward to getting my micromesh pads!
Did anyone ever solve the question as to whether you are supposed to use the pads back and forth only or does circular work?
Hi Doreen, Some people say you should only go back and forth and not in circles, but I didn’t really notice a difference. Perhaps a proper test would show a difference… but I’m guessing probably not such a big difference that you would need to worry about it.
Hi Cindy
I just reordered my mcro mesh soft pads and now found a place that has the swaps (sceintific instrument service) what would be the best size to order— they come in small, medium and large tips–set of 12 – one of each grit)
Natalie Herbin aka safti
Hi Natalie, I have found that I really don’t use those swabs very much. They area bit too flexi and you can’t get much pressure behind them to sand properly. You may just find a rolled piece of sandpaper more helpful. If you’ve bought them already then of course go and use them. Let us know what you think of them.
Hello Cindy,
These are now on my must-have list, as I love the sanded look, but have hated the actual sanding since as long as I can remember (Hello Kindergarten woodworking class- I dont like sanding)
I was wondering if you’d had any time to look at an adaptation of these micromesh to use in the tumbler for smaller, round beads?
Thanks again!
<3 your tutorials!
Hi Carrie, I don’t know if it would be worth trying to use Micro Mesh in the tumbler when we can use this sanding substrate.
How great would it be if all these “DYI ” ideas were compiled into one place.
Cindy would it be possible to open a page for paid members to access where we can put our ideas and read others, arranged in categories. Like you and Doug need more to do. It’s early and I have had some coffee so I’m just full of…….ideas lol
DYI = Do Yourself In
(I’ve got a HUGE pile of IKEA requires-two-people full height wardrobery to assemble by myself on Saturday, so I’m definitely going to have a DYI weekend! :D)
But that is a great suggestion, Cheryl! ;)
Thanks for your suggestion Cheryl – I’ll add the idea to our project pile. We need more hours in the days so that we don’t end up DOI – “Doing Ourselves In”
Love that some of the crazy stuff I end up trying helps others, lol! Will also note that you need a permanent marker to note the grit level of the paper so if you can use it again, you know what you are using.
Also, you can try the chain/string sanding approach used for wood turnings.
You can use double stick carpet tape or moleskin cut in a thin strip, Place a firm small diameter chain or string (vary the diameter of the chain/string to the openings/areas you need to tackle). Then put an equal strip of wet sanding paper over it. You can slide this through openings or gently around edges. The chain/string gives you “leverage” like you get with dental floss when you do your teeth. Dental floss would make a good base string, as it is strong.
I affix the string, sandpaper and moleskin, then use scissors to cut a thin enough strip. You can run your protected thumb or a burnisher over the seams pulling to bring the edges together.
When I use this, the object is usually in a vise so I can focus on the pressure on the sanding “string,” and I use the thinner version of moleskin to hold it in the vise so it doesn’t scratch the surface. The thinner version is also great used on the surface tips of pliers so that you do not scratch anything, or to adhere in small pieces around the bottoms of glass so they are easy to pick up and non marring. Only use moleskin around baked clay, as it sheds fibers.
All I can say is “Wow, thank you!” I have copied and pasted all this information into Evernote (it keeps me organized, I love it …)
Hi Cindy,
I was watching the back issue that I purchased 026-4, Micro mesh abrasives, you showed little sticks. They look great, and I can’t find them anywhere that I searched. Can you tell me where I can order them from. Every where that I searched including Amazon offers sticks that look like nail files :)
:)
Thank you,
Ginny
Hi Ginny – I found then at PolymerClayExpress.
They call them Micro Swabs or Micromesh Swabs.
HI Cindy – Have you used these swabs? I tried them and was very disappointed – they seemed very flimsy to me and I couldn’t exert any pressure on them while trying to sand …
Maria, I have had good luck making my own sanding pads and tubes for tight spots using the fine grade wet sandpapers and Dr. Scholls extra thick moleskin from the drug store. Just cut the sandpaper to fit the moleskin, and when needed, insert a bamboo skewer, toothpick, or knitting needle between the moleskin and the sandpaper.
The glue on the back of the moleskin is strong, and the moleskin will do sandpaper grit removal and some buffing, while the dampened sandpaper side can get into the knooks and crannies well when supported by a wooden or metal stick.
You can roll tubes, keeping the sandpaper on the exterior, or you can make mini paddles, like those used in boating. Dual layers of moleskin gives you more padding, if you need it.
Have also rolled tools or made sandpaper shapes using double sided carpet tape, just enclosing a round cosmetic cotton wipe for cushioning and/or shaping.
Another option is to purchase some needle diamond rasps or metal files. If you do, you will also need to purchase a brass brush to clean the poly clay out of the grooves.
In some instances, I used a finger cot, wrapped it with double stick carpet tape while on my finger, then adhered a wet grit sandpaper. They might not last long, but, they can sure do the trick to remove those fingerprints from concave or convex surfaces.
Hope this helps and all best…
Jocelyn – what a thorough answer! Thank you so much. I love this blog – everyone is so nice and helpful here!
Jocelyn- you are a wonderful inventive sharing trove of treasures:) Thank you
this is going to be copy/pasted on my word pad, where I keep cool stuff like Dixie Ann’s neat scrap cane:)
Yes thank you Jocelyn!! It is so good to see you back. You must be feeling better, which is excellent news. Thanks for helping Maria out like that!
About sanding your beads –
I did a class with Melanie Muir and she gave us a good sanding shortcut.
She uses 400 W&D sandpaper in a circular motion on the top of her mokume gane pieces (the back is textured and does not need sanding) and gently on the sides so as not to make a sharp edge. Then she moves on to the micromesh but she only uses the 1500 and 3600 nothing else.
then she buffs the pieces and they look lovely and shiny with no varnish or wax needed.
so there is no need to go through all the grades of sandpaper or micromesh.
Hope this helps
Hi Sharon, the thing everyone needs to understand about how sandpaper works is that it is removing the material from the piece you are sanding, through a series of scratches. The heavy grits are deep scratches and remove the most material. The finer you go in grits the finer the scratches get. So basically what you are doing is removing the deeper scratches and replacing them with finer and finer scratches until they are no longer visible to the human eye or to the touch.
The smoother the surface and the fewer and finer the scratches become, the more shiny the piece appears, because the light bounces more freely off the surface, rather than being trapped in the scratches.
So… skipping steps in sand paper will work, because you are removing the deeper scratches and replacing them with finer ones. But it can actually be more work in the end, because the finer grit has to work so much harder to remove the deep scratches. Plus it wears out that finer paper much faster.
To make a looong story short, sometimes it is faster to just run through all the grits (if you have them), than to take the extra time it takes for a finer grit to remove the coarser grits scratches.
If the piece is very smooth,even and flawless to start with, you can start at a higher grit in the first place to same some time and effort though. That way you won’t need to be replacing such deep scratches, if you don’t have to.
But like you experienced, you can get good results by skipping steps in sandpaper. It just might not be saving you as much time as you think.
Hi, Cindy:
I’d just like to clarify: you recommend that kit that comes in grades “1500, 1800, 2400, 3200, 3600, 4000, 6000, 8000, 12000.” I always start at 400 and am frustrated with that (it takes so much work to remove a fingerprint!), and if I’m motivated, I’ll move up to 1000. But you’re suggesting *starting* with 1500? Seriously? I’m looking at the company’s other kits, and notice they offer a Mircromesh AO (aluminum oxide, maybe?) in grades “300Ao, 600Ao, 800AO, 1500AO, 2400AO, 4000AO, 12000AO.” That sounds waaay more my speed. I’d use up to 1500 and then stop. Everything I’ve read says going as high as 1200 is sufficient, with the odd mention of ~ 2000 now and then. Is there a reason you don’t recommend that one? I can’t even see how I’d get a small divot or bump off a piece of clay with 1500-grade sandpaper; I’d wear the joint of my thumb off before I’d grind down the bump! I’d rather start with a coarser grain and work my way up. Help me understand the reasoning for not going with the coarser grain? Thanks!
And at last, the secret of those sanding pads we’ve seen Donna Kato so easily using on HGTV is revealed! Yay!
Binky
Great question Binky that is a common confusion for everyone! You see Micro-Mesh Pads’ grit number isn’t from the same numbering system as the Wet/Dry Sandpaper is. It is actually an abrasive product that uses kind of a crystal type material that ‘planes’ the surface rather than a sand particle of different grain sizes that actually scratches or gouges the surface. It is this crystalline structure that makes the Micro-Mesh product so quick and easy… you really don’t need to spend as much time on each grit, removing the scratches from the previous grit like you do with the sandpaper.
Like I mentioned, Micro-Mesh – (Regular) Pads (such as these are) are numbered differently. I believe it is a micron thing rather than a grain size thing… any way, the closest comparison to the two is:
Micro-mesh (Regular) 1500 = 400 grit Wet/Dry Automotive Sandpaper.
So to clarify… in the Faux Jasper Tutorial where I started with the 320 grit wet/dry then went to the 1500 Micro-Mesh would make perfect sense. It would be much like going from 320 grit to 400grit only with a much better performance. If I had a Micro-mesh pad that went coarser I would have started there instead.
Does that help to clear things up a bit?
A different numbering system?! (face palm) Oh, for crying out loud! A different standard! I *hate* that! But I understand now. You suddenly don’t seem like a crazy lady. :-) (But I guess *I* do!) Well, poo. I’ll pipe down now and go get some foam pads. I’m not much for sanding, but it looks as if I’ll be a sander *now*! Thanks for helping me out, Cindy!
Hi Cindy
I just received Micro Mesh Soft Touch Pad set. I ordered it from Klingspor’s Woodworking Shop . The cost was $10.95 and shipping $7.99. I ordered with other things that my hubby needed for his woodworking so the shipping was not bad. They are exactly like yours I bought the 2X2 size. The only problem is that they do not carry the other two products that you talk about in the video..Oh what size on the swap micro mesh do you recommend if and when I decide to get them(which I probably will).The phone number for Klingsor’s Woodworking is 800- 228-0000. People can call them to varify that the Micro Mesh Soft Touch Pads ( MI30000) is the color coded ones you show…mine were but you never know when the change things in a catalogue.
I got the gray ones! Shoot. I did buy the video lesson and learned something else….. I need to stop being so impulsive and running to buy before I have all the information. So I’ll order the right stuff this week. Sigh.
I love the micromesh pads! I follow the guide by starting with the most coarse pad which is the rust colored one and wet sand each bead or piece down through the levels of pads. Then I buff each piece with the softest material I can find (baby burping pad)until I get a nice shine. Then I decided to try rubbing oil on a bead and buffing it again and it looked and felt great…
I’m still trying to get this sanding down. I’m working on the Aurora technique and I started with the brown, I had to leave it to go to work, when I came home, it still had a white film over it. anyone explain what that is? how do I know when I have sanded enough?
@michelle: I think Jayne answered this quite well for you. The white powder is just dried sanding dust. If you start at the beginning grits and go all the way through to the end, you should have a well sanded bead. Buffing after sanding also helps remove any powders left, should there be any. Other than that, it would help to see what you are doing and how the beads look after sanding to be able to help you any further than that.
anyone have a huge price jump when you see the shipping and handling? the price of them is 8.00. to ship to calif had a $12.00 shipping and handling fee. Anyone know how long they will last before wearing down?
@Michelle C: Try Terry at UltraDome … he’s in CA
@Michelle C: Carolyn’s right, Terry’s shipping is cheaper for the Micro-Mesh pads than the actual company is. Plus he carries lots of other cool supplies that you may want to get at the same time. Now in regards to your question about how long Micro-Mesh Pads last… in case you did not know, there is a search box at the top of the page that is really helpful in being able to find quick answers to many of your polymer clay questions. Most topics have been discussed multiple times amongst the community members here. Be sure to scan through the comments below each of the articles for tons of helpful advice. And when you come across a particularly long comment thread (like the one on this page), the “CTRL-F” feature in your web browser is very useful for easily jumping to specific keywords on the page. In fact, if you search through the comments above, you will find several comments about how long the micromesh product can last.
@carolyn: HELLO Carolyn! How did I miss your comment?! We sure have missed you around here. Hope you are feeling much better. It really has been quite the year for you hasn’t it? Glad to see you up and around. Hope you are taking good care of yourself and are not over doing it. So happy to hear from you!! :-)
Received my package from Lee Valley yesterday and I LOVE the micromesh sanders! My beads feel so smooth I can’t stop handling them….
Raining here in Ottawa….what happened to winter? HAPPY NEW YEAR TO EVERYONE HERE…I’m looking forward to 2011’s lessons. Thanks Cindy.
thanks, for that.
just a quick question – how do you know when to move on to the next grit of paper/micromesh
Thanks in advance
@Sandra: I’ve found that when the grit doesn’t “grab” anymore is when you change to the next step. After the first couple of grits it goes rather quickly. HTH
@Sandra: Sounds like Laura answered your question perfectly! Thanks Laura!
Hi Isabel,
In the new year, I’ll be moving the beginners course into the members library, but for now you can access it from the link here at the blog at the top of the left navigation bar >> Topic Categories >> 01: Courses >> Protected: Course #1: Polymer Clay Bead Making for Beginners.
PS: Love your Christmas Lunch story. Thank you for sharing it… and congratulations! Getting feedback like that, from your friends and even from people you don’t know, is so rewarding.
Hi Cindy
I’ve just been reading this thread cos I’ve had some ‘issues’ with sanding. I’ll ask my sanding questions later if I haven’t figured out the answers myself, but here’s the embarrassing question. I can’t figure out how to get back to my original beginners course tutorials to read the basics on finishing! I looked at the dashboard and see a list of all the lessons I’ve purchased, but the beginner’s tutorial isn’t there. How do I find it?
Isabel
p.s. I LOVE your videos. Yesterday I went out for a Christmas lunch with a couple of friends and gave them each a bracelet I’d made and they went wild! Also, I was wearing a necklace I’d made and the waitresses all wanted to know where I got it! Do I feel ‘artistic’ or what??
Attention all Micro-Mesh Fans:
My friend Terry Morris of EpoxyJewelry.com and Ultradome (The UV Resin Guy) is now carrying Micro-Mesh Pads at his site. So next time you order some resin, pick some of the pads up there. Also, check out his new bezels and other findings. He’s starting to carry some pretty great stuff including some awesome silicone molding putty that I’ll be showing you soon, as well as, some 2 part epoxy resin. You may want to go check that out!
Cindy names them above: Micro-Surface Finishing Products. In the video she explains which ones we need and how to use them for the best results. The one drawback about this company is that shipping & handling is $12.50 …
I would love to know which website you purchased your “micro-mesh on. I would like very much to use this technique and would appreciate it very much…PLEASE!
Wow, finally received my micro mesh pads.. these things are AWESOME! Money well spent. Thank you Cindy for the tip :)
Holy Hannah, that’s robbery!
Checked at Firemountaingem.com and found three Micro Mesh products in their art clay section, the pads # H20-3395TL, the thin swabs# H20-3394TL, and some neat thicker swabs# H20-3393TL.
Provided you pick the cheapest postage option and are willing to wait up to 8 days, the shipping is $5.00 with a minimal (under $3) handling fee.
Wow” I just went to purchase a set of micro mesh pad and the shipping was 12.50 USD That is insane. I think I will sand My way. I barely leave finger pints anyhow.
Hi Cindy,
I just purchased some micro mesh pads and agree, they are much easier on my hands. I numbered each one with a permanent marker, 1-9 to graduate to the finest pad. This way, I don’t have to refer back to the chart {although I still have it}. I have used them on a few pendants and it is a lot easier than using the scraps of wet/dry sandpaper. Thanks for all your tips!
I received my pads a couple of days ago and have had a hard time putting them down — they are FABULOUS and make me feel like I should resand all my bead stock again! They are much nicer to use than ordinary sand paper and the end result is stunning — even better than using Klear! Thank you for finding, researching and sharing this product with us Cindy.
Woohoo! Just ordered my micro-mesh pads and sticks from polymerclayexpress.com. Pads + Sticks + Shipping = $36 and some change. I’m happy with that… I can hardly wait to get them!!
~Lisa :)
@Tanya L: It would indeed be great if they cleaned me out, but trust me, that won’t happen. I have lots of stock with me … more than one shop could handle. I’m just delighted that the Lord led me to this RV park. It wasn’t even here when I was in Fort Bragg with Don a few years ago. Being new, I’m getting in on their ground floor. I don’t expect a lot of action until they build their clientele. It is a good thing that I have patience.
The RV park here in Fort Bragg wants some of the beach wraps (stones found on the beach, hand polished and wire wrapped) as well as some of my clay and also other wire art for their gift shop. I’ll be here all week and we’ll be working out what they want and I’ll be making as much beach wrap as possible. I’m pretty sure they are going to take some of my lentil beads and some of the faux dichroic. I’m really stoked!!!! Unfortunately, it will most likely all be on consignment … wish it were out-right sales. At least this will give me a business reason to come to Fort Bragg at least yearly. I really do love it here and Don and I were here many times. In fact our last get away together was to Fort Bragg.
@carolyn: Carolyn, what a great idea. Now I’m looking at the pads, and wondering if I can glue them to a toothbrush to make the back and forth motion better, lol. I am better circularly.
Glad Fort Bragg is being good to you!
@Jocelyn: See above where I contacted Micro-Surface … back and forth is not necessary with these products … you can do circular just as well. It may be harder to make sure you’ve sanded everything, but that’s the only draw-back to circular sanding.
@carolyn: Sounds like you’ll be busy and have a great time! It’s great to know this is something you can count on yearly. Good luck – hope they take lots of lentils and your faux dichroic.. Wouldn’t it be great if they cleaned you out?? :)
I ordered these and they came in. They are the BEST thing since sliced bread. I have never had such a smooth finish from regular wet/dry sandpaper. I’m a believer. Thanks Cindy for showing them to us.
Hey, Guys – and gals – if you ever find rocks that you’d like to polish and don’t have a tumbler … these pads work great! My arm is killing me but I have some great stones polished and ready for wire wrapping. Found the stones on the beach yesterday. They were already nicely shaped and just needed polishing.
@carolyn: Gad ! WE will do anything to enjoy ourselves tee hee. Love it
@carolyn: Wow, Carolyn! So they work as well on “real rock” as they do on poly clay? Thanks for trying it out and letting us know!
I ordered them through micro-surface.com. The shipping was $12.00, but I figured that was better than trying to hunt all over for them. I got the little polishing swabs there too.
I just saw where Fire Mountain Gems (firemountaingems.com) has the Micro-Mesh Pads. They have “all-assortable pricing”, so the price depends on how much you buy. Prices are – $11.79, $11.51, 11.24, $10.50. Shipping is $5 for Fed-Ex Ground, no matter what the weight is. This isn’t the cheapest price if you’re only ordering the pads. But if you need other items it may be the way to go. Oh, but they don’t have the swabs..