Gold & Silver Tinted Liquid Sculpey Polymer Clay
Video #709: A new product from Polyform that adds metallic properties to Liquid Translucent Sculpey (TLS).
More...

IN THIS POST: — translucent liquid sculpey — tls — polyform — tinted liquid polymer clay — gold liquid clay — silver liquid clay — colored liquid clay — opacity — opaque — pearlex — sculpey molds — bakeable molds — silicone molds — bezel molds — cabochon molds — faux druzy — seashell impressions — (Topics marked with an asterisk* are discussed in the Comments Section below).
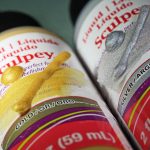
Today we are talking about Gold and Silver Liquid Sculpey Polymer Clay, made by Polyform, the makers of Premo.
This is a new product for Sculpey which is a metallic tinted version of Translucent Liquid Sculpey (TLS). This colored liquid polymer clay can be used in the same way as regular liquid polymer clay, for image transfers, molds, raised finishes, etc.
I demonstrate what the product looks like raw and baked, as well as show its strength and translucency.
I also talk about how you can mix your own tinted liquid polymer clay by mixing Translucent Liquid Sculpey (TLS) and PearlEx Powders so that you have an unlimited variety of color liquid clay.
Sculpey also has a new set of Bakeable Silicone Molds for Bezels and Cabochons that work well with the Gold and Silver Liquid Sculpey. You just pour the liquid clay into the molds and bake right inside. Watch out for bubbles in the liquid, though, or you will end up with unsightly holes in your molded pieces.
On a side note, in regard to color, the Gold Liquid Sculpey appears to be exactly the same color as Premo Sculpey 14K Gold Polymer Clay and of the Gold Paint from the Sculpey Silk Screening Kit. The same goes for the Silver Sculpey Liquid, being a close match to the Premo Silver Clay and the Silver Silk Screen Paint as well. This means you could easily color coordinate those three products in some way if you chose to.
00:00:03 –> 00:00:08 Hi guys, its Cindy Lietz, your Polymer Clay Tutor, and today’s PcT Product Demo, we’re
00:00:08 –> 00:00:16 talking about a new product called Stampies, and it is a design tool for Polymer Clay that
00:00:16 –> 00:00:18 is made in the UK.
00:00:18 –> 00:00:27 Now a little while ago, the owners of Stampies, his name is Mitch, and he has his brother…I’m
00:00:27 –> 00:00:31 actually not sure what his brother’s name is, but they contacted me, I guess they’ve
00:00:31 –> 00:00:38 been…they have been subscribers to our Youtube Channel for more than a year, and they really
00:00:38 –> 00:00:41 enjoy the stuff that we’re doing here, and they said they had this new product they wanted
00:00:41 –> 00:00:45 me to test and could they send me some, so of course, I said yes.
00:00:45 –> 00:00:52 So let me just show it to you, it is quite a unique product, now, here…first of all,
00:00:52 –> 00:00:56 I’m gonna show you the packaging…I’ve got 5 different sets here, they actually only
00:00:56 –> 00:01:07 carry 6 full sets of the Stampies lines, now if you get a full set, that has 10 designs
00:01:07 –> 00:01:15 in it, they’ll come in a box like this which is really a nice package and it is quite cute
00:01:15 –> 00:01:20 when you open it up, they’ve got a pamphlet on the inside here with some instructions
00:01:20 –> 00:01:25 and basic information on how to use them and everything.
00:01:25 –> 00:01:30 And then, they’ve got the little Stampies inside, now, they’ve got these really cute
00:01:30 –> 00:01:38 little…they look like tiny little swords but they’re really sharp pointy little cotton
00:01:38 –> 00:01:45 swabs that you can dip in rubbing alcohol, and…to clean out the tools if you need to,
00:01:45 –> 00:01:50 but I’ve found you don’t need to clean out the tool if you make sure they’re wet first
00:01:50 –> 00:01:53 before you push them into the Polymer Clay.
00:01:53 –> 00:02:00 Now each…he’s got several different sets, this set happens to be the…which one is
00:02:00 –> 00:02:05 this one, this is called Pillars of Creation, and they’re quite unique, he’s got a bunch
00:02:05 –> 00:02:14 of different kind of styles, but this one’s got a design on each end…if you buy them
00:02:14 –> 00:02:19 one at a time, you will just get a stamp with only one design on it, but if you buy more
00:02:19 –> 00:02:25 than one pattern, he’ll put two on the same stick, so this is really considered two tools,
00:02:25 –> 00:02:28 but they put them on the same stick, which just saves on the packaging, and you know,
00:02:28 –> 00:02:30 your storage and everything.
00:02:30 –> 00:02:36 So this is a set that has 10 different patterns on it, and I’ll actually show you how they
00:02:36 –> 00:02:39 work and press them into the clay, and then I’ll show you some of the other designs as
00:02:39 –> 00:02:40 well.
00:02:40 –> 00:02:46 And if you get them wet, and I just do it by dipping into some water, you can press
00:02:46 –> 00:02:55 into the clay, they’ve got a very deep design here, so you can press down quite deeply,
00:02:55 –> 00:03:00 depending on the design… now this one has quite a bit of flat area to it, so it won’t
00:03:00 –> 00:03:08 push down into the clay quite as easily, but if it’s got a cut open area, like this one
00:03:08 –> 00:03:15 here, then when you press into the clay, it presses down quite far, there’s less resistance
00:03:15 –> 00:03:20 obviously, and that one’s kind of a neat one, it has a half circle that pops up…out to
00:03:20 –> 00:03:22 the side.
00:03:22 –> 00:03:32 Here’s a kind of a flower design on that side, these stamps are great for all kinds of different
00:03:32 –> 00:03:38 Polymer Clay projects, but they would work really well for techniques like Mica shift
00:03:38 –> 00:03:46 or Mokume Gane that kind of thing, and they’re very, very deep like I said, so you can get
00:03:46 –> 00:03:51 the pattern in quite…quite far in.
00:03:51 –> 00:03:57 Now these are printed using a 3D Printer, but apparently… and I don’t know much about
00:03:57 –> 00:04:05 3D printing, but apparently, it’s a different type of 3D printer that does very, very fine
00:04:05 –> 00:04:10 printing, and you can tell because there’s really no ridges or lines in the printing
00:04:10 –> 00:04:15 of this, which would make a big difference if you had a regular 3D printer trying to
00:04:15 –> 00:04:22 make stamps with it, you would…the clay would really grab on it, but these do really
00:04:22 –> 00:04:24 well in the clay.
00:04:24 –> 00:04:33 Here’s the last design of that set, and you can…here I’ll just dab that off, oh and
00:04:33 –> 00:04:39 one thing, if you are going to be doing this into Fimo clay, Fimo doesn’t like water that
00:04:39 –> 00:04:46 much, it kinda makes it sticky, so if you were to put some cornstarch or something like
00:04:46 –> 00:04:51 that on your clay first and then press down into it with the stamps then it wouldn’t stick.
00:04:51 –> 00:04:58 And let me just show you some of the patterns, now, each of the sets…like this one looks
00:04:58 –> 00:05:04 like it has a lot more designs to it, but they’re a little bit wider, so they just kinda
00:05:04 –> 00:05:10 stretched out further, this set is called Ancient Origins… it does have one extra
00:05:10 –> 00:05:17 piece to it which is this one here, and I’m not totally sure what this is for other than
00:05:17 –> 00:05:25 maybe pressing that down, and then putting like 3 of the patterns inside of it, and the
00:05:25 –> 00:05:29 patterns are really quite unique, like I’ve said, really neat designs.
00:05:29 –> 00:05:37 This set here is called Valhalla, and they kind of have a rune pattern to them…one
00:05:37 –> 00:05:42 thing I wish that they had was some explanation as to what these patterns were, and I did
00:05:42 –> 00:05:46 mention that and maybe they can do that in the future…say what each of these patterns
00:05:46 –> 00:05:51 mean, and then…you know give them a name, and also which direction they’re supposed
00:05:51 –> 00:05:55 to go, I have no idea if I have any of these patterns upside down or the right way because
00:05:55 –> 00:05:59 I don’t know what they are, but they’re really very cool looking.
00:05:59 –> 00:06:05 Now this set here is called Smooth Geometry, and it’s a little more basic, it’s got,
00:06:05 –> 00:06:08 you know, circles and squares, stars that kind of thing.
00:06:08 –> 00:06:16 And then this set here is called War and Peace and it’s got some really neat ones in here,
00:06:16 –> 00:06:21 they’ve even got like a radiation symbol which I think is kinda funky.
00:06:21 –> 00:06:26 And then this last set I just stamped out for you is…oh I see I didn’t even do a
00:06:26 –> 00:06:31 straight line, it’s called Pillars of Creation, and I’m not totally sure why it’s called that
00:06:31 –> 00:06:36 either, but it’s got some really great designs in it as well.
00:06:36 –> 00:06:41 Now the clay that I was stamping into is called… this is Soufflé Clay and the color is called
00:06:41 –> 00:06:47 Pesto, and Soufflé Clay is nice to stamp into because it has quite a…it’s not a very
00:06:47 –> 00:06:53 sticky clay, so it releases from your stamps really well.
00:06:53 –> 00:07:00 Now the other thing I was reading about these stamps is that you don’t wanna use acetone
00:07:00 –> 00:07:05 on them, I guess that will be very hard on the plastic, and anyone that’s ever used acetone
00:07:05 –> 00:07:10 on Polymer Clay knows that you can remove fingerprints from baked Polymer Clay with
00:07:10 –> 00:07:15 acetone, so I’m guessing it’s a plastic issue, probably it just eats at the plastic, so make
00:07:15 –> 00:07:21 sure not to use acetone or fingernail polish remover, or anything like that on them, just
00:07:21 –> 00:07:24 rubbing alcohol or water.
00:07:24 –> 00:07:32 Now as far as places you can get them, he’s got a website at SimpleKonstruct.co.uk, ‘cause
00:07:32 –> 00:07:37 they’re out of the UK, or you can also get them at his store…or their store, it’s
00:07:37 –> 00:07:43 the brothers’ store, at Simple Konstruct on Etsy, and they are quite reasonably priced,
00:07:43 –> 00:07:48 if you buy one image at a time, they’re kinda in the $2 per image range, and if you buy
00:07:48 –> 00:07:53 the full set, it’s about $20, that kind of thing.
00:07:53 –> 00:07:59 So do check them out, they are a really neat product, I do really love how different the
00:07:59 –> 00:08:04 designs are from what I’ve seen out there, and how deep they are, because that makes
00:08:04 –> 00:08:12 a big difference when you’re doing something like Mokume Gane for example or for doing
00:08:12 –> 00:08:18 Mica shift and that kind of thing, ‘cause some rubber stamps just don’t go in very deeply,
00:08:18 –> 00:08:22 and they’re harder to do those types of techniques with and these ones will work quite well for
00:08:22 –> 00:08:24 that, alright?
00:08:24 –> 00:08:29 So I hope that was helpful for you, if it was, do let us know if you liked this video.
00:08:29 –> 00:08:35 And if you’ve got a product that you would like to learn more about or have us demo,
00:08:35 –> 00:08:39 do leave those suggestions in the comment section below.
00:08:39 –> 00:08:46 And we have done absolutely tons and tons of videos, so we might have the answer to
00:08:46 –> 00:08:49 any of your Polymer Clay questions that you might have.
00:08:49 –> 00:08:54 But if we haven’t done a video yet, you can leave suggestions for those as well, alright?
00:08:54 –> 00:08:56 So we’ll see you next time and bye for now.
Our goal is to translate these videos into as many languages as possible. If you are interested in helping with this initiative, then please do contact us and we will figure out a way to make it worth your while :)
Resource Links:
- Related Video: Comparing Sculpey, Kato and Fimo Liquid Polymer Clays
- Related Article: Liquid Sculpey vs Sculpey Bake and Bond Test Results
- Related Article: Pearl Ex Powdered Pigments For Polymer Clay
- Related Video: Silicone Molding Techniques
- Related Video: Faux Druzy Polymer Clay Tutorial
- Amazon: Liquid Polymer Clay **
Resources marked with a double ** asterisk are affiliate links. If you click on them and decide to buy something, we may receive some compensation. This does not affect the price you pay in any way. What it does do, however, is helps us to continue providing free videos for you, here at the PcT website. Using our links to purchase your tools and supplies, is always greatly appreciated.
Sponsored Ads & Special Promotions
Shareable Images
 Vid-709")
 Vid-709")
 Vid-709")
To share this full blog post anywhere on the web that allows links in comments, here's a shortened url to copy and paste...
>> https://mypct.ca/v709 <<
Want to chat about today’s post? That’s what the comment section below is for. Scroll Down… We’d love to hear from you!
Or... if you would like to request a topic for a future post, here is the link to do that… PcT Suggestion Box
How would this work in mokume gane as a layer of colour? Any ideas?
That is an interesting question Aims… I wonder if it just might make it a sticky mess layer though, since it wouldn’t be a solid layer until it was baked? I am trying to picture in my head whether that would work or not. Of course it wouldn’t hurt to test it… the worst thing that would happen is you would have to totally mix it into the clay, which would make it softer, but it wouldn’t ruin it. Let us know if you end up trying it. You have me curious now!
Cindy,
Thanks for thinking of mixing the Pearlex into the plain TLS! I have both of those, and can’t afford to buy any more supplies at the moment, with the way things are in Alberta at the moment, so you have saved me from sitting here going “boo hoo, I can’t try this!” :)
I haven’t seen anything for a while about the new web site (I might have missed seeing some things). Are you on track to have it up in January?
Will you be able to take PayPal payments for memberships? Mine comes due on January 16 (it’s really only a year since I bought my membership??!! I have learned SOOOOO much since then!!), and I have had my online use credit card hacked twice in the last year, so am very leery of using my new card online, but I do have a PayPal account.
Here’s hoping you and your family have a lovely, happy, safe, and healthy Christmas / Hannukah / Kwanza or whatever you celebrate.
Hi Doreen… no firm eta on when the new site will be fully ready… but please now that we are working hard behind the scenes to get er done.
And yes we will be able to take PayPal.
Happy Holidays to you too.
Cindy, in reference to the new Sculpey bezel molds. The two part ones, can you use resin in them and put them in the lamp? I ask because I have had a request for a rose gold bezel and I thought it would look neat if I used some of the colored glass with resin in the matching stone to mimick a druzy and then glue it in the pc bezel. The resin would hold the pieces together but will it pop out of the rubber mold once I have finished? Please advise, thanks Doll.
Hi Dixie Anne, yes you can use resin in silicone molds, no problem. I have a video coming out next week that shows a sample of this… I used the UV Resin in a different kind of silicone mold, but they all will work. You need to make sure if you’re using UV Resin that the light can get all the way through though, so i you do the druzy thing, you’ll have to put the colored glass in the mold first then pour the resin on top then cure. After removing from the mold, you might need to cure it some more outside the mold… just flip it over so the light can get at the other side. Hopefully that makes sense.
Thanks Cindy, I thought I would cure the glass pieces in layers so that all of it got cured completely. I just didn’t know if it would seperate from the mold when finished.
Hi Cindy, Another great video. Thank you. What is the work-around for the bubbles? Would a gentle stir with a toothpick make it worse or better? Is Amazing Mold Putty Bake-able?
I enjoy all of the comments and appreciate the great reviews and tuts. Thank you!
Hi Jane, I did try jiggling the bubbles out by placing it onto vibrating shoulder massage machine and it may have helped but I did still get a few bubbles. I hear warming the molds in the oven first helps, which I plan to test today.
As far as Amazing Mold Putty being bankable… that I do not know either… yet. Something that can probably be looked into online.
Thanks for your comment! I am glad you are enjoying it here!
What a great idea to use the liquid clay with the molds! I am thinking that warming them up will help eliminate air bubbles. Thanks!
Yeah I bet it does work. Actually plan on testing that theory today.
Cindy, where is the liquid silver and gold clay available? I’m really disappointed with the stuff they have in Michaels. They have their own brand of clay and just a few blocks of the white, frosty etc and a few colors. All the other stuff they had for clay is gone too.
Hi Cheryl, You may have to order the Gold and Silver Liquid Clay online, I haven’t seen it in my Michaels yet either. Sorry to hear they are down sizing your Michaels clay aisle. I hope that they don’t do that in my store too…
Hi Cheryl,
My Michales here in Michigan has really downsized as well, I have been ordering on line. :(
Hi, Cindy,
I’ve use the TLS with the PearlEx powders to coat cabachons. It looks sparkly and shiny. I also wanted to update you on a question I asked a month or so ago about “the Best Glue Ever”. This product works with polymer clay temporarily. After about a month, the test pieces I did all came apart. It also seemed like the clay got brittle. So, I wouldn’t recommend it for polymer clay. It was amazing with the paper and fabric pieces though.
Hi Joy – which glue are you referring to? Not Gorilla, was it?
Hi Carrie, Joy was talking about a glue called “the Best Glue Ever”. Something I had not had a chance to test yet. Looks like it is not going to work anyway.
Thanks Joy for coming back and sharing your results! And also, thanks for sharing your sparkling cabochon trick… sounds pretty!
Cindy — I have both of the gold and silver paints from the screen print kit, plus I have several bottles of TLS — do you think those paints might also be compatible with the TLS?
That I don’t know Bev. That would be something to test though. If there is a lot of water in the paint, it might cause some issues with bubbling and plaquing though you wouldn’t know for sure until you tried it.
Might the paint dilute the liquid clay and stop it curing properly?
Maybe.
Thank you, Cindy! Yet another new product to tempt us…….
The thin pieces looked so pretty! It looks interesting but the air bubbles look like a problem.
Off subject, but is there a Facebook or Flickr group for member’s creations? I’ve often wanted to see what people have made but can’t find anything.
Hi Carrie, I haven’t had a chance to test it yet, but a follower mentioned to me that if you heat up the mold before adding the liquid clay to it, that you won’t get any bubbles in your pieces. (I’m guessing the warmth encourages the bubbles to rise to the surface or something.) Any way will have to test that one to be sure.
In regards to a photo gallery of student projects, here is the link… Polymer Clay Tutor Facebook
Hope to see some of your work there soon!
Thanks, Cindy – guess where l’m heading now!
I can’t see members’ photos there……:(
Hi Carrie… that link works for me. What do you see when you click on it? It should take you straight to a long long scrolling wall of photos posted by PcT members. You can click on any photo in the gallery to see a larger version of the pic along with info about the member who added the image.
Hi Doug – l get a page called Polymer Clay Bead Making Tutorials – all the photos and posts are Cindy’s. At the top is a photo of clover flowers.
AHA!
I’ve just clicked on a right arrow on the line saying Visitor Posts and l get a gallery of students’ pics, quite big, with descriptions etc, which l can scroll down through. Success! Thank you!
Actually Doug – there are hardly any photos there after all – and a lot of rather obnoxious spam. Certainly not thè gallery you describe. I don’t understand it.
I get more or less the same page when l use the search function on fb. Few posts, questions etc and the spam.
Can somebody else try sending me a link? Thanks.
Carrie I don’t know where you clicked but this link takes me directly to the photos page.
Thank you, Dixie Ann – l can’t understand it – your link goes straight to the same page of Cindy’s as before…the last visitor post is a pair of earrings from Karen Samuels posted just a few hours ago. After only a few posts they are all unpleasant spam.
Carrie – It sounds like your web browser is getting hijacked. In other words, you may have a “bad” script that got installed without you knowing about it (from hackers), and that script is redirecting you to a page(s) that they want you to see… instead of the page you are trying to reach the actual PcT members gallery.
If you the link works when you click on it while using a different web browser (i.e. Chrome, vs Firefox vs Internet Explorer), that will be a good indicator that you have been hacked.
Of course the hacker script may affect any and all browsers you have installed on your computer, which would mean that the problem is not browser specific. But this would be the first step in trouble shooting the issue.
Thanks Doug.
The link doesn’t work for a different browser either so there needs to be some cleaning up on my tablet by the look of it.
I’ll have to get my pet expert on it (aka my son) next time l visit him!
Thanks for your help.
I know Dixie! I still have of the old one. I just wondered why they discontinue a product to bring it back years later.
Thank you for your answer though!
If they had liquid sculpey before, it was probably made with the old formula. Now with the new colors and new formula, it’s only natural they would have it available. kato has a whole line of color liquid kato. I think that once Sculpeys becomes more popular they will probably increase their color line. Only time and Sales will tell. PC use is growing so fast, new products are coming out all the time either to use with the clay or to enhance, align or decorate it. It is amazing what has transpired in the last 10 yrs. alone. I personally spent my last 5 working years just dreaming of retiring and starting my Artistic journey down the proverbial PC Road. I was lost until I found Cindy and her website. Now it’s like Christmas everytime she demonstrates a new product for us. For me I don’t wonder why the old stuff is not around, I’m just looking forward to embracing the new! I think you will find Hermine that for any “old” or discontinued product we feel they are bringing back, It will have a whole “new” and much improved side to it. I hope you enjoy discovering it as much as I do! Wishing you a very Happy Thanksgiving!
Wonderful comment Dixie Ann! You are so true about the incredible growth of this art medium over the last 10 years. I get more excited about its potential everyday!
I hope you had a great Thanksgiving. As you know we had ours a month ago, so everyone around here is on to Christmas preparations. But now that Thanksgiving is over, you all will be gearing up for Christmas now too! :)
Is it the same as the old formula they used to make before the phtalates?
No, it’s the new formula. They don’t make the old one anymore. They haven’t for quite some time.
Oh Cindy, I always enjoy watching you demo new stuff. Especially now when I am feeling so down, it just picks me up and gets me all excited again and I want to run around and see what my brain can come up with using it. I love the idea of making my own liquid mica clay, thinking of how it would look adding an interference mica powder to some of the colors. Hmmmm………..well here I go again!
Dixie Ann I am so sorry to hear that you are feeling down… :( Mucking around with your clay supplies should have you cheered up in no time! :) Go have fun and let us know what you end up making!
Wow Cindy, really liked the demo of the TLS gold and silver and loved your clever ideas for alternatives. I am busy making hosts of mini Christmas trees for a client ( using polymer clay).
The mailman has just dropped off my Snow Leopard costume. I will be wearing it, standing outside our community centre, selling finger lights to help raise money for the charity I support. I think it was made for a 6ft person, so will have to haul my sewing machine from the cupboard to alter it to fit. As I am only 5’2″ I am going to have to shorten the legs, but with the spare material I could make a little doggie jacket for Jessica, who is going to help me sell loads of lights. The Christmas lights in Leigh-on-Sea are being switched on this Friday, so we are just hoping it doesn’t really snow. Off now to check on my latest batch in the oven as the timer has just gone off……cheers xx……..
OMG Elaine I can just picture you and your dog in Snow Leopard costumes!! Doug and I will be on the next boat to England so we don’t miss it! :) I have no idea what finger lights are but good luck in selling tons of them. Have a wonderful Christmas… it sounds like you are well on your way!
Hi Cindy,
Just read this comment from you. Finger-lights, slip on the end of your finger using a rubber band. I attached three to my walking stick (yep still hobbling around) Told the kids I got injured while out hunting for food! ha ha.
Jessica had her fluffy coat decorated with these little lights. (Think ET with the blue light on the end of his finger). Some children bought 10, one for each finger. I told the parents they are great when the children come out of school on these dark nights. We practically sold out as Leigh was packed for the Light Festival. I know a lot of people but they only recongnised Jessica as it had taken me 2 hours to use my face paints to turn me into an “animal”. My niece was a marshall for the local council wearing her high vis jacket. We sang carols with the childrens choir and later with the Salvation Army band and had a lovely evening, and raised a lot for charity ~I will ask my niece to send some photos………………..cheers xx……….
Oh Elaine that festival sounds magical! What a delight you must have been in your animal makeup and all those little lights!! Please send pictures if you have any…
Oh the possibilities! Thanks for the demo Cindy.
You are more than Welcome Dawn!
Quick note: the colored liquid clays work great as “grout” for mosaics. I used the silver colored one for a leaf shaped micro mosaic piece, looks great!
Awesome tip Krithika!