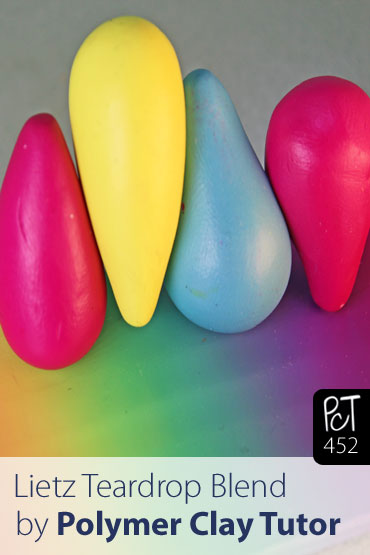
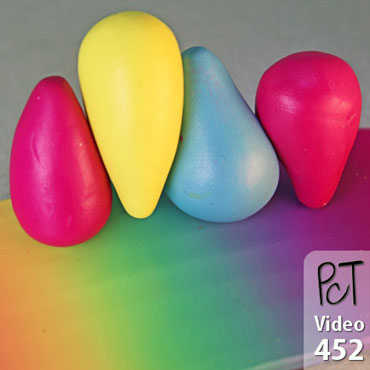
Lietz Teardrop Blend – Color Gradients Made Easy
Video #452: Making smooth color blends without having to measure & cut out tedious triangle shapes.
More...
IN THIS POST: — teardrop blends — skinner blends — gradients — color shifts — color blends — ombre — gradation – graduated blends — blending — blends — lietz blend — (Topics marked with an asterisk* are discussed in the Comments Section below).
Topics Covered In This Video:
- Last week I demonstrated how to do 2 different polymer clay color blending techniques…
- (1) The Stepped Graduated Color Blend… where each color shade is mixed individually by hand and then placed next to each other, to give the impression of blending from one color to the next. It is quite labor-intensive and is difficult to get a smooth blend without a lot of work.
- (2) The Skinner Blend Method… created by Judith Skinner, who took a more Scientific approach by cutting out triangles and positioning them to create a much faster and smoother color gradient.
- In today’s video, I am going to share with you my Teardrop Blend. It’s probably the easiest and fastest way to make professional looking color blends, because it takes most of the measuring and thinking out of the process.
- The following link will take you to, some of the early Lietz Teardrop Blend Articles posted here at my Polymer Clay Tutor blog. And you will find even more references by using “teardrop” as the keyword in the search box at my blog.
- If you have ever had a challenge with doing a Skinner Blend in the past (especially multicolored blends), then you are going to LOVE this Tear Drop Technique!
- In today’s video, I show examples of some jewelry items made using Teardrop Color Blends, based on the following PcT Tutorials…
- With my Lietz Teardrop Blend, you can easily create the same color blends using teardrop shapes of clay in any number of colors, without measuring cutting or needing to use math at all. You can even control the amounts of clay by simply changing the size of teardrop you start out with.
- I originally developed this technique about 10 years ago, by accident. I was rolling out shapes of clay, trying to figure out something new to make, and ended up laying out some teardrop shapes next to each other in an alternating fashion. It was then that I realized the shapes actually resembled triangles, and that they would probably make a great start for a Skinner Blend. Then with some tweaking, I came up with this easier and faster way to blend polymer clay colors… and never looked back!
00:00:03 –> 00:00:07 Hi guys, its Cindy Lietz, your Polymer Clay Tutor, and today’s Mini Tute, I’m gonna
00:00:07 –> 00:00:14 show you how to make my Lietz Teardrop blend, and it’s an easier and faster way to do
00:00:14 –> 00:00:15 the skinner blend.
00:00:15 –> 00:00:20 Now, if you have ever bought a tutorial from me that has a blend in it, you’ll already
00:00:20 –> 00:00:25 know how to do the teardrop blend, and here’s some examples of some of the tutorials that
00:00:25 –> 00:00:27 I do the teardrop blend in.
00:00:27 –> 00:00:36 Now this is a bead made with the Easter lily cane, here are the Sweet Pea earrings.
00:00:36 –> 00:00:40 Now, this one’s more obvious, you can see the blend in it, and this is from the Frosted
00:00:40 –> 00:00:44 Rainbow Flower beads tutorial.
00:00:44 –> 00:00:49 Then I’ve got some Cone Flower beads here, and I used the teardrop blend in that as well,
00:00:49 –> 00:00:58 and the Parrot Tulip cane bead, so that’s all of them where we used a lot of the teardrop
00:00:58 –> 00:00:59 blends.
00:00:59 –> 00:01:05 Now, in some previous videos, I showed you how to do blends in another way.
00:01:05 –> 00:01:12 The first one I showed you how to do the Stepped Graduated blend, and this is where you mix
00:01:12 –> 00:01:19 each color individually, and then you blend… have them go side by side…and then you give
00:01:19 –> 00:01:25 the illusion of having a blend from one color to the other, now it’s quite a labor intensive
00:01:25 –> 00:01:31 way of going about it and it’s difficult to have a very smooth transition between,
00:01:31 –> 00:01:32 color to color.
00:01:32 –> 00:01:38 Then Judith Skinner came along and took a more scientific approach to doing the blends…now
00:01:38 –> 00:01:45 I did a video on this as well, where you take triangles of White and Black…I used in this
00:01:45 –> 00:01:50 blend here, but you can use any colors that you like, and the way it’s blended together,
00:01:50 –> 00:01:55 you get a much smoother blend, and it’s way simpler.
00:01:55 –> 00:02:00 With two colors, it’s quite simple to do a Skinner blend with, but when you’re working
00:02:00 –> 00:02:06 with more than one color, doing a multicolored rainbow blend like this one here, it can get
00:02:06 –> 00:02:12 a little bit tricky, you have to kinda bring out your old geometry skills to get it…to
00:02:12 –> 00:02:13 make the blend.
00:02:13 –> 00:02:18 What you have to do is you have to precondition your clay, roll out sheets, and then cutout
00:02:18 –> 00:02:23 triangles that fit together properly and in fact there’s even a template out there so
00:02:23 –> 00:02:30 that you can actually trace out the right size pieces to make your blend work easily.
00:02:30 –> 00:02:35 I figured out a way to make the blend that looks…here’s the blend that I got from
00:02:35 –> 00:02:41 the skinner blend, but here’s the same blend done again using a much simpler method I figured
00:02:41 –> 00:02:48 out years ago called the Teardrop blend, and we just use some teardrop shaped pieces of
00:02:48 –> 00:02:52 clay to get the same blend in a much easier fashion.
00:02:52 –> 00:02:56 Now, let me just explain to you how this kinda came to be.
00:02:56 –> 00:03:03 I was sitting around, rolling some clay in my hands, trying to come up with something
00:03:03 –> 00:03:06 new to do…you know, I always do that…
00:03:06 –> 00:03:11 I’m playing around, and I had made a bunch of teardrop shapes, and the way to do that
00:03:11 –> 00:03:17 is you take a ball of clay and then you just make a V out of your hands and you get a teardrop
00:03:17 –> 00:03:18 shape.
00:03:18 –> 00:03:26 Well, I’d done up a bunch of these shapes, and I had a couple laying on the desk next
00:03:26 –> 00:03:33 to each other, opposite like that, and when I looked at it, I realized that these were
00:03:33 –> 00:03:42 two triangles, much like the Skinner blend is, and I realized that I could take these,
00:03:42 –> 00:03:47 and squash them down just like this…and I’ll flatten them a bit to start, and if
00:03:47 –> 00:03:52 I take a roller, and flatten them out so that they can fit into the pasta machine, I’m
00:03:52 –> 00:03:56 gonna have something that will resemble the triangles in a Skinner blend.
00:03:56 –> 00:04:04 So I’m just gonna run these through here first, and when I fold it in half, and keep
00:04:04 –> 00:04:12 running this through, it makes exactly the same kind of blend that you get with the Skinner
00:04:12 –> 00:04:13 blend.
00:04:13 –> 00:04:21 Now, the other thing that I discovered is that you can speed up the whole process if
00:04:21 –> 00:04:28 you roll it up instead of folding it, now I’m just rolling it up from this one end,
00:04:28 –> 00:04:32 and what this essentially does is instead of folding it just the one time, you get several
00:04:32 –> 00:04:39 folds all at the same time, and it forces the colors together to blend really quickly.
00:04:39 –> 00:04:46 Now, normally a Skinner blend takes about…I don’t know, depends on how soft your clay
00:04:46 –> 00:04:51 is and the brand and all that, but it can take like 40 times for the colors to start
00:04:51 –> 00:04:59 blending properly, but with the teardrop blend and this rolling up process, it can be a lot
00:04:59 –> 00:05:06 faster, so let me just do a few more here and show you.
00:05:06 –> 00:05:14 Okay, so now I’ve done that about 15 times in total, and now we’ve got a nice blend
00:05:14 –> 00:05:19 that’s happening, now I can go a few more times if I wanted it to be a little bit smoother,
00:05:19 –> 00:05:23 but you can see that it’s a much simpler way of going about it.
00:05:23 –> 00:05:28 Now, if you’re doing a multicolor blend, like this one here, all you need to do is…
00:05:28 –> 00:05:32 you don’t have to worry about measuring and all that stuff, you just choose the colors
00:05:32 –> 00:05:38 that you want in the blend, and make teardrops of them and put them side by side however
00:05:38 –> 00:05:44 number you want, so you’d end up…and then just blend it the same way, and you get these
00:05:44 –> 00:05:46 wonderful multicolored blends.
00:05:46 –> 00:05:53 Now you can also control the colors… if you want a large blend, then you use larger
00:05:53 –> 00:05:58 amounts of… like larger balls to start off with…with the teardrops, if you want a small
00:05:58 –> 00:06:04 one, you can even go right down to super tiny, like this one here, to just do a little test
00:06:04 –> 00:06:07 sample, now, try doing that with a Skinner blend, you would never be able to do a tiny
00:06:07 –> 00:06:12 little skinner blend that tiny, and what’s great about it is you can test it out to see
00:06:12 –> 00:06:18 how your colors are gonna blend before you have…so that you’re not wasting large
00:06:18 –> 00:06:19 amounts of clay.
00:06:19 –> 00:06:26 Now, you can also control the… if you have a color like this Fuchsia here that’s a
00:06:26 –> 00:06:31 little bit more dominant, or has a little higher saturation, I just made smaller balls
00:06:31 –> 00:06:38 of the Fuchsia than I did of the other two colors and then it made a proper blend at
00:06:38 –> 00:06:39 the end.
00:06:39 –> 00:06:44 So I hope that was helpful for you, click that like button if it was that would be really
00:06:44 –> 00:06:46 great, we’d really appreciate that.
00:06:46 –> 00:06:50 And today, instead of a question, I have a challenge for you, what I’d like you to
00:06:50 –> 00:06:57 do is go grab your favorite colors of Polymer clay and go make yourself a teardrop blend,
00:06:57 –> 00:07:02 then I want you to come back and tell us how it went, we’d love to hear your stories
00:07:02 –> 00:07:04 in the comment section below.
00:07:04 –> 00:07:09 And don’t forget to subscribe, we have new videos that come out every week and you’re
00:07:09 –> 00:07:11 not gonna wanna miss a thing.
00:07:11 –> 00:07:13 We’ll see you next time and bye for now.
Our goal is to translate these videos into as many languages as possible. If you are interested in helping with this initiative, then please do contact us and we will figure out a way to make it worth your while :)
Resource Links:
- Related Video: Stepped Graduated Color Blend
- Related Video: Skinner Blend Method
- Related Article: Lietz Teardrop Blend Articles
- Related Video: Easter Lily Cane
- Related Video: Sweet Pea Earrings
- Related Video: Frosted Rainbow Flower Beads
- Related Video: Coneflower Beads
- Related Video: Parrot Tulip Beads
Resources marked with a double ** asterisk are affiliate links. If you click on them and decide to buy something, we may receive some compensation. This does not affect the price you pay in any way. What it does do, however, is helps us to continue providing free videos for you, here at the PcT website. Using our links to purchase your tools and supplies, is always greatly appreciated.
Sponsored Ads & Special Promotions

Shareable Images


To share this full blog post anywhere on the web that allows links in comments, here's a shortened url to copy and paste...
>> https://mypct.ca/v452 <<

Want to chat about today’s post? That’s what the comment section below is for. Scroll Down… We’d love to hear from you!
Or... if you would like to request a topic for a future post, here is the link to do that… PcT Suggestion Box

What is the chance that Cassandra has old dried clay stuck under the casing? She will need to carefully dig it out to clean up the rollers. I leant my pasta machine to a friend who returned it with clay stuck under the metal guards and it sounds like her issue. marilyn
Hi Marilyn,
Thanks for the tip. I’ll keep a look out for old clay caught in there.
Unfortunately my machine was new when I started to have this problem, and it started doing this right off the bat :(
Cass
I am guessing that your scrapers are bent Cassandra, maybe from clay from behind the scrapers pushing them out of wack… or maybe they were damaged and returned to the store you bought it from? I don’t know, but they shouldn’t be scraping gouges out of your clay. If it is too late to return the machine, then try to carefully remove the clay if possible… other than that I think you may need a new machine. :(
Just wanted to say thank you for all your you-tube videos. I tried my first teardrop blend last night, turned it into a teardrop blend plug. It wasn’t brilliant, but I was pretty happy with my first try :)
Just curious if you ever have problems with your pasta making machine? Mine seems to have plastic scrapers underneath the rollers that sometimes scrapes out sections of my clay on the way through.
Thanks again :)
Cass
Cindy,
In the video you show the fuchsia on both sides of the teardrops, but the blend still seems to go from fuchsia to purple. I must be missing something because I don’t understand how the blend doesn’t end up having the same color on both ends and a blend in between. What am I missing in this process??
Beth Sullivan
hmmm that’s weird Beth. Are you putting the teardrops into the pasta machine in the right direction. Watch the video again and follow it along. If you are doing it exactly the way I did in the video you should be getting a rainbow blend like I did. Let me know how it turns out for you.
I am getting a blend but the video seemed to show fuschia on both sides of the blend. I was just wondering why you put fuschia teardrop on both ends
Are you not putting the yellow in the blend? The colors once blended should be fuchsia, orange, yellow, green, blue, purple and a touch of fuchsia. The fuchsia on the end is so that you end up with purple… otherwise it would just end at blue.
That answers my question, the Fuchsia on the right side is so you end up with purple and not just blue. That was what I was trying to figure out, why you had the Fuchsia on the left side and the right side of the colors. Rather than just a typical RYB blend with only 3 colors red, yellow and blue there is the extra fuchsia to get purple. Now I understand. Thanks for your help
Had a clay play day yesterday and wish I had seen this before I played all day. This would have made a lot of work easier.
Question: I have received a multi-color package from a manufacturer with fancy clays. When I went to try to condition them, they fell apart. Do I need to add liquid Sculpy and work like crazy to get these back into workable condition or throw them away. The clays that contained a “mica shift” seemed to crack apart more easily and were much harder to condition. Putting them through the pasta machine was a total bust, but surprisingly using a brayer worked better ~ any clues as to why one would work over the other. Thank you for all your fabulous information. marilyn
I have a question about which direction you place the skinner drops into the pasta machine. Your video shows it going in top first rather then lined up side to side.
Thanks again for some clear and wonderful tuts!
Bev Rose
Hi Bev, I think it would be good if you watched the video again. The teardrops do sit side by side in the video like they are supposed to. Don’t worry though, if it still is not clear to you, stay tuned for another video I will be doing in May which shows multicolor blends such as the rainbow blend, specifically. It seems there were a few people who couldn’t understand how they were folded in comparison to the two color blends.
Great tutorial…..thanks for sharing
Cindy you are heaven sent!! I’ve been trying to teach myself all about polymer clay for about a yr now. Up until now I couldn’t find anyone that effectively explained the subject, or their site is so very poorly constructed. But I’ve watched just 2 of your videos and I’m so impressed by your willingness to teach!!- rather than sell your secrets or techniques! You are my go-to from this point forward! THANK YOU, THANK YOU! I wish more artists were like you! Thanks again!
Aly, here is a link to another tute Cindy did which incorporated a long blended strip… Sculpted Rose Bead Tutorial
Sometimes, it really helps to see a technique created and added to a project to understand all the intricacies involved. The tute above has several parts. The variegated rose resulting was wonderful, and it works in just about any color way.
Just watched the video. I’m very excited to try it out!
This is much simpler and less mathematical – I’ve never had the patience to try a proper skinner blend but I will certainly try this. Thanks!
Hi Aly C – Your question is a good one for me to address in another upcoming video. Those long blends are not difficult to do. They starts the same but then get turned sideways. It will make sense when you see it done. Thanks for your comment!
Awesome! Thanks Cindy :) Your info is ALWAYS Great and much appreciated!
Maybe you can help…There is a woman that does really amazing flower canes that use skinner blends to start with. However her skinner blends are really, really long. Like maybe 20″ long and the width of the pasta machine…but her blends run in the direction of the length…which would be impossible to fit through the machine…unless maybe she folds it and puts it in vertically? I would think that that would be the only way to do it…sigh… I’d ask her, but she’s Italian so I can’t understand anything she says :( I’m sure you could figure it out? Her name is Missiclaus. Maybe some of your other viewers would be interested in how to do a really long skinner blend too. Thanks
thanks what a great and easy way to blend…I always seem to have problems with the skinner :)
Fabulous tutorial will be doing this.
My clay idol was Donna Kato. Not any more! She has been replaced by the genius named Cindy Lietz.
I have never been able to make a decent Skinner Blend. The Lietz Teardrop Blend is amazing. It came out great on the first try and was so easy. I can’t thank you enough!
*blushing* Thanks Sandra! What a sweet thing to say. I am very happy that the Teardrop Blend works out so well for you. Thank you for coming back and sharing your success!
Thanks Cindy great video, this will make life a lot easier.
Cindy, you are such a great teacher! The teardrop blend makes it all so much easier. Since I found the Lietz blend, I don’t use any other techniques. Thank you……
Once you have tried it you will never think about other ways :)
brilliant!
wow. thank you so much for posting this video.. you put a LOT of work into it. fantastic.
Excellent! If there was a choice for ten thumbs up I’d click that! Thanks Cindy!
It’s the only technique I use thanks to Cindy.
I think it is so cool of you to put this wonderful quick and easy way of getting blends out into our polymer clay covered world for free
-you guys are the best!
i was playing with the skinner blend myself the other day (using a clay roller, i dont have a pasta machine ^^; ) as i was rolling it i used a tip you suggested in one of your newer videos to make it smaller by rolling it and found out it was faster!
thank you so much for posting tips and tricks here <3
awesome video
thats great tip :) thanks cindy :)
Awesome! So much easier.
Great Idea!
Love this tutorial. She really simplified color blending.
Great Cindy! I think this will solve the problem of the lateral elongation caused in repeated skinner blend..Waiting to try my hands on this tear drop!
This is fantastic. I love the simplicity and speed of the method. Thanks so much for sharing I can’t wait to try it.
That is awesome, thank you for sharing great idea!