Perler or Hama Bead Board as a Resin Doming Tray
Video #663: These stiff white Perler/Hama boards, actually work better than the flexible mats made for the purpose. Go figure!
More...

IN THIS POST: — resin doming tray — resin — uv resin — epoxy resin — perler bead board — hama bead board — craftmama — epoxyjewelry.com — ultradome — resin mat — resin tray — pixelated canes — pixel cane — nautical cane — anchor cane — (Topics marked with an asterisk* are discussed in the Comments Section below).
In today’s Studio Tip, I’m going to show you how you can use a Hama Bead or Perler Bead Board as a Resin Doming Tray (or Mat).
You may have seen in a previous video, I showed you how to use UV Epoxy Resin on your polymer clay, and cure it in my UV Lamp.
In that video, I used a silicone resin doming tray that I picked up at Michael’s.
It is a silicone mat with little bumps on it that raises the piece you are putting on it… up away from the flat surface… so it is easier to get a dome on the resin without it pouring off the side.
The silicone mat that I have (the purple one) fits nicely inside my UV Lamp. But because the mat is flexible, it’s difficult to transfer the mat into the lamp when loaded up with resin coated pieces. The pieces can fall off, and the resin runs all over the place.
SO… I used a CD Case under the flexible mat for support… which does work nicely.
When I did that resin video, I got a comment from a fellow YouTuber by the name Craftmama. She suggested using a Perler Bead or Hama Bead board as a doming tray instead.
So when I was at my local craft store (DeSerres this time), I picked up a pack of two 5 1/2? X 5 1/2 Square Hama Bead Boards to test out.
Sure enough, they worked perfectly! Thanks Craftmama!
Perler Beads and Hama Beads are these large hole plastic ‘beads’ that you put out on a peg board in different pixel patterns. The plastic beads are then fused, using an iron, into a cute 2 dimensional designs. Kids (and adults) make charms, coasters and different designs for playing with, or decorating their rooms. The Perler Bead Boards come in all kinds of shapes, which can be linked together to make larger designs.
I decided to pick up a bag of multicolored Perler Beads to put on the board. This is a useful technique for planning out Pixelated Cane Designs. This gives me a 2 for 1 use for these little plastic boards.
00:00:03 –> 00:00:07 Hi guys, its Cindy Lietz, your Polymer Clay Tutor, and today’s Studio Tip, I’m gonna show
00:00:07 –> 00:00:15 you how you can use a Hama or a Perler bead board as a resin doming tray or mat.
00:00:15 –> 00:00:19 Sometimes they’re called resin doming trays sometimes they’re called resin doming mats,
00:00:19 –> 00:00:28 but you may have seen… in a previous video I showed you how to use UV Epoxy Resin and
00:00:28 –> 00:00:37 cure it in my UV oven, but I was using this resin doming tray that I picked up at Michaels,
00:00:37 –> 00:00:45 and it is a Silicone surface that when you go to put resin on a piece…so I’ve got some
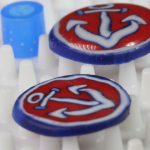
00:00:45 –> 00:00:55 cane pieces here that I’ve put resin on already, but if you’ve got really, really thin slices
00:00:55 –> 00:00:58 of cane that you wanna put resin on…like this one has the resin on it already and this
00:00:58 –> 00:01:05 one doesn’t, if you put it on to a flat surface, like this one here, the resin can actually…especially
00:01:05 –> 00:01:11 if it’s a super thin slice, it can actually kinda drip over the edge and grab onto the
00:01:11 –> 00:01:14 surface, and then just run right off.
00:01:14 –> 00:01:21 So these doming trays or mats are used to raise the piece up off the surface a bit,
00:01:21 –> 00:01:28 and then when the resin sits on top, it doesn’t have the tendency to run over the side.
00:01:28 –> 00:01:37 So this mat, you know, fits nicely within my UV Light, but the problem with it is it’s
00:01:37 –> 00:01:45 flexible, so when I go to take a tray filled with all the pieces with resin on them, if
00:01:45 –> 00:01:50 it bends at all, they can slide off or the resin can run off the side.
00:01:50 –> 00:01:57 So what I was using was just like a CD package or case, and then I was using that to get
00:01:57 –> 00:02:01 it into my oven, another option would have been to just leave it on the counter, remove
00:02:01 –> 00:02:05 the bottom here and set the oven on top, but sometimes I have it way at the back, and I
00:02:05 –> 00:02:08 just wanna be able to move it from here to there.
00:02:08 –> 00:02:15 Well, there’s…I got a comment from a YouTuber, and her name is CraftMomma, and she said,
00:02:15 –> 00:02:20 well why don’t you use like one of those Perler bead racks, or…and there’s a couple of different
00:02:20 –> 00:02:27 brands of them, one is named Hama Bead…Hama I believe it’s called, Hama, or Perler,
00:02:27 –> 00:02:29 and this is a package of the Perler Beads.
00:02:29 –> 00:02:36 And what these are… these kinda like these peg boards that you put the Perler beads onto
00:02:36 –> 00:02:43 or the Hama beads, depending on the brand you’re using, and you lay them out, and put
00:02:43 –> 00:02:50 them on the pegs, and then you put your design out and you iron them and you get these funky
00:02:50 –> 00:02:52 little designs and things like that.
00:02:52 –> 00:02:58 So she suggested I pick up one of these and use that instead, and of course that is a
00:02:58 –> 00:03:04 perfect solution, it’s just the right size, it’ll fit within my machine… or my lamp
00:03:04 –> 00:03:08 here, no problem and it’s stiff, and it’s perfect for that.
00:03:08 –> 00:03:14 When I picked up some of these beads, I had this idea for also using it as a way to plan
00:03:14 –> 00:03:23 out some pixelated canes, I could take the colored pegs and I could plan out some cane
00:03:23 –> 00:03:29 designs, so that was kinda my 2 for 1 idea on that, so thank you CraftMomma, this is
00:03:29 –> 00:03:30 perfect.
00:03:30 –> 00:03:35 I had got 2 in a set, and they weren’t very expensive I think they’re about $6 or something
00:03:35 –> 00:03:41 for the 2 boards, that way I could have one going, one in …and one in the lamp.
00:03:41 –> 00:03:46 Alright, so I hope that was helpful for you, do let us know if you like this video.
00:03:46 –> 00:03:53 And if you have any product suggestions or things you’d like me to test, things you
00:03:53 –> 00:03:59 don’t know how to do, then why don’t you check out the videos, we probably have already done
00:03:59 –> 00:04:05 a video on that subject, but if we haven’t you can leave a suggestion in the comment
00:04:05 –> 00:04:08 section below and we’ll see if we can make one for you.
00:04:08 –> 00:04:10 Alright, so we’ll see you next time and bye for now.
Our goal is to translate these videos into as many languages as possible. If you are interested in helping with this initiative, then please do contact us and we will figure out a way to make it worth your while :)
Resource Links:
- Amazon: Perler Bead Boards **
- Amazon: Resin Doming Mats **
- Related Video: Applying Ultradome UV Epoxy Resin To Polymer Clay
- Related Article: UltraDome UV Curing Epoxy Resin for Polymer Clay
- Related Video: Melody Susie 12W LED Curing Light
- Related Video: Polymer Clay Nail Art Madam Glam UV Gel Polish
Resources marked with a double ** asterisk are affiliate links. If you click on them and decide to buy something, we may receive some compensation. This does not affect the price you pay in any way. What it does do, however, is helps us to continue providing free videos for you, here at the PcT website. Using our links to purchase your tools and supplies, is always greatly appreciated.
Sponsored Ads & Special Promotions
Shareable Images


To share this full blog post anywhere on the web that allows links in comments, here's a shortened url to copy and paste...
>> https://mypct.ca/v663 <<
Want to chat about today’s post? That’s what the comment section below is for. Scroll Down… We’d love to hear from you!
Or... if you would like to request a topic for a future post, here is the link to do that… PcT Suggestion Box
Hi Cindy,
just watched the Hama bead board video tip on using stencil adhesive and as a rigid tray for resin, excellent but using the board as a design aid for pixelated canes is brilliant. I spend hours with graph paper and colour pencils, so this tip will save me oodles of time.
I have never seen this product, is it in the kiddie section? Not having a Michaels” Hobby Lobby, etc. here in UK I’m not sure where to look. Does anybody living in UK know where these are sold and how much they cost? Cindy, what a coincidence, I was wearing the exact red and white paisley bracelet today to match my fluffy red fleece. Well it’s really a pyjama top but has such handy pockets I slip it on when feel chilly (had ground frost this morning) Now back to my Fuchsia earrings. The lights are adorning the shelves in my living room and look so pretty, so decided to make a few different sets and trying to get sets of 10 or less as thinking, for along the centre at the top table at a wedding?……………..cheers xx……..
Thanks for the compliments on the idea Elaine! You might be able to find something like this in a toy store. In the crafty area where the finer paints and lanyard beads would be. From what I can see on their site, Hama Beads is a UK company so you should be able to find them there no problem. Here is a link to their About Us page.
Hi Mary – the topic of convection microwave ovens was just discussed recently in another thread.
You can also use the search box at the top of every page on this blog web site, for finding a ton of other helpful information about the various different baking options.
Hi Cindy,
I am Mary, a polymer clay artist. I love your videos. I was in U.K and now moved to Oman. I was baking all my polymer clay in a home oven, and since I had 2 built in ovens I didn’t have a problem to use one just for polymer clay until I came here. Here, Electric ovens are less in number( most of them are gas ovens and we have a space availability problem as well). So we ended up buying a gas cooker. I have a microwave oven (Panasonic) with convection option. So, could you please tell me whether I can use my convection option for baking my polymer clay. Here the toaster ovens are also not very good quality ones. I am so sad that I couldn’t start my jewellery making since I left U.K last month.
I really appreciate if you can reply soon.
Thank you very much,
Regards,
Mary