Vol-001-4 Adding Cane Slices to Lentil Beads PcT Tutorial (Intro)
Video #051: Here’s how to keep your cane slice patterns from getting all muddled:
More...
** This post is an introduction to one of our paid tutorials.
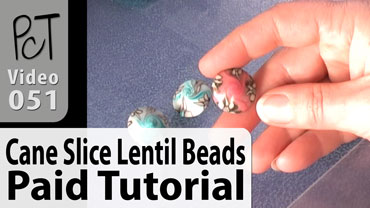
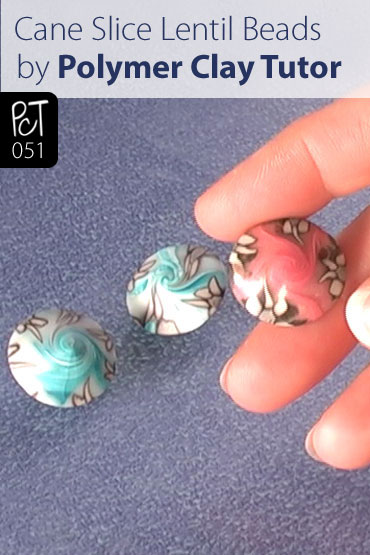
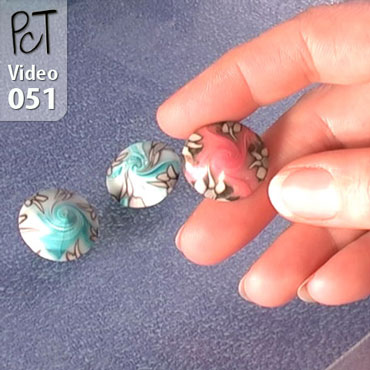
Once you start learning how to make polymer clay canes, you will want to make some pretty beads with them. A stunning bead design combines the swirly lentil with polymer clay cane slices.
First, you need to roll the basic lentil bead shape. During the process of rolling the lentil bead, the clay on the outside edges gets drawn into the center of the bead, forming a twist or swirl in the design.
You can add character to this swirl by adding thicker-than-usual cane slices to the outside edges of the unbaked lentil bead. If you place them in the center of the lentil where the swirl is, the cane design will get sucked in like a vortex to the inside of the bead… never to be seen again!
With the raw cane slices applied to the outside edges of the lentil, roll the bead again and watch the cane slices become part of the bead and begin to twist into the design. Twist only as far as you like the design. If you go too far here, the design will just become striped swirls on your beads and your intricate cane patterns will not be recognizable.
Experiment with the slices by adding some at different stages of rolling, or adding several different types of canes to the same lentil bead. This technique is also a good one to use on those imperfect beginner polymer clay canes. Since the design gets pulled and twisted, you won’t see any of their flaws.
Rolling polymer clay lentil beads and adding polymer clay cane slices is probably one of the most rewarding of the polymer clay bead making techniques. So go on… Give it a roll!
ADDENDUM: Unfortunately, this Vol-001-4 tutorial is no longer available for purchase. However, the button below, will take you to our Polymer Clay Tutor Store, where there is a wide variety of other premium tutorials that you can choose from...
Shareable Images


Want to chat about today’s post? That’s what the comment section below is for. Scroll Down… We’d love to hear from you!
Or... if you would like to request a topic for a future post, here is the link to do that… PcT Suggestion Box


**PHOTOS ADDED: Some project pictures have just been added to a Spotlight Feature showcasing Monica Daris, a member who is very much appreciated here at this supportive polymer clay community. Click on the “Lentil Bead Necklace” link by my name above to have a look.
**PHOTOS ADDED: Some project pictures have just been added to a Spotlight Feature showcasing Kimisen, a member who is very much appreciated here at this supportive polymer clay community. Click on the “Polymer Clay Jewelry Beads” link by my name above to have a look at her lentil bead work.
I’m glad you are “loving” the videos. That’s music to my ears :)
In regards to getting access to the video back issues, please click on the “Bead Jewelry Making” link by my name above. It will take you to a response that I just posted yesterday about this question in another thread.
I’m loving your sample videos and would be interested in receiving the one about putting canes on lentil beads. What do I need to do?
@Ellen: Thank you! I’m glad you enjoyed it!
@Keri Lee: You’re welcome! :-)
@Pamela: Sounds really cool! Let me know how they turn out! You saw the video for piercing lentils didn’t you? There were a lot of goo tips in that. You can also put ‘lentil’ in the search box for more posts on the subject.
Cindy Lietz’s last blog post..Premo Clay Flower Pendant Necklace Project with Vintage Glass Beads
very cool and so timely as well. I was just practicing with lentil beads – still working on gettng the hole in the right place. I wonder about trying some for halloween – with orange on the sides, swirled into the center . . . ok, I’m off to try that one. Thanks for the great video.
Cindy as always, a wonderful tutorial!!! Thank you!!
very nice video
Lyn you’re right! I have seen so many crafters and artists try to demo things with lovely nails. If I tried that, I’d never get anywhere!
Cindy Lietz’s last blog post..How to Slice Polymer Clay Canes
Thank you that was very informtive and easy to follow. It was a pleasure to watch you do it as you have natural fingernails and were not struggling with false one like some of the demonstrator I have seen.Thank you Lyn
I enjoy the video.
Please do not stop making them.
I have not put them to use.
But will use the knowledge.
Hope to see more.
@Diane Adele Strong: Thank you! It is wonderful to hear that someone new to polymer clay is progressing so quickly!
@denby: Translucent clay is a great background for cane designs. It makes the image ‘float’ on the surface!
@Marilyn: It is great to hear even a Veteran Clayer like you, likes to watch the videos!
@Kim C.: Thank you Kim! You’re a sweetheart!
@robin: Thanks! Great to have you here!
@Cindy E.: The possibilities are endless!!
@MJ: I agree… Closeups are very important if you want to really see how to do something!
@Adrienne: You are so Welcome! Thank you for your comment!
@Jan: Thank you! It is wonderful to have you here! Feel free to ask questions anytime!
@Sue: I am happy to have you here! You are probably more talented than you give yourself credit for. Your love for the medium, will help you advance your talents faster than anything else!
@Wendy: I am so glad you look forward to the Video Newsletters!! That makes me very happy!!
@Andrea: Never, ever doubt your abilities!! Babies don’t doubt whether they will be able to walk or not… they just assume they will! Assume that one day you will be a great polymer clay bead artist… and one day all the things you have learned will make you one!!
@Jerónimo: Welcome! Welcome! I am so happy the videos are helpful for you!! Thank you for your great comment!
@Sandy: Thank you Sandy! That means a lot coming from you! I love your website too!
@Dona: You are so welcome! Before you know it you will be making beads like a Pro!
@Susan: Thank you! Seeing this technique in video makes all the difference in the world. I’m glad it was helpful!
@Diane Woods: Thank you for your comment! Feel free to ask any question you wish!
Cindy Lietz’s last blog post..A Polymer Clay Tutorial About Adding Fimo Cane Slices to Round Beads
I think this site is exciting. I am new to the clay craft and need answer’s.
Great tutorial! I always had a problem getting my lentil to swirl and now I know what I was doing wrong. Adding cane slices gives the beads a nice finish!
your videos are great I`ve just started to think about doing the beads don`t have a clue what I`m doing. But I think if I watch these a few times I`ll get the hang of it thank you again for the videos.
Dona
This is a wonderful video, Cindy! Makes me want to go down to my hobby room right away and try out the technique.
Thanks so much for sharing this with us. I’m glad to have found your website.
Sandy
I don’t understand the dialogo because my english is very basic, but “one image is better than 1000 words”. I appreciate very much your video, and I learn a new technique.
Thanks from Spain.
So far I’ve only seen the video where you make the lentil bead in the bead roller,so it was amazing to see this produced with the flat plexi glass.Great tip, though I still doubt my own abliity to get theese results.
It’s been a great help discovering your videos while I get to grips with learning polymer clay bead making. It’s always a treat to find the latest ‘newsletter’ in my inbox!
Thanks for taking the time to post them on the web for us enthusiasts out there.
Regards,
Wendy (UK)
I’m so happy to have found you. I’ve been working with clay for a long while but am not very talented. I just love to do it.I enjoy your tutorials very much. It really helps to see a demo than to try to visualize it.I have drawers full of stuff that I never have put together.Thank you.
Cindy,
I’m very new to Polymer Clay.
You’re videos are so inspiring and informative.
Thank You for sharing your knowledge.
Regards,
Jan
I want to thank you for the time you have taken to put these videos together. You have made them interesting and full of valuable information. Again, thank you for your sharing what you have learned.
Adrienne
Cindy,
Looks like fun and unique beads to boot!! Will try to make a lentil bead from watching this video as I missed the 1st series of videos when you demonstrated the technique. This is why I think it is so important that the camera never leaves your hands.
Dear Cindy,
How VERY interesting!!! So THAT’S how it is done!:) This is a very cool method and I am looking forward to trying this. I am already imagining several different looks that might happen just by using different colors and canes! Thank you for sharing!
I am still getting unpacked and rested up from our trip, and will be happily claying again this evening :)
:) Cindy Erickson
you do amazing work – very informative
Thanks Cindy! That’s awesome. I’ve got to try that. If it wasn’t for you I wouldn’t be able to do lentil beads at all!
Cindy,
Great demo on adding cane slices to lentil beads!
Happy clayin
Marilyn
Can’t wait to try this method. I didn’t know to use translucent clay for the cane. Thanks for the tip!
Dear Cindy: Thank you SO much for your wonderful tutorials. I have been beading for about 1 month and am finding it a wonderful way to spend my “free time.” WHAT free time?
Anyway, you are clear, concise, and to the point.
I’m progressing nicely, I think. I have 23 necklaces completed and I can’t wait to try the flower cane on a lentil. Thank you so much for your excellent instruction.
Blessings!
Athens, GA
It is important to note, that the clay thins on the outside edge of the polymer clay lentil bead as it swirls into the center. Therefore, you need to sand carefully on the outside edges so you don’t lose some of your cane design.
Cindy Lietz’s last blog post..Polymer Clay Techniques – The Skinner Blend Plug