Polymer Clay Nail Art – Madam Glam UV Gel Polish
Video #615: Try the Madam Glam UV Gel out for yourself!
More...

IN THIS POST: — madam glam — uv gel — review — nailart — nail art — fimo nailart — nail polish — polymer clay testing — compatibility — uv gel nail polish — fimo nail canes — canes — nail canes — manicure — fingernails — (Topics marked with an asterisk* are discussed in the Comments Section below).
Topics Covered In This Video:
- I have used UV Resin in the past, and you probably have seen my pink UV Lamp sitting in the background of many of the previous videos.
- Many of you have requested that I test out some UV Nail Gel on polymer clay.
- So when Madam Glam contacted me and offered to send some of their UV Nail Gel Polish, I said, “Sure!” since I had been dying to try it on my own nails and on polymer clay as well.
- I am terrible with regular nail polish! It chips all the time since I am so rough with my hands. And I am so fidgety that I can’t even get it set in time before I have already smudged it.
- My hope was for this Madam Glam UV Gel to be compatible with polymer clay so that I could do some nailart with it… but I also wanted to see if there was a nail polish that would finally work for me… and it does!
- Applying this nail polish product is accomplished in three steps.
- First, you lay on the base coat. Then add color. And finally, brush on a top coat.
- All of UV Nail Gels set with a UV Lamp (which I have) or with an LED Light meant for curing nail gel (which I currently have not tried).
- You apply each layer separately, using the UV Lamp to cure each step for 2 minutes (or 30 seconds under an LED light).
- In the video, I show one of my hands with freshly done nails using one coat of clear base and two layers of top coat. They look very shiny and pretty.
- I also show my other hand where the polish has been on for 4 weeks. After this lengthy period of time, there is on slight chipping on the tips… and a gap between the polish and the cuticle where the nail has grown out.
- My reason for wearing clear nail polish (no color), is so that my nails won’t be distracting to viewers watching my videos.
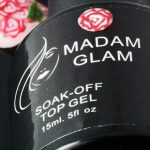
- The Madam Glam polish is called a soak-off gel, which means that the polish needs to be soaked with acetone or a commercial nail polish remover, then scraped off the nail. I have found that I really didn’t need to soak the nail first and that scraping did a good enough job in removing the gel polish.
- If the polish has been put on properly, it will take some scraping to get it off. But if you have put it on in a thick gloppy coating, it may peel off all in one step.
- To prep your nails for the Madam Glam UV Nail Polish, you will need to make sure your cuticles are pushed back, and that your nail is clean and filed.
- Rough up the surface of your finger nails with a nail file, and clean with rubbing alcohol to remove dust.
- Don’t shake the bottles because that will introduce bubbles.
- Put a thin coat of the base coat on your nails, making sure to avoid getting any on your cuticles or skin. It is not harmful, but if you do, the product tends to peel off too easily, and it looks sloppy.
- Cure under UV Lamp for 2 minutes (or LED Nail Lamp for 30 seconds). When the base coat is cured, wipe with rubbing alcohol to remove sticky residue. Repeat with 2-3 coats of color (if desired), and then 1-2 top coat layers… curing in lamp between each layer and wiping with rubbing alcohol to remove residue.
- The polish should last a week or two before requiring any touch ups.
- Really excited about the potential for this UV Nail Gel to be used with polymer clay, and I am planning to do learn (and teach) more about some polymer clay nail art techniques.
- I did some testing to see if the UV Nail Gel would be compatible with polymer clay. Most nail polishes aren’t compatible with polymer. It eats at the surface and becomes sticky, so I wanted to test this one to be sure it would work.
- Happy to say that this Madam Glam UV Polish is in fact compatible with baked and raw polymer clay.
- I coated a baked donut of polymer clay with a base coat and top coat of UV Gel, and cured it. Then this sample piece was left to sit for more than 4 weeks to see if any adverse reactions would happen.
- By the end of the 4 week test period, the Madam Glam product and the polymer clay looks good and seems tough.
- The only issue I found is that if there are any exposed edges on your piece, the cured gel can be peeled away from the surface quite easily.
- So although the finish appears to be compatible, it won’t be the most durable, unless the entire bead is surrounded in the coating and there aren’t any places where coatings can get peeled off.
- Therefore, it is not well suited for pieces the might get easily scratched. It might be OK as a coating on a pendant or a project that won’t get any wear and tear, but I would not recommend it for a rings or bracelets, which tend to see more abuse.
- Using the product on nails is a different situation, though, since this is more of a temporary use type thing.
- In the video, I show an example of some of the nail gel that peeled off in one section because I put it on too thick.
- I show an example of a clear plastic false nail where I added a raw polymer clay cane design to it. Started with a layer of the base coat and cured it. Then added a thin raw cane slice to the surface, rolled it out and trimmed around the nail. Then added two coats of top coat, making sure to wrap the gel around the edges of the cane to seal it in. It has been on that nail sample for over 4 weeks with no reactions or peeling.
- The only issue is with the soft clay unearth, which makes the surface slightly vulnerable to denting.
- I then showed a more durable sample of a nail blank. It had a layer of base coat… that was then sponged with some colored nail gel… followed by a top coat layer with some thin nail art cane slices… curing with my UV light between each step of course. Finally, a couple more layers of top coat were added to seal in the cane slices. Although I am not crazy about the design of this one, I do like how it worked.
- Lastly, I show an example of a nail done with a raw rainbow cane that was sealed in between layers of UV gel… and then I added a baked cane slice over top of that. This design also needs work, but I am encouraged by the potential of these test results.
00:00:03 –> 00:00:07 Hi guys, its Cindy Lietz, your Polymer Clay Tutor, and today in the PcT Test Lab, we are
00:00:07 –> 00:00:13 testing Madam Glam UV Gel Nail Polish on Polymer Clay.
00:00:13 –> 00:00:22 Now I’ve used UV Resin in the past and you’ve seen my UV Lamp that I use for curing that
00:00:22 –> 00:00:30 and I’ve had a lot of requests for trying UV Nail Gel on Polymer Clay as well.
00:00:30 –> 00:00:36 And so when Madam Glam contacted me and asked me if I wanted to test some of their samples,
00:00:36 –> 00:00:41 I said sure, ‘cause I’ve been dying to try it, and I also wanted to see if I could do
00:00:41 –> 00:00:49 a better job with my nails myself, with nail polish, because I am a terrible…I’m terrible
00:00:49 –> 00:00:55 with regular nail polish, I’m rough on my hands, it chips all the time, I’m so fidgety
00:00:55 –> 00:01:01 that I can’t even get it to set in time before I’ve already smudged it, and I was hoping
00:01:01 –> 00:01:05 not only would this be compatible with Polymer Clay, so I could do some nail art and stuff
00:01:05 –> 00:01:10 with it, but I also wanted to see if there was a nail polish that would finally work
00:01:10 –> 00:01:15 for me, and it does, let me just show you what it’s all about.
00:01:15 –> 00:01:20 Now first of all, it came in a little…pretty little box like this one here…or this one
00:01:20 –> 00:01:28 here, and it is…you do use this nail polish in a few steps, you have a base coat first…and
00:01:28 –> 00:01:37 all of these set with the…a UV Lamp or an LED Lamp, that’s meant for curing nail polish.
00:01:37 –> 00:01:44 So you use a base coat first, then a color… if you wanna use it, now, I’ve been just using
00:01:44 –> 00:01:49 the clear together not a color… ‘cause I’ll explain in a sec, and then it has a top
00:01:49 –> 00:01:55 coat, and you do each layer and then cure them individually under the UV Lamp, and the
00:01:55 –> 00:02:00 UV Lamp does it in 2 minutes and gets it rock hard, and it’s just really great.
00:02:00 –> 00:02:08 Now, let me just show you my nails first, now like I said, I like to just use clear
00:02:08 –> 00:02:13 nail polish because I do a lot of tutorials, and my hands are in there, I don’t wanna lot
00:02:13 –> 00:02:19 of distraction in the video with my hands…it’s all about the tutorial, not my hands, so I
00:02:19 –> 00:02:23 tend to use clear and that way if there is any chips or anything, it’s unnoticeable as
00:02:23 –> 00:02:24 well.
00:02:24 –> 00:02:29 So on this hand here, I’ve got a fresh coat, I removed what was on there and I put a fresh
00:02:29 –> 00:02:37 coat on, and it is exactly what a clear nail polish would be, it’s shiny and it’s pretty.
00:02:37 –> 00:02:45 And now, I’ve got…on this hand I’ve got some…like don’t mind…I’m not a nail
00:02:45 –> 00:02:49 person, you can tell by my hands, they’re all beat up, so don’t mind the shortness of
00:02:49 –> 00:02:55 them and the way they look, just look at the polish, this nail polish here has been on
00:02:55 –> 00:03:03 for 4 weeks, and I wanted to show you how well it survives my rough treatment, now I
00:03:03 –> 00:03:08 don’t know if the camera will pick it up, hopefully it will, but there’s a tiny bit
00:03:08 –> 00:03:15 of chipping along the edge here, and these 3 nails actually broke and I had to cut them
00:03:15 –> 00:03:20 back, so you can’t see the chipping along those edges, but you can see where my nails
00:03:20 –> 00:03:28 have grown out and there’s a big gap between the polish and my cuticles there… so if
00:03:28 –> 00:03:32 it can pick up, but other than that, the nail polish looks really good, other than growing
00:03:32 –> 00:03:37 out, on my thumb here where I get a little bit more wear and tear, it did chip a little
00:03:37 –> 00:03:44 bit along this side, it’s starting to chip along the base where the…it had grown out,
00:03:44 –> 00:03:49 and the edge was showing, and then a little along the top side, but it wears really quite
00:03:49 –> 00:03:54 well, I mean that’s 4 weeks, so if you treat it like a normal person, you can probably
00:03:54 –> 00:03:59 get a good couple of weeks out of your polish before you have to do much else with it.
00:03:59 –> 00:04:05 Now this nail here, I’m just gonna show you how to remove it, now it’s called a Soak Off
00:04:05 –> 00:04:11 Gel, and what they mean by soaking it off is you need an acetone or one of the like
00:04:11 –> 00:04:22 commercial nail polish removers, and you soak it… soak the nail in it before you remove
00:04:22 –> 00:04:23 it.
00:04:23 –> 00:04:30 Now I have found that I really haven’t needed to do that, its…the acetone softens it up
00:04:30 –> 00:04:36 and then you can scrape it off, I have found that all you have to do is just start scraping
00:04:36 –> 00:04:43 it off with something like a…like your nail file, and just start scraping it right off
00:04:43 –> 00:04:45 and it’ll all come off.
00:04:45 –> 00:04:51 Now if you’ve put it on properly, it will be kinda hard to take off, if you have put
00:04:51 –> 00:04:58 it on in a really thick, hard coat…or I mean a really thick gloppy coat, it may just
00:04:58 –> 00:05:04 peel off in one setting, but I’ll explain that in one second to you.
00:05:04 –> 00:05:09 Okay, to prep your nail to use this stuff, you wanna make sure your cuticles are all
00:05:09 –> 00:05:14 clean…of course hopefully you have a nicer looking thumb than this one, it’s all beat
00:05:14 –> 00:05:20 up…I’ve burnt myself, I’ve cut it, and I work with metal and all kinds of clay and
00:05:20 –> 00:05:26 stuff, so they get kinda beat up, then, what you wanna do is file it like you’re supposed
00:05:26 –> 00:05:31 to file it, then you can sand the top surface to kinda rough it up a bit, so I just use
00:05:31 –> 00:05:39 my nail file to do that, and then you wanna clean it with some rubbing alcohol…which
00:05:39 –> 00:05:46 if you’re a Polymer Clayer, you should have around, I’m just gonna clean it first.
00:05:46 –> 00:05:52 And then what you do is you put on the base coat, and it’s really easy to use, don’t get
00:05:52 –> 00:05:56 it…don’t shake it or anything, you’ll get bubbles all trapped in it, so you don’t want
00:05:56 –> 00:06:05 that, but you just want to… and you wanna put on a really thin coat, and it’s really
00:06:05 –> 00:06:11 important not to touch your skin, not that it’s gonna hurt it or anything, it’s just
00:06:11 –> 00:06:17 that if you have it touching your skin, it’ll peel away from that spot really easily, I
00:06:17 –> 00:06:22 know this because that’s what happened to me when I was testing this out, so don’t get
00:06:22 –> 00:06:27 it all over your cuticles, don’t get it all over your skin, wipe things up, and then to
00:06:27 –> 00:06:32 set the base coat, all you have to do is put it in your UV Lamp.
00:06:32 –> 00:06:37 Now this one has a little timer on it, and I just have to push it and it goes for exactly
00:06:37 –> 00:06:45 2 minutes, if you have a LED Lamp, I guess it’s only like 30 seconds or something, I’ve
00:06:45 –> 00:06:49 never seen one of those lamps, but you nail people would know what that’s all about.
00:06:49 –> 00:06:56 So this is kinda fun for me because we already are using this with the Polymer Clay with
00:06:56 –> 00:07:02 the resin, now I can have nice nails, and then we can do some combining with the UV
00:07:02 –> 00:07:10 Gel and the Polymer Clay Nail Art slices and things.
00:07:10 –> 00:07:13 So this takes another minute or so, so I’ll come back to you when it’s done.
00:07:13 –> 00:07:20 Okay, it just clicked off, so now, this part is set, but it’ll have a bit of a sticky residue
00:07:20 –> 00:07:27 on it, all you have to do is just wipe that off with your rubbing alcohol, which is something
00:07:27 –> 00:07:32 you wouldn’t think you could do but that’s how that works, and then you have this shiny
00:07:32 –> 00:07:38 base coat, and then you add the top coat, do exactly the same thing, I won’t do that
00:07:38 –> 00:07:44 ‘cause it won’t…just takes a little bit of time, you just put the top coat on
00:07:44 –> 00:07:46 and you can put one or two top coats.
00:07:46 –> 00:07:51 If you wanted to put color, what you would do is the one base…one layer of base, and
00:07:51 –> 00:07:58 then two or three layers of the color depending on, you know how thick you put it on there,
00:07:58 –> 00:08:02 and then you would put one to two coats of the top coat, and each time you would cure
00:08:02 –> 00:08:07 it in between, and wipe it off with the rubbing alcohol, and then you’ve got this really beautiful
00:08:07 –> 00:08:13 finish that’s really durable, I’m excited about that, but what makes me really excited
00:08:13 –> 00:08:16 is its potential use with Polymer Clay.
00:08:16 –> 00:08:21 Now, like I said, I’m not a nail artist, that I will work on, because I have the potential,
00:08:21 –> 00:08:26 I have all the tools and all the things, now I just will have to work on the design.
00:08:26 –> 00:08:34 But I first wanted to test to see if the nail gel was going to be compatible with Polymer
00:08:34 –> 00:08:41 Clay, now most nail polishes…the regular kind is not compatible with Polymer Clay,
00:08:41 –> 00:08:48 it eats at it, becomes sticky and it’s a problem, but this UV cured one is a different formula,
00:08:48 –> 00:08:55 so I wanted to test to make sure it would work and it is compatible, though you would
00:08:55 –> 00:08:57 wanna use it only for specific situations.
00:08:57 –> 00:09:04 Okay, so this is a little baked doughnut of Polymer Clay, it’s kind of a cabochon thing,
00:09:04 –> 00:09:11 and I covered it in the UV Gel, did a base coat and then a top coat and cured it, now
00:09:11 –> 00:09:15 it’s on there really nicely, it looks like it’s going to be durable.
00:09:15 –> 00:09:23 The only thing is that if you have an exposed edge… now I do somewhere on here, like I
00:09:23 –> 00:09:29 didn’t wrap it around the backside, I just did the topside, on…if you’ve got an exposed
00:09:29 –> 00:09:33 edge where something can get at it, it will peel off.
00:09:33 –> 00:09:36 So like right here, you can see I can just…
00:09:36 –> 00:09:42 I would be able to pull it right off of there, so this… even though it’s compatible with
00:09:42 –> 00:09:49 it, it isn’t gonna be the most durable for some situations, unless the entire bead is
00:09:49 –> 00:09:53 completely surrounded.
00:09:53 –> 00:09:57 If it’s a pendant or something like that where you’re not getting a lot of wear at
00:09:57 –> 00:10:03 it, you’re not gonna scratch it or chip it, what you could do is coat the top side, cure
00:10:03 –> 00:10:09 it, coat the back side, cure it, and make sure that both sides…like there’s no exposed
00:10:09 –> 00:10:15 edges, like wrap it right around, make sure it’s completely wrapped around, then it would
00:10:15 –> 00:10:18 be fairly durable.
00:10:18 –> 00:10:23 I wouldn’t use it on a ring or a bracelet or something like that where it could eventually
00:10:23 –> 00:10:30 get chipped because it looks like it will definitely separate from the clay and peel
00:10:30 –> 00:10:35 off, so whether or not it’s a best use for jewelry, I don’t know.
00:10:35 –> 00:10:41 But for nails, it’s a little bit different situation because you can do a few different
00:10:41 –> 00:10:49 things, okay so when I was telling you about it peeling right off if it’s too thick, here
00:10:49 –> 00:10:59 is a little piece of the UV Resin that I had had on my nail and what I had done was I had
00:10:59 –> 00:11:07 put a base coat on, and then I put one layer of top coat on, and then I stuck… while
00:11:07 –> 00:11:14 the top coat was still wet, I stuck a bunch of glitter into it, and then I cured it and
00:11:14 –> 00:11:17 then I put another top coat on.
00:11:17 –> 00:11:23 But I did it in a really thick kind of globby manner, and what happened was, it was on for
00:11:23 –> 00:11:29 a day or so, it looked good, and then I took a bath and water probably got in around the
00:11:29 –> 00:11:34 edges and it just sorta came off in one solid piece, so I thought I would show you that,
00:11:34 –> 00:11:40 and how that looks if it comes off in one piece.
00:11:40 –> 00:11:42 And in a different situation I’ve got here…
00:11:42 –> 00:11:49 I used, you know those blank false nails that you can buy… and I just got a bunch of cheap
00:11:49 –> 00:11:53 ones at the dollar store, I wanted to get them for practicing on, so what I did with
00:11:53 –> 00:12:02 this one is I put a base coat down, cured it and then I put a slice of raw Polymer Clay,
00:12:02 –> 00:12:11 and here’s one in the Poinsettia pattern, I cut it off, put it on to the nail, stretched
00:12:11 –> 00:12:19 it around, trimmed it, then I put a layer of a top coat on, baked it…or did the cure
00:12:19 –> 00:12:25 in the oven or the lamp there, and then put another top coat on, and I wrapped it around
00:12:25 –> 00:12:28 the edges, and this has been on here for about 4 weeks.
00:12:28 –> 00:12:33 It is not peeling, it’s not doing anything that would be a problem, so it would be quite
00:12:33 –> 00:12:38 durable, the only downside to having the raw clay underneath is it’s a soft surface and
00:12:38 –> 00:12:44 I can see there are actual dents that are happening, though they’re not getting damaged.
00:12:44 –> 00:12:48 As far as wearing a pair of nails for a couple of weeks, they would be perfect and quite
00:12:48 –> 00:12:50 a cool look.
00:12:50 –> 00:12:58 Now a little bit more durable option was I put a base coat on, then I sponged on….I
00:12:58 –> 00:12:59 don’t know.
00:12:59 –> 00:13:05 I was trying to be fancy, and I sponged on some of this Pink color, and then I put…cured
00:13:05 –> 00:13:10 it all of course, did a top coat layer, and then put a bunch of little…of the Fimo Art
00:13:10 –> 00:13:16 slices, and a video or so ago… or a few videos ago, I showed you how to slice these
00:13:16 –> 00:13:19 tiny little Polymer Clay canes.
00:13:19 –> 00:13:25 You can see the little tiny slices here, I showed you how to slice them really thin for
00:13:25 –> 00:13:34 the nail art, and what I did was add the little slices to a wet base of a topcoat and then
00:13:34 –> 00:13:39 cured it, and then put another couple of coats of the topcoat on top and cured it again,
00:13:39 –> 00:13:43 and it looks like it’s gonna look really good, as far as the design goes, I’m not totally
00:13:43 –> 00:13:47 sure…that’s something I’m gonna have to work on, but the effect and the toughness
00:13:47 –> 00:13:54 of it, is all good, so that is compatible.And then here’s kind of a combo of the two, I
00:13:54 –> 00:14:02 used some… a raw slice of a Rainbow cane I made, and then after I put a couple topcoats
00:14:02 –> 00:14:08 on and cured them, I put a baked slice of the Rose Cane on top and did the cure, and
00:14:08 –> 00:14:10 that looks like it works too.
00:14:10 –> 00:14:16 So I am really encouraged about using this with Polymer Clay, though like I said I probably
00:14:16 –> 00:14:23 wouldn’t use it in like a bead or a jewelry form too much, just because it could eventually
00:14:23 –> 00:14:28 chip and peel away, which we don’t want, but in a more temporary purpose like for nail
00:14:28 –> 00:14:33 art, it’s really a great, great product, and of course, for your own nails it’s a great
00:14:33 –> 00:14:36 product, so I’m excited about that.
00:14:36 –> 00:14:40 And now from now on, you should be able…you will probably see some much nicer, shinier
00:14:40 –> 00:14:44 nails on me in the tutorials.
00:14:44 –> 00:14:50 So I hope you enjoyed that, and for all of you that have seen this video through us,
00:14:50 –> 00:14:59 Madam Glam has an offer for you of 30% off, and we’ve got the link with the code there
00:14:59 –> 00:15:04 at our site, so you can just click the link and you can go straight there and find out…
00:15:04 –> 00:15:09 get that code, the discount code for the 30% off.
00:15:09 –> 00:15:14 So I hope you enjoyed this tutorial, and if you did…or it’s kind of a tutorial and
00:15:14 –> 00:15:17 demo, and if you did, do let us know.
00:15:17 –> 00:15:22 And if you’ve had experience with UV Gels on Polymer Clay, or any of the other kind
00:15:22 –> 00:15:28 of nail polishes and stuff, do leave a comment I’d love to hear your stories.
00:15:28 –> 00:15:34 And don’t forget we have a great resource over at PolymerClayTutor.com where you can
00:15:34 –> 00:15:39 use the search box and find answers to all of your Polymer Clay questions.
00:15:39 –> 00:15:41 We’ll see you next time and bye for now.
Our goal is to translate these videos into as many languages as possible. If you are interested in helping with this initiative, then please do contact us and we will figure out a way to make it worth your while :)
Resource Links:
- Madam Glam: Madam Glam Products
- Related Article: Fimo Nail Art Using Polymer Cane Slices
- Related Article: Making Polymer Clay Canes For Fingernail Art
- Related Video: Polyslicer Combo Tool For Slicing Nailart Canes
- Related Video: Using a UV Lamp To Cure Resin On Polymer Clay
- Amazon: UV Gel Nail Polish **
Resources marked with a double ** asterisk are affiliate links. If you click on them and decide to buy something, we may receive some compensation. This does not affect the price you pay in any way. What it does do, however, is helps us to continue providing free videos for you, here at the PcT website. Using our links to purchase your tools and supplies, is always greatly appreciated.
Sponsored Ads & Special Promotions
Shareable Images


To share this full blog post anywhere on the web that allows links in comments, here's a shortened url to copy and paste...
>> https://mypct.ca/v615 <<
Want to chat about today’s post? That’s what the comment section below is for. Scroll Down… We’d love to hear from you!
Or... if you would like to request a topic for a future post, here is the link to do that… PcT Suggestion Box
Greetings!
I am new to polymer clay, but have been doing UV gel nails for a while. I was also never able to keep nail polish on, or grow my nails out at all before gel polish! It is now a little fun thing I can do that is also another creative outlet. I also don’t have horrible low splitting on my nails anymore.
I did see several items that really concerned me if someone reads this post and does no further investigation about gel polish before diving in.
Also I’m wondering how well your nails are doing now, if you are still following the exact same process?
My BFF is terrible about picking her gel polish off, and it really damages her nails…????
There are numerous sources to get full, complete instructions or videos, Chickettes.com or ManicTalons.com are both good.
My instructions:
•Nail prep: push cuticles back, file and shape nails. Wash hands thoroughly, use a nail brush too.
{Do NOT file surface of nail (rough it up), is rarely necessary, makes removal more difficult and thins/damages your nail.}
•Use 90% alcohol or alcohol/acetone blend on a low lint wipe to remove all traces of oil on your nails. (Alcohol/acetone blend is 9 parts alcohol to 1 part acetone. You can cut up Bounty paper towels to make your own low lint wipes) Let nails dry thoroughly.
•Application: unless product instructs otherwise, put very very thin coats of base coat on nails and cure under UV or LED lamp per manufacturer’s instructions for time.
{Keep all gel products off skin as much as possible! Many people develop allergies to gel products after too much exposure! Remove any excess before curing gel.}
•Color: apply in thin coats. Typically 2-3 layers are needed, cure between each layer. Make sure to cap the tips of your nails for longer wear.
With darker colors it is especially important to keep coats thin, or sometimes it won’t fully cure and once again expose you to the chemicals that can cause allergies.
•Top coat: 1-2 coats, thin, capping tips. Most top coats need to have the sticky inhibition layer wiped off after the final cure. You can do this with the low lint wipes and the 90% alcohol only, or the alcohol/acetone blend.
•Finish: wash hands thoroughly to remove traces of chemicals, then apply cuticle oil and lotion.
Enjoy your nails!????
To REMOVE:
•lightly scuff the top surface of the nail with a 120 grit file. Put a drop of cuticle oil on your cuticles, then wrap your nails with 1/2 a cotton ball soaked in 100% pure acetone on the nail, with tinfoil wrapped over that to hold it in place. At the 10 minute mark, check the nail. The gel polish should be lifting/flaking off. If not, continue soaking another 5.
{Avoid scrapping polish off nails as much as possible! This can severely damage the nail plate, because layers of the nail comes off with it! Soak and GENTLY help remaining polish off with orange wood stick. The healthier your nails are, the easier the removals will be, and of course it will be easier to grow them out long & strong.}
•After, wash hands (and moisturize) OR start with new base coat again.
There are several gel polish removal methods on the market. They are all basically the same thing, but some are easier to use than others. Nail Mates are quite popular. I like to use little packets (from China/Ebay)that are pre-soaked in remover. Just open & place over each finger, folding to fit, and wait.
Have fun, it can become very addicting!????
THANK YOU Amy for your fantastic detailed instructions!! They make so much sense. Anything I knew was what I could figure out from the internet, so hearing your expert opinion is excellent. You were right about the process I was doing being hard on my nails. In fact Mine were breaking so I stopped doing them. I will try your methods and see if they are better for my nails. I really like how they work and how long they last, so if I can use it without damaging my nails I am all in! Merry Christmas! Have a wonderful holiday and thanks again for taking the time to share your knowledge with everyone here. I really appreciate it!
Being as I live in Tucson, Az, and we have over 300 days of sunshine, I wonder if you can cure your nails in the sun. If so, if will probably cure in 20 min………just a thought………..I would love some feedback. Like Cindy, my nails take a beating. It would be nice to have “pretty hands” ( at age 80, I wonder if that is possible……….teehee)
LOL Patt, I doubt I could ever sit long enough to get my nails cured in sunlight, but perhaps it is possible. I have heard of people being able to cure their UV resin in the sun, but being in rainy British Columbia, I have never even attempted that one!
Cindy…enjoy your vids so much. I have a question and an inquiry. Concerning the UV lite I have one that has a 9 watt bulb in it do I have to cure a longer time in it? Also, I received a Kitchen aid convection oven for Christmas…are you using yours and do you have any tips.
Juanita
Hi Juanita, yes your smaller UV light should work, but I would leave it in for way longer, since there will be way less light getting to the resin to cure it. And with the oven, I absolutely love it! Should have got one years ago!
Hey There,
This is not remotely urgent I just wanted to share some positive feedback with you. I am very new to this, so new that Santa brought me just this Christmas five packs of Fimo, a range of silicone moulds, some resin, a toaster machine and a pasta machine.
It began around the beginning of last year when on a whim in my late thirties I decided to have my ears pierced because I had recently had my hair cut short, and now you could actually see my ears. I went to the supermarket here in the UK and decided to look at their earrings…thinking, Hell it’s Tesco…they will be cheap as chips. Imagine my surprise when they wanted to charge me £7.00 for what amounted to four plastic beads and some wire.
Take me home Husband! I declared, I am going on EBay…there must be cheaper ways to make earrings. Boy was I right, would I have thought twice if I realised that now I would have several bead boxes and be whining at my husband for a “hobby room”. What for he demanded. No woman needs that MANY beads. Awww bless him and his ignorance.
I have quietly beaded for several months now, I don’t make to sell it’s strictly for my own amusement, and to make unique thoughtful gifts for those I love. After researching I began to want to experiment with polymer clay and resin so that’s why Santa was so nice to me this year. My husband and I are both creatively minded. He’s an architect, I was a commercial artist till the birth of our son. Jack is autistic and finding that the education and medical system treats them with scant regard. I went back to college to study to become an Early Years Teacher specialising in children with special educational and physical needs.
However we both are practical and wanted good tutorials. For several days now we have been combing the internet till we came across yours. There are a lot of others out there, but as my Husband commented some of the things they make…well they are ugly. We both held firm the opinion that not only were the items you made beautiful, they were items we would expect to see in high class boutiques, and if you are going to be taught, well better by someone with skill and taste right. Also we liked how warm and expressive you are on your tutorials. I have to say we both became very angry at some comments on you tube from people who didn’t seem to have any manners at all.
I have since purchased your beginners course. Before we buy anything we feel we would benefit from your expert advice and experience before hand. I just needed to say… thank you. I hope that you don’t become discouraged by the comments and rudeness you get on your you tube videos at times. If you had not of displayed them I wouldn’t have found you, and I dare say there are many others like me.
You are appreciated.
Sarah
Oh Sarah… you made my day! Thanks so much for your kind words of encouragement. You are a wonderful writer and story teller!
It’s feedback like this that makes it so much easier to rise above those Negative-Nelly comments over at YouTube… that, unfortunately, are part of life on the internet.
You are appreciated too Sarah :-)