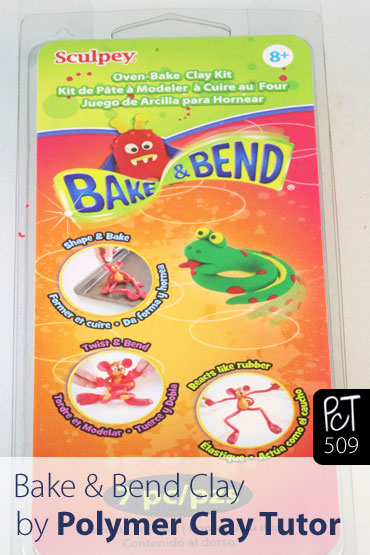
Review: Sculpey Bake & Bend Oven Bake Polymer Clay
Video #509: Taking a look at the color mixing and baking properties of this “made-for-kids” brand of polymer clay.
More...

IN THIS POST: — kids clay — sculpey — bake and bend — elasticlay — flexible — baking — color mixing — (Topics marked with an asterisk* are discussed in the Comments Section below).
Topics Covered In This Video:
- My first impressions of Sculpey Bake and Bend Clay.
- Generally considered a kid's polymer clay.
- Convenient re-usable packaging.
- Comes with plastic knife tool.
- Kit includes 1 oz. blocks of Bake & Bend clay in 6 bright colors (Black, White, Red, Yellow, Blue, Green).
- Colors can be mixed.
- Colors are much darker and more muted when baked.
- Clay is very sticky and soft.
- Leaves color on hands.
- Fingerprints easily (remove with rubbing alcohol).
- Clay bakes at 285F (130C) for 20 minutes per 1/4" (6 mm).
- I also tested at 40 minutes to see if it benefited from longer baking… it did not.
- Samples baked for 20 minutes at 285F were: Flexible; Quite strong; Stretched but didn’t break; Crazed slightly when tied in knot; Darkened significantly; Pieces fairly difficult to pull apart; Slightly squishy.
- Samples baked for 40 minutes at 285F were: Flexible but not as strong; Broke easily when stretched; Crazed significantly when tied in knot; Color darkened significantly; Pieces fairly easy to pull apart; More firm than sample baked for 20 minutes.
- Would make interesting flexible components in jewelry making.
- Could be compatible with Premo clay, though I should have mentioned in video that since Premo is best baked for 1 hour and the Bake & Bend only 20 minutes… it would be best to bake your Premo piece for 40 minutes first, then add any Bake & Bend pieces and bake for an additional 20 minutes, to achieve optimal results for both clays.
00:00:03 –> 00:00:08 Hi guys, its Cindy Lietz, your Polymer Clay Tutor, and in today’s PcT Test Lab, we are
00:00:08 –> 00:00:12 talking about Sculpey Bake and Bend clay.
00:00:12 –> 00:00:18 Now, I got some samples of this a little while ago from Polyform, and I wanted to test it
00:00:18 –> 00:00:25 out, it’s generally used as a kid’s clay and you can see from the cover here, they’ve
00:00:25 –> 00:00:30 got little sculptures and things, I don’t tend to do this style of stuff, so I wanted
00:00:30 –> 00:00:34 to test it out and see what the product was like and see if I could use it in some other
00:00:34 –> 00:00:36 ways as well.
00:00:36 –> 00:00:42 So this video is just a little bit about my first impressions about the clay.
00:00:42 –> 00:00:48 Now, the packaging is quite nice, it would be nice to be able to store your stuff back
00:00:48 –> 00:00:57 in here, it comes with a little plastic blade, I found on mine… the way it was cut out,
00:00:57 –> 00:01:01 it had kind of a thin plastic edge on it, it’s just probably the way it was pressed
00:01:01 –> 00:01:05 in the mold, I just used a pair of scissors and trimmed that off, actually, ‘cause it
00:01:05 –> 00:01:09 was folding over when I was trying to cut, not doing a very nice job, but once I trimmed
00:01:09 –> 00:01:12 it, it was fine and it cuts quite well.
00:01:12 –> 00:01:17 And the clay comes in a bunch of these bright colors, and of course, the first thing I did
00:01:17 –> 00:01:22 when I opened up the pack was see if they mix together, and could do some color mixing
00:01:22 –> 00:01:30 with them, so I took a little chunk of the Red, a little chunk of the Yellow and mixed
00:01:30 –> 00:01:38 them together, now, this clay is really, really soft and quite sticky, it’s quite a bit
00:01:38 –> 00:01:45 different than Premo, which is our usual brand of clay.
00:01:45 –> 00:01:53 I noticed that it leaves fingerprints really badly, but you can kinda fix that issue.
00:01:53 –> 00:01:57 Now the interesting thing, when you mix the colors…as you can see, they will mix into
00:01:57 –> 00:02:02 whatever colors you like, ‘cause I find these colors a little on the garish side,
00:02:02 –> 00:02:08 well you know, they often give kids’ colors a little on the bright side.
00:02:08 –> 00:02:14 But when the colors mix together…but after they bake, they change color quite a bit,
00:02:14 –> 00:02:24 so I’ll just show you that, here’s the Red color, here is the piece that I baked
00:02:24 –> 00:02:32 and the Red has changed quite a bit, it’s gotten a lot darker and it has less of a pastel
00:02:32 –> 00:02:34 kind of look to it.
00:02:34 –> 00:02:40 Here’s the Yellow here, this yellow looks quite, almost fluorescent, but when it’s
00:02:40 –> 00:02:49 baked, it looks a little more like a Cadmium Yellow maybe, maybe a Zinc Yellow, and mixed
00:02:49 –> 00:02:57 together, I got this really lovely Coral color…but baked, you could barely tell that it was different,
00:02:57 –> 00:03:02 so the Red was very, very dominant, and I would have to… if I wanted to get a nice
00:03:02 –> 00:03:06 light Orange color, I would sure use a lot less of the Red.
00:03:06 –> 00:03:12 Here, I’ve got another example where I mixed some of the Blue and the Red together I got
00:03:12 –> 00:03:17 a Purple color, and as you can see here, when it baked up…it’s a lot darker.
00:03:17 –> 00:03:23 There’s other… some other interesting things about it, first of all, it colors your
00:03:23 –> 00:03:29 hands quite a bit, so you’re gonna wanna have a baby wipe close by to keep them clean.
00:03:29 –> 00:03:34 And I did a couple of things, I tested baking it at different…I baked them at the same
00:03:34 –> 00:03:37 temperature, ‘cause I always think that they’ve figured out the right temperature
00:03:37 –> 00:03:42 for the clay, but sometimes I think the timing is off, but in this case, I don’t think
00:03:42 –> 00:03:44 so.
00:03:44 –> 00:03:55 I baked these samples here at 20 minutes at 285, which is says on the pack…285 Fahrenheit,
00:03:55 –> 00:04:01 and that was their suggested level of baking, and then I also did the same thing, only I
00:04:01 –> 00:04:06 did it for 40 minutes to see if that would make any difference, and there is a bit of
00:04:06 –> 00:04:09 a difference between the two.
00:04:09 –> 00:04:13 Now the thing about the Bake and Bend…and I haven’t tested it yet to see the strength,
00:04:13 –> 00:04:18 I wanted to do that in front of you and see how it would work, and I wanted to see at
00:04:18 –> 00:04:22 the 20 minutes, if it would stretch…it does stretch really hard, but it doesn’t break,
00:04:22 –> 00:04:29 it looks like it’s crazing, the edges are crazing a little bit…the camera probably
00:04:29 –> 00:04:34 won’t pick that up, but I can see it here a little bit, you can…the thing about this
00:04:34 –> 00:04:39 clay is it’s meant for bending and…look at… you can even tie it in a knot, this
00:04:39 –> 00:04:44 skinny piece, oh and see on the edge of this knot…I don’t know, will the camera pick
00:04:44 –> 00:04:47 that up, it’s gone light colored, so it will…
00:04:47 –> 00:04:53 I would imagine it would give some stress if you’re constantly tying and untying it,
00:04:53 –> 00:04:59 but it does mean that this kind of… that it’s strong, and that it’s certainly not
00:04:59 –> 00:05:03 gonna break if you put little appendages and things on your pieces.
00:05:03 –> 00:05:09 Now, I wanted to do some sorta little pod flowers to see how they would look, and they
00:05:09 –> 00:05:14 would suit this clay quite well actually, ‘cause you bend it and it’s not gonna
00:05:14 –> 00:05:19 break or puncture… be all that hard on you, because it’s quite flexible.
00:05:19 –> 00:05:27 I also wanted to see if it would come apart, it’s quite…it’s stiff there, but I see,
00:05:27 –> 00:05:37 I could tear it apart eventually…yeah, you can pull it apart, so if…you would wanna
00:05:37 –> 00:05:40 keep that in mind if you were using it…if kids were using it and they were doing a lot
00:05:40 –> 00:05:46 of stretching, that those pieces that you attach to it were stuck on really well, maybe
00:05:46 –> 00:05:49 a Bake and Bond would be a good solution for that.
00:05:49 –> 00:05:58 Now, I’m gonna try the same sorta test with the 40 minute bake, it seems really strong,
00:05:58 –> 00:06:05 but it seems to be crazing, or cracking on the surface…stress marks, a little bit faster,
00:06:05 –> 00:06:10 probably because the surface is a little harder, but it’s really strong…oh, it broke a
00:06:10 –> 00:06:16 little bit, in fact I think maybe this one’s not as strong as the 20 minute one, it ties
00:06:16 –> 00:06:24 nicely, oh and it does craze worse, so in this case, the longer baking is not a benefit
00:06:24 –> 00:06:32 okay, from what I’m seeing here, so stick to the instructions on the pack.
00:06:32 –> 00:06:38 It feels a little firmer… not quite as squishy as the other one, and it’s still as flexible,
00:06:38 –> 00:06:43 let’s see if it peels apart, yeah it does peel apart, in fact, I think worse than the
00:06:43 –> 00:06:49 other one, so, I think it benefits having the baking… proper at the 20 minutes.
00:06:49 –> 00:06:54 I think this would be an interesting product to use in, like little stamens coming out
00:06:54 –> 00:07:01 of some flowers, I’m…it’s…because the temperature is so close to Premo…it’s
00:07:01 –> 00:07:07 285 and Premo is baked at 275, I can see that they’d be quite compatible with each other.
00:07:07 –> 00:07:12 So if you wanted to add some appendages to a piece that you were doing, or you wanted
00:07:12 –> 00:07:17 to make some jewelry with some tentacles on it or whatever, you would have a lot of flexibility
00:07:17 –> 00:07:21 to it, and no risk of breaking, alright?
00:07:21 –> 00:07:26 So, I just thought I’d try that out, and if I end up using it in some future projects,
00:07:26 –> 00:07:29 I will let you know, alright?
00:07:29 –> 00:07:31 Let me know if you liked this video.
00:07:31 –> 00:07:32 Have you ever used this product before?
00:07:32 –> 00:07:38 Have you…is this a helpful tip for you to get to know it a little bit better?
00:07:38 –> 00:07:40 Leave those in the comment section below.
00:07:40 –> 00:07:46 And if you have any products or ideas, or problems that you’d like me to help you
00:07:46 –> 00:07:51 with and you wanna see it in a future video, leave those in the comment section below,
00:07:51 –> 00:07:52 alright?
00:07:52 –> 00:07:54 So we’ll see you next time and bye for now.
Our goal is to translate these videos into as many languages as possible. If you are interested in helping with this initiative, then please do contact us and we will figure out a way to make it worth your while :)
Resource Links:
- Related Video: Resource List of Where to Buy Polymer Clay
- Amazon: Sculpey Bake & Bend Polymer Clay **
Resources marked with a double ** asterisk are affiliate links. If you click on them and decide to buy something, we may receive some compensation. This does not affect the price you pay in any way. What it does do, however, is helps us to continue providing free videos for you, here at the PcT website. Using our links to purchase your tools and supplies, is always greatly appreciated.
Sponsored Ads & Special Promotions
Shareable Images


To share this full blog post anywhere on the web that allows links in comments, here's a shortened url to copy and paste...
>> https://mypct.ca/v509 <<

Want to chat about today’s post? That’s what the comment section below is for. Scroll Down… We’d love to hear from you!
Or... if you would like to request a topic for a future post, here is the link to do that… PcT Suggestion Box
Do you think that would work for a case for my Samsung Galaxy mp3 player? Since it was discontinued back in 2012 I can’t buy cases for it anymore. I recently got it in my head to get some of this clay and try to make a new case. It currently has a silicone case on it but one corner ripped. If I could make it a new case with this clay, that would be awesome.
I actually don’t know Athena. I have thought about whether you could make a case for your phone but it hasn’t gone further than just a thought. You would have to make a form first… unless your old case was heat safe… which you wouldn’t know until you tested it. You could try an airdry clay instead. That might work. I am afraid I don’t have better advice for you at this time. I agree it would be awesome to make your own cases though!
Cindy..do you think it would be possible to use bake and bend on the metal bead racks like you used the sugru? Or would it suffer from being baked numerous times?
Hi Peg, it would be worth testing if you already have some bake and bend, but I am not sure that its would do as well as the Sugru for fixing the slots in the bead rack. I don’t think it would stick that well to the metal and I think it might get brittle with the repeated bakings. The Sugru was designed as a moldable silicone glue that can handle a huge range of temperatures while still keeping it’s rubbery properties. It is the ideal product for the racks. But if you want to see if the Bake and Bend will work, I would love to hear about your results… I could be totally wrong. :)
Regarding Bake and Bend. I have used it 1/2 Premo and 1/2 B&B for shoe laces ! Works well. On, so I only used the white, so I don’t know about the colors. I can be used as a necklace,too I have only used a light weight pendent, and used Bake and Bond to fuse the ends together.. That is all my experience with it. Hope it helps someone…………..LOL
Thank you for your review of Bake & Bend. It was very informative and it didn’t feel like an infomercial for the product. I found your observations concerning the significant color change an important cautionary note worth taking into consideration when blending and baking the product.
I have been watching some of your free tutorial and reviews and have decided to become a member.
Also, have you ever done a tutorial or review of Swellegants by Christi Friesen? I would like very much to get your take on these products.
Hi Tom, so nice to meet you! Thank you for saying that and I hope you enjoy being a member. :) I have not tried the Swellegant product yet. It is something I’d love to see how it performs!
Omg wow. I just bought some polymer fimo clay and i want to start making designer jewelry, your youtube channel got all the tips and tricks i need to know and i am so happy that i subscribed. Thanks so much for taking the time to make these videos, it means alot to newbies like myself and also for advanced. Much love from Norway
If I Bake The PC For 60 minutes @ 265F – 275F , would it burn , i already bake some pc and want to bake again for 20 more mins and 265F because ithink the clay was uncure because Its breaking , HELP Please
Hi Tiffany if you use and oven thermometer and keep the clay at the temp that is recommended on the pack (Premo is 275F) and you tent your pieces (type tenting into search box to learn more), then you can bake your piece for 1 hour and it won’t burn. You can definitely bake your pieces again, if you are worried that they might not be cured properly. To learn more about baking, use the search box at the top of the page there is tons of info on this blog that will help you. If you haven’t done it yet, I would recommend purchasing my Beginners Course. That will help you improve your work quickly.
Hi Cindy,
I really enjoy your tutorials, they are so informative. Have you ever tried to use polymer clay with crystal clay at all? I am wondering if the 2 would react if used together. There has been a few occasions when having made something with polymer clay I have been tempted to add certain components using a bit of crystal clay because of its holding/sticking properties (to baked polymer, not raw) just wondered if you had tried it.
Keep up the good work :)
Thanks
Tracey
Hi Tracy, I have heard of Crystal Clay, though I haven’t tried it yet. If it is similar to other epoxy clays, it should be ok with polymer clay, though it would need to be tested to be sure. It is on my list of stuff to try.
Thanks for the tips on using this bake and bend for making texture sheets. I have use it to make bracelets and they did turn out quite nice. I did a copper wire wrap and it really dressed it up. Never thought of using it in the extruder but by golly I am going to try that!
As always Cindy, you come up with the best tips and videos.
I love that clay to make molds and texture sheets. They stay flexible after curing.
I use it also to make the extruder cords. Mixed half and half with premo makes it bendable and solid at the same time.
Found good info from your video never used the clay the way you did.
Have you tried their earaser clay? I have not had any fun using it with kids. It does not earase when I tried it. it smears colour on the paper instead.Bummer.
Hi Hermine, thanks for the tips! I haven’t tried eraser clay yet, but I have a pack of it to do some testing with. It is on the list for a future video. I was wondering myself, how it erased.
Many people use Bake n Bend for custom texture sheet. The texture sheet is made on a thin setting, baked, it is flexible enough to go through the pasta machine with a a sheet of polymer clay.
Thanks for the tip Anna! I’ll have to try it for that!