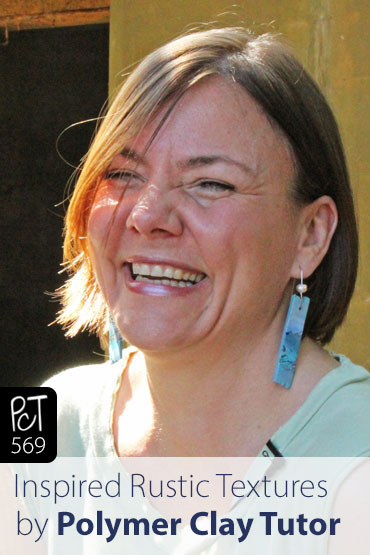
Rustic Textures Inspire Polymer Clay Creativity
Video #569: Roadtrip #3-01 (OR): A visit to the David Russell Battery at Fort Steven’s State Park. Polymer clay Inspiration is everywhere!
More...

IN THIS POST: — textures — inspiration — fort stevens — oregon — rust — moss — lichen — surface techniques — crackle — distressed — david russell battery — concrete — (Topics marked with an asterisk* are discussed in the Comments Section below).
Topics Covered In This Video:
- Fort Steven’s State Park in Oregon, USA.
- David Russell Battery, US Military Base operational from 1904 – 1944.
- Quick roadtrip to see a couple of people and do some on-location filming.
- Look for inspiration for your polymer clay art in your surroundings.
- I was very inspired by the textures found here in the abandoned concrete buildings and the surrounding area.
- Textures in weathered concrete, rust, moss, lichen, crackled surfaces, distressed finishes, etc.
- When you are out and about, keep your eyes open for inspiration in colors, shapes, textures and different ideas that will make your artwork come along further and make it more original.
- Gorgeous photos and video taken by Doug Lietz.
00:00:03 –> 00:00:07 Hi guys, its Cindy Lietz, your Polymer Clay Tutor, and today on the PcT Road Trip we’re
00:00:07 –> 00:00:11 out in Fort Steven’s State Park in Oregon.
00:00:11 –> 00:00:15 And we’re doing a quick trip here, we’re gonna be seeing a couple people, and we’re
00:00:15 –> 00:00:18 going to be doing some different filming.
00:00:18 –> 00:00:25 But we’re here at the David Russell Battery, where…Fort Steven’s is a historical military
00:00:25 –> 00:00:33 base, and it was running here from 1904-1944, and so there’s a lot of old buildings that
00:00:33 –> 00:00:36 haven’t had people in it for years.
00:00:36 –> 00:00:42 But I thought I’d do this neat video because when you are out and about, either on a road
00:00:42 –> 00:00:47 trip or just doing your everyday life, there is inspiration for Polymer clay everywhere.
00:00:47 –> 00:00:55 And there is some really cool…old concrete surfaces and stuff, there’s like old rust,
00:00:55 –> 00:01:03 and old… there’s lichen covered concrete, and it’s just so inspiring, the colors and
00:01:03 –> 00:01:08 the patterns, and the crackle finishes and the distressed look, that I feel like I should
00:01:08 –> 00:01:14 be about to come up with a really neat surface technique, out of just looking back at all
00:01:14 –> 00:01:19 the pictures of this stuff, there’s also the trees here, covered in moss and it’s
00:01:19 –> 00:01:21 very textural.
00:01:21 –> 00:01:28 So I just thought I’d let you…I’d just mention that to you because keeping your eye
00:01:28 –> 00:01:35 open for shapes, colors, textures and different ideas that can make your artwork come along
00:01:35 –> 00:01:38 further and make it more original.
00:01:38 –> 00:01:43 So I hope you enjoyed that, and if you did, do let me know if you liked this video.
00:01:43 –> 00:01:49 And also, if you have any comments, questions, ideas for future videos, leave those in the
00:01:49 –> 00:01:50 comment section below.
00:01:50 –> 00:01:56 And don’t forget, we have a great website, it’s a perfect resource for all your Polymer
00:01:56 –> 00:02:02 clay questions at www.polymerclaytutor.com and you can use the search box there to find
00:02:02 –> 00:02:05 all your answers to your Polymer clay questions.
00:02:05 –> 00:02:07 We’ll see you next time and bye for now.
Our goal is to translate these videos into as many languages as possible. If you are interested in helping with this initiative, then please do contact us and we will figure out a way to make it worth your while :)
Resource Links:
- Related Article: 40 Texture Ideas for Polymer Clay Projects
- Related Article: How To Think Creatively About Polymer Clay Bead Surfaces
- Related Video: Oregon Jewelry Artist Cindy Peterson Visit
- Related Video: Selling Polymer Clay Jewelry at the Astoria Public Market
- Related Video: PcT Roadtrip Beginnings
- Related Video: Mixed Media Artist Alisa Burke Seaside Oregon
Resources marked with a double ** asterisk are affiliate links. If you click on them and decide to buy something, we may receive some compensation. This does not affect the price you pay in any way. What it does do, however, is helps us to continue providing free videos for you, here at the PcT website. Using our links to purchase your tools and supplies, is always greatly appreciated.
Sponsored Ads & Special Promotions
Shareable Images


To share this full blog post anywhere on the web that allows links in comments, here's a shortened url to copy and paste...
>> https://mypct.ca/v569 <<

Want to chat about today’s post? That’s what the comment section below is for. Scroll Down… We’d love to hear from you!
Or... if you would like to request a topic for a future post, here is the link to do that… PcT Suggestion Box
I have a magnet question.
I have been making refrigerator magnets for fun little projects as I get into working with PC. I remember hearing you say somewhere (I think) that baking the magnets make them less powerful. So, I’ve been trying to attach my little (.25″?) earth magnets after baking. The magnet always seems stronger than the glue and pops off. It seems to work better if I glue to wood. I am using the gel super glue (that you like) and also normal super glue.
I am wondering if I use the good earth magnets that maybe I could bake them inside the clay after all. Or maybe there is some tip – like scoring the clay where the magnet goes? Or another type of glue?
I have a cool idea about making refrigerator magnets/pins for clothing. If I took a washer or another magnet for the inside of your clothes you could wear them too. I am trying to figure out what might work good for the back. Another magnet is too strong as it pulls off the glued one. I figure there is probably something at the hardware store that would work (like a washer), but I haven’t figured that out yet.
Any thoughts on my predicaments?
Hi Lena, I wouldn’t bake your magnets. They are not going to stay in there after baking anyway, so lowering their strength won’t be worth it. Try a different glue like E6000, Weldbond or 2 part Epoxy (the strongest). Your other clothing ideas sound neat. Keep experimenting with different processes and see what will end up working best. Let us know how it goes.
Hi Cindy,
The past few weeks I’ve been working on the 25 or so Christmas presents I make every year. I’ve covered Christmas ornaments before, but now I’m into coming up with refrigerator magnets.
I usually get clay from Donna Kato and Vernon (in Colorado Springs – I’m up the mountain from them, above Evergreen), and I took a class on her craftartedu site for a blue butterfly. The directions were for a 6-pound cane, so I made it 1/4 size or so. That came out beautifully except that I just used scraps for the body of the individual butterflies. I made those to go on top of a refrigerator magnet. My idea is to have a butterfly on top of an oval piece covered with flowers (as a fabric, as you taught me).
I made a few base pieces (2 – 3 inches or so, starting with 2 stacked pieces of clay on widest pasta machine settings), smoothed to an edge. But they’re really messy looking. Is sandpaper what you would use to smooth them before I cover them?
I did find that I can bake the magnets with the clay, adding a sheet to the bottom with holes cut out where the magnets go, and liquid clay to hold them in. I ordered magnets on the internet that were very small, but you had to slide them off the side of the refrigerator – they were really stuck.
This is so much fun, I love working with polymer clay. Would you have made the oval bases so they were smooth to start with, rather than waiting to fix them later?
Thanks.
Betsy
Hi Betsy, so sorry I missed answering your question. I remember reading it and not having time to answer it at the time, and then I guess I forgot to come back to it. :(
I always do my best to smooth things out before baking. It is much easier to spend a little more time making things look nice before they harden, then spending a lot more time later fixing it.
But since it is done, yes sandpaper is the way to get it smooth before covering them. Since they will be covered anyway, use a coarse sandpaper like 220 grit drywall sandpaper or 400g wet/dry to get it smooth. I wouldn’t worry about going with any finer grits after that… it is more about the shaping in this step.
Your magnets sound like they are going to be lovely. I should would love to see pics when you’re done. Let me know if there is anything else I can do to help.
Thanks Cindy!
I thought later that you would probably use a mold for the base piece, that might have been easier.
The key seems to be another layer of clay on the back with holes where the magnets go. When I tried the 2-part epoxy sticking them to a flat back, the magnets eventually slid off when hanging on the fridge.