
Sand Your Polymer Clay Beads – Or Else
Or Else…. Your Beads Won’t Look Nearly As Brilliant and Stunning As They Should:
More...

Sanding your polymer clay beads is one of the most important steps when it comes to making your bead jewelry look professional.
I follow a lot of blogs, websites and forums and am amazed how many polymer clay artists and crafters skip this step. They often can’t-be-bothered to sand their beads. I’m talking about smooth beads and pendants here more than anything.
Come on people! Not sanding is like a cabinetmaker going to all the trouble of getting a raw timber, cutting it into boards, building a beautiful piece of furniture, attaching expensive hardware to it, and then leaving the wood all splintery, rough and full of blemish marks or glue stains. It just doesn’t happen.
Why then would a polymer clay bead maker do this? Go to the effort of buying the clay, conditioning it, carefully mixing the colors, doing a bunch of techniques with it, making it into a bead or pendant, piercing it, baking it and then just leaving it unfinished! It would have only taken a little more effort to do the sanding and have your project go from just OK looking to becoming brilliant and stunning.
In some ways I think this final finishing step is THE most important step. I have taken pretty amateurish lookin’ beads, sanded and polished the heck out of them, and ended up with something pretty special.
So stop being so lazy! Sand your beads (or find yourself a bead slave) and get ready for the compliments to start rolling in.

Treasure Hunt Contest
Clue #3 >> Polymer Clay Cane Designs
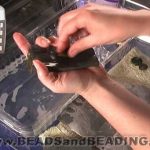
The sanding techniques photo I used in this post is from a free polymer clay image transfer tutorial that I recently published.
And if you’re interested, here’s a link to a full video where I discuss several of the frustrating mistakes I made while learning how to transfer images onto polymer clay beads.
Sponsored Ads & Special Promotions
Want to chat about today’s post? That’s what the comment section below is for. Scroll Down… We’d love to hear from you!
Or... if you would like to request a topic for a future post, here is the link to do that… PcT Suggestion Box
I was having a giggle at the age thing, yes I used to watch McGiver and then remembered the age of some ladies at a beginners class I recently taught. Some of them were 70 years young some a bit younger by a year or so. Instantly got them hooked making canes, The ideas were flowing very quickly. All were members of The Country Womens Association, not sure if you have it in the states, but all are talented and crafty in some way. Knitting crochet, spinners and weavers etc.
Wow. This is an AMAZING tips website. You saved my booty! I needed to sand my Sculpey covered eggs. I covered them with canes I made and couldn’t figure out what to do to smooth them. I resorted to scraping the worst of the lumps off with the paper blade and then sanding dry. I sanded my beads dry as well.. and it did NOT work!
Now I know what to do, and they are going to look GREAT!! Thank you so much!
I should probably post pictures. Haha! Thank you for your tutorials and tips, they are amazing and I will keep looking through them!
by the way, I’m 21 and I’ve seen a couple of Macguiver shows. HAHA.
@Cali: Hi there, and welcome! It’s good to hear that you’re learning so much and enjoying this site and your tutorials. I’m happy that you learned the importance of sanding (and doing it wet! LOL) Have you signed up to be a member yet? If not, it’s a really good deal…only $3.32 a month ($9.95 for 90 days — which gets you 12 new video tutorials!)
Cindy’s videos just get better and better all the time…to see some of her latest, go to the Home page (above) and choose one of the Tuesday posts out of the list of articles. A good way to spot them is the last word in the post name is “video” like this: [Video]
Tuesday is when the preview videos come out, (like the intro video above.) That’ll give you a better look at the cool projects and techniques we’ve done lately. It’s been a really great month, but to get the tutes at the low price, you have to become a member before the month is over. Otherwise, you have to buy it as a back issue ($9.95 for the month, instead of 3 months!) Don’t wait and regret it, like I did! I was really sorry that I waited — & wasted such a good deal!
Wow, I really rambled on, didn’t I? Sorry about that. I get excited telling people about Cindy’s videos. I’m sorry if you’re already a member! Anyway, have fun, and enjoy! ~Kat :D
Welcome to the community Gabrielle. I’m glad you are learning lots. The link by my name will take you to a comment I made a while back which outlines how to best use the various information resources here.
Hi,
I am learning a wealth of info from your site. I am just starting with polymer clay and had now idea you were supose to sand and buff after you have baked them. Off to start sanding.
Thanks so much!
Cheryl welcome, it is fantastic having you here! Thank you so much for sharing your story and your tip. I popped by your site and I see you are adding a few polymer clay features to your handmade bags. Way to go! They look great!
I found this site about a week ago and got a membership. I have always be intimidated with clay, but because of your calm teachings I think I can, I think I can, by George I did make my first beads and you are right, while sanding is hard work it really does make a difference. I was trying to find a way to sand without making my hands cramp up and ran across this information: planetjune.com/blog/detail-sander-ex-toothbrush/. It gives illustrated details on how to convert an electric toothbrush to a mini sander for your beads. I’m going out today to buy me a toothbrush. Thought I’d share this idea.
I know what you mean Joyce sanding is a lot of work! The tumbling does save some time. They sure look pretty when they’re sanded up nice don’t they?!
I just sanded my very first beads. I decided I don’t like to sand! But I like how shiny the beads came out. Now, on to read the posts about the tumblers……..
Hehehe that is so funny about your husband! I like your idea of using a kitchen scrubber for sanding. Bet it works well!
Thanks for sharing how you converted it over for bead sanding. That will be quite helpful to others!
The sign of a true PC artist is short uneven finger nails with small bits of clay wedged under them. I have showered and gone to work to look down and see some thing that looks like dirt under my nails, and had to explain to the other person why it’s there. Guess that is one way to market our products!!
I bought a Black and Decker Kitchen Scrubber which is similar Cindy E’s sonic scrubber but has only one handle, got it from Target online for $14.99-not available in stores. It has 3 inch round Velcro ad on top and attach my sandpaper by sticking th opposite side of Velcro; soft side to loop side. It is safe for wet sanding because it was made to be submersible. It is battery operated and spinds quickly enough to get the job done but is not like the speed of a Dremel. I really like the idea of putting on a wash clothe as it can b hard to hold onto a wet slippery bead. I use a Dremel for buffing and it scares my husband too death, your would think I was running a chain saw; told him to “Keep Out”, this is a girl thing.
Kimberlee: Great glove tip! It will be helpful for those sanding away their fingertips…ouch!
I couldn’t remember when Macguiver aired and I didn’t want all the young ones on this blog getting lost so I went with my age as a reference point. Do you remember when it was on?
And yes it does make a great verb! I have ‘Macguivered’ many projects in my life!
Cindy Lietz’s last blog post..Fimo Clay, Premo, Sculpey – Which is Best for Cane Making + Sculpting