Sculpey Souffle Polymer Clay Product Review
Video #545: A suitable replacement for the Studio by Sculpey clay product that was discontinued a few years back.
More...

IN THIS POST: — sculpey — souffle — review — studio by sculpey — premo — polyform — polymer clay brands — (Topics marked with an asterisk* are discussed in the Comments Section below).
Topics Covered In This Video:
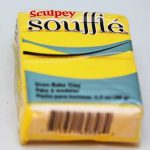
- Sculpey Souffle is a new line of Polymer Clay in 2014 from Polyform.
- Comes in 22 colors, at the time of this posting.
- Described as lightweight, exceptionally strong clay that doesn’t crack when used on large pieces.
- It has a suede-like matte finish that doesn’t need to be sanded.
- The clay is soft and reminded me of the old Studio by Sculpey polymer clay, which is no longer manufactured.
- Same sized block as Premo Sculpey but weighs 15% less than Premo.
- Also, available in Multi-Packs.
- Designer colors… not artist based pigments.
- When I mixed Mai Tai with the Bluestone 50/50 the colors mixed equally and appeared that the saturation levels (at least with those two others) are the same.
- Colors did not shift or change when baked.
- Matte finish that doesn’t need to be sanded.
- This product will sand and buff to a shiny finish, but there are tiny white specks in the clay that are visible on the sanded pieces.
- In a follow-up video, I will do some strength testing.
- Souffle is an excellent substitute for the old tutorials that called for Studio by Sculpey Clay.
- Clay can be used for caning, but it is a little soft, so it would be best suited for only simple cane designs.
- Bakes at 275F (130C) for 30 minutes. I think it will need to be baked for longer, but I will have to do more testing to know the ideal temp and time for this clay.
- Forgot to mention in video: The clay has only a very faint smell similar to Premo and is very opaque.
- There is no Translucent Souffle in the lineup at this time.
00:00:03 –> 00:00:08 Hi guys, its Cindy Lietz, your Polymer Clay Tutor, and in today’s PcT Product Demo,
00:00:08 –> 00:00:13 we’re doing a review of the new Sculpey Soufflé Polymer Clay.
00:00:13 –> 00:00:19 Now, a little while ago, I showed you that Polyform has come out with a whole bunch of
00:00:19 –> 00:00:24 new products for 2014, and one of them is a new line of Polymer clay called Sculpey
00:00:24 –> 00:00:33 Soufflé, and it comes in 22 colors…so far, anyways, and they’ve got them in the regular
00:00:33 –> 00:00:37 size packs as well as the multipacks.
00:00:37 –> 00:00:45 And it’s described as a lightweight very strong clay that won’t crack in large pieces,
00:00:45 –> 00:00:53 and…or, when you’re doing large pieces, and it’s got a suede like finish.
00:00:53 –> 00:00:55 When I first opened up the pack…
00:00:55 –> 00:01:03 I’ve got a couple of packs here that I opened up, the texture was soft and it reminded me
00:01:03 –> 00:01:10 very much of the clay that Sculpey used to carry…or Polyform used to do, called Studio
00:01:10 –> 00:01:16 by Sculpey, and it’s behavior is very, very similar, so I suspect, it’s quite a similar
00:01:16 –> 00:01:22 formula, but the colors are a little different, and packaged differently, they call it a lighter
00:01:22 –> 00:01:29 weight, and if you compare it to the Premo sized block, they’re identical sized blocks,
00:01:29 –> 00:01:39 but the weight on the package is 1.7oz or 48grams and for the Premo, it’s 2oz or 57grams,
00:01:39 –> 00:01:46 which makes it about 15%… the Soufflé 15% lighter, that isn’t a huge difference, but
00:01:46 –> 00:01:50 you may notice it on a really large piece.
00:01:50 –> 00:01:58 The colors are designer type colors, so they’re not based on an artist based pigment, so we’ll
00:01:58 –> 00:02:04 have to see how the colors mix together in general, but when I mixed these 2 colors…now
00:02:04 –> 00:02:09 the colors have such pretty names like; this one’s called Mai Tai, and this one’s called
00:02:09 –> 00:02:14 Blue Stone, and when I mixed them together, these are the results I got.
00:02:14 –> 00:02:22 I’ve got some raw clay here, and I did a 50/50 mix of the Mai Tai and the Blue Stone
00:02:22 –> 00:02:30 together, and I got this Purple-y color, and you can see that the colors are very equal
00:02:30 –> 00:02:34 in saturation, so it is pretty much a 50/50 mix, you can see it’s right in the middle,
00:02:34 –> 00:02:40 it’s not leaning toward the Blue or leaning towards the Mai Tai more, so I’m wondering
00:02:40 –> 00:02:45 if that is a typical result for the rest of the colors, kinda judging by the way they
00:02:45 –> 00:02:46 look.
00:02:46 –> 00:02:52 Also, when you bake them…this is the baked pieces here, they did not shift at all that
00:02:52 –> 00:02:57 I could see, at least these 3 colors didn’t, after baking, they are almost identical to
00:02:57 –> 00:03:03 the color mixed when raw, which is really nice, and makes it so it’s gonna be more
00:03:03 –> 00:03:10 predictable when you go to work on your projects, we’ll see if that also stands true for the
00:03:10 –> 00:03:14 rest of the colors, but I’m suspecting it probably will.
00:03:14 –> 00:03:23 Now, the thing about the Soufflé clay is that it has kind of a matte finish to it and
00:03:23 –> 00:03:30 it’s suitable for projects that you’re not planning on sanding, and I’ve got 2
00:03:30 –> 00:03:35 samples here…I’m not totally sure if the camera will pick up on it or not, but this
00:03:35 –> 00:03:44 is the unsanded piece here, and this is the sanded piece, it will sand to a shine…sand
00:03:44 –> 00:03:51 and buff to a shine, it’s got an interesting, almost…if you could see it blown up, there’s
00:03:51 –> 00:03:59 almost these little tiny white flecks in it, almost like as if there was little granules
00:03:59 –> 00:04:06 of cornstarch or something in it, but it’s what probably gives it that suede finish to
00:04:06 –> 00:04:12 it, and you can really tell when you feel the difference between the Soufflé clay and
00:04:12 –> 00:04:18 something else, there is a suede kind of feel to it and it does really look good with the
00:04:18 –> 00:04:20 matte.
00:04:20 –> 00:04:28 I think that we can use that to its advantage by combining some matte finish and some…the
00:04:28 –> 00:04:33 matte finish Soufflé with some Premo clay that gets a high shine on it, I think we could
00:04:33 –> 00:04:37 do some neat things with it, but we’ll do some more testing on that.
00:04:37 –> 00:04:44 As far as the overall strength and things…I’ve baked up some chips at different thicknesses…and
00:04:44 –> 00:04:51 we’ll do a Test Lab on it soon and compare it to the Studio by Sculpey, because I feel
00:04:51 –> 00:04:55 like it’s going to be very similar, and we’ll test out the strengths on that in
00:04:55 –> 00:04:56 another video.
00:04:56 –> 00:05:04 But overall, I think it’s quite an interesting clay, I think it will behave similar to the
00:05:04 –> 00:05:12 Studio by Sculpey, and actually that brings up a point, some time ago, I did some tutorials
00:05:12 –> 00:05:18 that I used the Studio by Sculpey in, and what…for any of you that have been with
00:05:18 –> 00:05:22 me for a long time, or if you’ve bought back issues that have that clay in it, I would
00:05:22 –> 00:05:28 go ahead and replace that with the Soufflé ‘cause I think it’s the same clay basically,
00:05:28 –> 00:05:31 and you can get the same results from it.
00:05:31 –> 00:05:35 So now, we have a…you know, for those of you…when it was discontinued, now we have
00:05:35 –> 00:05:39 a substitute that will be perfect for it.
00:05:39 –> 00:05:46 It’s gonna be interesting to see how this clay works in other projects, they suggest
00:05:46 –> 00:05:53 it’s good for Mokume gane and caning and things…I did a tiny little test cane…
00:05:53 –> 00:05:59 you know, just a typical jelly roll cane, I find it’s probably gonna be a little soft
00:05:59 –> 00:06:07 for caning, but when I sliced through it, the line stayed clean, so it may work in probably
00:06:07 –> 00:06:13 not too complicated designs I’m guessing, but it’s gonna be fun to play with it and
00:06:13 –> 00:06:14 see.
00:06:14 –> 00:06:20 It bakes at the same temperature as Premo, it’s at 275F and it…the packaging says
00:06:20 –> 00:06:26 30 minutes, with this test lab, I’ve tested both 30 minutes and 60 minutes, so we’ll
00:06:26 –> 00:06:33 see which one will benefit, with Premo we know that the 60 minutes is a better amount
00:06:33 –> 00:06:39 of time for strength and everything, but we’ll later find that out about the Soufflé.
00:06:39 –> 00:06:45 So, I hope you liked that, and I’d love you to go and get a pack and test it out and
00:06:45 –> 00:06:52 see what you think, see if it’s gonna suit your Polymer clay projects.
00:06:52 –> 00:06:56 Please leave a comment in the comment section below, and let me know if this is a product
00:06:56 –> 00:06:58 that you would like to try.
00:06:58 –> 00:07:04 And if you’ve got suggestions for future videos, Test Labs and all that kind of thing,
00:07:04 –> 00:07:07 leave those in the comment section as well too, alright?
00:07:07 –> 00:07:10 So we’ll see you next time and bye for now.
Our goal is to translate these videos into as many languages as possible. If you are interested in helping with this initiative, then please do contact us and we will figure out a way to make it worth your while :)
Resource Links:
- Amazon: Sculpey Souffle Single Packs **
- Amazon: Sculpey Souffle Multi Packs **
- Amazon: Sculpey Souffle Mai Tai Color **
- Amazon: Sculpey Souffle Bluestone Color **
- Related Video: New 2014 Sculpey & Premo Products
- Related Article: Studio by Sculpey Polymer Clay
- Related Article: Comparison of Studio by Sculpey vs Premo Sculpey
Resources marked with a double ** asterisk are affiliate links. If you click on them and decide to buy something, we may receive some compensation. This does not affect the price you pay in any way. What it does do, however, is helps us to continue providing free videos for you, here at the PcT website. Using our links to purchase your tools and supplies, is always greatly appreciated.
Sponsored Ads & Special Promotions
Shareable Images


To share this full blog post anywhere on the web that allows links in comments, here's a shortened url to copy and paste...
>> https://mypct.ca/v545 <<
Want to chat about today’s post? That’s what the comment section below is for. Scroll Down… We’d love to hear from you!
Or... if you would like to request a topic for a future post, here is the link to do that… PcT Suggestion Box
Cindy,
I was wondering if you could help me. I am trying to draw on cured clay with markers. I have seen other work like this. Do you know what kind of markers I should use? i have a set of Letraset Promarkers and they don’t work very well. They go on like water color paint. I am looking for markers that have the opaque look and run. I will appreciate you help because I don’t want to invest in another set that may not work.
Thank you,
Laura Hofherr
I haven’t tested a lot of markers yet Laura, but I did test the Sharpie Oil Based Paint Pen in a video a while back. It is opaque and should work for you. You can buy them in singles at Michaels, if you want to test one first. I do plan to add other pens in the future. Hope that helps!
Hi Cindy!
I am a beginner polymer clay enthusiast. I came across your videos and watched almost all of them! I really admire the clarity in your explanations and style.
I purchased some premo polymer clay to make beads and jewelry etc. I could not find a reliable brand of acrylic paint that would not get sticky. I live in Canada as well. Could you provide me a few tips/brands that you use?
It sounds like you are very busy with work – Thank you so much in advance for your time!
Ozlem
Hi Ozlem, thank you for your kind comments! I am not sure why you are having trouble with acrylic paint getting sticky. What brands have you tried? I have used DecoArt, Golden, Liquitex, Americana, and many others without them getting sticky. Are you letting them dry first? Are you positive they are acrylic and not oils? Just wondering…
Hi Cindy,
Feedback on your Beginner Course and 5 Bonus Videos:
First let me tell you I can’t remember the last time I enjoyed superlative value for my investment! Even if I had not been a beginner Clay-Lover, I would have learned new information from this course.
Your teaching style is so very professional, clear and concise. I love the way you break down videos into digestible and doable steps. I am so pleased to have found your web site as a newbee to polymer clay! Like your motto; You made the mistakes so I don’t have to!
Your beginner course videos helped me get a good solid foundation of knowledge and a successful start with polymer clay. Many of my “first attempts” were successes thanks to you being in my home helping me learn the basics. Not only do you explain the basic “How To” more importantly, you explain the “Why”. That’s how students learn best.. to know why you do certain things like condition the clay. Why you prefer Premo and Fimo and although Sculpey III is easier to use.. for certain applications like delicate flowers it is too brittle and cracks.
Once I enjoyed and absorbed the Beginner videos and began ordering the videos for some of your projects, ( e.g. Reptile, Crocus, Orchid, Burled Walnut) I had complete success because of all I learned in the Beginner course.
The five Bonus videos were exactly that… a BIG Bonus.. proper storage of clay (very important tips); sharpening your tissue blades.. I was worried about that as you can only buy them in packages of three and they are fairly pricey to be throwing them out so this video really helped understand that if your blades are not super sharp all your hard work in assembling canes can be undermined. Using Crayola Crayons was absolutely super.. I bought a couple of boxes at WalMart for just $3.00 each (back to school prices) and tried it right away.. with both the fine (used a lemon zester) and the chunky style with a knife… they came out exactly as you described in your video… WOW.. the fine grind ones looked like polished stones.. I’m so impressed.
Then the Drywall Sandpaper. If I had known how much sanding was involved with polymer clay I might not have started into bead and jewelry making with polymer clay… However with your video on sanding answering Why, When, With What, and How.. I definitely see the benefits. Then a Bonus video with more help with sanding using Drywall Sandpaper and your Youtube video showing the Jooltool.
You take all the mystery out of the process and give me confidence to try new techniques. A good example is the Skinner Blend using the tear drops as well as sanding techniques and tools.
Thank you so much, Cindy, for coming into my home and introducing me to the wonderful, creative world of polymer clay; demystified, and first time successes.. incredible VALUE – unique to and only available through the “Polymer Clay Tutor”!
Thank you so much, Donna, for taking the time to write those very kind words. Sharing feedback like this really gives others great insight about what they can expect from the video tutorials. I truly appreciate it.
I bought several packages of the Souffle clay and tried doing a cane. You are right! The cane was very soft – even mushy. I put it in the freezer for a while and it stiffened up a little but it was difficult to slice. I don’t think I will use this except for very simple canes.
However, the color mixing was great! The clay conditions very quickly and the colors blend very well. I am going to experiment more with the clay soon. I’m anxious to see how it does.
Yeah I agree Gail with the caning comment and the color mixing comment. It is nice to have a quality clay that has different properties, so that you can use it to its advantages. I’m glad to have it as part of our clay options!
One thing about the old Sudio was tht it hed it’s shape while without baking without any supports underneath. Has anyone tried this with the Souffle?
I forgot about that Anna, since I really didn’t use Studio by Sculpey for large dimensional pieces. Have already filmed the Souffle Test Lab but will have to do some testing on that and do another video on it. Thanks for the suggestion!
Great info. I will try it for sure