Tool Magic Protective Coating For Your Jewelry Tools
Video #499: A dip treatment that will help to prevent unprofessional looking nicks and in your wire jewelry pieces.
More...

IN THIS POST: — jewelry tools — pliers — rubberized dip — silicone dip — wirework — tool magic — protective coatings — nicks in wire — (Topics marked with an asterisk* are discussed in the Comments Section below).
Topics Covered In This Video:
- Tool Magic – Rubber Type dip for the working surfaces of jewelry pliers and tools.
- Marks, dents and dings on wirework in polymer clay jewelry looks unprofessional.
- Coating helps prevent tools from marring and denting soft wire and metal.
- The coating has a thick paint like consistency.
- Clean tools well with rubbing alcohol before applying Tool Magic.
- Stir Tool Magic well before dipping tools into it.
- Dip tool tips only. Do not go as far as the hinge.
- Set aside to dry for 2 – 3 hours (on edge of a bucket, coffee cup, etc.) so that the pliers tips do not touch each other while drying.
- Product will shrink to surface as it dries.
- Tool Magic can easily be peeled off when it shows signs of wear, so that you can then apply a fresh coat.
- Temporary coating, won’t harm expensive tools.
- I really like this product. Makes it easier to get a nice, professional finish on wire jewelry projects.
00:00:03 –> 00:00:07 Hi guys, its Cindy Lietz, your Polymer Clay Tutor, and today’s PcT Product Demo, I’m
00:00:07 –> 00:00:14 gonna show you a product called Tool Magic.Now it isn’t exactly a Polymer clay product,
00:00:14 –> 00:00:20 but as a Polymer clay artist who makes a lot of jewelry, I think it’s a great product
00:00:20 –> 00:00:24 to be using with your jewelry making tools.
00:00:24 –> 00:00:32 Now what it is, is a kind of a silicone rubberized product that you dip your tools into to make
00:00:32 –> 00:00:37 them…so that you aren’t marring up your wire, so I’ll just explain.
00:00:37 –> 00:00:44 Now if you’ve got a pair of jewelry pliers…like these round nose pliers here, when you go
00:00:44 –> 00:00:52 to use them on your soft metals… now this is a piece of Dead Soft Bronze wire, if I
00:00:52 –> 00:00:58 go to grab the wire and make some twists in it, if I squeeze too hard…and this happens
00:00:58 –> 00:01:06 a lot with newbies, I can get a lot of little dents and things in the wire and what that
00:01:06 –> 00:01:13 does is it really makes it look unprofessional, so if I’m making a pair of earrings or charms
00:01:13 –> 00:01:18 or something like that, and I’ve got a whole bunch of little nicks and things in my wire,
00:01:18 –> 00:01:19 it just doesn’t look very classy.
00:01:19 –> 00:01:24 So other than getting really good with your pliers and being more gentle with them, another
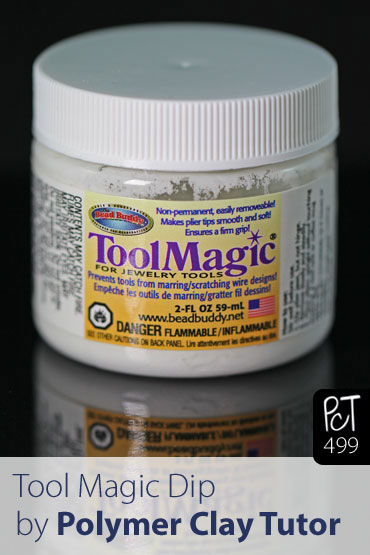
00:01:24 –> 00:01:29 product you can use that really helps is this Tool Magic, and I’ll just show you what
00:01:29 –> 00:01:37 it looks like first, it comes in a little tub and you can see that there’s this White
00:01:37 –> 00:01:42 material inside…I think tool magic can come in some other colors as well, but I’ve got
00:01:42 –> 00:01:47 White and there’s this clear liquid on the top, what you need to do is you need to stir
00:01:47 –> 00:01:55 it really well before you try to dip your tools into it, so I’m just gonna do that.
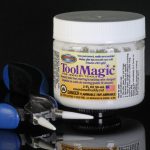
00:01:55 –> 00:02:02 And another thing you wanna do is make sure that your tools are really clean, so I’m
00:02:02 –> 00:02:08 just…as soon as this is done here I’ll just…I know that there’s no more liquid
00:02:08 –> 00:02:15 on the bottom there…or on the top, oh and it smells, it’s quite strong, so apparently
00:02:15 –> 00:02:18 don’t be smoking or anything near it, you don’t want any open flames…you don’t
00:02:18 –> 00:02:20 want it catching on fire..
00:02:20 –> 00:02:25 So, I’m just gonna take a little bit of rubbing alcohol on a piece of paper towel
00:02:25 –> 00:02:31 and wipe down my tools, and this just makes sure that they’re nice and clean before
00:02:31 –> 00:02:33 I dip them into the product.
00:02:33 –> 00:02:40 Now, I just wanna dip them down on the working surface, you don’t wanna get any of the
00:02:40 –> 00:02:47 dip onto the hinges or deeper into the tool, so I’m just gonna slowly dip my piece…my
00:02:47 –> 00:02:56 pliers in the magic dip here, and then see, there’s this coating on the outside.
00:02:56 –> 00:03:00 Just gonna make sure that none is dripping off and then I’m going to set them up to
00:03:00 –> 00:03:04 dry, you wanna make sure that they’re gonna be able to dry in a spot where they stay open
00:03:04 –> 00:03:05 and don’t touch.
00:03:05 –> 00:03:13 Now, the cool thing about this product is that it’s gonna give you a nice grippy surface
00:03:13 –> 00:03:17 to work with, it will drip down and get a little thinner looking…it won’t look so
00:03:17 –> 00:03:20 heavy on here as it dries a little bit.
00:03:20 –> 00:03:25 But, when you’re working with your tools…now here’s a pair of flat nose pliers that I’ve
00:03:25 –> 00:03:32 got where the…it’s starting to wear out, and that’s actually a good thing, ‘cause
00:03:32 –> 00:03:36 when it starts to wear out, you can just remove it, real easy, just with something like that
00:03:36 –> 00:03:41 and you can peel it off and then you would clean up your tool and then re-dip it, that
00:03:41 –> 00:03:47 way you haven’t wrecked your tools or done anything permanent to them, and also, if you’ve
00:03:47 –> 00:03:52 dipped it kinda funny, you can remove it easily.
00:03:52 –> 00:03:57 Now, what you do is, after they’re dry…I would wait a day or so, then when you go to
00:03:57 –> 00:04:04 use your jewelry pliers, those edges will be softer, you’ll grip better without putting
00:04:04 –> 00:04:12 little nicks in your wire, which will be an improvement on your work, which is important,
00:04:12 –> 00:04:19 if you really want to get some quality work, you wanna make sure that you’re not dinging
00:04:19 –> 00:04:20 things up.
00:04:20 –> 00:04:24 Anyways, so I hope that was helpful for you, I really like this product, it’s a neat
00:04:24 –> 00:04:29 one and I’ve been using it for a little while, and if you like this video, let us
00:04:29 –> 00:04:30 know about that.
00:04:30 –> 00:04:35 And if there’s any products that you’d like us to demo, or you’ve got some suggestions,
00:04:35 –> 00:04:38 let me know in the comment section below, okay?
00:04:38 –> 00:04:40 We’ll see you next time and bye for now.
Our goal is to translate these videos into as many languages as possible. If you are interested in helping with this initiative, then please do contact us and we will figure out a way to make it worth your while :)
Resource Links:
- Related Video: Handmade Ear Wires
- Related Video: Wire Wraps and Loops
- Related Video: Embedded Wire Links
- Amazon: Tool Magic **
Resources marked with a double ** asterisk are affiliate links. If you click on them and decide to buy something, we may receive some compensation. This does not affect the price you pay in any way. What it does do, however, is helps us to continue providing free videos for you, here at the PcT website. Using our links to purchase your tools and supplies, is always greatly appreciated.
Sponsored Ads & Special Promotions
Shareable Images


To share this full blog post anywhere on the web that allows links in comments, here's a shortened url to copy and paste...
>> https://mypct.ca/v499 <<
Want to chat about today’s post? That’s what the comment section below is for. Scroll Down… We’d love to hear from you!
Or... if you would like to request a topic for a future post, here is the link to do that… PcT Suggestion Box
Hey Cindy, I was going to ask you for a mini tut on Tool Magic too. Thanks for the info. and the tips. I’d like to try it one day. :o)
Hi Cindy, thanks for all the vids and this website, I have learned alot from them :)
As you often post to post questions and challanges in the comments… here I go!
I do have a little pickle on what matte/gloss varnish to use… As most of the brands used and talked about on the website around are American products that we can not get here in Europe (Netherlands to be specific).
Things like Varathane and PYM II are not available to us :(
I do need a durable finish on the products I make/want to make as I will use pastels and mica powder on them. As these still need to be fixated better after baking. Renaisance Wax would not do I guess because you then run the risk of smearing the pastels and mica powders.
Maybe a nice idea for a blog/video about fixating pastels and powders in a durable way?
Many thanks!
Frits
Hi Frits, I’ll add your suggestion to the list! Maybe one of the liquid clays would be a good solution for you? I don’t know what products are easily available to you, but if you can get clay, maybe you can get the liquid clays too? Try that and see if you like the results and I’ll do some further testing to see what your options could be.
Hi, thanks for your reply.
Liquid clay does not seem to be benefitial for us due to the thickness. It will fill in a bit on the small details we have. And people say it is not so durable.
Ideal would be a thin varnish in matt and gloss choice. We can then also spray them with an airbrush that we got to get a thin but uniform layer.
We are a bit hestitant with this as it can be months and months till you know you got a wrong varnish and it eats in on the clay and get tacky and all that horror. As we make OOAK items this would be a disaster.
We hoped you had some experience with some different options ;)
Thanks for looking into it!
To add a little more. Some of the varnish brands we do have here, but from which I do not know how ‘good’ they are:
Liquitex
Jo Sonja’s
Pearl-Ex
paverpol Josefine
But Google may be a lil in the way of finding the right results as we are not US based and most info seems to come from US websites. But for all the above we do not find to much results as most are useing the stuff we can not get here, like the Varathane.
Anway, we just hope to find something that would last for years on the things we make.
Thanks for sharing what is available for you Frits. I tend to not use varnishes and glazes that often… opting for techniques that mostly use sanding, buffing and waxing. Have you tried using Perfect pearls instead of Pearl-Ex? It has a resin in it that is quite durable. I haven’t done enough testing with it yet to know its long term wear without a finish to protect it, but it may be an option for you.
I have used Liquitex Red Label Matt Varnish with success, but not the others you mentioned.
I would suggest making up some samples with the pearl-ex and each of the different varnishes you have available to you and then putting them in a high use situation (like a key chain in a purse). That way you will have an excellent idea how it will wear over time. I will continue to do test labs and share my findings. Let us know how it goes!
Hi Cindy, I have used a product similar to tool magic years ago. Back then you dipped the pliers handle or whatever handle you wanted at the time in a long tall bottle and it placed a plastic rubberized coating on the handle of your tools to help you hold it better.
The only problem with this product is that it dryed hard within 6 months time and you just had to throw it out. It cost around $8.00 a bottle back then. Am so happy to see you find another product in a smaller jar that will work on the tips of the tools and it is white in color. Nice to know also it can be thinned when it starts to thicken up. I will definitely get a jar of this now that I know it is available. Thanks so much for the great tip!
Hi Carol I just did some research and here is the info I found:
“Some of our customers have reported being able to thin Tool Magic with toluene, xylene and naphtha.”
“I think I used mineral spirits to thin mine, I think it had one of those 3 ingredients on the list, so I threw it in and it worked fine. I’m also not sure about the acetone, BUT, scoop a little of the thick stuff out of the can and mix the acetone in and see if it works. You got nothing to lose, it won’t explode or anything.”
“How to thin out clumpy Tool Magic: Sometimes your Tool Magic will start to get clumpy as it gets used up and closer to the bottom of the jar. You can use a product called Naphtha to help thin out your Tool Magic, which is a type of paint thinner. Just use a very small amount to start, you can always add more if your Tool Magic is not thinned out enough yet.”
“You can buy Naphtha at home improvement or hardware stores for usually around $8.00 a quart. We recommend using this product in a well ventilated area, and to read the warnings on the Naphtha container.”
“If your Tool Magic is thick, instead of dipping the pliers, we recommend using a shiskabob skewer (or similar utensil) to spread on a thin coat, making sure to cover the edges well. After letting it dry for a few hours, apply a second thin coat.”
Hope that helps!
Cindy, thank you so much. I appreciate your speedy reply as much as your good advice. You’re the best!
Thank you for that demo I have wondered how to keep my tools in tip top shape and now I know. I am so excited to have found your site,the demos are clear and easy to understand and I have already made my first rose with your guidance and it actually looks like a rose. Thank you to both of you
We are excited to have you here Jennifer! Thanks for your lovely comment!
where did you purchase the Tool Magic Protective Dip?
Hi Anna, I believe I bought mine at Rings & Things but I bet it is at FireMountainGems and a ton of other places as well.
Hi Cindy. I just watched your tool magic video. Unfortunately, my experiences with it have not been good. I have bought it on 3 separate occasions. The results were the same with every jar. It’s fine when first open it, so the first applications are OK. However, when I have gone back to reapply, the product is extremely thickened and rubbery. I have searched the web for ways to thin it out but found nothing. Having to buy a new jar after only one use is expensive and frustrating. Do you have any suggestions?
Hi Frieda, I posted some info below, that should be helpful for you.
Cindy – love your videos! Question about Tool Magic: The contents of my jar has gotten very thick and leaves too much on my tools. How can I thin it out? I’ve had it for a couple of years but still have most of the jar. Do I have to replace it?
Hi Carol, I answered you below…