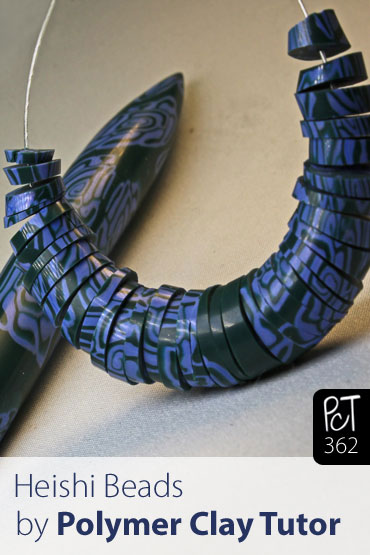
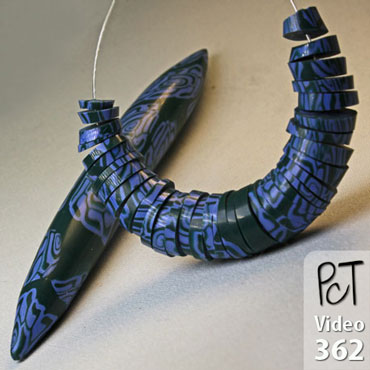
Upcycle Old Ugly Polymer Clay Beads into Heishi Beads
Video #362: Even wonky and weird beads can be used creatively… so never ever throw anything away.
More...
IN THIS POST: — recycling — heishi beads — scrap clay — slicing — (Topics marked with an asterisk* are discussed in the Comments Section below).
Topics Covered In This Video:
- How to re-purpose your orphan or downgraded polymer clay beads by making them into Heishi Beads.
- See examples of some of my old beads that didn’t turn out so well… and watch as I chop them into bits.
- Because of their shape, Heishi Beads can be used as spacers and even sequins.
- Depending on the look of your original polymer clay beads destined for the chopping block, your heishi beads can end up looking like shell or bone, taking on an organic, tropical or even tribal appearance.
- Tips and tricks for easily warming and cutting your old beads into Heishi beads, as well as things to avoid that would make the task tricky.
Do you have any ugly beads that could be used in could be used as I showed in the video? Why don’t you chop them up and let me know how it works out for you!
Looking forward to hearing from you!
00:00:03 –> 00:00:09 Hi guys, its Cindy Lietz, your Polymer Clay Tutor, and today’s studio tip is how to make
00:00:09 –> 00:00:13 Heishi Beads out of old beads.
00:00:13 –> 00:00:18 Sometimes you have beads that just don’t turn out that great, or when you first are making
00:00:18 –> 00:00:23 beads; they’re not that great, so sometimes you don’t have quite the heart to throw them
00:00:23 –> 00:00:27 away, and I basically tell you never to throw them away, and this is a good reason.
00:00:27 –> 00:00:33 Now you can re-use your old weird looking beads and make them into Heishi Beads.
00:00:33 –> 00:00:40 And I’ll just show you a few examples, I have this bead; definitely a weird bead, I worked
00:00:40 –> 00:00:45 on one time, and if you…I’ll show you in a sec how to do it, but if you warm them up,
00:00:45 –> 00:00:54 you can slice them and turn them into Heishi beads, and here is the same exact bead that
00:00:54 –> 00:00:59 has been cut into Heishi beads and it sure changes the look of them.
00:00:59 –> 00:01:04 Now they can be used for spacers, you can even…when they’re cut up, they look a
00:01:04 –> 00:01:10 lot like sequins, all kinds of different things, so you get it just a whole new life out of
00:01:10 –> 00:01:11 them.
00:01:11 –> 00:01:18 I’ve got a bunch of different examples here of beads that were cut up and how they look,
00:01:18 –> 00:01:22 they have a sort of a tropical look if they’re in more tropical colors.
00:01:22 –> 00:01:29 This is some little spiral tube beads that turned out okay but not great, and once they’re
00:01:29 –> 00:01:35 cut up, they almost look like they’re bone or shell or something like that.
00:01:35 –> 00:01:43 Here is a… it was a Natasha bead that I got a big dent in the side of and didn’t notice
00:01:43 –> 00:01:48 that I had the dent in it until after it was baked, and I cut it up and look at how neat
00:01:48 –> 00:01:52 it looks, it has just a different look to the bead.
00:01:52 –> 00:01:58 Now I’ve got some beads sitting in the oven here at about…oh I guess they’re at about
00:01:58 –> 00:02:05 just over a 150 degrees, you want to warm them up; I’ve got them in a little bowl here,
00:02:05 –> 00:02:10 and you don’t wanna heat them up so hot that they become rubbery, you just want them to
00:02:10 –> 00:02:13 be warmed up so they’re soft.
00:02:13 –> 00:02:18 And here’s one here, it was a marbled bead, and you can see it’s rubbery a little bit,
00:02:18 –> 00:02:24 but it’s just…it’s warm, it’s not too rubbery, you’ll know what I mean if you’ve
00:02:24 –> 00:02:26 over heated them, they’re tricky to cut.
00:02:26 –> 00:02:33 Then I’ve just got a little thing I’m cutting on here and a razor blade, and you’ll see
00:02:33 –> 00:02:41 that they’ll just cut right through just like butter, and you can cut them super thin and
00:02:41 –> 00:02:48 then you have these sort of wafer thin almost Sequin kind of…type bead, or you can cut
00:02:48 –> 00:02:54 them bigger, so that they’re more like Heishi Beads.
00:02:54 –> 00:03:00 And you don’t have to worry if they’re all perfect, because if they’re not perfect; if
00:03:00 –> 00:03:07 say for example they are cut a little bit wonky and a little triangular, when they go
00:03:07 –> 00:03:13 to stack together, they’ll look a little bit more random and they won’t fit together perfectly,
00:03:13 –> 00:03:19 and it’ll have a more natural look, so I just wanted to show you that.
00:03:19 –> 00:03:25 I heat them up for about 10 minutes or so at that low temperature, like I said, if you
00:03:25 –> 00:03:32 did go too high, like 265F, 275F it’ll get very rubbery, and you’ll go to cut it and
00:03:32 –> 00:03:39 it’ll be…it’ll be really tricky to do, and if you try to cut them when they’re not
00:03:39 –> 00:03:42 warm, they’re difficult as well, they’ll snap kinda funny.
00:03:42 –> 00:03:47 So just warm up your old beads, slice them up and see if you can give ‘em a new life.
00:03:47 –> 00:03:52 So I hope you liked that, and if you did, could you please give us a like that, or give
00:03:52 –> 00:03:55 us a thumbs up, that would be great.
00:03:55 –> 00:04:00 And my question for you today is, do you have any old ugly beads that you could use in this
00:04:00 –> 00:04:01 type of fashion?
00:04:01 –> 00:04:08 I’d love to hear about it, so leave me a comment in the questio…leave me a comment in the
00:04:08 –> 00:04:12 section below, and we’ll see what everyone’s done out there.
00:04:12 –> 00:04:14 So we’ll see you next time, and bye for now.
Our goal is to translate these videos into as many languages as possible. If you are interested in helping with this initiative, then please do contact us and we will figure out a way to make it worth your while :)
Resource Links:
- Related Video: Mirror Image Scrap Cane Natasha Beads
- Related Video: Tube Beads for Jewelry Making using Gold Leaf
- Related Article: Polymer Clay Projects Using Scrap Clay
- Related Article: What To Do With Your Scraps of Polymer Clay
- Related Article: Rustic Arizona Style Beads from Scrap Polymer Clay
- Amazon: Single Edge Razor Blades **
Resources marked with a double ** asterisk are affiliate links. If you click on them and decide to buy something, we may receive some compensation. This does not affect the price you pay in any way. What it does do, however, is helps us to continue providing free videos for you, here at the PcT website. Using our links to purchase your tools and supplies, is always greatly appreciated.
Sponsored Ads & Special Promotions

Shareable Images


To share this full blog post anywhere on the web that allows links in comments, here's a shortened url to copy and paste...
>> https://mypct.ca/v362 <<
Want to chat about today’s post? That’s what the comment section below is for. Scroll Down… We’d love to hear from you!
Or... if you would like to request a topic for a future post, here is the link to do that… PcT Suggestion Box

Hi Cindy Lietz,
I am jothi…from india. I am very much interested and doing in polymer clay jewel designs.
Could you explain in brief how to bake the Polymer Clay @ home.
Please reply…
jothi
Hi Jothi! It’s great to see folks interesting in learning polymer clay from all over the world, welcome.
To get the basics, I would take Cindy’s series of beginner classes.
Cindy, can you sand and polish the bead before you warm them in the oven, or will that take off the polish, you think? It would definitely be much easier when it is in whole form!
Yes Toni, I recommend you do any sanding, buffing and glazing/waxing/etc. before you warm and cut the bead. You’re right it is WAY easier that way!
Fabulous idea :)