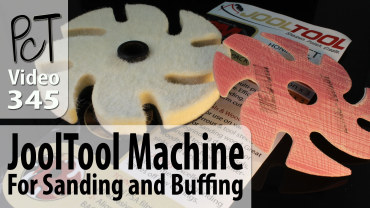
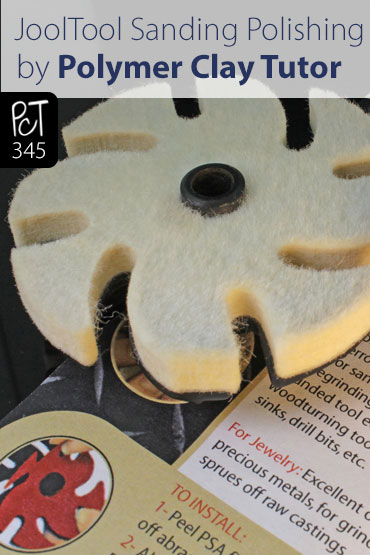
JoolTool Introduction | Buffing Polymer Clay
Video #345: A rotary tool that actually lets you see what you are doing… Ninja Style!
More...
IN THIS POST: — jooltool — buffing — rotary tool — sanding — power tool — jewelry making — polishing — sanding polymer clay — smooth polymer clay — abrasives — felt buffing wheel — muslin buffing wheel — machine — high shine — shiny — (Topics marked with an asterisk* are discussed in the Comments Section below).
Topics Covered In This Video:
- Overview of the JoolTool.
- Unique see-thru properties of the quick change Ninja Disks which make this the easiest to use rotary tool on the market (that I know of).
- Endless options for polishing, grinding, sanding, sharpening, drilling, carving, etc. for metals, glass, plastics, wood, stone and now… polymer clay!
- Dust collection system.
- Prepping the felt disks for buffing polymer clay.
- Safety considerations:
– Tie hair back
– No loose clothing, scarves, ties, long jewelry
– Should have added glasses, for eye protection - How to polish buff polymer clay with the JoolTool.
- See how a sanded AND buffed Mica Shift bead looks so much better than one that has only been sanded.
- Price Range $300 – $1000 depending on accessories.
Looking forward to hearing from you!
00:00:03 –> 00:00:09 Hi guys, its Cindy Lietz, your Polymer Clay Tutor, and today’s studio tip is using a JoolTool
00:00:10 –> 00:00:12 for buffing Polymer Clay.
00:00:12 –> 00:00:19 Now this is a new tool I’ve got in my studio, I’m very excited about it, it can do a gazillion
00:00:19 –> 00:00:20 things.
00:00:20 –> 00:00:28 Its Jool spelled, J-o-o-l and tool, T-o-o-l, so that’s… but what’s really neat about
00:00:28 –> 00:00:36 it, is a bunch of things, it’s a rotary tool, here I’ll just quickly spin it, and you can
00:00:36 –> 00:00:41 see that it spins like that.
00:00:41 –> 00:00:48 But what’s great about it is you can buy all these little disks, and they’re called Ninja
00:00:48 –> 00:00:56 Disks, and with the design… with this cut through design, when you use them you can
00:00:56 –> 00:01:03 actually see through the top, and it’s the first tool, or rotary type tool that I’ve
00:01:03 –> 00:01:05 seen that works in that manner.
00:01:05 –> 00:01:12 So they have all these different types of disks, you get this plastic disk first and
00:01:12 –> 00:01:19 then you add different sanding disks and things for them, and you can get them in… you can
00:01:19 –> 00:01:25 basically sand anything, polish anything, grind anything with them, there’s…
00:01:25 –> 00:01:31 I’m waiting on an order for some one’s that will work better for Polymer Clay, and actually
00:01:31 –> 00:01:33 it works best if you have a cushion there.
00:01:33 –> 00:01:40 But I want to today show you the buffing, the way I do buffing with this tool.
00:01:40 –> 00:01:47 Now I’ve got a shop-vac hooked up to it, it doesn’t come with it, you can order quite
00:01:47 –> 00:01:54 an expensive vacuum system for it if you want, but I just have this $30 Shop-vac that I’ve
00:01:54 –> 00:02:02 just plugged into the side here, which is beautiful for collecting any dust that you
00:02:02 –> 00:02:03 have.
00:02:03 –> 00:02:06 When you’re buffing, you don’t have any dust, so I won’t need to turn on the vacuum to show
00:02:06 –> 00:02:08 you this part.
00:02:08 –> 00:02:14 Now down below here is the dial, and it’s such a quiet little machine.
00:02:14 –> 00:02:21 It takes hardly any space on your desktop, I have it on a little table that’s a little
00:02:21 –> 00:02:25 bit lower, so that I can see up above it.
00:02:25 –> 00:02:29 And like what I was saying with… these little disks sorta spin on and off, so you could
00:02:29 –> 00:02:34 change out whatever grits you were using really easily.
00:02:34 –> 00:02:39 The surface that… the work surface that you’re working on goes face down, and what
00:02:39 –> 00:02:46 happens is… so you just spin them on like that, because of these little cut throughs,
00:02:46 –> 00:02:52 when it spins fast, you can actually see your work through it.
00:02:52 –> 00:03:00 So I’m gonna lift my piece up to the… to the spinning disk here, and you can see your
00:03:00 –> 00:03:07 piece through it, and that makes it completely different than anything else that I’ve ever
00:03:07 –> 00:03:08 worked on.
00:03:08 –> 00:03:12 A Dremel you have to kind of keep bringing it up to the spinning surface, on a buffing
00:03:12 –> 00:03:18 wheel, same sort of thing and then you have to keep checking back, here you can work on
00:03:18 –> 00:03:19 it the whole time.
00:03:19 –> 00:03:24 So if you’re sanding and buffing, you can tilt your hands and work with it really nicely,
00:03:24 –> 00:03:28 and see it the whole time that you’re working on it.
00:03:28 –> 00:03:34 Like I said, this particular setup, the way I’ve got it setup, works beautifully for polishing
00:03:34 –> 00:03:37 or buffing your Polymer Clay.
00:03:37 –> 00:03:45 Now here’s a piece here that I have buffed on one side, and I haven’t buffed on the other,
00:03:45 –> 00:03:51 and there’s just an enormous difference in how shiny these 2 pieces are, I’ll show you
00:03:51 –> 00:03:53 how I buff it in a sec.
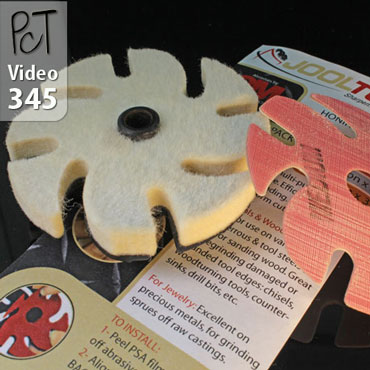
00:03:53 –> 00:04:02 Now what I did for this one is I bought the Black back plate, and a felt disk, now these
00:04:02 –> 00:04:10 disks come with kind of this White stick that’s… it’s kinda like a White version of Rouge that
00:04:10 –> 00:04:17 jewelers use to polish metal and stuff, and they tell you to charge up your felt wheel
00:04:17 –> 00:04:20 before you…with the stick.
00:04:20 –> 00:04:28 I recommend, if you’re gonna use it for Polymer Clay, don’t put any of the White stick on
00:04:28 –> 00:04:31 the wheel, leave it clean.
00:04:31 –> 00:04:37 Another thing is, that you want to… it’s pretty firm, what you wanna do is you wanna
00:04:37 –> 00:04:43 end up scratching up the surface, and a fork works well, I saw somebody do this with some
00:04:43 –> 00:04:49 other type of wheel the other day online, so I thought it was a good idea, but you can
00:04:49 –> 00:04:54 do it while it’s working, I’m just gonna start it up.
00:04:54 –> 00:04:59 Now always make sure, with any rotary tool, make sure your hair is tied back, if it’s
00:04:59 –> 00:05:07 long and it could get caught in here, no loose clothing, no scarves and dramatic jewelry
00:05:07 –> 00:05:09 and things like that.
00:05:09 –> 00:05:17 Also the way this spins, it has the rotation here, it goes this way, so it will spin away
00:05:17 –> 00:05:22 from you and get caught in here if you end up letting go of it, always use a really light
00:05:22 –> 00:05:24 touch.
00:05:24 –> 00:05:26 But when you… you can scratch it up, what I’m gonna show you here, is I’m just gonna
00:05:26 –> 00:05:33 start it up, and it starts… this is the slowest it’ll go, and this is as fast as it’ll
00:05:33 –> 00:05:39 go, I generally kinda work on a half speed, and then you can just take your fork and just
00:05:39 –> 00:05:46 kinda hold it up against the surface and scratch up that felt.
00:05:46 –> 00:05:51 Because it’s spinning so fast it doesn’t act like there’s any holes in there at all, so
00:05:51 –> 00:05:56 you’re not gonna slip through the thing, but this will… and you can kinda scratch up
00:05:56 –> 00:06:02 the edges here, and this will just soften up the felt a little bit so it has lots of
00:06:02 –> 00:06:09 nice little hairs for polishing your Polymer Clay, like that.
00:06:09 –> 00:06:16 Now when you’re…when you’re buffing your pieces, now I’ve already sanded right down
00:06:16 –> 00:06:21 to the finest grit I’m gonna go on here.
00:06:21 –> 00:06:28 You lift the piece up towards the disk, so you may be used to… if you’re using a buffing
00:06:28 –> 00:06:33 wheel of the other types, coming in from the side, don’t do that, come up from underneath
00:06:33 –> 00:06:37 and practice coming up straight from underneath.
00:06:37 –> 00:06:43 And use a light touch, if you push really hard on here, it’ll grab it and fling it away,
00:06:43 –> 00:06:48 so I’m just gonna…oh, and you should know, it’s soft, like it’s fine on my hands, I’m
00:06:48 –> 00:06:52 not worried about that even when it’s going fast.
00:06:52 –> 00:06:56 On the edges, it can kinda give you bit of a rug burn ‘cause it’s really going fast
00:06:56 –> 00:07:01 on the edges there, but underneath, even if your fingers do touch it, it’s… the felt
00:07:01 –> 00:07:03 especially, is no problem for your hands.
00:07:03 –> 00:07:12 So you just wanna lift the piece up, and gently touch it, and kinda move it around, and hopefully
00:07:12 –> 00:07:20 the camera can see it well, and it’s already starting to get a bit of a dull sheen to it
00:07:20 –> 00:07:26 which is really nice for these Mica Shift beads here.
00:07:26 –> 00:07:32 Mica Shift is just an amazing technique that looks 3D but it’s completely flat, but it
00:07:32 –> 00:07:35 looks especially great if it’s buffed up.
00:07:35 –> 00:07:46 So I’m just gonna keep going, and you can see it comes shinier and shinier and shinier.
00:07:46 –> 00:07:53 So this is a wonderful tool to bring in to your studio, it’s kinda in the $300 range,
00:07:53 –> 00:07:57 depending on the different accessories, I mean you can spend a $1,000 dollars if you
00:07:57 –> 00:08:02 wanted to, and get all kinds of different wheels and things for it.
00:08:02 –> 00:08:07 As I get it more perfected with the sanding and that kind of thing, I will start showing
00:08:07 –> 00:08:12 you my best methods for working with Polymer Clay on it.
00:08:12 –> 00:08:17 And then of course you can use a tool like this for all kinds… you can sharpen your
00:08:17 –> 00:08:26 blades with it, with the right accessories, you can grind glass, you can do all kinds
00:08:26 –> 00:08:27 of cool stuff with it.
00:08:27 –> 00:08:31 So I’m really excited to get to play with this and show it to you.
00:08:31 –> 00:08:40 I think it’s gonna be a beautiful tool for all of you Polymer Clay artists that like
00:08:40 –> 00:08:46 to do things in an easier way, in a cleaner way, faster way.
00:08:46 –> 00:08:51 Oh, look at that gloss I’m getting on there.
00:08:51 –> 00:08:58 It’s fast, easy, beautiful, and hopefully the camera is seeing that, but it’s just amazing.
00:08:58 –> 00:09:02 So I’m really excited about the JoolTool for Polymer Clay.
00:09:02 –> 00:09:09 And as soon as I get more of the accessories and figure out exactly the right grits of
00:09:09 –> 00:09:13 sand paper and stuff that will work beautifully, I will let you know.
00:09:13 –> 00:09:15 So I hope you enjoyed that.
00:09:15 –> 00:09:23 Make sure, if this was helpful for you, make sure to click that thumbs up button and subscribe.
00:09:23 –> 00:09:28 If you have any questions or if you’re excited about this tool, make sure to let me know
00:09:28 –> 00:09:33 in the comment section below, and we will see you next time.
00:09:33 –> 00:09:35 Bye for now.
Our goal is to translate these videos into as many languages as possible. If you are interested in helping with this initiative, then please do contact us and we will figure out a way to make it worth your while :)
Resource Links:
- Related Video: Mica Shift Technique
- Related Video: How to Buff Polymer Clay Using a JoolTool
- Related Video: Comparing New JoolTool Design To Previous Version
- Related Video: Vancouver Polymer Clay Guild JoolTool Democ
- Related Video: How To Get Shiny Polymer Clay Using Renaissance Wax
- Amazon: JoolTool Polishing Kit **
Resources marked with a double ** asterisk are affiliate links. If you click on them and decide to buy something, we may receive some compensation. This does not affect the price you pay in any way. What it does do, however, is helps us to continue providing free videos for you, here at the PcT website. Using our links to purchase your tools and supplies, is always greatly appreciated.
Sponsored Ads & Special Promotions

Shareable Images


To share this full blog post anywhere on the web that allows links in comments, here's a shortened url to copy and paste...
>> https://mypct.ca/v345 <<
Want to chat about today’s post? That’s what the comment section below is for. Scroll Down… We’d love to hear from you!
Or... if you would like to request a topic for a future post, here is the link to do that… PcT Suggestion Box

Hi Cindy, I have a question on the JoolTool. I just purchased one and it’s arriving tomorrow. Do you have any recommendations yet, for which attachments to get for sanding polymer clay. Any advice would be greatly appreciated.
Hi Richard, I do have an idea which accessories will work, but I have not nailed down a kit for it yet, since I am having trouble getting a hold of Anie (the founder) to make it available for everyone. She has an extremely busy travel schedule. Several options can work, but I want to make sure that I am recommending the most appropriate ones so that you get the best value for the dollar. (Some grits work well but wear out quickly… some are too aggressive… others work best on flat surfaces… etc.) I am trying to get this done as quickly as possible because I really believe it is an excellent product for polymer clay. I will let everyone one know, as soon as I have it figured out. In the meantime, do make sure to get a felt buffing wheel and use it for buffing your polymer clay. At least you will have something good to get started with.