How to Buff Polymer Clay Using a JoolTool
Video #455: Roadtrip #2-04 (WA): “Bad JoolTool” is what Karonkay used to say… but not any more.
More...

IN THIS POST: —sanding — abrasives — buffing — finishing — polishing — buttery — smooth polymer clay — (Topics marked with an asterisk* are discussed in the Comments Section below).
Topics Covered In This Video:
- In today’s PcT Roadtrip video, we visit with KaronKay Cowger again, in Spokane Washington.
- We are talking about the JoolTool and some of the different accessories that you can use for getting a good finish on your polymer clay.
- When I first shared information about the JoolTool earlier this year, KaronKay went out and bought one right away on e-bay.
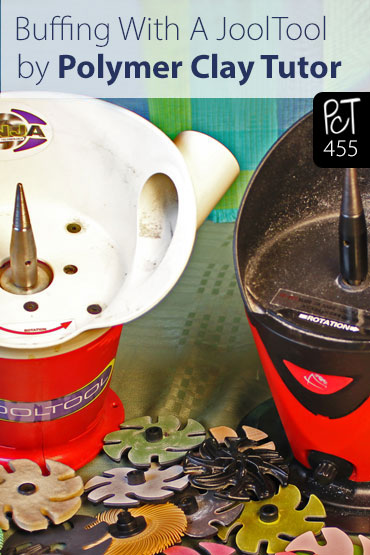
- Karon’s JoolTool machine is an older white and red version. As you will see, there have been a few changes made to the newer black and red version which I purchased. The power button is on the front of the newer machines, and the unit has a more sealed and a cleaner design. Other than that, the older machines are not that much different from the newer JoolTool model.
- Karon was having so much trouble buffing her polymer clay with her machine, that she scolded it into the corner for the longest time… “Bad JoolTool!” LOL.
- Well, I’m happy to say that we figured out the problem… and now Karonkay has a much healthier relationship going on with her JoolTool companion :-)
- Watch the video below for the full story…
00:00:03 –> 00:00:07 Hi guys, its Cindy Lietz, your Polymer Clay Tutor, and today’s Product Demo, we are
00:00:08 –> 00:00:14 going to be talking about the JOOL tool, and a little bit of the accessories and stuff.
00:00:14 –> 00:00:21 But I’m here with Karon Kay Cowger, and she is…we’re in Spokane, on the PcT Road
00:00:21 –> 00:00:24 Trip once again, and we’ve come back a year later.
00:00:24 –> 00:00:30 And one of the things that…back when I showed you the JOOLtool and the buffing wheel…I’m
00:00:30 –> 00:00:33 gonna be doing a lot more videos on it, so don’t worry, I’m gonna be showing you
00:00:33 –> 00:00:40 all sorts of cool things with the accessories, but when I showed the video, you raced out
00:00:40 –> 00:00:41 and bought one immediately.
00:00:41 –> 00:00:42 (KC) I did.
00:00:42 –> 00:00:47 (CL)And she found one on eBay, and we wanted to show you that they are a little bit different,
00:00:47 –> 00:00:53 this is an older version that she has and there’s been a few changes to it.
00:00:53 –> 00:01:00 Pretty similar as far as the whole concept goes and how the tool works, but there’s
00:01:00 –> 00:01:04 a few upgrades, actually I quite like this… some of the upgrades…the buttons on the
00:01:04 –> 00:01:08 front here, instead of on the back on hers.
00:01:08 –> 00:01:14 This one’s a little cleaner looking with…you don’t see the little screws and things like…but
00:01:14 –> 00:01:18 it works about the same, I don’t know if there’s a different motor or anything like
00:01:18 –> 00:01:24 that, but anyways, she was having trouble buffing, and she…it was funny ‘cause she
00:01:24 –> 00:01:28 said, “Bad JOOLtool!” and she put it in the corner, and I thought, ‘how is she having
00:01:28 –> 00:01:31 troubles, ‘cause it’s beautiful’, now I see why.
00:01:31 –> 00:01:37 Now when we get here, she showed me that her old…her older version of the JOOLtool’s
00:01:37 –> 00:01:43 felt buffing wheel is actually…it’s just like rock hard, and it’s kind of a wedge
00:01:43 –> 00:01:51 shape… kind of curved here and its way harder than the version I have here, I have a felt
00:01:51 –> 00:01:56 Ninja Wheel here that’s a lot softer, and then we…in the video, when we scratched
00:01:56 –> 00:02:00 it up using like a fork…you can go back and look at that video if you don’t know
00:02:00 –> 00:02:01 what I’m talking about.
00:02:01 –> 00:02:02 (KC)I tried the fork and it didn’t work.
00:02:02 –> 00:02:08 (CL)The fork…yeah well I see why, hers is just hard felt; this might work really great
00:02:08 –> 00:02:13 for buffing up some metal or something, we’ll have to…she’ll have to figure that out…what
00:02:13 –> 00:02:17 it’ll be good for, but it doesn’t work well with the Polymer clay ‘cause it’s
00:02:17 –> 00:02:19 just not soft enough.
00:02:19 –> 00:02:27 Now she…once we got out a couple of her samples here that were baked, and she had
00:02:27 –> 00:02:32 sanded, but they were still matte, so what I’m gonna do is show you…here’s a piece
00:02:32 –> 00:02:40 and she’s…you’ve made a…a barrette…I had to think about that, what the heck is
00:02:40 –> 00:02:42 that thing… okay now it’s a barrette and it’s beautifully sanded but it’s still
00:02:42 –> 00:02:45 a little on the matte side, it’s not super shiny.
00:02:45 –> 00:02:46 (KC) It is, yep.
00:02:46 –> 00:02:53 (CL)And we can show you that the JOOL tool indeed does work beautifully with this felt
00:02:53 –> 00:02:55 wheel, and we can get a really nice high shine.
00:02:55 –> 00:03:02 Now I haven’t got it in the most ideal positioning, what you’d wanna do is have it down in front
00:03:02 –> 00:03:08 of you, on a lower table so that you can see up through the wheel here…the Ninja Wheel,
00:03:08 –> 00:03:12 the advantage to it is that you can see through the top when you’re workin’ on it.
00:03:12 –> 00:03:15 But I’ll show you anyways how it works and we’ll just buff up half of this.
00:03:15 –> 00:03:24 (KC) Okay (CL)Okay, now, actually we might as well…well depending on where it is, but
00:03:24 –> 00:03:30 you just work it at a fairly low speed, and then you just lift up your tool up against
00:03:30 –> 00:03:33 here, and it’s quite easy, it doesn’t fling it around.
00:03:33 –> 00:03:42 Actually I should have had you do it, maybe I’ll do that, move it over to you a little
00:03:42 –> 00:03:43 bit here, because I already know how to do this.
00:03:43 –> 00:03:44 (KC)I’m used to flying saucers…
00:03:44 –> 00:03:54 (CL)Okay, so just lift it up from underneath the disc so you can hear that shift there,
00:03:54 –> 00:03:59 and you don’t wanna press too hard, ‘cause if it’s moving too fast, and you’re pressing
00:03:59 –> 00:04:03 too hard, it’ll actually sorta melt the surface, can you see that, it’s already
00:04:03 –> 00:04:04 working.
00:04:04 –> 00:04:06 (KC)Look at that, I wanna do all of it.
00:04:06 –> 00:04:10 (CL)This is an awkward position (KC) That’s okay, (CL) You need to set it up in a little
00:04:10 –> 00:04:13 bit better position, I think I’ll turn it up a little bit higher.
00:04:13 –> 00:04:16 (KC)This would have been flying across the room right about now.
00:04:16 –> 00:04:20 (CL) Yeah, your disc looked way too hard and it probably just grabbed it and spun it, right?
00:04:20 –> 00:04:22 Is that what happened?
00:04:22 –> 00:04:24 (KC)Yep, we had to put a box behind it to catch ‘em.
00:04:24 –> 00:04:26 (CL)Yeah, and there’s no issue here.
00:04:26 –> 00:04:27 (KC) Look at that.
00:04:27 –> 00:04:31 (CL)Now I shouldn’t even be in this position, ‘cause if it did spin…this is…
00:04:31 –> 00:04:33 (KC) I’m gonna send it to you.
00:04:33 –> 00:04:36 (CL)See how it doesn’t even grab or anything.
00:04:36 –> 00:04:39 (KC) No it doesn’t (CL)It’s just really nice, so that’s gonna work beautifully for…
00:04:39 –> 00:04:42 (KC)Okay, if mine worked like this, it wouldn’t have been in the corner.
00:04:42 –> 00:04:46 (CL)Okay, so what you’re gonna need to do… and I see with your older machine here…you
00:04:46 –> 00:04:51 do have the same kind of…her wheel looks just a little bit different than mine, like
00:04:51 –> 00:04:55 her backer wheel, just a sec…
00:04:55 –> 00:04:59 I’ll show you a little bit about this, how it works, but this is the newer version of
00:04:59 –> 00:05:06 the backer wheel, hers looks a little different, still the same design, just a little bit different
00:05:06 –> 00:05:08 the way it looks, and it’ll still work for you.
00:05:08 –> 00:05:14 What you gonna wanna do is buy the…I’m gonna be setting up a kit, you guys, that’s
00:05:14 –> 00:05:18 perfect for Polymer clay artists, so just give me a little bit more time and we’ll
00:05:18 –> 00:05:24 have that perfect for you, but for your particular wheel, what you’ll need to do is just get
00:05:24 –> 00:05:28 the felt disc and then you can glue it on to there, onto your…
00:05:28 –> 00:05:30 (KC)That glues on there?
00:05:30 –> 00:05:32 (CL)Yeah, there’s an adhesive on the back of it.
00:05:32 –> 00:05:33 (KC) Okay, it’s the same as these.
00:05:33 –> 00:05:38 (CL) It’s the same as the discs, it’s just a little thicker and it’s a felt pad,
00:05:38 –> 00:05:43 and then you can just…well you’ll peel off your sanding disc if you only have one
00:05:43 –> 00:05:44 if these.
00:05:44 –> 00:05:45 (KC) Oh, okay.
00:05:45 –> 00:05:47 (CL)And then you just attach it to this, and then you can use that on your machine and
00:05:47 –> 00:05:48 get going right away.
00:05:48 –> 00:05:50 (KC)Okay, ‘cause this one, it’s just separate and it didn’t come…
00:05:50 –> 00:05:54 (CL)Yeah, this one has just a hole in it, and it just screws right down on to the top
00:05:54 –> 00:06:00 of the wheel like that, it is really too hard, you can really feel it, it’s like almost…
00:06:00 –> 00:06:01 (KC)No wonder it doesn’t work.
00:06:01 –> 00:06:07 (CL)Yeah, actually, I kinda wanna see what it’s like, what do we have here as a sample?
00:06:07 –> 00:06:08 (KC) Willow duck.
00:06:08 –> 00:06:12 (CL) I just want to see what it feels like (KC)I’m backing up here.
00:06:12 –> 00:06:19 (CL)Oh yeah, you can feel…I’ll be gentle and slow, yeah it does wanna grab here a bit.
00:06:19 –> 00:06:22 (KC)Mmhmm, it flings everything.
00:06:22 –> 00:06:26 (CL) Yeah, well now you know what the problem is, it’s not you.
00:06:26 –> 00:06:27 (KC) It wasn’t me.
00:06:27 –> 00:06:31 (CL)And this tool probably works beautifully for metal or something, it’s just not perfect
00:06:31 –> 00:06:35 for Polymer clay, so is that helpful for you?
00:06:35 –> 00:06:39 (KC)You have no idea, it’s not gonna be in a corner forever, (CL)Okay, good (KC)But
00:06:39 –> 00:06:41 I am gonna wait for you to do all of that first.
00:06:41 –> 00:06:44 (CL)Yes and as you can see guys, I’ve got a bunch of stuff from Anie, and I’m gonna
00:06:44 –> 00:06:52 be testing it out, and I’ve got brushes that are sanding brushes… they work beautifully
00:06:52 –> 00:06:57 on round objects and all kinds of different shapes, I’ve got different weights and…of
00:06:57 –> 00:07:02 the different discs and when I get the perfect setup for you guys…then I’ll let you know
00:07:02 –> 00:07:06 what that will be, and I’ll put together a kit for you guys, okay?
00:07:06 –> 00:07:08 (KC)Oh, but hurry ‘cause I’m out of patience.
00:07:08 –> 00:07:12 (CL)I know, I’m not patient either, so, soon as we get back from the Road Trip, I’ll
00:07:12 –> 00:07:13 get that figured out.
00:07:13 –> 00:07:14 (KC) Okay.
00:07:14 –> 00:07:18 (CL)So, I hope that was helpful for you, if it was, make sure to press that like button
00:07:18 –> 00:07:21 we really appreciate it.
00:07:21 –> 00:07:27 And my question for you today is…oh, what is my question, my question is; do you want
00:07:27 –> 00:07:31 one of these tools for buffing and sanding your pieces?
00:07:31 –> 00:07:32 (KC) Yes you do…
00:07:32 –> 00:07:33 (CL)You do?
00:07:33 –> 00:07:39 And are you excited about the new… what I’m gonna be showing you next, if so, leave
00:07:39 –> 00:07:43 a comment in the comment section below, that would be great.
00:07:43 –> 00:07:47 And don’t forget to subscribe, we have new videos that come out every week and you’re
00:07:47 –> 00:07:49 not gonna wanna miss a thing.
00:07:49 –> 00:07:51 So we will see you next time and bye for now.
00:07:51 –> 00:07:52 (KC)Bye.
Our goal is to translate these videos into as many languages as possible. If you are interested in helping with this initiative, then please do contact us and we will figure out a way to make it worth your while :)
Resource Links:
- Related Video: JoolTool Introduction To Buffing Polymer Clay
- Amazon: JoolTool **
Resources marked with a double ** asterisk are affiliate links. If you click on them and decide to buy something, we may receive some compensation. This does not affect the price you pay in any way. What it does do, however, is helps us to continue providing free videos for you, here at the PcT website. Using our links to purchase your tools and supplies, is always greatly appreciated.
Sponsored Ads & Special Promotions
Shareable Images


To share this full blog post anywhere on the web that allows links in comments, here's a shortened url to copy and paste...
>> https://mypct.ca/v455 <<

Want to chat about today’s post? That’s what the comment section below is for. Scroll Down… We’d love to hear from you!
Or... if you would like to request a topic for a future post, here is the link to do that… PcT Suggestion Box
I guess I jumped too fast to purchase my jooltool. I’m waiting for Cindy to offer a kit? I have had mine for over a year and a half now. Is it in the future and what are the lessons I am reading about
Hi Wilma… there is more info about our upcoming course over at this link.
For those like you, who did not purchase your JoolTool using our PCT Ambassador Code, we will be making the course available for sale as a stand alone product.
However, anyone who DOES purchase a JoolTool using our PCT Ambassador code, will get the course at no extra charge. It will be our way of saying thank you for purchasing through our link.
News of the JoolTool course will go out to everyone subscribed to our weekly newsletter, and post her at the blog as well. The newsletter signup form is at this link.
YES! I would like a Jool Tool w all the appropriate attachments! I will watch for your kits but……. I’ll have to purchase Jool Tool first. You mentioned your friend purchased hers on EBay? I’ll go take a look now.
Thank You, Cindy, for these videos. They are very informational and APPRECIATED!
Mary C Stazzoni
‘heartieone’
Hi Mary… if you want to get receive the JoolTool course that we are putting together (when it is ready), then you must purchase your JoolTool directly from Anie’s website AND you MUST remember to apply our PCT code in the coupon code box before proceeding to the check out.
There is more info here.
Mary – the JoolTool kit from their website does come with all the relevant polymer attachments. I just purchased mine and used Cindy’s code so I could get the videos when they come out. (:
Bad JoolTool Part 2………. I received my Jooltool and couldn’t wait to try it. Love, love, love the buffing and polishing, it does a wonderful job. Much better than the buffer. But I obviously need to practice with the fine and extra fine grits that came with the kit. Press too soft, not much happens, press too hard, and I wound up with divets shaped like eyelashes. Some I could get rid of, others I could not. Or maybe I created them on the buffing wheel, I don’t know. I did the fork-scraping on that, so it seemed okay. I didn’t notice the divets until I was buffing and polishing. If I wasn’t getting divets, I was getting scratches that did not polish out. To lessen the divets I used the radial brushes – pink and green ones that came with the kit. It helped, but my divets were too deep. The pieces I was trying to do were scarf ties that were slightly rounded, which is why I think the radial brushes did a better job for those. Practice on your not-so-good pieces before doing the good stuff……. “A bad tradesman always blames his tools”, so I guess I need to practice, practice, practice.
Cheers
Veronica
My JoolTool just showed up a few minutes ago. I have a bunch of Fordite chunks I plan to ruin with it. LOL.
I hope you have gotten more practice in. (:
Congrats Lena! The Fordite is perfect for practicing on because the color goes all the way through, so unless you completely sand away the entire piece, you can keep starting over until you get it right. :) Let us know how it goes…
I know you are VERY busy, any more news on the jooltool kit?
Thanks
Sandra
Maybe Doug could set up a little progress meter for us so we won’t keep bugging them. LOL. I am also curious. I have work stacking up waiting to get mine. (:
@Sandra and Lena… you must have missed the “soft launch” message from earlier this month… in another comment thread. We are now set up to be able track orders for anyone who is eager to buy now. More info here.
Shut up and take my money! LOL.
I missed it too. Where is it?
Just send Cindy an email. She will email you back with more details. I’m about to go get mine! WHOO HOO!
Hi Cindy,
Will your jooltool kit have the same range that Anie is offering? Or will your kit have more bits and pieces? How close are we getting to your launch do you think?
Cheers
Veronica
Hi Veronica, our plan is to offer several different kits depending on what it is you will want to accomplish with your JoolTool… plus we will be including an exclusive video training course which will not be available anywhere else. I wish I could give you a date but we are doing the best we can with all the behind the scenes work. So sorry for the delay.
Ive been looking at Jooltool and they are on back order. When will your kit be available. I really cannotseeing able to r putting a whole lot of effort into too many projects w/o being shined up. Cannot wait. andh opefully your kit will be ready. I watched some of Anis video and she did mention your name. What a great collaboration. Im assuming that your kit will include disks that will be able to get into deeper areas of more intricate shapes. hope so. final getting my working schedule (?RN) into some sanity so can work on my projects. Thanks Cindy
I have been wondering the same thing. I have been thinking about just ordering one through the company. I have a pile of stuff I need to work on. The only thing that is keeping me from it is all the tutorials that Cindy will be providing. I am unsure if I would have access to the tutorials if I bought through the company directly.
Cindy – Do you have any updates you could share with us?
Hi Patty and Lena… so sorry for the delay. We have actually filmed the lessons and figured out everything for the course, but we’re having trouble finding the time to fit in the editing and everything else needed to get the package launched for you guys. As far as the lessons go, they won’t be included with the kit if you go directly through the company rather than through us. I wish we could move faster on this… it has been frustrating for all of us :( I can tell you though, that it will come together. We have already put in a huge number of hours into the videos and I know they will be *VERY* helpful for you.
I would like you to show on one of your videos how to finish a necklace made with rubber cording. How do you do the fastner using a bead and a loop. How is the loop made? I love your videos. Thanks, Cathy from Indiana
Thanks for your compliment and suggestion Cathy! I’ll add it to the list of possible future videos.
I am considering a JoolTool – but I have a good old bench grinder already. So, I thought I’d do a little research to see what types of wheels would work for polymer clay on the bench grinder.
I can find plenty of information for buffing with a bench grinder – but nothing for SANDING polymer clay with a bench grinder.
Any ideas? Are their sanding wheels for a bench grinder that would work for clay? Pros? Cons? Should I just save up for a JoolTool?
Hi Lena, I had a bench grinder also to use for the same purpose and believe me it doesn’t work well at all for sanding. The wheels are too rough, too coarse and most of these are meant for steel not PC. They have a very high RPM which cuts into your clay piece and causes some nasty marks. I have found no wheels that are compatible enough to use with PC. Also the wheels are a pain to change constantly. I finally sold mine in the want ads and bought the jool tool. and never looked back.
Thanks for the information Dixie. I had a feeling if it was a good solution my Google Fu would have turned up something. I’ll start saving my pennies for a JoolTool!
Hi Lena, Dixie Ann is right, we had a grinder in the shop that I never used for polymer, for the same reasons. You’ll love the JoolTool when you get one, and we’ll have lots of perks if you buy one through our promo (we’re getting closer to being ready). So it will be worth saving pennies for! :)
Great! I’ll save those pennies! I’ll look for the promo! Thanks!
I didn’t miss the promo did I? Where will it show up? Our weekly newsletter?
Hi Lena, no you haven’t missed the promo yet. We’re just taking a while to get it ready. You will see it here and in the newsletter, so don’t worry, you won’t miss it.
Just bumped into your video with KarenKay using the Jooltool. Do I want to use one? Yes please!!
Can’t wait!
Marion
I ran across Anie’s videos on the Jool Tool and watched her demo with Cindys beads. She did a pretty good job but I am definitely waiting for Cindys video’s and the kit that is going to be available along with the Jool Tool when it’s all available. Good things take time so if you plan on getting a Jool Tool, be patient, It is all going to come together soon and you will be happy you did. I have been biting my knuckles waiting for this too but I want to do it Cindy’s way.
So happy to see the release of how to videos for the JoolTool. Ani does a good job, but, Cindy, I hope this doesn’t stop you from releasing a few more instructional videos with your tips and suggestions.
Both of Ani’s videos were fast, and I am not too sure about how that round bead gets sanded, buffed, and polished.
Also, if you watch the bead video, it appears that the squirrel tail attachment abraded away some of the cane design.
Sure would like to see you use these attachments in your own studio, where we can closely watch the process. Your insights will keep me from making a lot of mistakes.
Hi Jocelyn, don’t worry I will be doing a whole series of JoolTool videos as soon as we have the kit(s) available on our site. (Which we are hoping to have by May.) Anie did a good job, but I kind of wished she had waited since most of the products are on backorder right now anyway, and I will be doing several videos soon myself and there could be some confusion for people who had been waiting for the information. But at least everyone can see that it will do a beautiful job and all of our testing has resulted in the perfect solution to our industries sanding and buffing woes!
Yippee! I saw on your YouTube channel that Anie has made some videos on using the JoolTool with polymer! I was just looking for something to play in the background while I got ready for bed so it’s not the best time to absorb what she does. But I will be playing them again tomorrow and probably placing an order. Just wanted to say thanks for so patiently working on getting this done!
Hi Bertha, if you could hold off on buying the Jooltool for a month or so, Anie and I have put together a kit and are working on doing a launch on our site. We hope to get it out to everyone in May. Most of her product is on back order anyway and won’t be available until May, so you might as well get it from us, because we plan on making it worth your while. It is an awesome product and I am very excited to be able to offer it to you all!
Hi Cindy, glad to hear you and Anie are still working on a kit specifically for polymer clay. I can hold off because my schedule this month is already pretty full with my job and various other jewelry-making activities.
I actually already have a JoolTool (purchased with a very good discount) but that came with accessories for sanding and polishing rough stones, not clay. So if you guys can make kits with and without the JoolTool I know you’ll have a lot of happy readers/students. :-) Thanks so much for doing this!
Cool just read yr answer to Bertha so you have answered the question I sent you. Looking fwd to this. It has been a long gestation period hehe
Hi Sandra, Haven’t got it finalized yet, unfortunately, but am hoping to soon. Even if we did, Anie doesn’t actually have a store where you can pick up the stuff while you’re in the states. You might be able to do a search on where you could buy a JoolTool in the area that you are visiting and if you email me, I can give you a list of accessories that you could pick up on your own. It wouldn’t be in a kit so there wouldn’t be a break in pricing, but it would probably still end up cheaper for you than shipping it. It’s a great tool. I think you are going to love having one, if it all works out!
HI Cindy, you’re probably getting tired of us asking about the Jool Tool Kit. How’s that going? I’m coming to the States in May, and if it would be available by then i can save heaps on postage.
Thanks
Hi Cindy,
My husband bought me a dremel for my birthday after I showed him your tutorial on the Jewel tool. That tool is really cool looking, but it is very pricy… I saw them listed for $300-$400. And I live in Canada, so I would have to order off-line and pay who knows how much for shipping :P blah!
But I was wondering your thoughts on the Dremel and if it is even worth the bother? It seems, and maybe I am wrong, to do just buffing? The guy at Lee Valley told my husband that there is this stuff you buy and you dip the dremel in and use that to sand with? Do you know anything about this? Maybe you have a tutorial on the dremel? I didn’t see one last time I looked. I appreciate any feedback you may have on both subjects. Thanks a bunch.
Alison=
Hi Alison, just so you know, FireMountainGems.com sells the JoolTool and now has a $5 flat rate shipping fee to Canada, no matter the size of the order. Which is awesome, especially if you order a bunch of low ticket times and drive the unit price down. (Just check out their site and you will understand what I mean about the unit pricing.)
About the Dremel, I do have some ideas for sanding with it but I need to do some testing first. But I do have a few videos and posts on using it for buffing, which will help you quite a bit if you’re interested.
Here are the links:
Dremel Tool Safety Tips
Dremel Tool Intro
Buffing with a Dremel Tool
Make Felt Buffing Wheels for Dremel Tool
Dremel Tool the Perfect Bead Crafts Gift
.
Cindy when using the jool tool how long do you spend on a piece when polishing?
I have used mine but I cannot see much difference in the
before and after
Hi Sharon, you should see a difference pretty quickly. My guess is that you haven’t sanded your beads with a fine enough grit for long enough, if you’re not getting much of a shine without buffing for a long time. Or you could be pressing too hard. Just a light touch should do it. As well, make sure to ‘fluff’ up that wheel with a fork first. The softer the felt is, the nicer the shine. Let me know if that helps!
Hi Cindy
I just bought the Jool Tool and I am very disappointed with it’s results. The sanding wheels are way too rough and just rip through my polymer clay pieces. Even the buffing wheel is way too rough for the polymer clay. I sure hope that you can get in touch with Anie and sort all this out. I was so excited to be getting a Jool
Tool only to be disappointed with the results. Thank you for all your effort in trying to get this whole thing off the ground for polymer clay enthusiasts.
Cheers
Marissa Marcolin
Hi Marissa, yes you will find that the JoolTool is much more aggressive than sanding with the same grits by hand. I have found with testing that the grits that you would think would work, like 400g will chew through polymer in no time. I have had some tremendous results with the micro polishing films and the very low micron brushes. I am just finalizing my recommendations for using with polymer clay and a soon as I can nail Anie down for another consult (she has an extremely rigorous travel schedule), we will put together a kit that will work nicely for you. I know you are disappointed right now… but trust me you won’t be when you have the right accessories for it. Just use it with the felt wheel for now and at least your buffing will have greatly improved! Thanks for your patience!
Thanks for your prompt reply, Cindy. I will wait patiently for the kit to be released and await the wonderful results I hope to get. Sanding is really difficult for me as a few of my fingers are wrecked, so I will be eagerly waiting for our new kit. Thanks again.
Cindy, I received a Jool Tool for Christmas and was wondering if you have worked out which grits etc. are best for polymer clay. I am anxious to get started. I have watched both of your videos on the subject, I work in metal and stone as well so I think it will be a good tool for me all around.
Looks like you had a great murder.
Wilma
Hi Wilma, unfortunately I am still working on that with Anie. Hopefully I will have something to share with you soon. In the mean time, you can use your new machine to polish, grind and sand your other jewelry, as well as use it for buffing your polymer clay. It is a lovely machine, isn’t it?
I am eagerly waiting to buy jooltool too.
You go girl!! I can hardly wait to get something that will help me sand all those buttons that I make. I am not sure that my fingers have any fingerprints left on them.
I have a polishing machine which works great but if this machine can do both I will be all over it.
Hi Cindy
As you know, I’ve already purchased the Jool Tool. I haven’t used it yet, as I too, am waiting to purchase the kit for polymer clay that you have been kind enough to test for us. Please let Anie know that I am eagerly waiting for the day when a sanding and buffing kit for Polymer Clay, is available to purchase, so I can start using my Jool Tool!
Thanks Cindy, for your time in helping Anie to put together a Jool Tool sanding and buffing kit that’s perfect for polymer clay, it is very much appreciated!!!
Kindest regards
Sue
I want to buy the Jooltool, so I watched the video. In it you mentioned a kit you were going to put together, what will it include. If it has the Jooltool with it I’ll wait.. Thank you, Kathy
Hi Kathy, that is a great question that I don’t actually have the answer to yet. Something that I need to work out with Anie (the inventor) in the new year. Hopefully soon though. We’re all a little anxious to get going on this!
That wonderful patient lady with the Jool Tool. I sure hope you left her with your soft felt pad. By the way, if this tool works for metal, I’m in.
One of Anie’s favorite demos is to polish metal, especially precious metal jewelry. She has also demonstrated polishing metal clay after it is fired. I don’t know what else it can do with metal but she says she has sold to bench jewelers in top jewelry houses.
I want a kit – for Christmas???? Maybe Loved the video and Karen’s reaction was just great. Thanks Cindy P
I echo Sandra J., “(im)patiently waiting” for a PC kit. Though I do have other uses for my JoolTool.
Heads up, though. Looks like there is an even newer version that has become available. Anie was showing the JoolTool “X” on the shopping channel where she sells it about 10 days ago. (Video is available on YouTube. Search for the 11/24/13 episode of Jewel School With Kim.) It looks very similar to the version Cindy has but has a rectangular body that can be turned on its side, plus some other design changes. Soooooo . . . . be very careful verifying which version you are buying from some sites, although this may mean that some good deals are coming if you are willing to get an older model.
Hi Bertha, I just saw that square machine. I didn’t realize it could be turned on it’s side… that’s cool! Do you know if it is more expensive? It looks a little bigger. Will ask Anie about it. She is traveling right now but hopefully after the holidays we will be able to chat on the phone again and get things finalized. Trust me, I am Im(patiently) waiting as well! :)
Hi Cindy, I’m not sure about the price. JTV sells it as prepackaged kits so I would have to find and compare the price and contents of the old kit with the “X” version. But if my (very unreliable these days!) memory is correct I think it may be a little more expensive, e.g. US$50 more.
The body is square and has a handle and rests on a docking base. So I think it is wider but the height doesn’t look that different. And the hood is now removable. This allows you to remove the body from the dock, turn it sideways and replace it on the base, so that it looks more like the common lathe. This also makes it portable so you can use it on large or heavy pieces, e.g. polishing a large decorative metal item. There is a small tray to hold water that can be attached just below the wheel, which would be convenient for washing off your piece as you sand. I believe there were a couple of other features that I can’t recall now.
Hopefully Anie will be able to spend a little time with you because Tucson is barely no time after the New Year and I imagine she has to get ready for that. Tell her she has a small crowd with checkbooks open/credit cards waving waiting to buy! :-)
Thanks for that Bertha! I’ll ask Anie about the new machine when I get the chance to speak with her. And don’t worry, I’ll also let her know there are checkbooks and credit cards impatiently waiting! LOL
After watching the video and seeing how it works, I am excited now about the Jool Tool. I’m still gonna hold off ordering one until the PC Kit is complete and I see how it all works. Thanks Cindy for putting this together for us.
I have the jool tool and have been (im)patiently waiting for the much anticipated kit.
I have been wondering about the JoolTool kit! I have been interested in getting one ever since I saw your first demonstration of it! It seems like the perfect sanding and buffing tool and I desperately need something!!! I don’t know how I’m going to come up with the money to get it, but I haven’t been real motivated since you didn’t have it all worked out yet. Now that I know you have the accessories figured out, I will be working on getting that money so that as soon as Ani settles down and you can connect with her on it, I will be ready to buy! Yay!!!