Polishing Papers For Sanding Polymer Clay Beads
Video #346: A low tech sanding and polishing solution that will get the job done!
More...

IN THIS POST: — sanding — wet dry sandpaper — polishing papers — buffing — fire mountain gems — grits — polish — polishing — sanding polymer clay — smooth polymer clay — (Topics marked with an asterisk* are discussed in the Comments Section below).
Topics Covered In This Video:
- Basic differences between an un-sanded and a sanded piece of polymer clay. To see a more detailed video on the big differences of sanding vs not sanding, watch this video Sanding and Buffing Your Polymer Clay Is Worth It
- Sanding polymer clay by hand – Low Tech Method.
- Quick overview of Wet/Dry Sandpaper and the grits available.
- Introduction to polishing cloths purchased at Fire Mountain Gems, the size and costs.
- Tips for knowing which grit is which.
- Sanding set-up and supplies.
- How to sand, using the polishing cloths in grits from 400g, 600g, 1200g, 4000g, 6000g, 8000g.
- Getting a nice sheen by hand buffing with felt.
Have you ever used polishing cloths to sand your polymer clay? If you have, what do you think of them? And is there another type of sandpaper that you like to use, that is, if you do sand your polymer clay?
Looking forward to hearing from you!
00:00:03 –> 00:00:07 Hi guys, its Cindy Lietz, your Polymer Clay Tutor, and today I’m gonna show you how to
00:00:08 –> 00:00:14 use some Polishing Papers to sand your Polymer Clay pieces.
00:00:14 –> 00:00:21 Now there are many, many ways to sand your Polymer Clay, I showed you in a previous video
00:00:21 –> 00:00:28 where I showed an unsanded piece versus a sanded piece.
00:00:28 –> 00:00:34 And there are low- tech ways and high-tech ways, and today I’m gonna show you a low-tech
00:00:34 –> 00:00:35 way.
00:00:35 –> 00:00:43 Now in the past I was using some of these Wet/Dry Sand Papers that you can find in the
00:00:43 –> 00:00:51 automotive departments of many stores, so places like Canadian Tire here in Canada has…
00:00:51 –> 00:00:57 if you go into where their…the automotive department where you would do painting and
00:00:57 –> 00:01:00 finishing and that kind of thing, you can find these Wet/Dry Sand Papers and they come
00:01:00 –> 00:01:03 in pretty high grits.
00:01:03 –> 00:01:10 You can find them from 320, and 320 is the lowest grit…I mean is the lower grit that
00:01:10 –> 00:01:18 I’m mentioning, 320 then 400 and 600, 800, 1000 and sometimes you can get a little higher
00:01:18 –> 00:01:23 with that…than 1000 as far as grits go.
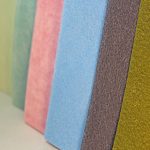
00:01:23 –> 00:01:29 But another option is to use Polishing Papers, now I found these Polishing Papers, they’re
00:01:29 –> 00:01:38 these little 5 x 5 inch pieces of almost like a cloth, they’re a bit of a fiber and I found
00:01:38 –> 00:01:48 them at Fire Mountain Gems, and they’re quite inexpensive, the little pack has 4 sheets
00:01:48 –> 00:01:55 in it…yeah it has 4 5×5 sheets, and they were… you can get ‘em in a bunch of different
00:01:55 –> 00:02:11 grits from 400, let’s see, I wrote them on the back here 400, 600, 1200, 4000, 6000 and
00:02:11 –> 00:02:16 they also had 8000 grit, which is really a high, high grit.
00:02:16 –> 00:02:23 Now the…they range in price… you know with Fire Mountain Gems, the more you buy,
00:02:23 –> 00:02:30 the cheaper the price gets per unit, so if you’re just buying 1 bag or so, it would be
00:02:30 –> 00:02:38 about $3.67 currently today’s prices, and if you’re buying up to 200 units of different
00:02:38 –> 00:02:45 things like beads and findings and things, it would be a $1.59 a pack, so I picked up…
00:02:45 –> 00:02:51 I was buying a very large order, so I picked up 1 pack of every kind, so I got them very
00:02:51 –> 00:02:53 cheap.
00:02:53 –> 00:02:58 Now, I’m just gonna quickly show you how to use them.
00:02:58 –> 00:03:03 I’ve got, like I said, I’ve got the unsanded piece so we might as well start there, now
00:03:03 –> 00:03:09 on this piece here, it’s got a fairly thick layer of a Translucent layer, this is one
00:03:09 –> 00:03:15 of the Faux Labradorite techniques that I do, on the back it’s pretty rough because
00:03:15 –> 00:03:22 I had changed my mind, I’d originally put a textured backing on it, but it was not as
00:03:22 –> 00:03:28 even and as nice as I wanted it, so I can sand this one back to right smooth like I
00:03:28 –> 00:03:34 did this other one and it would look much better, I would have to start… the Polishing
00:03:34 –> 00:03:42 Papers are a little too fine to get a lot of grit…or a lot of… to remove much with
00:03:42 –> 00:03:43 them…
00:03:43 –> 00:03:45 easy for me to say.
00:03:45 –> 00:03:50 Anyways, so if you have a lot of clay that you need to remove to really get a nice base
00:03:50 –> 00:03:57 on it, then you would have to start with one of these Wet/Dry Sand Papers, and you can
00:03:57 –> 00:04:03 start with 320 grit which is a good place to start for a lot of removal, and that’s
00:04:03 –> 00:04:07 where I would start here, on this particular piece.
00:04:07 –> 00:04:12 I would start with a dish of cold water, cold water works better when you’re sanding than
00:04:12 –> 00:04:18 warm water because it hardens up the Polymer Clay and makes it firmer, and then when you’re
00:04:18 –> 00:04:23 sanding it, it’s not so squishy and it’s easier to work with.
00:04:23 –> 00:04:28 So I’m just gonna show you here…where I would start, I would start with a piece of
00:04:28 –> 00:04:36 320 Wet/Dry Sand Paper, I like to work on a piece of Fun Foam, it gives it a cushion
00:04:36 –> 00:04:41 and especially on any pieces that have a bit of a rounded surface to it.
00:04:41 –> 00:04:48 So I’m just gonna dip my piece into the cold water with a drop of dish soap in there, that
00:04:48 –> 00:04:56 helps to keep the sand paper clear of any grit…or clay and stuff.
00:04:56 –> 00:05:02 So I would just sand away on the surface like this, whirling around, and you can hear it,
00:05:02 –> 00:05:04 can you hear it sort of gripping?
00:05:04 –> 00:05:07 That means its working, it’s doing something.
00:05:07 –> 00:05:17 I would continue doing that on all the surfaces, edges, the back until I had a nice, smooth
00:05:17 –> 00:05:22 surface to the touch, and when it looked… when it was wet it looked good, now I’m not
00:05:22 –> 00:05:25 quite done this, I would have to spend more time at it.
00:05:25 –> 00:05:35 Then I would move to the 400 grit, so I’d quickly do that, and it’s just because I have
00:05:35 –> 00:05:42 a kind of rough surface that I’m starting off with, if your beads are really smooth
00:05:42 –> 00:05:46 and fingerprint free and that kind of thing to start off with, then you don’t have to
00:05:46 –> 00:05:52 start with these Wet/Dry ones, you can go straight into the polishing papers.
00:05:52 –> 00:05:59 So I would continue, I usually spend a few minutes on each, really getting a good feel
00:05:59 –> 00:06:02 for it, you close your eyes and touch it and you’ll get a better feel for how smooth that
00:06:02 –> 00:06:08 actually is, I don’t know, taking away one of your senses seems to help in that area.
00:06:08 –> 00:06:14 Anyways, so then I would move to the different grits of the Polishing paper, now they start
00:06:14 –> 00:06:20 at 400 with these particular papers, this 400 grit seems to be a little different than
00:06:20 –> 00:06:27 this 400 grit, and you’ll find that that’s true if you’re swapping brands around, so
00:06:27 –> 00:06:33 this is a little finer, I’m not sure why that is the case, but that’s what I’ve found.
00:06:33 –> 00:06:38 Also, it’s hard to remember what color is which grit and all that kind of stuff, so
00:06:38 –> 00:06:44 what I did right away was take a Sharpie and write the grit on the back of my Polishing
00:06:44 –> 00:06:47 Papers, that way I know which grit is in the right order.
00:06:47 –> 00:06:54 So you start with the lowest number, so in this case it’s a 400, and I would just sand
00:06:54 –> 00:07:00 away like I always do, now like I said, this is the low tech version, I do have other ways
00:07:00 –> 00:07:05 of doing it with machines and things like that, that you’ll get to see over time as
00:07:05 –> 00:07:07 I get the videos made.
00:07:07 –> 00:07:15 So you can see that little bit of soap in there is foaming up, and it’s…there’s
00:07:15 –> 00:07:20 a bit of a paste there, it means that some of the clay is coming off and starting to
00:07:20 –> 00:07:22 sand up.
00:07:22 –> 00:07:27 Now, there’s a difference already, I can see it, but I would keep going, then I would go
00:07:27 –> 00:07:36 to the next grit which would be 600 in this case, and on and on.
00:07:36 –> 00:07:42 So as you keep going, you put a little bit of time, a few minutes into each grit, then
00:07:42 –> 00:07:47 I would go to 1200… pretend that I have spent more time doing this.
00:07:47 –> 00:07:55 This is especially easy on these flatter pieces, rounder pieces tend to be, you know, you have
00:07:55 –> 00:07:59 to kind of work them around holding it, I’ve got some other tricks later I’ll show you
00:07:59 –> 00:08:09 for working with round beads, but with the flat stuff it sure can make a big difference.
00:08:09 –> 00:08:15 Now we’re at the 600 grit…or 6000 grit, they seem to make a big jump in what they
00:08:15 –> 00:08:24 carry there, they go from 1200 to 4000 to 6000 and then they go to 8000, I believe,
00:08:24 –> 00:08:26 yeah, 8000.
00:08:26 –> 00:08:33 So even with this minimal kind of not quite spending enough time on it, you’ll see…I’ll
00:08:33 –> 00:08:45 just finish this up, this has already got a lot smoother and it’s even got a pretty
00:08:45 –> 00:08:54 good sheen on it, if you can see that, and it’s made a huge difference already, so even
00:08:54 –> 00:09:00 just that sort of abbreviated sanding version there’s a big improvement in the way it was.
00:09:00 –> 00:09:08 Now if I was to continue, you would see that it would get even clearer and look even better.
00:09:08 –> 00:09:13 Now one hand buffing way, now I like to use power tools to buff ‘cause you get a really
00:09:13 –> 00:09:20 high sheen, but you can do some buffing using a piece of craft felt…you know the stuff
00:09:20 –> 00:09:26 you get at Michaels or any other craft stores, this will work beautifully and you can just
00:09:26 –> 00:09:33 do it by hand, and buff, buff, buff and it will make a big difference on your piece.
00:09:33 –> 00:09:45 Now a piece of denim works as well, muslin, cotton even a piece of relatively smooth canvas
00:09:45 –> 00:09:47 will work.
00:09:47 –> 00:09:51 Is the camera picking that up Doug?
00:09:51 –> 00:09:55 There’s a bit of a sheen there, and it just makes all the difference in the world.
00:09:55 –> 00:10:01 So even if you haven’t got all the power tools, you can do a beautiful job with your pieces
00:10:01 –> 00:10:08 by hand sanding and hand buffing, and you can try out these Polishing Papers, and I
00:10:08 –> 00:10:13 picked them up at Fire Mountain Gems, so I hope you enjoyed that.
00:10:13 –> 00:10:17 If you liked it and it was helpful for you make sure to press that like button; that
00:10:17 –> 00:10:22 really helps spread the word, you feel free to share this.
00:10:22 –> 00:10:29 If you have any comments or questions do add them below in the comment section.
00:10:29 –> 00:10:34 And my question for you today is have you ever tried these polishing papers?
00:10:34 –> 00:10:37 And if you have, what do you think?
00:10:37 –> 00:10:43 And what is your favorite sanding method if you sand?
00:10:43 –> 00:10:46 I will see you next time and bye for now.
Our goal is to translate these videos into as many languages as possible. If you are interested in helping with this initiative, then please do contact us and we will figure out a way to make it worth your while :)
Resource Links:
- Related Video: Sanding and Buffing Your Polymer Clay Is Worth It
- Related Video: Using Wet/Dry Sandpaper For Sanding Polymer Clay
- Related Video: How To Make Your Own Sanding Pads For Polymer Clay
- Amazon: 3M Wet/Dry Polishing Paper (Assortment Pack) **
Resources marked with a double ** asterisk are affiliate links. If you click on them and decide to buy something, we may receive some compensation. This does not affect the price you pay in any way. What it does do, however, is helps us to continue providing free videos for you, here at the PcT website. Using our links to purchase your tools and supplies, is always greatly appreciated.
Sponsored Ads & Special Promotions
Shareable Images


To share this full blog post anywhere on the web that allows links in comments, here's a shortened url to copy and paste...
>> https://mypct.ca/v346 <<
Want to chat about today’s post? That’s what the comment section below is for. Scroll Down… We’d love to hear from you!
Or... if you would like to request a topic for a future post, here is the link to do that… PcT Suggestion Box
It like you read my mind!! I was talking to my friend about sanding some of her pieces today! Thanks for the video it helps! I will be getting some next week.
I bought polishing papers quite a while back with the intention of using it with some metal pieces I was making. After seeing this video I’m going to have to try them with my polymer clay!
Thanks Cindy!
Wow -talk about “in-put”. Thank you everyone for MORE info. Definitely going get those sanding cloths. Great for curvy and sharp places.
Cindy- this tute sure opened a can of worms,Huh? So many sharing folks -aren’t polymer clay people the BEST !!!!!!!!!!!
I have been a paid member since 2010 -and boy, have a learned a lot. Books are fine but POLYMER CLAY TUTOR videos are the way to go. BRING IT ON !!!!!!!!!!!
Thank you everyone so much. Love this group !!!!!!
BTW – I smooth most everything with baking soda or a bit of alcohol to make sure eveything is ULTRA smooth. Works for me. Hate sanding – but doesn’t everyone…….LOL
Thank u for the tutorial. I’ve been waiting a long time to see this demonstrated.
Thank you so much. I love the craft felt idea. Jeans just never seemed to work for me. Maybe I am just impatient. Keep up the awesome work. So glad I decided to join as a paid member. Thank you.
So far the only things I’ve used are the auto wet/dry papers and more recently (at your recommendation) the micromesh pads. I’m able to get a much better shine from the micromesh than I was ever able to get from the wet/dry auto papers. But I didn’t notice it until I got to the buffing stage (with a dremel) when suddenly I had a very glassy finish on a piece of the faux jasper. Woot! {insert happy clayer dance}
Oooh! Cooltools carries the polishing papers in a variety pack! Set of 6 (5.5″ x 8.5″) for about $11US.
Thanks again Cindy and Doug!!!
I haven’t tried the polishing papers but I order from FMG all the time and those are going into my cart next! I love their leveling system and these papers look like a good tool in my PC arsenal.
So how do the micro mesh pads compare with the sanding papers : in terms of preference of use and the grits (ie, what # is their coarsest grit – 400?)
Another thing: I made a pendant with very fine details on the edges that I’d like to sand – the pads dont fit and sandpaper is too flimsy. I know that there are micromesh sanding “swabs” . I have tried those and was very disappointed with how flimsy they are. Does anyone have any suggestions as to what I can try?
Hi Maria,
The ability to sand fine details is one of the reasons I like the Micro Mesh sanding sheets and don’t like the sanding pads. The sanding sheets are cloth-backed and they’re very durable, but also thin and flexible enough to be sharply folded or repeatedly pushed from behind without damage.
For example, depending on the type of fine detail, I might:
* Make a sharp fold in the sanding sheet so that I effectively have a double sided thinnish sanding sheet with a sharp sanding edge.
* Fold or wrap the sanding sheet around a small triangular, square, round, flat, etc. support (bead piercing pin, skewer, file, toothpick, etc.) to help sand edge indentations of those shapes.
* Use the edge of an unfolded sheet, if I need something fine to slide into a straight or curved slit (slip the sheet in, move the it back and forth along the edge of the sheet to sand one surface of it, remove the sheet, flip it so the sanding surface faces the other side of the slit, and do the same on that side).
* Fold a sharp pointy corner, for sanding inside small or pointy indentations.
* Put a stylus, skewer end, etc. behind the sanding sheet and use that to sand inside slightly larger or rounded indentations (pushing the sanding sheet into and moving it around those indentations).
Even if you like the sanding pads normally, perhaps a few grades of the sanding sheets would be enough to deal with those fine details and other things where the pads aren’t suitable.
Hope that helps,
Sue
Great advice! I will try out your suggestions.
Hi Maria
How about using nail-art emery boards you can buy these in fine med and coarse, they do not last long when wet but are cheap enough to buy and can be cut to size for getting into tiny places. Or if you have the time use lollipop( the flat wooden sticks) or kiddies wooden play sticks. They are sold in the kiddie section in bags of about 100 for about $1 and put strong glue (Welbond) on your wet/dry paper. Lay a few sticks on the paper and leave to dry. Then cut round the shapes and do the same on the reverse side. I did this with the lathes from a piece of trellis and cut them to handy lengths. ideal to lay in a dish that they will exactly fit before covering in a little water (mainly for flat pieces) I used a non slip mat then put a heavy dish on this, freeing up your non dominant hand . So instead of having to use both hands you should be able to just use one hand to sand with. I have used both micro mesh pads but they come unstuck after a while. and sanding papers but didn’t really get on with them. Now, like Sue F i have bought the micro mesh sanding sheets that I can cut to the size that suits me…………cheers xx……….
Yes, I have and do use emery boards made for acrylic nails to sand my polymer pieces. (I wonder what the grit on them is? They definitely seem to be much coarser than 400 or even 320) I like your suggestion about the popsicle sticks and will give that a try.
I have tried the polishing papers but much prefer the micro mesh pads. I wish someone could figure out how micro mesh pads could be made to work with a rock tumbler. (That’s a hint for you, Cindy!) Now that would be bead heaven.
That *would* be nice, Jill! :)
If I were going to try this, my first approach would be to look for some heavyish but cuttable rods, glue Micro Mesh sanding sheets all around them with a very strong waterproof adhesive, and then cut the sanding sheeted rods into tumbleable pieces.
I’m not sure what I’d use for the rods. It would be nice if scrap clay would work but I have a feeling it wouldn’t be heavy enough (for a vibratory tumbler, anyway), so I’d probably look for possibilities at the hardware store. From past tumble-sanding and tumble-buffing experiments I’m pretty sure pieces of Micro Mesh sanding sheet on their own wouldn’t give a satisfactory result in my tumbler.
I also don’t know what glue would be suitable and would have to research that.
With my tumbler I need quite a lot of tumbling/sanding medium otherwise things don’t move around properly, so it’d take a bit of setup to try. And I’d probably need to prepare several grits, although I probably wouldn’t need them all if they were being used in a tumbler.
I’ve been happy with the results I get from my hand-picked rocks so far (sands them to just about as fine as the finest wet and dry sanding paper I can get, which is not as good as Micro Mesh but better than most), but maybe I’ll try the above some time.
Sue F., what a thoughtful answer! I will research glue types as well. Thank you so much!
When you say you use a lot of tumbling/sanding medium, do you mean you use that sandy medium that polishes rocks?
Hi Jill,
Sorry, I guess I wasn’t very clear… one of those cases where *I* knew what I meant! :D
Anyway, when I said that my tumbler needs quite a lot of tumbling/sanding medium, I meant that the tumbling action doesn’t take place properly unless the tumbler is at least half full, regardless of what I put in it (the tumbling medium) and regardless of what I’m trying to achieve. The “sanding” bit was just to clarify that in this case I was using the tumbler for sanding, so in this case the tumbling medium is a sanding medium, which for polymer clay in my case is 3kg+ worth of perfectly smooth oval 9mm river rocks.
Note that I have a vibratory tumbler — mine’s a Hornady Case Tumbler, which is normally used for cleaning ammunition cases prior to reloading — and that polymer clay tumble-sanding processes seem to be somewhat different for vibratory tumblers versus rotary tumblers (e.g. Lortone rock tumblers and the like).
Cindy did a tutorial a couple of years ago on using the Lortone (rotary) rock tumbler for sanding and polishing polymer clay.
I’d already been using my Hornady vibratory tumbler for the same thing, but there were differences in what I’d found to be most effective with my vibratory tumbler compared to what Cindy used with her rotary tumbler (mostly to do with selection of rocks to perform the sanding while tumbling takes place, proportion of rocks versus beads, and amount of water). I wrote quite a bit on what I’d found in a comment on that post.
My original info on sanding polymer clay with a vibratory tumbler and rocks came from Desiree McCrory.
I hope that helps :)
Sue
Yes, that does help. You cleared up my confusion. I have a rock tumbler and have used it on beads with river rock as the sanding medium. I was just hoping that maybe there was a better medium that could really replace any and all sanding. (Hence my yearning for a combo of micro mesh and rock tumbler.) Thanks again for taking the time to steer me in the right directions.
It sounds like Cindy has some neat suggestions coming up on exactly that kind of thing!
Hi Sue,
what we need for our tumblers are micro-mesh rocks. So if anyone from the micro-mesh company is reading this we need 2lb bags of micro-mesh rocks in all the grits. I too took hours with the help of DH to sort out aquarium rocks (used white ones) they work great especially for small round beads that are so fiddly
With more and more people wanting easier sanding/buffing solutions for their polymer clay pieces I am sure it will not be too long before joolTools or some other company will come up the things we need. Loved the pic of your studio, so organised, Hope to get my workshop/studio finished by the summer but till then can look at yours and Cindy’s and dream……………….cheers xx…………………………..
Micro Mesh rocks would be great, Elaine! LOL
I don’t think we need the coarser grits though, since the smooth rocks seem to do as good a job as those, but if Micro Mesh rocks ever did become available I’d buy a whole stack in a heartbeat.
While I’m wishing, I’d also like a waterproof Dremel. Or a T-Rex-sized electric toothbrush to make a “toothbrush sander” from! (Hmm… wonder if I could adapt a stick blender… gotta try that some time! :D)
Hi guys, just thought I’d pop in here and mention that I have been testing some different substrates meant for use in tumblers that I am very pleased with and will share in a video soon. They are tiny plastic triangles that come in coarse, medium and fine grits. I also finish off with a tumble of tiny porcelain balls that give the beads a soft sheen. Then a quick buff on the JoolTool and they are good to go. I’ll go into better detail later in a video, so stay tuned for that!
There are so many ways to get the job done! Some take more work but are cheap as far as equipment goes… others are easier but cost a little more of an investment buying tools. I want to show you all that you have options. Choose whatever works best for you and your situation. :)
OH BTW, thank you everyone for your feedback and the way you are helping one another with questions. The busier it gets around here, the more I appreciate your help. You’re the BEST!
Those other tumbling substrates sound very interesting, Cindy… it would be great to have something that matched or bettered the rocks but was a lot, lot quieter! LOL
Is there any chance you could include Kato items in your testing of those substrates? Kato cures much harder than Premo: the difference is noticeable when hand sanding, and the one time I used a plastic substrate in my tumbler it didn’t have any effect. It wouldn’t have been the same thing (the particles were round), but it would be nice to know whether I should test this new option in my vibratory tumbler or not (I’d need to buy a heap make my tumbler work properly).
The porcelain balls sound great though… Looking forward to the video! :)
@Sue F, I bought a battery operated scrubber that I never got around to experimenting with. It’s got a huge surface. I thought of hot gluing the large micro mesh pads on the scrubber’s removable velcro pads. I went as far as ordering several of the velcro pads, one for each grit, but never got any further.
That sounds like it should work well, Jill! I’ll have a look for something similar, and if I end up with a decent solution I’ll post the info here. Thanks! :)
Here’s a handy conversion chart for some of the different abrasive numbering systems/grits.
I haven’t tried the polishing papers from Fire Mountain Gems yet, although I’ve been aware of them for some time.
I usually do rough hand sanding (when required) with wet and dry sandpaper from the hardware store, used wet with a few drops of dishwashing liquid in the water as Cindy described, starting from P240 and working through to P600 or P800. Those are FEPA/EURO grit numbers, which are what I see most often in Australia; it’s a slightly different numbering system to the P-less one that Cindy refers to.
For finer and finishing hand sanding I use Micro Mesh sanding sheets (bought in 150mm x 300mm sheets and cut into 150mm x 100mm thirds for use) — not the more common Micro Mesh sanding pads, which I don’t like! ;D — also used wet with a few drops of dishwashing liquid in the water, from 1500 through to 12000 in Micro Mesh’s own numbering system. Depending on what I’m sanding, I lay them flat, wrap them around a thick soft sponge, fold them to give edges or corners, etc. The 12000 gives a near-shiny satin finish even without buffing.
I don’t have a sink in my studio but there’s a bathroom next to it, so I usually do my hand sanding there. It has great lighting, and it doesn’t matter if I’m not particularly neat and splash water around. :D
Feature beads, special items, and experiments that I just “have to see now” get hand sanded.
Small fiddly beads, bulk/filler/background beads and similar are more likely to get tumble sanded when I’ve got a pile of them, using a vibratory tumbler, a splash of water, and a large quantity of small super-smooth pebbles picked out by hand one extremely boring day. Since I use a firm clay I rarely have fingerprints or baking fibrefill marks that need to be sanded out, so these beads generally go straight into the tumbler without any preliminary hand sanding. I check them after the tumble sanding is complete and spot-sand any blemishes that the tumbling didn’t remove, using the abrasives described above, but I don’t have to do that very often.
I’ve seen people recommending plasterer’s grids (used dry) for really rough hand sanding when you want to remove a lot of material in a hurry. I got a pack of those recently but haven’t tried them yet.
Wow Sue, just took a glance at your studio! I am amazed by the organization. I’d love to find out what you have in the boxes – are there rows of finished things, half-done items, raw canes? Another interesting thing: you don’t have any labels that I can see. I guess having clear boxes is enough to see what’s where?
Hi Maria,
The short answer to the “are there” question is “Yes”. ;D
It’s not ALL polymer clay related… it’s a bit of an “everything” studio, including the stages at which things are at. I could do a bit of a descriptive studio overview/tour, but that might be a bit much of a thread hijack.
There’s no high-level labelling because it’s not really needed. It’s actually pretty easy to see inside the clear containers when you’re in the room, and things are organised into zones which also helps. Usually a zone is a block of shelves in a bookcase, although sometimes it’s been more efficient or logical for a zone to be wider, e.g. a shelf and a half organised horizontally to span two bookcases, rather than a shelf an a half vertically within the one bookcase. I’ve tried to make the progression of zones logical, at least for the way my brain works, although I need to finish the last bit of shelving (in the corner you can’t see) to make it all work out.
There is detailed labelling, however. For instance, the containers in the top 3-4 shelves of the first two bookcases have beads grouped by colour: gemstone on one side, non-gemstone on the other. Since those beads move between boxes a fair bit as I acquire and use beads, split colours more finely, etc., there’s not much point labelling the containers themselves: you can tell more at a glance about a container by seeing its contents than you could by reading a label. But the different types of beads in each box are individually bagged and labelled with material, size, and (when I remember to do it) where I got them from, and how much they cost overall and per bead (except for things like seed beads, obviously!):
Sometimes visual labelling is more helpful, for instance having coloured samples on the tops of bottles of alcohol inks and paints, jars of mica powder, etc., so I can pick the colours I want out without needing to rummage, lift and replace bottles, and so on:
Sue
Thank you Sue for such a thoughtful and complete answer! I eagerly await more photos of your studio on this blog in the future!
great info, thx
All the difference form amateur to professional. Sand away…..
I still use w/d auto sandpaper
But I’d Love to know how long the papers from FMG last
I realize you just got them But I’m here with you guys for the long haul
So maybe when they wear out you’d pop back in and let us know how well the papers from FMG lasted compared to w/d auto sandpaper
thanks bunches – sherry
Great video my friend! Thanks Melodie