The Acrylic Roller – An Essential Polymer Clay Tool
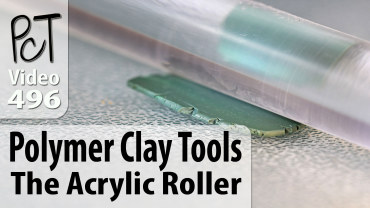
Video #496: For beginners, this acrylic hand rolling tool can even get you by if you don’t have a pasta machine yet.
More...
IN THIS POST: — tools — acrylic roller — rolling pin — brayer — acrylic brayer — sculpey — fimo — amaco — beginner — starter tools — (Topics marked with an asterisk* are discussed in the Comments Section below).
Topics Covered In This Video:
- Must Have Polymer Clay Tools.
A Polymer Clay Acrylic Roller is one of those essential polymer clay tools that every clayer should start with. - It’s a tool that you will also continue to use as your skills with polymer clay advance.
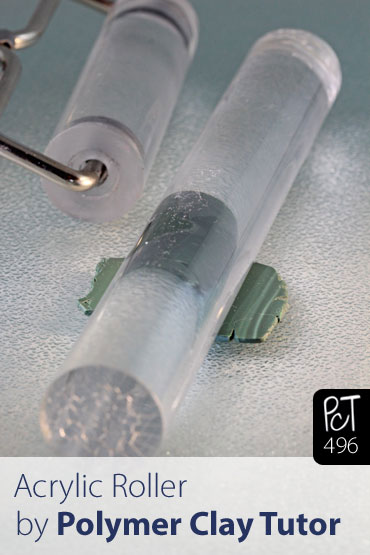
- Acrylic Rod 1" Diameter, 8" Long, polished smooth.
- Several companies sell them including Sculpey, Staedtler (Fimo) and AMACO.
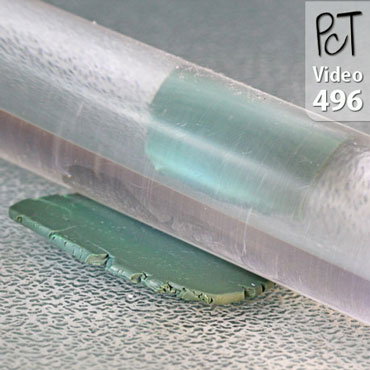
- Perfect for rolling flat, smooth sheets of polymer clay.
- Also used for reducing canes.
- Some people use the sides of glass bottles, round pens or wooden rolling pins.
- Acrylic Roller advantages are: Glassy smooth; Non-reactive surface; Non-stick; Easy to clean; Large 8" length; Nice weight for rolling.
- You should not use a wooden rolling pins. The disadvantages include: Wood grain leaves marks on the clay; Wood absorbs oils in clay; Wood grain swells from oils in the polymer clay; Clay sticks to wood.
- Some Plastic Rollers will react to clay and cause it to stick. So watch for that if you don’t buy a roller that is sold for use with polymer clay.
- Acrylic Brayer Option: Nice to have in addition to the acrylic roller; Half the size at 4" rod length; One hand operation; Nice for reducing canes; But harder to find.
- Your acrylic roller will be a great investment… you’ll have it forever and use it often!
00:00:03 –> 00:00:08 Hi guys, its Cindy Lietz, your Polymer Clay Tutor, and today’s Studio Tip we’re talking
00:00:08 –> 00:00:14 about Polymer Clay Tools, but specifically, the Acrylic Roller for Polymer clay.
00:00:14 –> 00:00:19 Now, beginners ask me all the time, ‘what should I start with?’
00:00:19 –> 00:00:22 I mean there’s tons of Polymer clay tools out there…and you know how much I love Polymer
00:00:22 –> 00:00:28 clay tools, but, they ask what I should start with, and this is what I would consider a
00:00:28 –> 00:00:36 must have Polymer clay tool, it is an acrylic rod that… actually several of the Polymer
00:00:36 –> 00:00:38 clay companies make them, they’re…
00:00:38 –> 00:00:43 Amaco makes one, Sculpey makes one, Fimo makes one, basically they’re just an acrylic rod
00:00:43 –> 00:00:47 about 8 inches long and they’re perfectly smooth.
00:00:47 –> 00:00:51 Now, you know, when we’re working with Polymer clay, we need to roll out sheets on a regular
00:00:51 –> 00:00:56 basis…sometimes we use a pasta machine, but if we need to roll them out by hand, an
00:00:56 –> 00:01:01 acrylic rod is really the perfect thing to use, there are people that will use the side
00:01:01 –> 00:01:09 of a glass bottle, and I’ve even seen people use the side of a pen, and it works, but the
00:01:09 –> 00:01:14 nice thing about these rods is… first of all, the size of them are great, they’re
00:01:14 –> 00:01:20 highly polished, so when you roll on the clay you’re not gonna get any marks left behind,
00:01:20 –> 00:01:26 and that would be especially true if you were gonna use like a wooden rolling pin.
00:01:26 –> 00:01:31 Wooden rolling pins are really not a good choice to use, because a couple of reasons,
00:01:31 –> 00:01:39 first you leave the grains of the wood behind on the surface of your clay, next, the wood
00:01:39 –> 00:01:44 can absorb the oils from the clay, and so they’ll soak into the wood, swell up the
00:01:44 –> 00:01:51 grains, make the clay stick to it, it’s not the best choice to use at all, so the
00:01:51 –> 00:01:53 acrylic is perfect for that.
00:01:53 –> 00:01:59 And some other plastics will eat away at the clay, so the acrylic doesn’t do that, and
00:01:59 –> 00:02:05 you can easily wipe it down just with a baby wipe or a paper towel with rubbing alcohol
00:02:05 –> 00:02:06 on it.
00:02:06 –> 00:02:12 Now another option… and I got this years later, so it’s not as important but it is
00:02:12 –> 00:02:19 really handy, is to get it in a brayer form, now, this is only 4 inches wide so it’s
00:02:19 –> 00:02:24 a little smaller, but the neat thing about a brayer is that you can use it one handed.
00:02:24 –> 00:02:33 Here’s a cane from my Faux Abalone tutorial, and what you can do is just use the brayer
00:02:33 –> 00:02:40 and use your other hand to move the clay around, so that’s a very handy tool.
00:02:40 –> 00:02:46 Now, it’s a good investment to have a roller, you’ll use it forever, I bought it years
00:02:46 –> 00:02:51 ago, and I think it was around $8 or something like that, I don’t know what they cost now,
00:02:51 –> 00:02:57 but you’ll have it forever, absolutely ever and you’ll use it on a regular basis.
00:02:57 –> 00:03:04 Now, I just wanted to quickly show you something kinda cool.
00:03:04 –> 00:03:10 You may remember a while back, I had done a video on how to store your jewelry tools,
00:03:10 –> 00:03:15 and I’ve got like these tin buckets that I put my Polymer clay tools in, and my…
00:03:15 –> 00:03:20 I use these more oval ones for putting pliers in and hammers in.
00:03:20 –> 00:03:27 Well, actually, a writer from the magazine, Step by Step jewelry…and this is their latest
00:03:27 –> 00:03:34 edition, one of the writers, Ronna Sarvas Weltmann, who’s actually a mixed media artist…she
00:03:34 –> 00:03:40 does Polymer clay jewelry as well as wire and that kinda thing, she saw this bucket
00:03:40 –> 00:03:47 for storing the jewelry and she was doing a tool storage article, so she asked us if
00:03:47 –> 00:03:50 she could feature our idea.
00:03:50 –> 00:03:57 And it was really fun, Doug took a great shot of this Copper pot here…I actually upgraded
00:03:57 –> 00:04:01 since the one I had in the other video, I had a Purple tin bucket but I found this antique
00:04:01 –> 00:04:04 copper one that’s just gorgeous and I liked it even better.
00:04:04 –> 00:04:09 So she wrote about it and showed some of the other things…other ideas that people have,
00:04:09 –> 00:04:16 there’s another woman here that uses the same storage units that I use for Polymer
00:04:16 –> 00:04:20 clay and stuff she was using hers for seed beads and all that kind of stuff.
00:04:20 –> 00:04:25 So I just thought I’d share that with you so you could see that we got published…that
00:04:25 –> 00:04:29 the idea got published in the magazine, alright?
00:04:29 –> 00:04:34 So I hope you enjoyed this, I’m gonna be doing more videos on the different essential
00:04:34 –> 00:04:38 tools, and then also the ones that are just nice to have, so I’ll be doing those in
00:04:38 –> 00:04:39 the future.
00:04:39 –> 00:04:44 If you have any suggestions or favorite tools of your own that you’d like to add to the
00:04:44 –> 00:04:47 comment section below, that would be great.
00:04:47 –> 00:04:52 Or if you have other ideas that you think you’d like to see me do a video on, that
00:04:52 –> 00:04:55 would be great as well, make sure to leave those in the comment section below, so make
00:04:55 –> 00:04:58 sure to let us know you liked this video.
00:04:58 –> 00:05:00 And we’ll see you next time, bye for now.
Our goal is to translate these videos into as many languages as possible. If you are interested in helping with this initiative, then please do contact us and we will figure out a way to make it worth your while :)
Resource Links:
- Related Article: One of my jewelry tool storage ideas was published in the Feb-Mar 2014 issue of Step by Step Wire Jewelry Magazine. The article written by Ronna Sarvas Weltman, was called “Smart Design and Clever Storage for Your Jewelry Studio.”
- Amazon: Acrylic Rod **
- Amazon: Acrylic Brayer **
- Related Video: Jewelry Tool Storage
- Related Video: Essential Polymer Clay Tools – Oven Thermometer
- Related Video: Faux Abalone Tutorial
Resources marked with a double ** asterisk are affiliate links. If you click on them and decide to buy something, we may receive some compensation. This does not affect the price you pay in any way. What it does do, however, is helps us to continue providing free videos for you, here at the PcT website. Using our links to purchase your tools and supplies, is always greatly appreciated.
Sponsored Ads & Special Promotions

Shareable Images


To share this full blog post anywhere on the web that allows links in comments, here's a shortened url to copy and paste...
>> https://mypct.ca/v496 <<
Want to chat about today’s post? That’s what the comment section below is for. Scroll Down… We’d love to hear from you!
Or... if you would like to request a topic for a future post, here is the link to do that… PcT Suggestion Box

The roller stays in my plastic tool bin in my studio which is 70 degrees all year round in the lower level of my home so heat or uv is not an issue. I will take your suggestion though and see if I can get a response from Polyform.
Hi Cindy, nice to see your bucket ended up in the magazine. Congrats!
I also have both of these acrylic rollers but have a question on the 8″ one. The rod is cracking and chipping on the ends. It doesn’t get thrown around or abused so I don’t understand why it is doing this. My brayer is also just starting to do this on one end. I keep them clean and wipe them down with a baby wipe. I even store them in a horizontal position. Any idea what is causing this? It never does it while I am using it and I don’t see any pieces that would get in the clay sheet and I have never found any in my clay. It is probably 3-4 yrs old and it does get used a lot. I finally taped the ends with masking tape, don’t know if that will help but am worried a piece might fall off and get in my clay piece. Is this breaking and cracking normal?
Hi Dixie Ann, Do you store your roller in a place where it gets hot or is exposed to a lot of sunshine? I have heard that heat and UV Rays can effect this type of roller. My roller is probably 8 years old and it only has a few tiny lines on each end. Nothing actually chipped or cracked though. It might be a good thing to run by Polyform and see if it has been an issue for people. Thanks for letting us know!
I am new to working with clay, and your tutorials are giving me the tools and ideas I need to be successful. I LOVE working with polymer clay. Best invention ever. As I watch your vid’s, I am thinking of many ways to use the different techniques. Thank you for making these video’s. Please keep them coming!
Hey Cindy, congrats on having your idea published in the magazine. Way to go, that’s so cool!!!
Hi Cindy – just wanted to say your crocus lariat looks fabulous ! Looking forward to finding some pretty stones to make one for myself:)
I have to say that I have been watching you on UTUBE and you do a great job!
Sorry dont know what happened did not mean to send the message yet. I have a question about ear wires . I like to make my own. the problem I have is wareing them they come out of my ears. No matter what adjustment I make large or small. does anyone have this happen . I would like to see a lesson on how to make ear wires that hook closed something like the little wire one that sort of hook behind a little wire. I know I dont write oftem I like to stay sort of in the background but I am watching and reading. I do apreciate all that you and Dug do. Love the videos . Cindy you seem like a natural in from of the camera. Thanks Barb .
Hi Barbara, thanks for your feedback on the vibratory tumblers. I would like to get one if/when my tumbler dies. Many people have said they really like them!
In regards to the ear wires with the hook (Kidney Ear Wires), I should do one in a tutorial sometime. Some people have trouble with earrings popping out and they offer a great solution. Another option is to get those clear silicone ear nuts to slide onto the back of the ear wire after you have put it through your ear. They are cheap and they will save you from losing your favorite pair of earrings!
Thanks again for popping by! It is lovely to hear from you!
Hi Cindy I have used both types of tumblers. I personally like the vibrabrating tumbler best. I can see what is happening in the tumbler , I usually run the bead about 2 days. I put it out in the garage and hardly hear it. I have the smaller tumbler. If I remember it works with about 3 lb. total. I dont weigh anything I check to see if its tumbleing if not I take for rock or beads out. the bead come out silky smooth. I am going to try three days someday.