Vol-033-1 Aurora Technique Northern Lights PcT Tutorial (Intro)
Video #190: “Sure would like to see someone tackle a bead or clay fabric mimic-ing the Aurora Borealis.” ~Jocelyn-C
More...

** This post is an introduction to one of our paid tutorials.
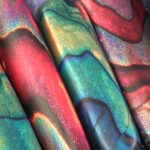
Well, I am beside myself with excitement to be able to share another original Cindy Lietz Exclusive with all of you guys. This one is called the Aurora Technique! Named after the stunning natural phenomenon known as the Aurora Borealis, or the Northern Lights, which this polymer clay technique mimics beautifully.
Here is a beautiful time-lapse video clip from Vimeo, that I wanted to share to help set the stage for this post...
I have seen the Northern Lights myself only once, when I lived for a short time in Edmonton, Alberta, Canada as a child. It was an amazing show of rainbow-colored lights that danced in the northern night sky. The conditions need to be just right for them to appear. It was an event I will never forget.
Like a rainbow that appears briefly after a storm, the Aurora Borealis is one of those fleeting gifts from Mother Nature, that makes you stop and commit to memory it’s incredible beauty… knowing at any moment it will disappear from view. If you have ever been lucky enough to experience the Northern Lights in person, you will know exactly what I mean.
When I was creating this unique polymer clay technique, there were two stories in particular that came to mind… inspiration from right here within our friendly community.
“We did pick out a name for our baby a while ago. Aurora Padme. Aurora because we are in Alaska and Padme because it means Lotus in Sanskrit language and it’s my favorite flower.” ~Rada-F
The Aurora Borealis are commonly seen in Alaska, so I imagine their beauty is at least in part what led Rada to decide on the name for her new little baby. On a personal note for Rada… I hope this week’s tutorial will inspire you to make some Aurora beads for your daughter and your family. You may even find that many others in your community will go crazy for these beads as well.
The other snippet that kept coming to mind was Jocelyn’s interpretation of something she saw in Jon Anderson’s amazing Fimo sculptural pieces. By the way, the technique I am teaching this week has nothing to do with what Jon does. The only parallel is the reference to Northern Lights, as Jocelyn points out in this comment...
“Cindy – Thanks for the link to Anderson’s work. It probably doesn’t make geographic sense but that group of penguins is stunning and the colors make me think that it’s a reflection of the aurora borealis on their chests.” ~Jocelyn-C
“
Wow, it does give me goosebumps! After the sanding, buffing on old jeans, and waxing... they are stunning. I'm going to put them on handmade ear wires, big ones, maybe with some shiny beads. I plan to keep on practicing and experimenting, I'm really loving it. Thank you Cindy, you have taught me so much.
Trudy M
“
Great tutorial! The first time I made these, they came out beautifully! I also covered some Crochet hooks for a friend, and she loves them! I love being the envy of my crafty friends when I show them what I made. I told them what a cool web-site you have, with great classes! I've certainly gotten my money's worth!!!
Naomi D
“
I am new to polymer clay work. This Aurora technique is awesome!!! It was totally worth the money I paid for the video. Keep up the great work!
Dorene T
Transcript coming soon...
Transcript coming soon...
Our goal is to translate these videos into as many languages as possible. If you are interested in helping with this initiative, then please do contact us and we will figure out a way to make it worth your while :)
Shareable Images


Want to chat about today’s post? That’s what the comment section below is for. Scroll Down… We’d love to hear from you!
Or... if you would like to request a topic for a future post, here is the link to do that… PcT Suggestion Box
Hi Chris,
With you now, this was one of my intentions to do soon, I did something sort of similar but didn’t place it on anything as I hadn’t made a large enough piece but for my piece I made the log bead as above and then flattened it with a piece of perspex I would then try putting that through the pasta machine, but I think Cindy may need to confirm that step.
Marie
Hi Guys, great discussion here! You are on the right track! The thing about the extruded snake is that in order to get those kind of swirls you are talking about, the rows of snakes need to be distorted a bit. On a bead that is kind of simple because as you rolll it around in your hands, the rolls get kind of pushed out of shape.
When you want to do a larger strip like for a cuff, think about putting those rows in kind of squiggly. Maybe push some of the ends one way and some the other with your hands. You could even curl some of the rows a little or drag s tool along them to distort them.
Don’t worry so much about messing up. It is part of the learning process. If you ‘screw it up’ just mix it up and use it as one of your colors in the stacking process. If it is really dark, it could even be your black if you wish.
Try again and let us know how it goes!
Hi Cindy!
Ahh, That’s the ticket!! I did what you said and it came out perfect, thanks so much for your help! I’m still learning and I know I need to relax a bit more and not worry about messing up!! As always Cindy you’re a gem and I am learning so much from you:)
Chris
That is excellent news Chris! Glad to be of help!
Need help! I love this tutorial but wondering if I’m missing a step when adding the Aurora blend to the bracelet? I got as far as running the clay log through the pasta machine at mid setting but the strip still has the ribbon like stripes and not that beautiful swirl pattern as shown on the video. I keep re-watching the video but this part of the tutorial shows the strip already done. What did you all do when you made this? I appreciate your guidance:)
Hi Chris,
Once you applied the layer to the scrap clay did you roll it into a ball first, before rolling it into the tube bead. I’ve made some of these beads and followed Cindy’s video so I think this might be what you need.
Hope it helps.
Marie
Hi Mare,
Thanks for your help!
I only rolled the strip of clay through the pasta machine. I will now try rolling it into a log and then put it through pasta machine, in the back of my mind I thought this was what to do but was afraid of turning it into mud. Thanks for answering Marie! I have messed up so many times at different techniques & even though you can always reuse clay I sometimes feel like all I do is mess up! I probably worry too much about going through my clay without producing a good product!!
Chris
Hi Chris,
Hope you read this before starting but the log bead rolling is last. After you have extruded the clay and you’ve cut it into six then placed them together put that through the pasta machine. Then make a barrel shape out of scrap clay and cut a piece of the joined strips you have put through the pasta machine. Wrap this round the scrap so that the stripes go horizontally around the scrap and also make sure it covers the top and bottom. Then roll this into a round ball, after doing this You should have some wavy patterns then roll it into the log type bead then you should have what will become Aurora after baking, sanding and buffing.
Hope it helps.
Marie
Hi Marie,
Ok, I understand that’s what you need to do if you’re making beads but I want to add this to the metal cuff blank to make the bracelet that’s in the next video. The video on this just shows the aurora strip already rolled out & Cindy didn’t show how she did this. She did say to add the strip to a piece of scrap clay but my strip now doesn’t have the wavy pattern even after adding it to scrap clay & running through PM several times. So I’m wondering if I need to make a barrel shape & roll a bit first to get the wavy pattern.
Thanks Marie!
Chris
Ms. Cindy, wanted to get back in touch. I’m no longer as computer literate as when working. Not too sure what bell I rang or button I pushed, the videos are working. Your helps were wonderful in directing me to get the fix done. Thanks so much. PS: found all my tools and molds, 2 pasta machines etc., etc. Boy do I have a lot to create. Not enough hours in the day. My special thanks for your help and mostly for keeping claying in front of the crafters. You do make it easy. Happy spring.
Hi Cindy!
Happy New Year to you and yours :). I did this tute today to kind of lift the post-holiday blahs and I’m enjoying it. I just hit a bit of a snag. I made my beads to resemble the ones you do in the tute, that are sort of “tablet” shaped, like long flattened barrels. I am on the verge of piercing them, but I’ve never pierced such long beads. The longest I did with this technique are about 2, 1/4 inches long. I used the bead rack pins with cornstarch, but I’m having trouble keeping the hole straight. Any tips please? I’m DYING to get to the step after baking when I can sand them and get the big reveal. Thanks in advance!
Karen
Hi Karen sorry for the long delay in getting back to you, with the holidays and the web upgrades it has been a little crazy around here! With holes that long it will take some practice. Make sure to start a hole at each end and then hopefully they will find each other in the middle. Rocking the bead back and forth as well as twisting the bead pin will help to let you know whether your wire is centered or not. It may help if you practice on a few scrap beads that you can squish up and keep trying on until you get holes that are straight. Hope that helps and Happy New Year to you and your family as well!!
Thanks! I totally understand you being swamped and I appreciate you finding the time to answer. I will give your suggestions a spin, Cindy :). And if all else fails, I can always pierce them front to back! Having said that, I am gonna try. I do really like how they look pierced from end to end.
@Cindy
Eureka! Your tips worked! Not that I doubted you :D. Here’s the link to a pic
Awesome job Karen! It looks like you got them perfectly aligned. Way to go!
Another Aurora Borealis alert for tonite and the 22nd. Go to NOAA.gov solar satellite section for specifics. St Paddy’s Day display made it down to Northern Illinois, so I’m keeping my fingers crossed!
what colors do you now use to create Aurora Technique (Northern Lights) since some of the original colors are not available?
Hi Pat! I find I can use any mica major clay colors (Premo, Kato, et.al.). Using Cindy’s color shifting and color blending recipes you can pretty much create any blues, yellow, and reds that you like and experiment.
Google “color shift” “color blending” and “mica colors” here and you will get loads of blogs tutes and excellent comments where folks share their experiences.
Good luck and all best….Jocelyn
Jocelyn – thank U for your reply. I’ll give it a try. Pat
Jocelyn is right, you can make whatever colors you want. Try mixing pearl with the other Premo colors in a 50:50 mix and you should get some pretty good results. You can also add mica powders like PearlEx to make the mica content even higher. Cobalt Blue and Pearl mixed will give you the old blue pearl… though you can only get cobalt online or in the multipacs. Good luck! Let us know if you come up with some nice Northern Lights!
For those of us dying to see the real deal, tonite’s readings are the highest they have been in a long time. Good luck, and if anyone does get a peak of a spectacular display while celebrating St. Paddy’s Day tonite, please post some cellie video.
Fingers crossed.
Will post photos of the aurora borealis necklace when I upload them.
I tried this technique and made some beads. I thought a little part of the extruded bit got a bit messed up but i used it anyways and was actually quite please with the result. I sold it yesterday.
Do you have clay suggestions for your aurora cane since some of the original clay colors are no longer available. Thank you, Pat
Hi Pat, Aurora’s come in many different colors. Just use any combination of the pearl colors that you like. I think that only the Red and the Blue Pearl are not in the 2oz packs anymore. There is Magenta Pearl, Light Green Pearl, Peacock Pearl, Purple Pearl and in the small sample packs you can still get the Blue Pearl. Have fun!
I have been enjoying Cindy’s tutorials for a couple of years now – and am finally putting the info into use so to speak! I am doing my first Arts and Crafts Show next weekend – am so very excited! I have made some earrings using the aurora borealis technique. Here is a link to some photos at my site.
I searched the thread so I hope I’m not repeating this, but I have a question regarding layout of the final product. If I want to make something flat, say like a barrette or pendant, what’s the best way to do this without wasting the aurora clay if I want the backside of the barrette to be a solid color? What I did today was rolled a large chunk of aurora clay into a bead (just like the video) and flattened it out but it took a lot of clay to do it. Could I slice off a section of aurora clay or layer them differently to still achieve the same effect? I was thinking I could roll it out flat instead of rolling it into a bead first. I’m not sure I would get the same cool striations, however. Suggestions? Experiences?
Hi Karen, without giving away too much from the tutorial, probably the best thing you could do so you don’t lose that organic look, is to make the bead the same way as the video including rolling in you hands. Then you could slice the bead down the center and flatten each side out separately then at least you will take less clay that way and you will have enough for two projects. Hopefully that makes sense. Good luck!
PS: Doug got your new last name switched over in the system so all future comments should go without a hitch… and congrats on you getting hitched :-)
Thanks for asking this question! Having re-watched this tutorial today, it was just what I was going to ask too! I want to try this on the pen barrels, instead of the faux wood tutorial.
thank you Cindy! Great tutorial!!!.
The very first time I made this, they came out wonderfully!
Fantastically!
Beautifully!
and easily!!!
I’ve also covered some Crochet hooks for a friend, and she absolutely loves them!
..I wish I could post a picture here to show off to everyone!
Thank you so very much. I just love being the envy of all my crafty friends when I showed them what I make. I also told them what a cool web-site you have with all the great classes! I certainly have gotten my money’s worth!!!
Thank you so much Naomi!! Your comment makes me feel so wonderful today! I am so pleased that you are finding success with the tutorials. It is excellent to hear you are the envy of all your craft friends! (I love it too when I get the chance to feel that way. Makes all the effort worth it!) :)
BTW… you can share pictures of your PcT inspired pieces over at the Facebook Members Photo Gallery.
.
The time you’ve spent on these tutorials and your web site is amazing…and you obviously have a wonderful husband who supports you. Thank you!
I’d love to dive into the whole deal, really, but I have to pinch pennies right now….I shouldn’t even be spending $ on crafty stuff, but I need my sanity more than ever at this point in time, and I just HAVE TO KNOW how you did that Aurora Technique! So beautiful!
Thanks again for your time.
Naomi. &:-)
At my facebook page I have a photo of an aurora taken over Hobart in Tasmania, Australia just recently. We call it the southern lights here down under.
Planning to make some beads soon.
Carolyn
What gorgeous colors!! TY for sharing
Not that every pic in National Geographic isn’t wonderful and inspiring, but, if you follow this link, I think you folks will be blown away by this brand news series of aurora photographs:
Hope you come away with some great ideas, and re-watch the tute. It is amazingly simple to do, and the results are spectacular.
Sure hope so Ken. For those following this thread, grant you a Huffn’Puff source, but a good article on the upcoming display.
No luck again, Cloudy at night both Friday/Saturday and Saturday/Sunday. Oh well, maybe next time……
Thanks for the heads up, the way things are going I just might get to see the auora without having to travel to the artic, and to think that the solar cycle doesn’t even reach peak until 2013. Keeping my fingers crossed for clear skies here in Philadelphia, it was overcast here for the transit of Venus back in June.
Wow, another chance for us lower in lats, LOL!!! June 14, 15, and 16th, 2012
Good luck, and hope some of you get to see it!
gse-aa mailing list
A significant event located on the Sun facing Earth took place on July
12. The effects of this event will begin to reach Earth early on the
14th of July GMT.
Observers in North America should watch for aurora on the nights of
the 14th and 15th local time. Depending on the configuration of the
disturbance, auroras may be visible as far south as the middle tier of
states.
Activity may remain high also on the 16th. Auroras should be
visible Southern New Zealand, Tasmania, and of course, Antarctica
OK… I had to pass this along to you guys. It was recently brought to our attention by a subscriber (Robert-N). The entire video (only about 2 minutes long) is fascinating to watch, but the main tie in to this blog is with the very cool filming of the Northern Lights (Aurora Borealis) as seen from the space station looking down on them… more inspiration for this Vol-033-1 Aurora Technique shown above. Enjoy…
Video Credits and Description: Flying Over the Earth at Night
Gateway to Astronaut Photography, NASA ; Compilation: Bitmeizer
Explanation Of The Things Shown In The Clip: Many wonders are visible when flying over the Earth at night. A compilation of such visual spectacles was captured recently from the International Space Station (ISS) and set to rousing music. Passing below are white clouds, orange city lights, lightning flashes in thunderstorms, and dark blue seas. On the horizon is the golden haze of Earth’s thin atmosphere, frequently decorated by dancing auroras as the video progresses. The green parts of auroras typically remain below the space station, but the station flies right through the red and purple auroral peaks. Solar panels of the ISS are seen around the frame edges. The ominous wave of approaching brightness at the end of each sequence is just the dawn of the sunlit half of Earth, a dawn that occurs every 90 minutes.
Fascinating Doug, great find and thanks for the share. The nite light concentrations make it look like the planet is on fire.
Stayed up late the last two nites because there was a slight chance the display would come to Connecticut. If it did, it was when I wasn’t looking.
Also, here’s the Aural Alert link I signed up for and what the notification looks like:
A solar event occurred on the 14th of June that will lead to increased
auroral activity that may be visible in southern Canada and northern
United States. We expect the auroral activity index to be 4 or
greater. Watch the short term forecast at
gi.alaska.edu/AuroraForecast/.
The nights are too bright to see the aurora in northern Canada,
Alaska, Russia and Scandinavia.
Well, seems like there might be a good chance to see the Aurora Borealis tonite in more southerly locations, see the link: swpc.noaa.gov/Aurora/globeNW.html
If you are lucky enough to have clear skies and are up late, by all means take a look at the sky.
Good luck!!!
More fun, recent pics:
cedareden.smugmug.com//The-Adirondacks/Northern-Lights/19227845_R96h8z#!i=1683047140&k=MrpktX6
Hey, if I win the lottery, we’ll allllllll go, my treat. Mush!
I’d like that. :-)
I was soooo bummed, too, Ken. Called the local weather tv station, and they agreed we might see some action in CT if the cloud cover cleared. Hah! I should be so lucky. Dragged myself outside at 3 am, dressed in pjs and slippers. Nothing.
I promise I will stay on top of solar storms, I set a google alert link for them. If you and I are diligent and pray to the borealis fairy, lol, maybe this year could be the year, scientists are reporting we should expect an active year with solar disturbances.
They actually cancelled air flights with this storm, and some folks reported a lot of wonky online occurances, so I feel sort of bad wishing for them.
Not terrible, just sort of……lol.
Well we have untill 2013 for this current cycle of solar storms, the sun runs in an 11 yr ramp up to what is called solar Max, and then 11 yr decline to solar min., solar max this time is in 2013, so we’ve just got to keep our fingers crossed or plan a vacation to above the artic circle
Ok, so who saw the auroras last night that dipped as far south as arkansas? I missed them AGAIN because I didn’t know they were going to happen.
Oh, shoot, Ken. I didn’t know about it either. I was once on a plane and the pilot came on the loudspeaker saying that if we looked out the left side of the plane we could see the northern lights. I was sitting in a window seat on the right side of the plane and the person sitting next to me was asleep so I couldn’t get up to look. Darn.
I just heard about them, too! I missed it! We need to have some kind of alarm to let each other know. Now, I’m just going to have to make some of these beads to help me get over it. Did anyone else see any and get any photos?
I think there are pictures on space.com and I know one of them was from the shores of lake michigan, just like there was a photo from west chester, pa about 30 mins from philadelphia.
You know I would have lean over the person and prayed they didn’t wake up!! LOL!! I remember flying at age 5 to Denver and wanted to sit near the window but didn’t have the nerve to pick that seat. The lady that sat there let me sit on her lap to look out. It was great but, I felt cheated because I didn’t have the guts to sit near the window. So, now I alway request a window seat and act like a tourist taking pictures the whole flight! LOL!!
That is sooo cool Ken! I had no idea that the Aurora Borealis could drop down so far South. Too bad you missed them. That is a total bummer! (Sorry let my 40’s show again.) Are they expected to appear some more in your area? I would be tempted to stand outside at night for days until they showed again, if I thought they could happen in my area. (Or at least spend some time sitting by the window! lol)
It’s a rare event for them to be seen outside of the arctic yet alone as far south as Arkansas and Alabama. You never know, this was an exceptional magnetic storm that erupted from the sun on Saturday and took two days to reach the earth. If anyone is interested check out Space.com, they have photos up on that site, some of the ones from Michigan are absolutely stunning.
Heads up folks. Solar flare just hit, so possibility of aurora borealis coming further south. Here is a link to the news and video:
huffingtonpost.com/2012/01/23/strongest-solar-storm-sin_0_n_1223841.html?icid=maing-grid10%7Chtmlws-main-bb%7Cdl1%7Csec1_lnk3%26pLid%3D129790
I’d tune into local news tonite to see if you are one of the lucky ones.
I will stay awake. I will stay awake…..I will….
I can’t catch a break, it was cloudy last night and early this morning, I’m beginging to think Mother Nature is trying to tell me something.
Hi Cindy,
I would like to use the Aurora technique on some stemware or decorative serving dishes. Do I need make any modifications? Less black? Also, when sanding glasses, bowls, etc, do I really need to buff the pieces since I always apply multiple coats of glossy or satin glaze? I don’t make beads out of polymer clay-at least not yet.
Thanks for your time.
Rolanda
Thank you Jocelyn, love clay attic. Heading there now. 3 a.m. and I should be heading to bed……after the attic!
The ultimate information source for mica based clays has to be the following: glassattic.com/polymer/mica.h
In the case mentioned above with plain lilac, a solution may be to make mica powder based clays or to add certain amounts of pearl and translucents in order to acheive colors that will shift, thus add well into any combination for the aurora borealis technique.
Pages of suggestions, pics, and descriptions….enjoy!
I finally tried the technique after hemming and hawing. Wow! It does give me goosebumps. I am going to use maybe one less black circle because the strip of black would not be sanded away even when I started with heavy duty drywall. BUT, after the sanding, buffing on old jeans, and future (brushed on, I remember your comment on dripping Cindy) they are still stunning. I’m going to put them on handmade earwires, big ones and maybe add some shiny beads.
I plan to keep on practicing (I bought so much of the premo pearl colors at polymer express since they’ll soon be gone) and experimenting. I’m starting to get the hang of this. And really loving it. Thank you Cindy for all you give and to all the Lietz “family” on this blog who have, through advice and their own struggles, have taught me soooooo much. Stay healthy and happy everyone.
Hi guys, on with the saga of the aurora technique. I have upload two photos on the facebook gallery page of the second attempt, it looks much nicer than the first one, it still doesn;t look like Cindy’s. Though in saying that, i like it.
Cheers
Thanks guys. Yes the lilac was a dull lilac and I think that was the main problem. I keep forgetting to “Try before you do” ie the teardrop method for trying colours. You’ve told me that before Cindy. I did so much sanding that it went down to the core clay. hence the question. I will have to go back to the drawing board and test colours out.
Appreciate the help, thanks again.
Kat, just kidding. So sorry if I made you feel bad. You know how much I enjoy and value all your contribs here. Cranky day excuse, K? LOL!!!
Sandra, welcome. Interesting color combo, black, gold, light purple, off white, then blue. Sounds beautiful. Color blending with polymer is an art in itself. My guidelines are try it, and see what happens. Cindy has demystified this process here at the blog, and I would suggest you hit the search box in the upper left to do some research.
In this case, wonder if more sanding is needed to reveal the color combo beneath the black layer? One way to check is to use a blade to remove the surface black and see if the color combos underneath work. I found that using a blade to remove layers faster to be helpful.
Second possibility is that due to colors chosen, when squooshed together in the tube, made “mud” rather than blended nicely. I’d advise you to use the Lietz Teardrop blend technique with the chosen colors ahead of time, just using small amounts of clay as a pretest. If the resulting sheet shows sections of “blah” combos, you can move on and try the next set of colors.
The third factor may be that you are trying to incorporate regular colors with the mica laden colors. Most of the “glow” that occurs in the aurora effect comes from the sparkle, and the lilac may cause dead spots thus emphasizing the black/gray.
Cindy’s choice of bright primary colors, contrasting with the black, may be the secret to the technique. I tried a combo using the coppers and golds and loved the results. Not as bright, but, gorgeous color gradiations..almost a mokame gane effect.
Wish you the best of luck.
Hi there, i just tried this technique and i must have done something wrong. I used gold, lilac, pearl and blue pearl with black at the front, in the order i have written. But when sanded it looked nothing like cindy got. Is it the order i had the colours in? or the wrong colours?
Any help greatly appreciated.
@sandra: Jocelyn answered this beautifully for you Sandra. If the colors aren’t quite looking right, you have either used dull colors or you haven’t done quite enough sanding. Maybe sand with a courser grit like 320grit to start with, or use the blade scraping technique Jocelyn mentioned. The cool thing about this technique is that it is so quick and easy to do and uses not a lot of clay, so you can always try it again until you get it exactly how you want it. Good luck and let us know how it goes!
LOL!!! Yeah, go ahead Kat and pick on the neurologically impaired kid…….All of you I am sure detect something off, and it’s multiple sclerosis. Decided not to let it stop me from expressing myself here and other places.
I cannot express how much I enjoy producing these!!!!!! Cindy you are a genius.
@Jocelyn: Good for you, Jocelyn. Keep on expressing!
@Linda K.: You know the first thing I thought when I read this?
Breast feeding.
I know we’re all very friendly, but that would have been way too much information, lol! ;)
@Silverleaf: LOL!!!!
@Silverleaf: Too funny!
@Jocelyn: Jocelyn, I do not detect anything “off” with you at all…what comes through (at least IMO) when I read your comments is a great, fun personality. I love reading your comments filled with smart ideas and interesting things you’ve tried. I hope you haven’t taken my comments as picking on you — that most definitely isn’t how they were meant. I was just teasing you…we all make mistakes in our rush to join in on the fun here…me just as much (sometimes more!) than anyone. You must know that I adore you, Jocelyn! Hugs, Kat
…and remove the “l”, too?
(if “excluded” is s’posed to be “extruded”, I mean…)
Just teasing you, of course. Your meaning was clear, and think everyone understood what you meant!) ;D
insert r too
change the c to a t
Have to admit, when this tut arrived I was in a pretty dark cold snow bound existence.
Wow!
Every time I watch it I feel like I have sparklers shooting off alllllllll over my body. Just ingenious and fab, especially because if you do the work you get the warm reds and the cool blues all in the same strip of excluded clay.
(Cindy, please ignore my email on how to post for this technique, surprisingly I figured it out!)
This has become my favorite technique. It is simply brilliant. What I tend to do with tutorials, is the same thing I do with cooking. I like to tweak the directions some, because I have trouble leaving well enough alone! While your instructions were perfect on there own, I played around a little with it. Instead of the black, I used a dark silver with a small amount of silver glitter. Also, I had left over clay from a rainbow cane, so I used more colors in the spectrum then was called for. Anyway, it came out so beautifully, I can hardly believe I made it, but the credit goes to you. Thank you!
Julia
@Dorene: Thank you Dorene for saying that! It means so much to hear from people new to polymer clay. Enjoy the process… it’s a fun one!
@Julia B: Oooo your tweaks of the technique sound wonderful Julia! I’d love to see them posted on our Polymer Clay Facebook Gallery page. One of the things I was determined to do as a teacher of the arts, was to teach in a way that others would be able to find their own artistic voice through the learning process. There is no point in teaching a whole bunch of people to become clones of yourself. I want people to find that joy of creating inside themselves. Sounds like you have found that joy… Way to go!
I am new to polymer clay work. This Aurora technique is awesome!!! It alone was worth the money I paid for the videos. I can’t wait to view the others. Keep up the great work!
Wow! You are a true artist! :) Amazing.
How exciting, we may see the aurora here in the UK this week!
Apparently if we’re lucky it will be visible Thursday night because there’s a massive increase in solar flare activity and shouldn’t be much cloud.
How cool is that??
@Silverleaf: Do you know your Lat & Long ? If you don’t what city/town do you live in and I’ll look it up. I wonder if it’ll dip far enough south for Philadelphia to catch a view.
@Ken H: I live in Chesterfield, Latitude = 53.2362, Longitude = -1.4392. Hope that’s in the right format!
I’m really hoping I’ll be able to see something at least, I’ve never seen the aurora before.
@Silverleaf: Thanks, I hope you do get to see it, I think we’re too far south. Philadelphia is 39 Lat. and I would have thought I’d have heard something on the news by now. It’s a super rare occasion that it dips this far south, and the last time it was overcast/raining.
@Ken H: The aurora forecast website I use says there’s no major geomagnetic activity today. :( But I’m hoping for the future, because the next few years will have much more activity than normal.
Thank you Cindy, I just wanted you to know that what you do is appreciated, when you pour your heart, soul and mind into something creative only to have people disparage(sp) what you’re doing can suck the urge to create right out of you, so just don’t let it bother you, as I’ve read in the books on starting your own craft business, you’ve got some of the best marketing out there – ” word of mouth” – so let what these “folks not in the know” say go in one ear and out the other, they just don’t know what they’re missing.
I finally got a chance to play with my clay today. My washing machine broke and needs to be replaced because it’s going to cost over $400 to fix it. So I went to my mother’s (who is wintering in the south) with all of our laundry and spent the day there in peace and quiet and had fun with my clay. One of the first things I did was try this technique. It is sinfully easy!!! I kept thinking there should be more to it. Again, thank you so much Cindy. Your tutorials are worth every penny and more!!
Someone thinks $9.95 for three months is a rip off? My goodness. For what I have learned from these videos, I would pay that every month.