
When Baking Beads, It’s OK to Sometimes Break Rules
How Long Do You Bake Your Beads? How’s that Working For You?
More...

Rules are sometimes meant to be broken. And when it comes to baking polymer clay beads, this is no exception!
I have been reading about polymer clay artists that bake their polymer clay beads for twice as long as it says on the package. They say this makes a much stronger bead.
Being kind of impatient, I had never really given this idea a try. I just baked the beads for as long as the manufacturer suggested, and then took them out when they were done. But I’ve been having a few problems with some of my beads breaking and cracking. So I thought I would give the extended bake time a try. And guess what? It works!!
Instead of baking my polymer clay beads for the recommended 30 minutes, I baked them for 1 hour. Please note that it is very important to still bake your beads at the right temperature for the clay, or it will burn. So don’t break that rule!
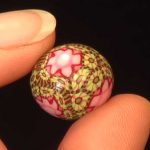
My polymer clay beads came out rock hard. You could tell they were harder, even on the round beads. And because they were harder, they sanded easier and buffed to a much smoother finish!
Holy cow!!! Why did I wait so long to try this? Sometimes it doesn’t pay to be impatient.
Sponsored Ads & Special Promotions
Want to chat about today’s post? That’s what the comment section below is for. Scroll Down… We’d love to hear from you!
Or... if you would like to request a topic for a future post, here is the link to do that… PcT Suggestion Box
Hello Cindy, it’s my first time at your blog and I’m totally in love with your work performed as I have seen so far.
I am searching for help because my first test with FIMO soft has been a complete flop when I found your awe-inspiring webside. Possibly you could find the reason for my “disaster”. All my pieces are fragile and are breaking imediatly when bending like breakaway glass.
I rolled out the FIMO 2 playing card thick covered it with foil from a CD, inked it with alcohol ink and baked it in my convection oven for 60 min at 120°C (~250°F). The control button allows no lower temperature, FIMO recommends 110°C. I put the clay on a sheet of baking paper and in an aluminium pan with 3 cardboards at the bottom. It was tented with another aluminium pan, but the air could go through a little gap where the pans met. I used 3 thermometers (1. from FIMO, 2. baking thermometer, 3. digital thermometer from a kiln with tentacle. The detector of the digital thermometer was inside of the aluminium pan) and all were different in a range of 10°C. The lowest said 110° the hottest said 120°C. The oven was preheated but the temperature sank when the door was opening and rose within 10 min from 80°C to then steady 110/120°C. After that moment my timer starts measuring. When baking was finished the pieces were flexible but when cooled down they were inflexible and breaked imediatly when I gave a little pressure to it. So what did I wrong? Your expert advice would be very appreciated and I hope my english isn’t too faultly to understand :-) Thanks for your efforts
Hi Petra, you did a great job explaining yourself. I am surprised that your piece was breakable, since it sounds like you did everything right as far as the baking goes. I don’t work with Fimo that much, so I am not totally sure if it could be an issue with the Fimo itself. Did you condition it well? Was it dry and crumbly when mixing it, firm but mixable or super squishy? Was the ink dry when you baked it?Did the clay get wet? I am just trying to figure out what could be happening. I know that Fimo can be affected by water so just throwing ideas out there. Does anyone else here that works a lot with Fimo have any ideas? Hopefully we can get to the bottom of this. In the meantime why don’t you try it again with a different clay? And see if that makes a difference. Let me know…
Thanks, I appreciate the input!
Hi Leslee, I’m sorry I meant to respond here myself as well. Like Shawn suggested, i would go ahead and re-bake the pieces. I can’t see why there would be any problems with it being old. But you never know, with stuff like that. The best thing to do is try it and then watch any negative or positive effects down the road. Do let us know how it goes. We can all learn from what each other does. Thanks for your comment!
I’ve personally never tried to re bake anything after that long a period.
Looking at it purely from the standpoint of re baking an underbaked item then yes, it would make them harder if you do it at the right temp. Theoretically you’re just re baking an underbaked piece.
I’d be very interested to know if the age would make any difference to that.
On one hand I don’t see the age making a difference. On the other, there’s the more scientific part of my mind that wonders whether storage temperature and things like coating would make a difference. It all comes down to whether there is some sort of continuous chemical reaction taking place that might change the clay itself.
But in reality I’m probably over-thinking and it really is simple. Personally I’d just try to re bake a piece and see if it does get harder. Either that or contact the manufacturer. They’re usually very helpful.
But I’m sure one of the smart people here might have an answer.
Hi…I have a HUGE bunch of polymer clay beads I made years ago. I had a lot of trouble with them being weak and breaking or cracking. I have since learned that it was probably due to both too low of heat and not baking them long enough. Would it still be effective after all these years to re bake them?
Oh yes, forgot to mention a technique I learnt not too long ago.
I sometimes needed to bake smaller sections partially so that I had a bit of structure to add onto without them deforming. I also can’t always wait for a few pieces to bake and firing up and entire oven for a tiny piece is just a waste. This works great as long as there isn’t any metal or foil inside.
All I do is fill a microwave safe container with water and put the piece in there. Just don’t overfill or it might boil over. Then I just nuke it for a couple of minutes until it’s hard enought ot work with.
The water seems to eliminate the issues that microwaving polymers usually causes. I’ve never had any issues after a final bake.
I would never try a full bake using this or bake anything that might be considered a joint or supporting piece. But I’ve found a lot of use for it.
I can’t think where that might come in handing with beads but I find that the more techniques I have the better.
Just one warning. The microwave will super heat water so whatever you do, don’t take it out and pour cold water in. The result is not good. I usually bake it then leave it for a minute or 2.
Hi all–
Lots of great information from Cindy and commenters. Somebody mentioned using the toaster oven only if she’s remaining in the room–excellent advice that I want to reinforce for anybody new to this.
All the materials we use are safe at the recommended curing temperatures, including the cardstock (because we all remember from the book title that paper burns at about Farenheit 451). BUT–and this is where the process goes pear-shaped–your toaster oven doesn’t maintain a nice, even temperature.
It’s a little like firing clay with a flamethrower–on at full blast, off. On at full blast again…off. That’s why, when I covered a plastic switchplate with polymer (a switchplate that was supposed to be fine at clay-curing temperatures) and baked it in my toaster oven, I was very, very lucky to walk back into the room just as the flames started coming out the front of the oven. The only damage was the scorched enamel finish on the toaster oven. And the flaming project, of course.
Now I’m a fan of the oval roasting pan method. It was about ten bucks at Target, and I added some tiles to the bottom…now I can wait to bake until I’ve made enough things to fill the pan (and the lid means no cat fur can drift onto the clay….eeww). I feel all green because I’m not turning the oven on to bake a dozen beads…and It’s also much easier to take out of the oven, since I’m a klutz and I’ve had to chase more than a couple of hot beads around the kitchen floor.
Excellent point. I tried using a toaster oven but honestly when it comes to large or complex pieces or even multi-bake pieces it’s not great. I just couldn’t nail down a consistent temperature. Even though I paint my pieces after and a scorched piece isn’t an issue it does make it more brittle. That can cause serious issues in joints and finer parts that don’t have armatures.
I also agree with the pan idea. I’m also a huge klutz so I’m really prone to tilting the tile. Except in thew case of sculpture you end up with shattered pieces. Pretty heartbreaking if you’ve put in days of work.
I do the same with the pan and tile in the bottom. The pan I use is pretty old and never had a lid so I cover with a tile if the piece isn’t too big. That way I’ve created an oven in the oven with a more consistant temperature. It pretty much eliminates scorching.
I personally find that it’s just simpler to collect
Another point I’d like to bring up.
You won’t see it as easily on cardstock but it does the same thing. Paper will generally leach the plasticiser from polymer clay if you leave it on for too long in it’s raw state. It’s ok if you put it on and bake it soon after. I always place my pieces on baking paper and then on the tiles. Baking paper has a much higher flash point. So it’s better to either use baking paper or only use card close to baking. The paper basically starts looking almost like something oily was on it.
I know your site is primarily for beads, but I have questions about the baking process. My wife does animal sculptures and has been using the Crayola soft clay, but was having problems with breakage during shipping. She wants to try the Premo clay and bake them for durability. But she’s not sure how long to bake. The thickness can vary widely between say, the body and the tail, or ears and legs. I know the foil “innards” would help, but not sure it would account for all variations in thickness. Any suggestions? thanks so much.
I know exactly where you’re coming from. I’m a polymer clay sculptor so I’ve dealt with this issue.
The whole “bake for X amount of time per Y amount of thickness” thing gets pretty confusing when you’re working with irregularly shaped pieces.
I would definitely recommend she move over to Premo. I use Sculpey products exclusively.
It actually doesn’t matter how long you bake as long as it’s not too short. You can’t overbake Sculpey. I mean you can bake it too hot and it will burn but if the temperature is right you could bake forever if you wanted to. I often make pieces that need to be baked in sections. I’ll bake the basic figure. Then I’ll add other pieces and bake again. No problems so far.
If you calculate the time for the thinnest parts then the thin sections will be done but the bulky parts won’t.
So it’s temperature and not time that burns.
There are some tricks I’ve discovered.
I always bake on some baking paper on a ceramic tile. To keep the top of the piece from burning I tent a piece of paper over it. The paper won’t burn and it provides protection.
You can also find a way to have another tile above the piece as well. But then you have to find something high enough that won’t burn to serve as separators.
But the paper is usually enough.
My final trick has come from research and years of experimenting. Ramp baking.
Since I’ve used this technique I’ve had consistent results everytime. It takes longer but you have evenly baked pieces that are strong. Though I really wouldn’t bother using it if it were something like a bead. It’s kind of overkill. Ramp baking works best with sculptures.
Pre-heat the oven to 100c/212f bake for 30 minutes then remove.
Ramp the temperature up to 110c/230f for 20 minutes and remove.
Ramp up to 120c/248f and bake for 20 minute then remove.
And finally ramp up to 130c/266f for 30 minutes and you’re done.
Always wait until the oven is at the next temperature before the next bake. I have done this without removing between steps and it doesn’t really make a difference. But I like to take it out between steps to check on the piece.
I also have a basin of cold water ready and dunk the piece between pieces. It seems to add strength and if you’re using liquid clay it changes the way it looks.
Hope this helps.
Thank you so much Shawn for your answer to Mike’s question. You shared some very helpful and interesting information that I am sure many people who like to sculpt with their polymer clay will really appreciate!
It’s entirely my pleasure. Glad to help.
Does baking the beads longer create toxic fumes? Also, what is all this nonsense about baking beads in your oven making the oven unsafe for food? I saw something like this on a box for a tiny clay oven. Is it just a marketing tool? I’ve been making clay for 15 years and if it’s true, I should probably have cancer by now!
@sarah harkins: Well, Sarah I sure hope you don’t have cancer.
Purists and the clay companies are adamant about not transfering the plastics in clay to any surface that will be used for food, thus most dictate using tools strictly for clay.
The oven, which can be the source of build up and producer of fumes, is treated the same, keep one oven for clay, or bake items in an aluminum packet which can be opened outdoors, wipe down the oven thoroughly after each clay bake if using for food (I assume this means oven cleaner and scrubbing all surfaces and racks), etc.
In addition, some sites caution against baking clay around small children, animals, birds or other folks with auto immune problems, etc.
I’d hit the search facility in the upper left using baking saftey as the keyword and see what you get. I’d also go to the site of the manufactor of the clay you mostly use and download their pdf’s on safety and cautions.
Googling the web for information wouldn’t be a bad idea either.
It’s like stained glass, due to the lead compounds found in the solder. The cancer rate for this hobby jumped and it was discovered that those that smoked during the glass work inhaled and ingested more lead.
For me, dedicated stupid toaster oven (yes it spikes, lol), under the kitchen exhaust fan (loud but on), objects not placed on metal, and all objects tented. I also keep the windows open, and have a few fans blowing out the windows.
Back in the condo, I baked outside the sliding glass door on the deck because we had cats. To me, one of those tables or units that hold air conditioners in place outside is ideal. Just pop that oven out there and bake away.
Hope this helps.
@sarah harkins: That is a great question. Premo Sculpey polymer clay is certified non-toxic for use in a regular oven, but it never hurts to err on the side of caution when working with any art material. There is some excellent discussion on this topic in another thread. Do give it a read, it is very informative. Click the link by my name to go straight to the safety conversation.
Well, I burned my beads for the first time. Didn’t keep an eye on the thermometer. They were fuschia and I used a texture sheet and African Bronze Guilder’s paste. First time I really played with various techniques. So, I’ll be making a new batch tomorrow. And watching the thermometer like a hawk. Thank you Cindy and fellow clayers for all the good advice. Now, I’ve just got to follow that advice!
@Trudy M: Hi Trudy! Best of luck with your next set of beads. Don’t worry, most of us have burned clay at least once! I’ve seen some really cool pieces made using Gilder’s paste…can’t wait to try it myself sometime. (There are just so many new products to try with polymer clay!) In the projects I’ve seen, they used Gilder’s paste on clay that was already cured — the paste never went into the oven (it was air-dryed.) When your clay burned, did it have wet paste on it? I’m just wondering, as I’ve no experience with the stuff yet… Anyway, please let us know how your project turns out…can’t wait to hear (and hopefully see in Cindy’s Facebook gallery!) ~Kat ;~D
Very true. You never know what will spark your creativity until you see it. So exposing yourself to as much as possible IS key. Cindy’s videos are the best place to start, expecially for “visual” people. I’m often inspired by what I read here, too—in all of these wonderful blog postings…
I will agree that Christi’s books aren’t as instructional but I suppose I like the idea that they are more of a free flow concept and it allows you to use it as a guideline and make it your own. For me though it was just nice to pick up snippets of information that I could adapt. And I’d never seen the things she made so it unlocked a whole new set of ideas for me.
But yes I will definitely agree that a video would trump a written page any day. Especially if it’s a good video.
I really must sit and go through some of the videos. Just another thing on my very long to do list.
I think what it all boils down to is the more resources as we can get hold of and as much inspiration as we can find.
Hey anytime. I find that the more you learn about polymer, the more you want to do and sometimes we just can’t figure out how. These kinds of resources where you have a mix of opinions really broadens your knowledge.
I’ve never actually tried pure beading so there are techniques I’ve never tried. You guys have all given me some great tips here that I wouldn’t have tried.
And yes, sculpting is a whole other set of skills.
Another problem is that we get so involved with what we make all the time we never really think outside to trying other things.
Since you guys focus mainly on beads but some of you may want to expand a little, there is a really good way to mix between standard beads and sculpting. If you’ve never tried making focal beads you really should. In general focal beads are bigger or differently shaped beads. I saw some work by a lady named Christi Friesen. She makes some of the best pieces I’ve ever seen and her books are amazing. These are focal beads that are basically little sculptures that act as beads.
I learnt so much from them. Honestly so many of her techniques I use everytime. No sales pitch here but if you want to expand your technique base and learn to make some unique pieces then that’s really a way to go. The focal beads are spectacular. The idea that you can sculpt fish, birds and dragons at such small scales is amazing.
And perhaps you can make full pendants to add to bead pieces. You’ll see what your options really are once you see that.
I have a few of her books but my favourite is the one about polymer clay and mixed media. I’d never though of adding sem-precious stones or watch gears but take a look and see the final result.
Take a look at her gallery (cforiginals.net) and especially look at the jewelery and focal beads. Oh yes, the section of downloadable projects is great to get a couple of sample projects to try out.
@shawn: Yes, Christi is fun and has some great ideas in her books … I have several … they still don’t hold a candle to Cindy’s videos. I guess it is the difference between the written and the visual. I’ll go for the visual any time. Wish I could attend conferences and workshops. Can’t do that so Cindy’s tutorials are the absolute best way for me to go. No one does them better!
Just glad I can help some people. I only use armatures if the piece is large enough. Though I’ve found if you align everything right then you can get away without one. Or I’ll just bake in sections and add on. Whatever is going to work best at the time.
If it’s a figurine then I’ll use toothpicks in the neck, arm and leg joint just to add stability. Sometime thicker gauge wire. Though that just comes down to what I get hold of.
Other than that I’ll just make an armature by twisting wire into the skeleton and then wrapping in foil. Though armatures take alot of planning. If you’re off somewhere you’ll see it in the finished piece.
@shawn: I, too am happy to have some tips on sculpting. Since the focus here is on beads, there’s not a lot of talk about sculptures. But some people like to dabble, so this extra info is helpful to them. I haven’t tried making figures yet, but I’m still glad you can feel free to add your tips. It makes this wonderful site an even-better resource for clayers (if that’s possible!) ;D *wink, wink* —I guess you can tell I’m a super-fan!… ~Kat
Shawn, just wanted to give thanks to you for your information on baking, since you bring a different perspective creating sculptures and fine detail work. Do you use armatures? How do you decide what type and when?
So long as you keep your temps from spiking, I don’t think you can bake the stuff too much. Bleaching lightens the darkening that occurs with transparent clay, and I notice more hardness and a sharper glow or shine to items baked again.
Excellent idea and thanks for the article links.
I’ll be trying that for sure. And that would really eliminate the texturing.
Thanks
@Heather Graef: Congrat’s on the cool, romantic gift! That’s quite a find. I’m so glad that it really does “work ok!” :D
@Shawn/Heather: You mentioned using baking soday, and you can use corn starch the same way. It’s reuseable, so you can fill a bowl with it and bake all of your pieces in the same bowl of cornstarch (at separate times.) Cindy has an article that mentions all of the great ways to Use Cornstarch with Polymer Clay.
It’s got some tips for baking with cornstarch, as well as some other great ideas. She has another article on the subject, too, called Baking on a Bed of Cornstarch.
There are additional tips, tricks and info in the comments below the articles, including things like baking soda—so check those out, as well… Have fun!
~Kat Riverside, CA, USA —Where are you from?
Most definitely a good way to go. Temperature settings with a toaster oven are pure trial and error. And just because it was running right today it doesn’t mean it will next week. But you’ll soon work into a system with that as you do with anything else.
The taller items will generally scorch unless they’re tented. I always put my pieces on the bottom shelf regardless. Though because the toaster oven is smaller you won’t get that much distance so tenting is a good fail safe.
I have had great results with baking soda. I just make a foil bowl and put in some baking soda, put in the piece and then cover that with more soda. Very nice baking without any burning or scorching.
Though I do find that you will get a fine almost dimpled finish on pieces. And it would get pretty expensive for every piece.
The other day I had a couple of ideas and they worked nicely. First off I always use baking paper under my pieces because they reduce shine and flat spotting.
For my flatter pieces I got myself a big glass pizza dish to put them on. For the bigger pieces I got a deep Pyrex bowl. I went for a square, flat bottomed one. I put a tile or piece of paper over that and it works wonderfully.
Just make sure to only use those for polymer and never for food.
Definitely. Those toaster ovens are notorious for spiking.
I’ve found that if you just bake a whole lot of pieces at the same time it doesn’t work out too pricey.
Then again i can only speak for an electric oven.
My boyfriend got me something I’ve been wanting for a while now… an old toaster oven from the street – with a sign on it saying “WORKS OK”. How romantic! No more using my old fashioned gas-converted-to-propane stove from the 50’s. Now its a “modern” toaster oven that’s got to be at least 20 years old… and guess what? It really WORKS OK!
@Heather Graef: Just a reminder … do use an oven thermometer …
@carolyn: I used my oven thermometer, and tested the toaster oven for an hour before baking anything. I placed two tiles on the bottom between the heating elements, and it still ran hot, so I set the temp lower and kept an eye on it every 15 minutes or so to check temp, adjusting if required.
I baked a bunch of small flat pieces sandwiched between tiles and sheets of paper for one hour (they came out great). Since the tiles hold heat, the oven temp was more regular with all the extra tiles inside.
BTW, some of my taller (1″) items on the top shelf did scorch a little, Next time I’ll try the bottom shelf and tent them.
Thanks to Cindy and everyone for all the tips at this link for using a toaster oven for baking polymer clay.
On the subject of re-baking, I just found this old post and video clip: Re-Baking Polymer Clay Will Not Harm Your Beads