Baking Polymer Clay Beads and Pendants – Tips for Awkward Shapes
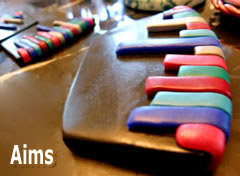
“Help Cindy! Can you tell me if there is a special way I should bake this item?” ~Aims
More...
I received a somewhat desperate sounding email the other day from Aimee Abson (aka Aims). Wanted to answer it publicly so that everyone can learn from the information, as well as join into the conversation too. Here what she said…
Now, I had to think about this for a bit. The piece is very cool looking and different from anything I have baked before. So I wanted to make sure my advice was good. I’d hate to see something go wrong.
Here’s what I came up with for you, Aims…
I would put it on a piece of card stock and then on a smooth ceramic tile. Tent with another piece of card stock and bake for about ten minutes. This should set the clay well enough so that it doesn’t get fingerprints or marks on it when you do the next step.
Now carefully turn it upside down and place into a bed of cornstarch. Nestle it down into the cornstarch, so it is properly supported and flat. Tent it again and bake for 1 hour.
The reason I suggest baking upside down in cornstarch like this, is because any trapped air in the clay tends to bubble up to the surface during the baking process. Better that this happens on the backside where you can finish sand more aggressively as compared to the front.
This being a relatively thick piece, I doubt it will warp at all. But the first 10 minutes of baking, as described above, should help to set the piece and reduce the potential for warping.
As far as any fingerprints or marks you may have gotten on the piece before baking, you will need to spend some time sanding them out afterwards… which I would highly recommend you do for this project.
Hopefully everything works well for you, Aims. Just to be sure, I would only do one of your pieces at a time, just in case you run into any problems. And if something does go wrong, be sure to come back and write about it here, in the comments below, where we can do some troubleshooting.
Also, it would be great if you would send in a photo once everything is finished and shiny. I’m sure everyone would love to see how things turned out. Your pendant and earring design is beautiful and wonderfully unique Aims!
Sponsored Ads & Special Promotions


Want to chat about today’s post? That’s what the comment section below is for. Scroll Down… We’d love to hear from you!
Or... if you would like to request a topic for a future post, here is the link to do that… PcT Suggestion Box

Hi Cindy!
First of all Thank You for all of your wonderful information and tutorials!
I am relatively new at polymer clay also and just love it.
On several blogs and tutorials you say to bake the Sculpey between 265 and 275. My question to you is…Can I bake Sculpey Premo and Souffle at 265 ALL the time? (instead of going to 275 at all) or do I need to stay at 275? Will it cure properly if I cure it at a flat steady 265 instead??
Thanks so much for your help! :-)
Hi Laurie, thanks so much for your kind comments! I mention the temp range because ovens will go up and down a bit while it bakes and you want it to hold within that range (not dropping below 265F or going too much over 275F). However the most ideal temp to bake Premo and Souffle at is 275F. But if your oven won’t hold it there without spiking and it does at 265F then keep it there and do some testing to be sure it is baking properly. Once you ‘find the sweet spot’ on your, it should be fine to just keep it set there and keep monitoring it with an oven thermometer. Let us know how it goes.
Thank you so much for your advice, Cindy! I’m still trying for that sweet spot. lol
Christmas is coming so I might say goodbye to this toaster oven and get a better one. ;)
Have a Happy Holiday!
Hi Margriet, thanks for the kinds words! Polymer clay does not need to be sealed or varnished and won’t be affected by the skin or the other way around. Polymer clay is basically a plastic, that once it is properly baked acts like most plastics. Hope that helps to answers your question. Thanks for commenting!