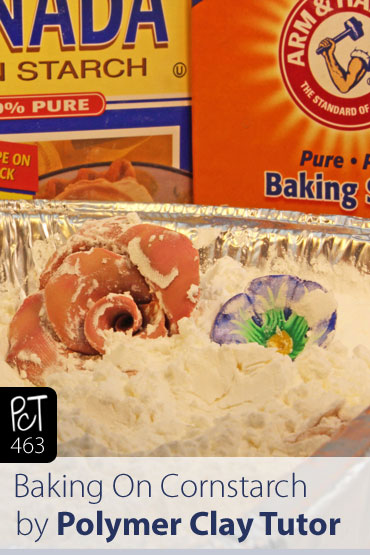
Baking Polymer Clay on Corn Starch or Baking Soda
Video #463: A baking technique that works great with sculptural polymer clay items.
More...

IN THIS POST: — baking — oven thermometer — temp — oven — burning — discoloration — curing — heat gun — cornstarch — baking soda — water — sculpted — layered — formed — flowers — organics — sculpted — figures — miniatures — dolls — fairies — trolls — conditioning — hard — soft — leaching plasticizers — (Topics marked with an asterisk* are discussed in the Comments Section below).
Topics Covered In This Video:
- A few years ago, I posted about Baking Beads on a Bed of Cornstarch. It has been getting a lot of pins and re-pins on Pinterest.
- Today’s video post is an update on this popular topic.
- I mostly make polymer clay beads and jewelry projects, so I mostly bake on a ceramic tile or on a bead baking rack. But there are times when it makes a little more sense to bake either on a bed of cornstarch or a bed of baking soda.
- It is a good idea to place sculptural pieces like polymer clay flowers, dolls and other beads that have a lot of detail or curved areas that may droop or get damaged somehow in the oven, onto a bed of baking soda or cornstarch while they are baking. It helps to support and protect the pieces.
- You use either cornstarch or baking soda, depending on the brand of polymer clay that you have.
- I use Premo Polymer Clay and prefer to use cornstarch. It is ultra smooth. Won’t leave a texture on the clay. Rinses clean off after baking. Won’t leave a residue on the clay. And it doesn’t adversely affect the strength of the clay after baking.
- However, for Kato Polyclay users, I have heard that cornstarch will weaken the clay when baked in it, so they prefer to use baking soda instead. It is a grittier powder than the cornstarch and can leave a slight texture on the clay. I have also found that it can leave salt stain’s on the surface, which can be difficult to remove.
- Don’t leave raw polymer clay in your cornstarch or baking soda for very long before baking. Both powders are very absorbent and will leach out the polymers, plasticizers and oils from your polymer clay, making it more brittle after baking. Once you place your piece in the powder, make sure to bake right away, and you won’t have any issues.
- I forgot to mention in this video, to not put pieces that have liquid polymer clay on them, into the cornstarch or baking powder. The powder will bake right into the liquid clay and stay white! Thank you to Tammy Kennedy for mentioning this tip.
- Use aluminum rectangular cake pans 20 cm x 14 cm x 3 cm (7-7/8 in x 5-1/2 in x 1-1/8 in) which fit perfectly in my toaster oven. There are many sizes available, which you can look for in your local grocery or general merchandise stores. Another advantage of these tin pans, is that you can use two of them together… one as a base and the other as a lid. It makes a nice little mini-oven to bake your pieces in. They can be clipped together with metal binder or bulldog clips from an office supply store.
- Bake your pieces in the cornstarch/baking powder at the correct temperature for your brand of polymer clay, but bake for at least one hour or longer. I usually bake for 75 to 90 min just to be sure. It takes the heat longer to reach the buried polymer clay, so it is important to bake for a slightly longer period of time.
- I do plan to do a PcT Test Lab Video in the future to see which brands do better in which medium…. So I can give you a bit more scientific proof on which one will be best for you to use. But that will need to be another day.
00:00:04 –> 00:00:08 Hi guys, its Cindy Lietz, your Polymer Clay Tutor, and today’s Studio Tip, I’m talking
00:00:08 –> 00:00:13 about baking Polymer Clay on cornstarch or baking soda.
00:00:13 –> 00:00:18 Now a couple of years ago, I did a post all about this on our blog, and it’s been getting
00:00:18 –> 00:00:23 pinned quite a bit on Pinterest, so I thought I’d do an update and show you here a little
00:00:23 –> 00:00:25 bit more about that.
00:00:25 –> 00:00:30 Now, I mostly make Polymer clay beads and jewelry and that type of thing, so I tend
00:00:30 –> 00:00:38 to bake, either on a ceramic tile or on a bead rack like this one, but there are times
00:00:38 –> 00:00:45 when it makes a little bit more sense to bake, either in a bed of cornstarch or baking soda,
00:00:45 –> 00:00:48 now, I’ll just explain a little bit about that.
00:00:48 –> 00:00:54 Now, pretend these were unbaked…I haven’t made any recently, but if you have a piece
00:00:54 –> 00:01:03 that’s got a lot of detail like this Rose, or this Dragonfly bead here, where it’s
00:01:03 –> 00:01:11 got some areas that are kinda curved, or could droop or get damaged somehow in the oven,
00:01:11 –> 00:01:16 what you can do is you can put them into a bed of cornstarch or baking soda…and I’ll
00:01:16 –> 00:01:21 explain which is best for you in a minute, but you can set them down and then you can
00:01:21 –> 00:01:28 put the cornstarch all in around the parts that could use some support, and then, you
00:01:28 –> 00:01:35 can even sprinkle it right down inside to protect it and keep it from scorching, and
00:01:35 –> 00:01:38 to keep it from drooping while it’s baking in the oven.
00:01:38 –> 00:01:44 And all kinds of different bead shapes will do well, if you do sculpture or that kind
00:01:44 –> 00:01:49 of thing…with little arms and features and things that you’re worried about needing
00:01:49 –> 00:01:53 support in the oven, this is a perfect solution for you.
00:01:53 –> 00:02:02 Now you can either use cornstarch or baking soda, now the difference between the two…
00:02:02 –> 00:02:11 Cornstarch is just super, super, super smooth and it rinses off really well after your piece
00:02:11 –> 00:02:13 has been baked.
00:02:13 –> 00:02:18 Baking soda works the same way, it’ll give the same kind of support, but it’s a little
00:02:18 –> 00:02:25 on the grittier side, and it also has sodium in it, and so it has a bit of a salt thing
00:02:25 –> 00:02:27 that happens.
00:02:27 –> 00:02:30 But, I use Premo!
00:02:30 –> 00:02:38 Polymer clay, and cornstarch works beautifully with it, there’s no kind of adverse effects,
00:02:38 –> 00:02:42 but I’ve heard from the people that work a lot with Kato Polymer clay that cornstarch
00:02:42 –> 00:02:49 can actually weaken the clay if it’s baked in there, so they prefer to use baking soda
00:02:49 –> 00:02:52 instead, and I guess you don’t get the same sorta reaction.
00:02:52 –> 00:03:01 But with cornstarch, I mean…I like to bake in cornstarch because if I bake my Premo in
00:03:01 –> 00:03:08 the baking soda, I find that it’s left…it leaves kinda little salt marks, you know when
00:03:08 –> 00:03:13 you’ve been out with your…in the snow and there’s salt on the road and you get
00:03:13 –> 00:03:17 those little salt specks on your boots if… well, if you live in Canada, we get, you know
00:03:17 –> 00:03:22 a lot of salt on the roads and stuff when it’s cold, that’s the kinda thing that
00:03:22 –> 00:03:27 you get on your Polymer clay even after you’ve rinsed it, so I tend to… you know, you have
00:03:27 –> 00:03:33 to kinda sand it off, or you have to use some acetone or something to get it off of there,
00:03:33 –> 00:03:37 I don’t find that happens at all with the cornstarch.
00:03:37 –> 00:03:43 Now the one thing to keep in mind is that you never wanna have your raw Polymer clay
00:03:43 –> 00:03:49 piece sit in the cornstarch for very long before you bake it, ‘cause what can happen…both
00:03:49 –> 00:03:57 the cornstarch and the baking soda are very absorbent, and they will soak the oils and
00:03:57 –> 00:04:01 the polymers out of the clay, and that will weaken your clay.
00:04:01 –> 00:04:09 So what you wanna do is…once you’ve set your pieces in your cornstarch or baking soda,
00:04:09 –> 00:04:12 put them into the oven right away, then you won’t have any issues with that, it’s
00:04:12 –> 00:04:17 just when people have set them in there and then left it a day or two that they’ve noticed
00:04:17 –> 00:04:20 that their pieces were more brittle the next day.
00:04:20 –> 00:04:29 Now I use these little rectangular aluminum cake pans, they fit in perfectly in my toaster
00:04:29 –> 00:04:34 oven…there’s lots of different sizes of pans you could find that will work well, another
00:04:34 –> 00:04:43 neat advantage to these particular pans is that you can also just use like a little paper
00:04:43 –> 00:04:48 clip, bulldog clip or whatever these things are called….binder clips, and you can snap
00:04:48 –> 00:04:53 it together like that on both sides and you end up having your own little oven like a
00:04:53 –> 00:04:58 mini-oven, or you’re tenting it and you don’t have to worry about that.
00:04:58 –> 00:05:03 Make sure to bake like you normally do at the correct temperature for your brand, and
00:05:03 –> 00:05:09 to bake for at least an hour, especially if you’ve buried your piece completely, it
00:05:09 –> 00:05:16 takes a little more time for the heat to get in there and really get at your Polymer clay,
00:05:16 –> 00:05:21 so I tend to bake for at least an hour, and maybe an hour fifteen minutes or an hour and
00:05:21 –> 00:05:26 a half, if I’m totally burying it like that.
00:05:26 –> 00:05:35 So I hope that was helpful for you, I will be doing a PcT Test Lab video in the future
00:05:35 –> 00:05:41 to test exactly which brands do better in either…either material, so that we can have
00:05:41 –> 00:05:45 a little bit more scientific kinda proof on that, but that will have to be another day.
00:05:45 –> 00:05:49 So if you liked this video and it was helpful, make sure to click that like button I’d
00:05:49 –> 00:05:50 really appreciate it.
00:05:50 –> 00:05:58 And my question for you today is, have you baked Polymer clay in either cornstarch or
00:05:58 –> 00:06:04 baking soda, which brand do you use and have you had any results that you’d like to share
00:06:04 –> 00:06:05 with us?
00:06:05 –> 00:06:09 That would be great if you’d… left those in the comment section below.
00:06:09 –> 00:06:13 And also, don’t forget to subscribe to our channel, we have new videos that come out
00:06:13 –> 00:06:16 every week and you’re not gonna wanna miss a thing.
00:06:16 –> 00:06:20 We’re gonna…we’ll see you next time and bye for now.
Our goal is to translate these videos into as many languages as possible. If you are interested in helping with this initiative, then please do contact us and we will figure out a way to make it worth your while :)
Resource Links:
- Related Article: Baking Beads on a Bed of Cornstarch
Resources marked with a double ** asterisk are affiliate links. If you click on them and decide to buy something, we may receive some compensation. This does not affect the price you pay in any way. What it does do, however, is helps us to continue providing free videos for you, here at the PcT website. Using our links to purchase your tools and supplies, is always greatly appreciated.
Sponsored Ads & Special Promotions
Shareable Images


To share this full blog post anywhere on the web that allows links in comments, here's a shortened url to copy and paste...
>> https://mypct.ca/v463 <<
Want to chat about today’s post? That’s what the comment section below is for. Scroll Down… We’d love to hear from you!
Or... if you would like to request a topic for a future post, here is the link to do that… PcT Suggestion Box
Thanks so much Dixie Ann! I’m looking forward to this weekend :)
Hi Sean J. In answer to your question, Cornstarch can be used indefinitely for baking clay in., just don’t every use it for anything else. You should always rinse your pieces with cool water after they have been taken out of the oven and allowed to cool completely. This will get rid of the white haze thats left on them.
Planning ahead to my weekend baking, can the cornstarch be reused for future polymer projects indefinitely?
Can the baked item be washed in water after it has cooled completely?
Thanks everyone for the tips about where to find the foil pans. Yay, today I finally found ’em. Plus I got the binder clips, so perhaps next weekend I’ll have time to give this method a try. I appreciate your help everyone :)
I watched this great video the other day, and it answered questions I’ve had about this possibility, thank you!
But I can’t find any aluminum cake baking pans like those anywhere. They have tons of baking stuff at Target, for example, but I couldn’t find anything like that. I checked in both the cooking utensils aisle, and the bakng stuff (like flour and spatulas) aisle, and even the camping aisle. Couldn’t find them there, or at any other store. They must be there, but I must be looking in the wrong place?
Can anyone tell me what I’m doing wrong?
Sean, I would suggest you try Walmart, in their cookware dept. They have just about every size and shape of aluminum bakeware. You might also want to check out your local Dollar Store. Good Luck
Grocery store also often have them near where the tinfoil is.
Hi Kathy! Hmmm, What clay did you use? Premo soaks the coating or rinses off with water, but, Donna Kato advises against using cornstarch with Kato brand (baking soda is fine). For more, you can use the search box and use the “brand and cornstarch” to get reams of blog articles, videos and comments covering the topic. All best.
Thanks Jocelyn for helping Kathy! That was what I was going to suggest.
Hi,
I’ve only been working with polymer clay a couple weeks; yesterday I made a couple pendants & a cross. Pendants were black & muted gold, cross is “kind of ” a skinner blend. But anyway – my question – I baked theses things in cornstarch, and I have swabbed several times with rubbing alcohol/cotton ball. I can’t get rid of the white film. Is there any other solvent that will get rid of this?
Thank you, you do a great job!
Kathy
Hi Cindy!
Great info on baking with cornstarch/baking soda. I use Kato for my
tiny hand and feet sculptures on my needle felted mice. The package says
to bake for 10 mins but your video says to bake at least an hour since
the clay is buried. Will that work for Kato?
Thanks!
Marcy
Hi Marcy, your little mice sound cute! Yes, I would bake the Kato for much longer as well. On something so delicate, it will be important for the clay to be as strong as possible, and the longer baking will definitely help! Thanks for commenting!
Hi Cindy, I have a question re cornstarch residue on polymer clay beads. After shaping a round bead, I then dust my gloved hands with cornstarch and ‘reshape’ the round bead to make it ‘perfectly’ round (So the cornflour is only on the surface). But I noticed after baking, the cornflour residue still remains on the PC bead even after washing them. The only way to remove them is to polish them, which I am not keen to do (esp for hundreds of them). I like using the cornflour because it makes the bead look ‘really round’ but am not too keen on the residue. Any tips?
Try using water in your palm instead Bhavani, that might work for you… as long as you’re using Premo and not Fimo. Fimo gets sticky with water.
Thanks Cindy for the tip, unfortunately I like to use Fimo (I find Premo sometimes is too soft, I just cant stand that). If I do find a solution to it, I will let you know.
Hi Cindy,
I am just getting into working with polymer clay and found your website. Thanks for the wealth of info and help you provide for us out here. It has been very helpful for me.
I had a couple questions. First, if I bake my creation on a ceramic tile, which has already been fired and glazed itself, will the piece be adhered to the tile?
Second, what is the best way to attach a piece to a journal cover?
Thanks so much for all your guidance.
Laurie
Hi Laurie, one of the clan here, if baking on a ceramic tile you should put a piece of light colored cardstock, white paper or parchment paper on your tile first. If you don,’t your piece will stick to the tile but more often it will have a partial glaze where it sat on the tile and I
‘m sure you don’t want that. If you use the search function at the top of the blog you will find most answers to your questions. If you are attaching pieces to your journal cover Cindy recommends several different glues, one of which is Lisa Pavelka’s Super Glue so be sure and check out the search function and I’m sure you’ll find all the help you need. Good Luck, nice meeting you, Dixie Ann
The piece should not adhere to the piece because that tile and its glaze fire at thousands of degrees and you shouldnt be firing your clay at thousands of degrees so it wont adhere to the tile unless you melt your piece.
Hi, I decided to see what the clay looks like when baked in baking soda. So I half filled a glass bowl and put it in my clay oven. It was a disaster. I had forgot that my oven is the fan forced kind. It blew the baking soda everywhere. I just wasn’t thinking. It was so funny.
Oh my Cynthia that does sound like a disaster! Too funny! I will have to keep that in mind, since I will be getting a new convection oven for Christmas! Have a wonderful holiday! If you do decide to bake in baking soda again, maybe clip on a lid… :)
Hello, Cynthia,
I know that you have probably worked this out since your post was a while ago, but just in case it might help you or someone else:
I bake in baking soda all the time. I have come up with a way of making a “collar” of cardstock from old boxes (rather like baking a souffle, not that I have ever bothered trying that!!) that fits inside the rim of my tinfoil baking pans. This raises the height of my pan, so that I can fit more pieces in at once. I cut other pieces of heavy box board (cereal boxes, file folder boxes, etc) into smaller pieces, which I set my raw polymer clay pieces on. I do a lot of sculptural, shaped pieces rather than as many beads, so a bead rake often doesn’t work for me. I baked a clay encrusted glass votive and about 8 or 9 flattish sculptural pieces plus a couple of dozen beads (rounds, tubes, shaped leaves) in one go in a table top convection oven that is fairly small. I put a layer of baking soda in the bottom of the baking dish, which I always set on the little metal tray that came with the oven, for extra support. Then I put a ceramic tile that happens to fit the tray quite closely on top of the baking soda, after I swish the soda back and forth to level it. Another thin layer of baking soda. Then I start adding my box board pieces with the clay pieces on them, arranging them to fit as many as I can. Once I have a layer arranged, I sieve more baking soda over top until that layer is buried. Sometimes I need to move the baking soda around a bit to get it into the corners. A very light hand and a a soft brush or the edge of a piece of box board works for me as a whisk. Another layer of clay pieces on box board, a final layer of baking soda. When I did the votive, I even buried more pieces inside the votive, to maximize what I was baking at once.
Also, I can nestle shaped pieces into the loose baking soda. I haven’t had a problem with supporting any of my pieces since I started doing this, and I make some that would be hard to support any other way, for example thin leaf beads that curve in 2 different directions.
Then the containment, to stop the problem that you had the first time you tried baking soda – thank heavens that I saw a hint about this before I ever tried the convection oven! :) I wrap aluminum foil one way and then the other over the top of the lot, and hug it down around the side.
There are times when I have to really work to lift the pan into the oven. But I can bake a lot of pieces at once, or a fairly large sculptural piece.
Because I need to let the baking soda cool down, I can’t get over-impatient and pull the pieces out and get fingerprints into the hot clay.
I have reused the baking soda a number of times. I have two sieves; a metal one and a larger grid plastic one. When I am decanting the pieces, I spoon the baking soda out of the pan through the metal sieve into an ice cream bucket. That way I am getting rid of any lumps. The sieve catches the clay pieces, which I transfer into the plastic sieve. I use the plastic sieve because I once lost a small leaf bead down the sink when I was washing them by hand. GRRR! Now everything goes into the plastic sieve and I run the water through that, and always hold anything that I am washing individually over the sieve. Nothing I make is THAT small that it can disappear through the holes in the sieve.
It’s a bit more work than baking on cardstock with a tent, but I scorched a couple of pieces when I started out and found the information about baking in baking soda before I ran into Cindy’s informaiton about tenting and lids, and I have just never changed how I do it. I am comfortable with it.
The big thing is probably the layer of aluminum foil over the top. Otherwise I, also, would have a horrible mess! I can SOOOO see myself doing that if I hadn’t read the tip about NOT before I baked my first batch in soda! LOL
Wow Doreen, thanks so much for sharing your detailed ideas here! I am sure your tips will be helpful for a lot of people. I like the sieve idea. Bet that works well. It is good to see that you have found a method of baking that works well for you. Thanks for commenting!
Hi, All!
No, I have never cured with either. But I love the great tip with the clips on the aluminum pans! Thank you!
Hi Andrea, with all the sculptures you do, you may find the cornstarch to be very handy in supporting and/or protecting delicate pieces in the baking process. Let us know if you do end up trying it.
Glad that you liked the mini-oven idea. You could make one in any size you like. Would just depend on the size of your oven.
I am so glad I learned this tip from Cindy. Since I use strictly Premo clay the cornstarch is perfect for my sculptures but also I have used it a lot for my oversized beads simple because if I hang them on a bead rack they tend to elongate the holes while baking and who wants wonky holes! I purchased the square and loaf size aluminum pans and use one for the bottom and one for the tops. I also use a set of them for fiberfil to bake some items on when called for. Thanks Cindy for ALL your great tips you have been so generous to share with us.
Thanks for saying that Dixie Ann! I am very glad this tip has been helpful for you. Love the new profile picture btw… You look so cute! Looking forward to the day I get to actually meet you in person.
Dear Cindy,
I know you did a tutorial on faux Jasper but I cannot find a video tutorial anywhere on faux Malachite. Would you be willing to cover this and maybe Opal too. All the faux Opal videos in polymer clay don’t really look right. But I bet you have a Jim Dandy sure fire opal technique. I am interested in making faux focal beads big enough for wire wrapping as pendants. The Pardo Translucent clay is an interesting thought for opal. What do you think?
Thank you,
Rose Mary Abbott
Hi Rose, I should put Faux Malachite on the list. There have been a few others who have requested it also. As far as Faux Opals go, I do have a tutorial on that a long time ago: Faux Opal Bake and Bond Technique
It is one of my more tricky tutorials but the effect is worth the work. It is done using liquid clay, so the Pardo clay may not make much difference in this particular case. Though it would most definitely be a good choice for other opal techniques.
Thanks for your suggestion!