Cleaning Dirty Polymer Clay That’s Not Baked Yet
Video #511: By far, my absolute favorite method for cleaning unbaked polymer clay is 99% Isopropyl Alcohol.
More...

IN THIS POST: — dirty clay — unbaked — lint — dust — sweater fuzz — pet hair — cat hair — dog hair — rubbing alcohol — baby wipes — cleaning wipes — baby oil — sculpey clay softener — clean clay — white clay — (Topics marked with an asterisk* are discussed in the Comments Section below).
Topics Covered In This Video:
- Try your best to keep your work area as clean as possible to help prevent you polymer clay from getting dirty in the first place.
- But there are ways to clean raw unbaked polymer clay if it does get dirty with lint, dust, sweater fuzz, pet hair from dogs and cats, etc.
- Be sure to clean your polymer clay before baking.
- First, try to carefully remove large bits of clay/dirt/lint with a clay blade.
- Using a kitchen cleansing cloth (or baby wipe) to wipe dirt off the surfaces of the clay.
- I prefer Kitchen wipes over baby wipes because they have stronger cleaners in them, so they work better.
- Baby oil or clay softener on a paper towel can work to remove dirt from clay, but not as well as other options.
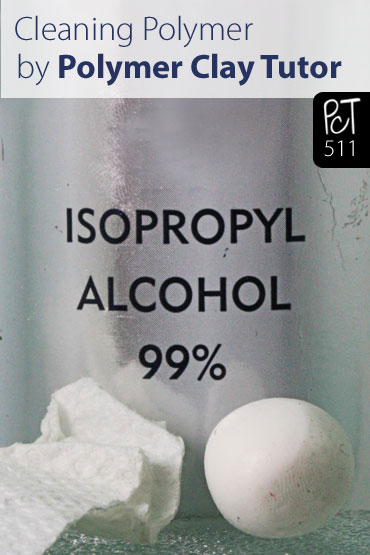
- 99% Isopropyl Alcohol (Rubbing alcohol) on a paper towel or Q-Tip works the best for removing dirt and lint from polymer clay.
- Fingernail or needle tool will help with removing hairs and lint from the surface.
- In a future video, I will show you how to remove dirt and lint from Baked Polymer Clay pieces.
00:00:03 –> 00:00:07 Hi guys, its Cindy Lietz, your Polymer Clay Tutor, and today’s Studio Tip, we’re talking
00:00:07 –> 00:00:10 about how to clean dirty Polymer clay.
00:00:10 –> 00:00:15 Now in a previous video, I showed you how to avoid getting your White Polymer clay dirty
00:00:15 –> 00:00:22 in the first place, but, now I’m gonna show you what to do if it has already gotten dirty,
00:00:22 –> 00:00:26 and this is before you’ve baked it, okay?
00:00:26 –> 00:00:32 So I’ve got a piece of Polymer…White Polymer clay here that I’ve rolled in my hands,
00:00:32 –> 00:00:37 and I wasn’t careful with the lint, and didn’t clean properly and now I’ve got
00:00:37 –> 00:00:47 a piece that is all covered in lint and dirt, and little bits of clay and all sorts of stuff,
00:00:47 –> 00:00:52 well, as long as we don’t bake it in, we’re okay.
00:00:52 –> 00:00:58 Now what we can do…first of all, if there’s some really large pieces, you can just take
00:00:58 –> 00:01:05 a blade, and take a little tiny bit off, like that, the really large pieces are gonna be
00:01:05 –> 00:01:12 difficult to wipe off if you don’t get rid of them this way.
00:01:12 –> 00:01:18 And then, what we can do…there’s a few different methods, now, I really like to use
00:01:18 –> 00:01:25 a kitchen wipe… actually I like them better than baby wipes, not so much for myself but
00:01:25 –> 00:01:29 because the kitchen wipes tend to have a little bit of alcohol in them, or something that’s
00:01:29 –> 00:01:37 a little bit more of a cleansing thing, so they work really well for…and you could
00:01:37 –> 00:01:45 use a baby wipe if you like, but you can use them for wiping off the clay and cleaning
00:01:45 –> 00:01:47 it up.
00:01:47 –> 00:01:53 This works pretty good, but as you can see, there’s still…well hopefully the camera
00:01:53 –> 00:01:59 can pick it up, but it doesn’t work if it’s really, really kind of embedded in there,
00:01:59 –> 00:02:02 it’s not quite harsh enough.
00:02:02 –> 00:02:14 Now some people like to use something like baby oil or clay softener, to me, they’re…I
00:02:14 –> 00:02:20 mean oil is kind of a…it’ll work pretty good on Polymer clay to remove stuff, but
00:02:20 –> 00:02:26 it doesn’t work as well as the next thing I’m gonna show you, so you can start gettin’
00:02:26 –> 00:02:30 some stuff off if you have baby oil or clay softener.
00:02:30 –> 00:02:39 But by far my favorite method for removing dirt and lint…I keep wanting to call it
00:02:39 –> 00:02:45 dint, is to use some isopropyl alcohol, or also known as rubbing alcohol…oh I’ve
00:02:45 –> 00:02:51 got it on the French side, in Canada we have lots of French…I like to use this 99% stuff,
00:02:51 –> 00:02:57 I pick up 4 bottles at Costco for just a few dollars, it’s cheap, cheap, cheap, but the
00:02:57 –> 00:03:01 stronger stuff is the best…I like it the best.
00:03:01 –> 00:03:09 And if you use it on a paper towel, you can just wipe off the dirt and the lint, and it
00:03:09 –> 00:03:17 starts removing it quite well, now, I’ll just go around, sometimes there’s little…the
00:03:17 –> 00:03:24 little hairs and things are a real pain, you can remove those with your fingernail, usually,
00:03:24 –> 00:03:27 and just get those out.
00:03:27 –> 00:03:35 But if you keep working at it, you can usually get most of everything off…just try this
00:03:35 –> 00:03:41 a little bit more here, and you can usually work it right off and get it nice and clean.
00:03:41 –> 00:03:47 Like I said in the previous video, you’re gonna want to avoid trapping too much dirt
00:03:47 –> 00:03:54 and gunk in there in the first place, so that you don’t have these sorts of hassles, but
00:03:54 –> 00:03:56 that will really help.
00:03:56 –> 00:04:05 In another video, I will show you how to remove any dirt or speckles and things on there if
00:04:05 –> 00:04:09 it’s been baked already, and there’s a few different tips and tricks for that as
00:04:09 –> 00:04:10 well.
00:04:10 –> 00:04:14 So I hope that was helpful for you, if it was, do let us know.
00:04:14 –> 00:04:24 And if you have any special requests for demonstrations, problems you might be having, products you’d
00:04:24 –> 00:04:30 like me to test, just let me know in the comment section below, we’ll see you another time.
00:04:30 –> 00:04:31 See you next time, bye for now.
Our goal is to translate these videos into as many languages as possible. If you are interested in helping with this initiative, then please do contact us and we will figure out a way to make it worth your while :)
Resource Links:
- Related Video: Polymer Clay – Keeping it Clean
- Related Video: Polymer Clay Blades
- Related Video: Polymer Clay Pasta Machine Cleaning Tip 1 Baby Wipes
- Related Article: How to Bake Polymer Clay so that Your Whites Stay White
Resources marked with a double ** asterisk are affiliate links. If you click on them and decide to buy something, we may receive some compensation. This does not affect the price you pay in any way. What it does do, however, is helps us to continue providing free videos for you, here at the PcT website. Using our links to purchase your tools and supplies, is always greatly appreciated.
Sponsored Ads & Special Promotions
Shareable Images


To share this full blog post anywhere on the web that allows links in comments, here's a shortened url to copy and paste...
>> https://mypct.ca/v511 <<

Want to chat about today’s post? That’s what the comment section below is for. Scroll Down… We’d love to hear from you!
Or... if you would like to request a topic for a future post, here is the link to do that… PcT Suggestion Box
will the rubbing alcohol make fluorescent/ glow in the dark polymer clay lose its luminescent qualities?
Is spray painting over your polymer clay project after it’s been baked a good idea?
Thank You
Not usually… most spray paints have chemicals in them that are not compatible with polymer clay. You would have to do some extensive testing to be sure the brand and type of spray paint was compatible and didn’t cause your clay to get sticky over time. I do not know of any brand that is compatible though it is possible. Test first.
A quick question that I can’t remember seeing answered in your tutorials…. once you have made some beads how long can you wait before cooking them? Days? Weeks? Forever? I’d be really grateful for an answer whenever you can give it. No rush! LOVED seeing Fisher on your video last night. Boy does he look like you! THANKS.
Thank you Julia for the sweet question. As long as your raw clay is not in too warm a place or sitting on something absorb ant, you can wait a long time before baking it. I don’t know if I would wait years though… seems like it would get covered in dust by then! ;)
Cindy,
I downloaded the Photon App as you suggested (it cost just a few dollars), and it was so worth it! Now I can conveniently watch your older videos on my iPhone while my husband watches hockey!
Since you are in Canada you might appreciate this: Stanley Cup playoffs are going on right now and I pretty much lose my husband to hockey for a few weeks. Luckily, I have your wonderful tutorials to keep me busy!
I had dabbled in poly clay before, but was turned off from it all when I burned a piece and my house was overcome by fumes. You are a wonderful instructor and after watching your Beginners Course videos, I’ve mustered up the courage to try again.
After the Beginner course, I’m purchasing your Faux Abalone Technique video. I loved your Abalone samples and hope I can achieve similar results.
I also recently purchased Suze Weinberg’s Melting Pot. Although it’s mainly for melting UTEE, it says on the packaging that you can bake polyclay in it. Have you baked polyclay in one of these before? It would be great if you could put it to the test in your “Testing Lab” videos which are magnificent!
Lily
Hi Lily,
Glad to hear that the Photon App worked out so well for you (and your husband too, LOL).
By the way, the Faux Abalone Videos will play on your iPhone without having to use the Photon App. All of the videos from Vol-035 to present, use a format that works directly on most every mobile device out there.
Now in regards to the Melting Pot… although technically it can be used to bake small pieces of polymer clay, there is no easy way to control/monitor the temperature. And as you now know from the Beginners Course, this is such an important consideration to ensure proper curing of your polymer clay beads. The melting pot could work for getting a partial cure when you are doing techniques like I demonstrate in my Deep Crackle Faux Raku Tutorial (Vol-014), but other than that I would not use it for normal baking. Instead, use a good toaster oven and thermometer.
Thank you for your compliments! I am happy that you are enjoying and learning from the tutorials!
Hi Ginny, Hope you had a wonderful Mother’s Day as well! Yes you can make cell phone covers from polymer clay, but I haven’t figured out how to myself yet. From what I have heard, there are some people who have made them, but I am not sure if they are just making sheets of polymer that they bake first and then glue to a manufacturers cell case or if they are making a mold of some sort.
I have thought a little about making them, but worry about the constant changing sizes and shapes of all the different phones out there making it tricky to have a tutorial that will be ‘evergreen’ and won’t go out of date too soon so I haven’t put the effort in to figure out something yet.
You may want to do a Google search on polymer clay cell phone covers and see if something turns up. If I do figure out a good way of doing it that can be adapted to whatever cell you have, then I most certainly will do a tutorial on it. I am sure everyone would love to personalize their phones!
Hi Cindy,
I hope you had a lovely Mothers day, I’m not sure if that is only a U.S. holiday. Today when my daughter in law was over she asked me if I thought I could make a cell phone cover with Polymer clay? Do you think that would be possible? It sure would fun , I just can’t imagine how it could be done:)
Thanks,
Ginny
WOW!!!! You absolutely made my day Fran. Thank you so much for taking the time to write those very kind words. You are WONDERFUL!!!
By the way, your suggestions about being able to keep the course updated, are already in the planning stages. Doug is working on an app for that :-)
Cindy,
I started my journey with you – and this great community – with your Beginners Course. My finger hesitated for a second over the “buy” button, because money is a very limited commodity around here. But I haven’t regretted it for a single moment.
As everyone knows, on the web there are hundreds (thousands?) of videos and tutorials about claying, many of them free. I have watched lots of them, and still do: seeing lots of different ways of doing things is a great way to learn. And while I have occasionally seen a great tutorial on other sites, no one has ever come close to what you provide. Your videos are consistently good, and in a depth of detail rarely seen elsewhere.
Your manner is a large part of what made me choose to buy the video in the first place. You know what you are talking about, and you make it interesting and easy to watch and learn from you. You are relaxed and open, there is always a sense of ease about you. Your voice is easy to listen to. (That may seem trivial, but there are some videos I have seen where I cannot stand to watch because the voice is harsh, or the person chatters on interminably. I even listened to one where the dog was snoring in the background.) You seem like someone I would like to know personally. And that is important, because by now I have so many of your videos it seems I invite you into my home every day! I almost want to make you tea while you’re here ;)
I think you are a natural teacher. You know what people need to learn to do the thing you are teaching about, and you get it across clearly and simply. You motivate and encourage, you make me curious.
You keep great track of where you are in your discussions. Whenever you say “I’ll get to that in a minute” you DO.
You keep a good balance between telling us exactly how to do something and encouraging our own creativity.
You have such a good sense of what to teach. There is SO much information about claying that I would imagine that one of hardest things to do when creating the beginner’s video was to decide what not to include. But you kept it all to a manageable level so that, as someone starting out, it didn’t feel like I was getting overwhelmed by the information or that you were pushing me to buy too many tools and pieces of equipment. You always seem to keep a good balance between providing information and options on the one hand, and not being overwhelming and confusing on the other.
Like a great book, this video is a resource I keep returning to, over and over.
So, how could you improve the course? That’s a hard one… The only thing I can come up with is having a way to provide updates, without re-doing the video. There aren’t very many that I can think of; most of the areas where you have devised a new technique could really be called a more advanced method, or a spendier one that a newbie might not best be advised to pursue (e.g. Ren Wax vs Future).
In fact, there is only 1 example I can think of: the switch in name & packaging for Future/Pledge. On the page where the video player is, you could write a paragraph or two about the new information. Yes, that information is available via the search box, but newbies would not know that they needed to look it up until after they had struggled to find the product.
So, thank you for providing the great gift of this video, and I hope my comments have helped.
Fran
Cindy ;
Your utube tutorials for polymer are so helpful!!!
Thank you!
You are very welcome Susan! And thank YOU for the kind words.