Comparing Sculpey, Kato and Fimo Liquid Polymer Clay
Video #708: Translucent Liquid Sculpey (TLS) vs Sculpey Bake & Bond vs Kato Liquid Polyclay vs Fimo Liquid Gel.
More...

IN THIS POST: — sculpey — tls — translucent liquid sculpey — bake and bond — polyform — kato polyclay — kato liquid polyclay — liquid polymer clay — fimo liquid — fimo gel — deco gel — staedtler — transparent — translucent — clear — clarity — see-through — opaque — (Topics marked with an asterisk* are discussed in the Comments Section below).
In this video, I will compare the differences between 4 brands of liquid polymer clay. Translucent Liquid Sculpey (TLS), Sculpey Bake & Bond, Kato Liquid Polyclay and Fimo Liquid Gel.
All 4 of these are liquid polymer clays that have to be baked to cure. Liquid clays can be used to do image transfers, molded pieces, coatings, glazes, adhesive, mixed with solid clays to soften or make icings, mixed with chalks or mica powders, used to polymerize fabric and paper, etc., etc.
I show examples of pieces from past tutorials where I have used liquid polymer clay.
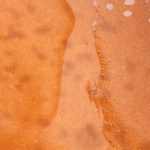
TLS, Bake & Bond and Kato Liquid, all start milky and bake up translucent. Fimo Liquid starts out as a clear gel and bakes the clearest. Kato is the next clearest, with TLS and Bake & Bond baking up the least translucent.
Both Kato and Fimo are fairly shiny when baked, though Fimo has a slight pitting to the surface. Both TLS and Bake & Bond bake up to a matte finish, though they can be brought to a shine by sanding and buffing them.
Kato Liquid has a slight yellowish tinge when baked, and Fimo has a slightly white tint. I didn’t mention it in this video, but I am guessing that the whitish look comes from UV enhancers, since I hear that Fimo liquid glows under UV light.
All four clays can be used with pretty much any brand of clay, since they all have a bit of a range in temperatures at which they will cure at. The recommended temperature for TLS, B&B, and Kato are 275F and for Fimo 265F. Though all of them will bake at quite a bit higher temps (up to 300F+) with quite good results. In fact, many clayers will bump up the baking temps of their liquid polymer clays, to improve clarity. This needs to be done with caution if combining with solid polymer clays, though, because the solid clays will scorch at higher temps.
I show examples of all four brands of polymer clay that were baked for 30 minutes at 275F. I also show the strength of the baked liquid clays and the clarity of each sample after baking.
As far as value goes, TLS and B&B are the most widely available in retail as well as online, and are the least expensive of the four liquid clays tested. Kato Liquid Polyclay is the next highest in price, and is available in limited retail locations, and online. Fimo Liquid is the most expensive and is available in both retail and online. It is more readily available in Europe than in North America.
00:00:03 –> 00:00:08 Hi guys, its Cindy Lietz, your Polymer Clay Tutor, and today in the PcT Test Lab, we are
00:00:08 –> 00:00:12 comparing the different brands of Liquid Polymer Clay.
00:00:12 –> 00:00:18 Now, I’ve got four different types of liquid Polymer Clay here that I’m going to be talking
00:00:18 –> 00:00:19 about.
00:00:19 –> 00:00:27 The first one is TLS, which is also known as…it’s known as TLS but its Translucent
00:00:27 –> 00:00:36 Liquid Sculpey, and another product made by Sculpey is called Bake & Bond, it’s similar
00:00:36 –> 00:00:41 but a little different, which we’ll talk about, we’re also gonna be talking about Kato Liquid
00:00:41 –> 00:00:52 Polyclay, and also this one is Fimo Liquid, sometimes called Liquid Gel or Deco Gel.
00:00:52 –> 00:00:59 Okay, so I’ve got some baked up samples which I’m gonna show you in a second on how it is…or
00:00:59 –> 00:01:02 how it works when it’s baked and how it looks and the differences between them.
00:01:02 –> 00:01:07 But I just wanted to show you some quick little samples, now I kinda just went around the
00:01:07 –> 00:01:12 studio to see if I could find some things that I had made in the past that used Liquid
00:01:12 –> 00:01:17 Polymer Clay and I found a few things.
00:01:17 –> 00:01:22 You can use Liquid Polymer Clay for all kinds of different projects, and you can use it
00:01:22 –> 00:01:27 in different ways, you can use it… and I didn’t find a sample on that, but you can
00:01:27 –> 00:01:38 use it for doing image transfers, you can also do something like this where you do Polymerized
00:01:38 –> 00:01:40 Fabric.
00:01:40 –> 00:01:46 You can do…and this is a piece of Polymerized Fabric as well, actually, that one was made
00:01:46 –> 00:01:53 with Liquid Polymer Clay in a dryer sheet, it was a long…that’s an oldie.
00:01:53 –> 00:01:57 You can mix it with the chalks, I’ve talked about mixing it with chalks, here’s a sample
00:01:57 –> 00:02:05 here with some Liquid Polymer Clay, this is…I believe this one is Kato Polyclay.
00:02:05 –> 00:02:13 And then also, I was just doing a little sample, I’m working on a project…and this is not
00:02:13 –> 00:02:18 finished, so don’t think it is, but I’m making this little door, and I used some of the Fimo
00:02:18 –> 00:02:25 mixed with some chalk pastels and you can see it has a really cool look here, these
00:02:25 –> 00:02:29 top windows here I buffed up a little bit and these bottom one’s I didn’t, and you can
00:02:29 –> 00:02:36 see, you can get quite a bit of shine onto the Fimo Liquid and it’s quite translucent.
00:02:36 –> 00:02:43 Now these pieces here, these little Faux Opals, were made years ago using Bake & Bond, believe
00:02:43 –> 00:02:53 it or not, mixed with some Buffalo Snow or those kinda iridescent flakes, and here is
00:02:53 –> 00:02:58 the same product…same project as this one, these two are the same actually, only this
00:02:58 –> 00:03:02 one has been sanded and buffed and this one has been left raw, and you can see it has
00:03:02 –> 00:03:08 quite a matte finish when it’s baked without sanding and buffing it, and that’s all I have
00:03:08 –> 00:03:09 here for now.
00:03:09 –> 00:03:16 Now, let me just show you first what the product looks like, I’ve got a little colored tile
00:03:16 –> 00:03:19 here so that you can see it sitting up here.
00:03:19 –> 00:03:26 I’m gonna take some of the TLS which is made by Sculpey, so it’s called Translucent Liquid
00:03:26 –> 00:03:31 Sculpey, and I’m just gonna put a little line of it on here so you can see the thickness
00:03:31 –> 00:03:43 of it and how it is, it’s kinda like White Glue where it will go out milky and then bake
00:03:43 –> 00:03:52 relatively clear, and this one’s fairly thick and it doesn’t have much of a smell to it.
00:03:52 –> 00:04:01 This one here is the Bake & Bond, I’ll just show it, compared to it, it is a little thicker
00:04:01 –> 00:04:10 or at least the bottle of it that I have is, it has a slightly more opaque look to it and
00:04:10 –> 00:04:20 it is stickier, it’s used as… it’s a great adhesive if you’re trying to glue two raw
00:04:20 –> 00:04:25 pieces of Polymer Clay together or a baked piece of Polymer Clay with a raw piece of
00:04:25 –> 00:04:31 Polymer Clay, or two baked pieces, but you have to bake it in order for it to work, it’s
00:04:31 –> 00:04:37 not just like regular glue, it is a Liquid Polymer Clay.
00:04:37 –> 00:04:40 And both of these can be used for liquid transfers…
00:04:40 –> 00:04:47 I mean image transfers, glue, you can mix it with all kinds of different things, you
00:04:47 –> 00:04:56 can mix it with chalks and Pearl powders, you can also use it to soften up a clay, you
00:04:56 –> 00:05:02 can add a few drops of it, and I’ve got lots of videos on different uses that you can use
00:05:02 –> 00:05:03 that for.
00:05:03 –> 00:05:15 Also, this one here is the Kato Liquid Polyclay, it’s a little bit different, it is a little
00:05:15 –> 00:05:25 thinner and it comes out quite milky when you put it on there, and it is…it smells
00:05:25 –> 00:05:32 a little different, it smells a lot like the clay only because of the…I don’t know, it
00:05:32 –> 00:05:37 just doesn’t seem as strong as when you’ve got a big block of clay, so when I use it,
00:05:37 –> 00:05:39 I don’t have an issue with that smell at all.
00:05:39 –> 00:05:47 And then the Fimo Liquid, it is similar but it comes out a lot clearer and you’ll see
00:05:47 –> 00:05:55 that right even from this stage right here, it comes out kinda like a gel, and it is not
00:05:55 –> 00:06:03 milky hardly at all, it has a smell to it as well but it’s more of a…what kind of
00:06:03 –> 00:06:09 smell, it’s an interesting smell, it smells like felt pens, kind of, and then these other
00:06:09 –> 00:06:13 two just smell a little like glue…I’m sure you really care but I just wanna mention that
00:06:13 –> 00:06:17 because some of you may be sensitive to smells.
00:06:17 –> 00:06:23 I did some test samples here of the different clays and I’m gonna peel them up off of this
00:06:23 –> 00:06:30 piece here, but I wanted you to see what the differences were when they were baked up.
00:06:30 –> 00:06:37 Now this first sample here is the TLS, and I did a little smear of it underneath and
00:06:37 –> 00:06:40 when I peel it up, we’ll be able to see the big transparency.
00:06:40 –> 00:06:49 But you can see, both the TLS and the Bake & Bond have still a slight milkiness to it
00:06:49 –> 00:06:55 when they’re thick like this, they’re pretty transparent when they’re spread out thin,
00:06:55 –> 00:07:01 but you can also see that they are quite matte finish, you can sand them and buff them to
00:07:01 –> 00:07:05 a high shine but when they first come out, they’re quite matte in finish.
00:07:05 –> 00:07:12 This is the Kato Liquid Polyclay and you can barely see it there, it almost has a bit of
00:07:12 –> 00:07:18 a Yellowish tinge…we’ll pull it up from the surface and we’ll see, on the glass here,
00:07:18 –> 00:07:22 the smear on the glass…now hopefully the camera’s picking it up, but you can barely
00:07:22 –> 00:07:27 see it there, it’s very transparent…or translucent.
00:07:27 –> 00:07:35 And then here is the Fimo Liquid, it is also very translucent and it…but it has more
00:07:35 –> 00:07:42 of a Whitish tint to it than the Kato, and then here’s a smeared out piece of it there,
00:07:42 –> 00:07:49 and it’s very translucent…I don’t know if we’ll be able to pick up on the camera or
00:07:49 –> 00:08:01 not, but the Kato has quite a shiny kind of finish to it, and the Fimo, has almost…not
00:08:01 –> 00:08:10 quite Orange peel, but there’s a little bit of a super fine fleck to the texture, and
00:08:10 –> 00:08:14 you can kinda see it, it’s a little bit pitted, so it almost like there’s tiny particles in
00:08:14 –> 00:08:20 there, though it’s so clear, it’s curious as to what those little particles are, anyways,
00:08:20 –> 00:08:23 they have each their own look to them.
00:08:23 –> 00:08:30 And if I just peel them up from here we’ll be able to see them a little bit better, here’s
00:08:30 –> 00:08:35 the TLS and you can see it’s quite translucent, and when you lift it away, it doesn’t have
00:08:35 –> 00:08:43 as milky of a look to it, it’s very, very strong and you can do quite a bit of cool
00:08:43 –> 00:08:48 things with the TLS.
00:08:48 –> 00:08:56 Same with the Bake & Bond, see that coming up off of there, it is also very, very strong
00:08:56 –> 00:09:02 when it’s in a thick piece like this, so you can do wings and all kinds of cool things
00:09:02 –> 00:09:04 with the Liquid Polyclay.
00:09:04 –> 00:09:15 Here is the Kato, see how translucent that is, isn’t that neat, it has almost a window
00:09:15 –> 00:09:23 cling type feel to it, and you can actually make window clings with these types of liquid
00:09:23 –> 00:09:30 clays, and you can see against the White here it is got a little bit of a Yellowish tint
00:09:30 –> 00:09:33 to it.
00:09:33 –> 00:09:39 And here is the Fimo, now when it’s lifted from the surface, it is probably the clearest
00:09:39 –> 00:09:47 and the Whitest, see that, but like I said, there’s just like the finest, finest finish
00:09:47 –> 00:09:49 to it, it’s very strong…
00:09:49 –> 00:09:56 I didn’t test the Kato, I’ll just test that one; they’re all strong, alright?
00:09:56 –> 00:10:03 Now I had baked each of these samples all for 30 minutes at 275F degrees, each of them
00:10:03 –> 00:10:09 are… that’s the baking range that they have, some of them go a little bit lower like the
00:10:09 –> 00:10:17 Fimo Liquid says 265 Fahrenheit, but it can…and pretty typical of all the liquid clays, you
00:10:17 –> 00:10:24 can actually bump the temperature up even a little higher, Kato will go to 300F…325F
00:10:24 –> 00:10:33 I’ve heard of people pushing it, they don’t brown like the other solid clays, so you can
00:10:33 –> 00:10:38 bump the temperature up and you can get a bit of a clear finish with them.
00:10:38 –> 00:10:44 So there is lots of cool things that you can do with them, they’re all…these are probably
00:10:44 –> 00:10:49 the least expensive…I can’t remember the prices, I have Canadian prices, so the prices
00:10:49 –> 00:10:56 are off for you guys…for the bulk of you guys anyways, these are the least expensive
00:10:56 –> 00:11:00 and the most available, you can get them in Michaels and just about anywhere.
00:11:00 –> 00:11:08 Kato is next in line for price, and then Fimo is the most expensive, and it’s a little harder
00:11:08 –> 00:11:18 to get, I have one art store, somewhere close by, DeSerre’s, I can get it at, or I have
00:11:18 –> 00:11:22 to get it online, I have never seen it at Michaels nor Kato, you can get that online
00:11:22 –> 00:11:23 as well.
00:11:23 –> 00:11:28 Alright, so I hope that was helpful for you, there are lots of cool things you can do with
00:11:28 –> 00:11:35 Liquid Polymer Clay, and I hope that you can see some uses for you in the future.
00:11:35 –> 00:11:38 And if you liked this video, do let us know.
00:11:38 –> 00:11:43 And if you’ve got products that you would like me to test in the Test Lab, make some
00:11:43 –> 00:11:46 suggestions in the comment section below.
00:11:46 –> 00:11:51 And if you have questions about anything to do with Polymer Clay, we have done hundreds
00:11:51 –> 00:11:56 and hundreds of videos, so there may just be the one that you need, so check… make
00:11:56 –> 00:12:02 sure to search through our videos, and see if we’ve done that video, and if not, you
00:12:02 –> 00:12:07 can leave suggestions for those as well in the comment section below, alright?
00:12:07 –> 00:12:09 So we’ll see you next time and bye for now.
Our goal is to translate these videos into as many languages as possible. If you are interested in helping with this initiative, then please do contact us and we will figure out a way to make it worth your while :)
Resource Links:
- Related Video: Polymerized Fabric Roses Tutorial
- Related Video: Faux Opal Bake & Bond Technique
- Related Article: Liquid Sculpey vs Sculpey Bake and Bond Test Results
- Related Video: Faux Enamel and Viking Knit Polymer Clay Tutorial
- Amazon: Liquid Polymer Clay **
Resources marked with a double ** asterisk are affiliate links. If you click on them and decide to buy something, we may receive some compensation. This does not affect the price you pay in any way. What it does do, however, is helps us to continue providing free videos for you, here at the PcT website. Using our links to purchase your tools and supplies, is always greatly appreciated.
Sponsored Ads & Special Promotions
Shareable Images


To share this full blog post anywhere on the web that allows links in comments, here's a shortened url to copy and paste...
>> https://mypct.ca/v708 <<
Want to chat about today’s post? That’s what the comment section below is for. Scroll Down… We’d love to hear from you!
Or... if you would like to request a topic for a future post, here is the link to do that… PcT Suggestion Box
Hi Cindy
A bit late I’m afraid, but just wanted to thank you for this test of the liquid polymer clays. I was particularly interested in the Fimo as I’m keen to try it to get a sort of enamel look. It seems that mixing Fimo LC with pastel chalks could result in a fabulous, clear colour with a beautiful shine. I’m just about to try this with some cut-outs and keeping my fingers crossed that I can keep the liquid in the open areas and not have it seeping underneath and mixing with the colour ‘next door’. Maybe it would work if I pasted the clay with a very light coat of Fimo first, then stuck on the cut-out while it’s still tacky. And then, when dry, fill in the openings with the chalk coloured Fimo?
Thanks again. As always you are a mine of information – and, after the 6 years I’ve been with you, still coming up with new ideas, projects and advice for best results! How lucky we all are!
Marion
Thank you so much Marion for saying that! It means more to us than you know!! Let us know how your experimenting goes. Your project sounds like a fun one!
Thank you for this comparison! I was coating paper using the TLS. ugh. It yellowed way to much to be pretty on the lighter colors. I am going to try the fimo…THANKS TO YOU! I am so glad to be a part of this class! Again thank you.
Hi Laurie, that is odd about your TLS yellowing… I haven’t had a problem with that. The Fimo definitely stays white though, so if that will work better for your situation, then definitely go for it!
Just in time! I was wonderng about these liquid clays! I want to make window clings and I think I’ll try the liquid Fimo. I have made some before with TLS but mine is a little old. I may try like Krithika suggested and add clay softner to thin it a bit. One question I have for you, Cindy, is have you figured out how to keep some of the clay colors from darkening after baking? I lowered the temp of my oven to 250 F and it seemed to help. I’m a little concerned that thick pieces may not cure enough. So, I let them cool and re-bake at 250 F a second time. Just wonder if you have a better solution.
Hi Catalina, sorry to take so long to respond to your question. I wouldn’t lower your temp to keep the color from darkening… that is just going to make your pieces weak. Try doing it with a touch of white or even some translucent. That should help the light get into your clay a bit and make it appear a little lighter. Hope that helps!
I have all the liquid clays, I use each for different things and when I want different finishes: TLS for a matte finish, Kato polyclay for a shiny finish.
I used to use Bake n bond when I wanted to attach two pieces of clay, but I’m liking Kato poly paste much more for that now. It’s a lot thicker, so pieces don’t move around. I was putting together a gingerbread house with baked clay wall and roof pieces and poly paste actually held things in place as it baked. Bake n bond made things slide all over the place.
Kato liquid clay comes in a giant 8 oz bottle that’s great value for money. I’m probably going to get that when the bottle I have runs out.
Ah, so wonderful to see the return of Dr. Cindy in the lab coat….testing, testing, all for us.
A great summary of the liquid clays, I learned a great deal. I have bottles of all but FIMO, and they are absolutely ancient, so I wonder what one would use to thin them and/or reactivate them? Does anyone have any ideas?
This will be the winter of polymer clay. Cannot wait to experiement with them!
I’ve had good luck thinning out Kato liquid clay with the Sculpey clay softener. I’d guess that should work with TLS as well. Bake n bond is intentionally thicker I think, since it’s meant to be more of a glue, but you could try adding clay softener to that as well.
Thanks, Krithika! Appreciate the help!