Conditioning Polymer Clay By Hand Without Any Tools
Video #596: If you are a beginner without a pasta machine, here’s how to condition polymer clay without hurting your hands.
More...
IN THIS POST: — conditioning polymer clay — condition polymer clay — beginners — softening — pliable — by hand — no tools — carpal tunnel — wrist pain — soft clay — soften — (Topics marked with an asterisk* are discussed in the Comments Section below).
Topics Covered In This Video:
- In the past, I have shown you how to condition clay using various different types of tools.
- But I also know that some of you are just starting out with polymer clay and don’t any have tools yet.
- I show you some tips on how to condition clay by hand without hurting your wrists and hands.
- First warm up the clay in your hands or by placing in a warm (not hot) location.
- Some people like to sit on the clay (or put in your bra) to initially warm up their blocks of polymer clay.
- Don’t squeeze or knead with fingers or thumbs. That will be hard on your muscles and joints.
- Instead, roll and press with the palm or heel of your hand.
- Continually twist and wiggle the clay to wake up the oils and plasticizers.
- Keep rolling and squishing clay with palm until clay is soft, pliable and workable.
- It can take a while by hand, but you still can do a good job of conditioning clay without any tools and without being too hard on your hands.
- However, if you have hand mobility issues, then you are going to have to invest in some tools.
- Using tools to condition polymer clay… like a pasta machine… the NEVERknead… or a food processor… will obviously help speed up the process.
00:00:03 –> 00:00:08 Hi guys, its Cindy Lietz, your Polymer Clay Tutor, and today’s Studio Tip is how to condition
00:00:08 –> 00:00:11 Polymer Clay by hand without any tools.
00:00:11 –> 00:00:16 Now in some previous videos, I’ve talked about using tools to condition Polymer Clay, but
00:00:16 –> 00:00:20 a lot of you don’t have the tools, you are just getting started out, and I wanted to
00:00:20 –> 00:00:24 show you, just right back to basics, how to condition your clay.
00:00:24 –> 00:00:30 Now by conditioning your clay what I mean is that you’re warming it up, softening it
00:00:30 –> 00:00:37 so that it is workable and pliable and isn’t going to be brittle on you when you go to
00:00:37 –> 00:00:38 bake your pieces.
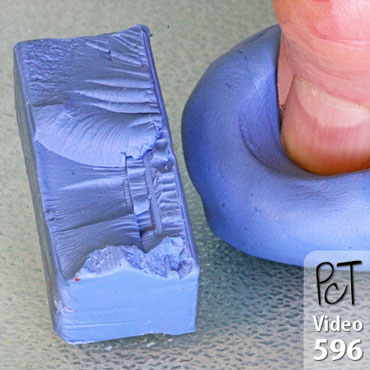
00:00:38 –> 00:00:43 So here’s a block that I’ve conditioned, you can see that it’s nice and soft, but if you
00:00:43 –> 00:00:50 were to condition a piece of clay like this…it’s all firm and straight from the pack, just
00:00:50 –> 00:00:54 by hand, by squeezing it and pressing on it like this it’s very hard on your hands, your
00:00:54 –> 00:01:00 hands can… it’s hard on the muscles and the joints and everything to just be doing
00:01:00 –> 00:01:05 it by pressing it with your hands, so I have a couple of little tricks that will help you.
00:01:05 –> 00:01:10 Now I’ve just got a block of clay here that’s fairly firm, I can feel it, and it’s been
00:01:10 –> 00:01:16 sitting around for a bit, what I would do is just start warming it up and rolling it
00:01:16 –> 00:01:24 on my table…it’s kinda shaky here a bit, and what it does is it warms up the clay a
00:01:24 –> 00:01:30 little bit, I can roll it in my hands, and this flat part of my hand is a lot…I mean
00:01:30 –> 00:01:37 it can handle pressing down with it more than my fingers can, then I can use the basin and
00:01:37 –> 00:01:43 press down this way a bit, and we’re just sort of waking up those particles, all the
00:01:43 –> 00:01:49 oils and the plasticizers and things in the clay, and we’re getting them to start moving,
00:01:49 –> 00:01:56 now I can twist the block, press it in, twist, and you can see already it’s starting to be
00:01:56 –> 00:02:04 a little looser, and my fingerprints are squishing into it a lot more, and soon it’ll start working
00:02:04 –> 00:02:08 into a pliable workable clay.
00:02:08 –> 00:02:15 Now with this kind of method you don’t introduce a lot of air or anything into the clay which
00:02:15 –> 00:02:21 is really good, it is more work than using tools of course, and that’s why we use the
00:02:21 –> 00:02:22 tools.
00:02:22 –> 00:02:28 But it is possible to get a very well-conditioned clay without hurting yourself too badly if
00:02:28 –> 00:02:30 you’re doing it this way by hand.
00:02:30 –> 00:02:37 So just rolling it back and forth, and I can feel already it’s starting to soften up, so
00:02:37 –> 00:02:44 I’m just going to press it down again, and a lot of people like to warm up their clay
00:02:44 –> 00:02:50 first by sitting on it, some ladies like to stick it in their bra, you can set it…I
00:02:50 –> 00:02:56 have a sort of a warm spot beside my computer where the little vents are, that is a good
00:02:56 –> 00:03:01 spot to set it, somewhere where it’s warm but not too hot you don’t want to be curing
00:03:01 –> 00:03:06 the clay, that’s a nice way to get it kind of started.
00:03:06 –> 00:03:13 See that, it’s already becoming conditioned, and it would take just a little bit more of
00:03:13 –> 00:03:21 this playing around with it to get it completely pliable and workable for whatever it is that
00:03:21 –> 00:03:23 you wanna do with it.
00:03:23 –> 00:03:33 Once it’s woken up well enough, you should be able to roll it out with a brayer or acrylic
00:03:33 –> 00:03:38 roller that kind of thing, you can just keep waking it up and it’s getting softer and softer
00:03:38 –> 00:03:40 and more conditioned.
00:03:40 –> 00:03:46 So I just wanted to show you that that this rolling process is a lot better than trying
00:03:46 –> 00:03:47 to do it…
00:03:47 –> 00:03:50 I’ve seen a lot of people just sorta squeezing it in their fingers and trying to mix it this
00:03:50 –> 00:03:56 way, and that is really hard on your thumbs and your knuckles and your hands and everything,
00:03:56 –> 00:04:01 and when you get older like me or you’ve had carpal tunnel that can be a real problem,
00:04:01 –> 00:04:03 and so I just thought I’d show you this little trick.
00:04:03 –> 00:04:09 So I hope that was helpful for you, if it was let us know that if you like this video.
00:04:09 –> 00:04:15 And if you have any suggestions for future videos, products you like me to test, things
00:04:15 –> 00:04:20 you don’t know about that you’d like to learn, leave those in the comment section below.
00:04:20 –> 00:04:26 And don’t forget we have a great resource over at PolymerClayTutor.com where you can
00:04:26 –> 00:04:31 use the search box there to find all the answers to all of your Polymer Clay Questions.
00:04:31 –> 00:04:33 We’ll see you next time and bye for now.
Our goal is to translate these videos into as many languages as possible. If you are interested in helping with this initiative, then please do contact us and we will figure out a way to make it worth your while :)
Resource Links:
- Related Article: Tools For Conditioning Polymer Clay
- Related Video: Acrylic Roller For Polymer Clay
- Related Video: Atlas 150 Pasta Machine
- Related Article: Pasta Machine Motors
- Related Video: NEVER Knead Polymer Clay Conditioning Tool
- Related Video: Using Food Processor For Conditioning Polymer Clay
- Related Article: Conditioning Polymer Clay Without Trapping Air Bubbles
- Related Article: Hand and Wrist Pain Prevention for Polymer Clay Artists
Resources marked with a double ** asterisk are affiliate links. If you click on them and decide to buy something, we may receive some compensation. This does not affect the price you pay in any way. What it does do, however, is helps us to continue providing free videos for you, here at the PcT website. Using our links to purchase your tools and supplies, is always greatly appreciated.
Sponsored Ads & Special Promotions

Shareable Images


To share this full blog post anywhere on the web that allows links in comments, here's a shortened url to copy and paste...
>> https://mypct.ca/v596 <<
Want to chat about today’s post? That’s what the comment section below is for. Scroll Down… We’d love to hear from you!
Or... if you would like to request a topic for a future post, here is the link to do that… PcT Suggestion Box

I need help to find out how do I make sure the polymer clay sticks to my old clay teapots and do I put it in my oven, convention oven or kiln to cook. And for how long ? is there are gude somewhere that i can find out this info.
Hi Linda, I don’t believe there is any guide out there that will help you. Although I haven’t added clay to teapots, the process would be very similar to baking clay on glass, which I have done. There are many things to consider, that would be too difficult to explain in this tiny little box. My best advice would be for you to take the Mistletoe Ornament Tutorial. Although it is based on a glass ball ornament, the techniques would be similar. Here is the link if you are interested: Attaching Polymer To Glass Surfaces (Vol-055 Back Issue)
Hello Cindy,
Having only recently become a part of the polymer clay community , I have a ton to learn and your videos have been invaluable to me. My first set back was buying clay from a previous owner , it was very dry and crumbly so learning how to save my purchase was my first objective. Of all the different conditioning techniques i’ve learned about and tried , ultimately i’ve found chopping up the clay most effective. But the idea of using my food processor to do all the chopping made me cringe at the thought of the clean up. So I elected to use my blade and hands to do it, I figured the clean up would be much easier than the processor.
But even more importantly this technique did the best job of resurrecting my dry mess. Just a couple of drops of baby oil and some finely chopped bits and I was well on my way to Polymer play.
Thanks again for your help and I look forward to more along the way!
Tracy
You are very welcome Tracy! So happy to have you here in our sweet little polymer clay family! Have a great holiday and look forward to a creative New Year!
Several years ago when I first got into claying I tryed manipulating Fimo and we all know how hard that was. Now with arthritis running rampant throughout my whole body I was forced to find alternatives. Like Jocelyn I used a heating pad laid across my lap to really warm up the clay but as things progressed I bought a $20 pasta machine and that helped a whole lot. But, still you have to manipulate with your hands at times. Now between the NEVERKnead and the pasta machine the only time I have to use my hands is when I reduce canes. That probably is the hardest part for me because there is no other way to do it. I took your advice Cindy and now I reduce them immediately right after I make them while they are still warm. Every section moves better together and it is easier on the hands. Bless you for all the wonderful tips and support you have given us throughout the years. Happy Holidays to you and Doug and the kids.
You are so welcome Dixie Ann! Thank you for the lovely comment!
Thank you for this video, Cindy. Warming and conditioning clay by hands can be very theraputic and relaxing. The satisfaction you feel when it first starts to meld is always a magic moment for me, I marvel at it.
If the north wind blows a storm, it is cold in the work area. I work small, trying a bunch of stuff themed on a colorway, and could not survive without the pasta machine motor. I always go for the Black and Decker coffee grinder first. Metal interior and blade with a plastic pop off lid, so just do small amounts, heat them up spinning, then dump contents into plastic bags and “massage” into a sheet through the bag.
Sometimes these lucky little bags of mixing color dots ends up in bed with me, heating on the pad with my knees. Keep a towel to work on over the lap, and have kneaded many a palette while watching PBS…… I tend to roll snakes of color first, and gradually mix.
Happy Thanksgiving all. I am very thankful for Cindy and Doug, and all who work with polymer clay.
Thank you Cindy that was really helpful!