Easy Polymer Clay Zipper Cane Tutorial
Video #723: Starting with a Skinner or Teardrop Blend that has good color contrast, is key to making Zipper Canes that work.
More...

IN THIS POST: — zipper cane — teardrop blend — skinner blend — teardrop blend — polymer clay cane tutorial — beginner polymer clay cane — pattern cane — (Topics marked with an asterick* are discussed in the Comments Section below).
In the previous video, I showed how to get more color contrast in your polymer clay color blends. This can be very important when making certain polymer clay canes… especially a Zipper Cane.
If you don’t have enough contrast between the darkest to the lightest colors in your blend, your Zipper cane design will lose its impact, visually. Colors that are too close to the same value, will blur together, and the pattern will be difficult to see. This is especially the case if you reduce your cane to a smaller size.
So… before attempting this Zipper Cane Tutorial, make sure to first watch the “Managing Color Contrast With Skinner Blends” video (See Resource Section for the link), so that you end up with a pleasing result for your zipper cane.
As you will see in the video, once you have a good Teardrop Blend with nice contrast, you can easily transform it into a Zipper Cane in just a few steps.
The first step is to manipulate your cane into a long strip between 1" to 2" in width. The blend should go from side to side down the entire strip, rather than from end to end. In the video, you will see what I mean.
This strip is then cut in half, leaving you with two long strips that you will flip one side to side and stack on top of the other. Making sure that the light edge of Piece Two is now on top of the dark edge of Piece One… and that the dark edge of Piece Two is on top of the light edge of Piece One. Again, this makes the most sense when you can see it done in the video.
Then, to make this double layered alternating stack into a cane, you simply cut in half and stack… repeating until you have a rectangular cane that suits your needs.
This Zipper Cane can then be reduced to a smaller size as needed, and sliced to be used for whatever you want. Zipper Cane slices make great earrings, beads, buttons, pendants, polymer clay background sheets, slices to add to bangle bracelets, frames, candleholders, etc., etc.
Try this cane out in lots of different color ways. Have fun!
00:00:03 –> 00:00:08 Hi guys, it’s Cindy Lietz, your Polymer Clay Tutor and in today’s PcT Mini Tute.
00:00:08 –> 00:00:13 I’m going to show you how to make a Polymer Clay Zipper Cane.
00:00:13 –> 00:00:21 Now, last video, I talked a little bit about making more contrast in your polymer clay
00:00:21 –> 00:00:27 Skinner Blends or Gradients or Ombres or Teardrop Blends, whatever you want to call them but
00:00:27 –> 00:00:32 how to get more contrast and I mentioned that we would be making a Zipper Cane this time
00:00:32 –> 00:00:39 around, and what does it pertain is is a polymer clay cane that you can take slices off of
00:00:39 –> 00:00:45 and use for all kinds of different projects and the design looks a little bit like a zipper
00:00:45 –> 00:00:49 because it’s light to dark, alternating back and forth.
00:00:49 –> 00:00:54 There are different versions of Zipper Canes out there that people teach in they add variations
00:00:54 –> 00:01:00 and different things to them but this is a very basic Zipper Cane that is quite simple
00:01:00 –> 00:01:03 to do and I will show you how to do that now.
00:01:03 –> 00:01:09 Now, what you’re going to need is at least two colors of polymer clay.
00:01:09 –> 00:01:15 I’m going to be using these three colors here because I want to a blend that has a lot of
00:01:15 –> 00:01:17 contrast in it.
00:01:17 –> 00:01:23 Now, do watch that previous video on the contrast– getting the contrast in your blends because
00:01:23 –> 00:01:28 it will really help you decide which colors to choose but if you want to do one exactly
00:01:28 –> 00:01:34 like this, you’re going to need one section of like a– their sports sections in a block
00:01:34 –> 00:01:43 of Premo and that’s the brand that I’m using today, one section of this is Periwinkle I
00:01:43 –> 00:01:51 always forget that– a Periwinkle, one section of Wisteria and one section of White and then
00:01:51 –> 00:01:54 you’re going to need to turn that into a Teardrop Blend.
00:01:54 –> 00:02:00 Now, I also have more in-depth videos on doing a tear drop blend but I will show you the
00:02:00 –> 00:02:05 basic concept of how that works here.
00:02:05 –> 00:02:08 They can take a little while so I won’t go through the whole process.
00:02:08 –> 00:02:13 So if you’ve never done one make sure to watch the the videos that I have on that.
00:02:13 –> 00:02:22 So, I’m just taking my section and I’m turning it into a ball first and then I’m going to
00:02:22 –> 00:02:27 turn it into a teardrop shape and this is so that we can get our triangular shapes that
00:02:27 –> 00:02:29 we need to get the blends.
00:02:29 –> 00:02:31 So there’s the one shape.
00:02:31 –> 00:02:36 Now, I didn’t bother conditioning this clay ahead of time, don’t really need to because
00:02:36 –> 00:02:42 just the whole process of blending, making a Skinner Blend or Teardrop Blend conditions
00:02:42 –> 00:02:47 the clay plenty anyways so there’s no need to precondition it unless it’s rock hard or
00:02:47 –> 00:02:52 crumbly or something then you would need to recondition it.
00:02:52 –> 00:02:58 But this is fresh clay so it’s good to go and as you can see, or hopefully you can see
00:02:58 –> 00:03:05 I’m alternating the shapes pointy to thick, back and forth.
00:03:05 –> 00:03:11 So in the previous video, I just did a blend like this and then I added the white but in
00:03:11 –> 00:03:17 this one, we might as well just get right to the point and add the white right now.
00:03:17 –> 00:03:24 So I’m getting– this white is a little stiffer and we’ll get a teardrop shape there and then
00:03:24 –> 00:03:27 I would add it right here to the end.
00:03:27 –> 00:03:36 Now you would then flatten it out and you have– you can do it with a roller a little bit.
00:03:36 –> 00:03:39 You need it so that you can run it through your Pasta Machine.
00:03:39 –> 00:03:43 Now if you do not have a Pasta Machine, then you can do it by hand with an acrylic rod
00:03:43 –> 00:03:46 like this but it will take a lot more work.
00:03:46 –> 00:03:52 So a Pasta Machine is definitely easier if you’re going to be doing a lot of blends.
00:03:52 –> 00:03:59 Then you take your blend, you run it through the thickest setting of your Pasta Machine,
00:03:59 –> 00:04:11 this I’m kind of controlling the width here you fold it in half, and you run it through
00:04:11 –> 00:04:19 again and you do this forever and ever you can even double it over 2 times if you want,
00:04:19 –> 00:04:23 trying not to trap any air in there, squeeze it out the ends and then run it through the
00:04:23 –> 00:04:24 machine like that.
00:04:24 –> 00:04:30 So you would continue and continue and believe me, if you do it enough times you’ll end up
00:04:30 –> 00:04:35 with a really smooth ,beautiful blend just like this.
00:04:35 –> 00:04:43 Alright, so, now what you need to do you have got your blend, we need to manipulate this
00:04:43 –> 00:04:46 into a much skinnier width.
00:04:46 –> 00:04:53 So we want it anywhere between an inch and an inch and a half.
00:04:53 –> 00:04:57 It doesn’t matter that much but we want to have something that we can deal with that’s
00:04:57 –> 00:05:04 a lot smaller than this big width so the best thing to do to control that width is to first
00:05:04 –> 00:05:09 fold it in half and you always want to make sure your blend’s going up and down.
00:05:09 –> 00:05:18 I’m going to fold it in half again and I’m going to shorten it up and you can really–
00:05:18 –> 00:05:25 you can do this just by pushing your hands on either side and we’ve already got it a
00:05:25 –> 00:05:29 lot skinnier than it was before just by manipulating it here.
00:05:29 –> 00:05:34 We’re keeping the colors the way they were now when we go to put it into our machine
00:05:34 –> 00:05:41 ,we can continue to control the width by squeezing on the side here I want it to be relatively
00:05:41 –> 00:05:49 flat though because I don’t want it to hurt my machine and now, I’m going to kind of hold
00:05:49 –> 00:05:57 my fingers to the side and run it through at the thickest setting and now we have a
00:05:57 –> 00:06:03 much skinnier sheet, it’s still not quite as skinny as I would like, so I’m going to
00:06:03 –> 00:06:10 do that one more time, squish it up, and we’re getting really close here it’s at about two
00:06:10 –> 00:06:20 inches wide now and once we have a strip that is about an inch to in it to–an inch and
00:06:20 –> 00:06:25 a half or so wide, then we have something to work with.
00:06:25 –> 00:06:32 Alright, so let’s try this again and I’m continuing to pinch and I kind of hop back and forth.
00:06:32 –> 00:06:37 If I just hold on to it sometimes, it’ll drag and crumble a little on the edge be kind of
00:06:37 –> 00:06:42 pinch– pinch it like that it will go through nicely.
00:06:42 –> 00:06:46 So now we have a nice long skinny strip.
00:06:46 –> 00:06:53 Now, what we’re going to do is cut this and stack it into alternating sections and then
00:06:53 –> 00:06:58 the quickest way to do that is to take it and cut it in half so where’s half somewhere
00:06:58 –> 00:07:06 that and we’re going to take this and we left it, I left it at the thickest setting it’s
00:07:06 –> 00:07:12 going to give the best effect if it’s you know, fairly thick so I’m going to stack this
00:07:12 –> 00:07:17 on top but see how these colors are matching ,what I want to do is I want to flip that
00:07:17 –> 00:07:22 over so that the colors are opposite.
00:07:22 –> 00:07:30 Now, what I’m going to do is trim it on either end here so that I don’t have– so that everything
00:07:30 –> 00:07:40 is all kind of matching up and then I’m going to cut it in half so about half.
00:07:40 –> 00:07:45 We’re going to take this stack and now because it’s already alternating, we can just stack
00:07:45 –> 00:07:59 it on top and cut it one more time and stack it one more time and that should be good.
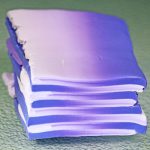
00:07:59 –> 00:08:04 Now what you have is a Zipper Cane.
00:08:04 –> 00:08:09 Now, you can either– now let me just trim up the front there so it’s nice and clean
00:08:09 –> 00:08:16 and you can see how nice that looks– isn’t that so very cool?
00:08:16 –> 00:08:25 Now, you can reduce this cane, you can– you can trim up the sides a bit if you were worried
00:08:25 –> 00:08:31 about the edges flopping over if you don’t mind about that, that’s fine too, you can
00:08:31 –> 00:08:38 reduce it and make it longer, smaller, you can take slices of it, you can lay these slices
00:08:38 –> 00:08:50 next to each other, for example and make a big sheet that you can roll out to the– the
00:08:50 –> 00:08:59 same thickness cut earrings out off, cut shapes out of using as background cane or backdrops,
00:08:59 –> 00:09:05 all kinds of very very cool things that you can do with this simple simple Zipper Cane.
00:09:05 –> 00:09:08 So I hope that was fun for you, it’s an easy project.
00:09:08 –> 00:09:13 I want you to go ahead and try that try it with whatever colors that make you happy and
00:09:13 –> 00:09:17 I do make sure to check out those previous video so that you can really get a good handle
00:09:17 –> 00:09:23 on how to do color blends and how to do these neat little canes.
00:09:23 –> 00:09:29 If you like this video do let us know and if you have any suggestions for techniques
00:09:29 –> 00:09:34 or things that you don’t understand then leave those in the comments section below and make
00:09:34 –> 00:09:36 sure to check out our other videos.
00:09:36 –> 00:09:40 We have absolutely tons and tons of videos that we’ve done and you may just have one
00:09:40 –> 00:09:44 in there that you have not seen before, do make sure to check that out too.
00:09:44 –> 00:09:47 Alright, so we’ll see you next time and bye for now.
Our goal is to translate these videos into as many languages as possible. If you are interested in helping with this initiative, then please do contact us and we will figure out a way to make it worth your while :)
Resource Links:
- Related Video: Managing Color Contrast With Skinner Blends
- Related Video: Lietz Teardrop Blend Color Gradients Made Easy
- Related Video: Is Your Skinner Blend or Teardrop Blend Too Wide
- Related Video: Reducing Square Polymer Clay Canes Mini Tutorial
Resources marked with a double ** asterisk are affiliate links. If you click on them and decide to buy something, we may receive some compensation. This does not affect the price you pay in any way. What it does do, however, is helps us to continue providing free videos for you, here at the PcT website. Using our links to purchase your tools and supplies, is always greatly appreciated.
Sponsored Ads & Special Promotions
Shareable Images


To share this full blog post anywhere on the web that allows links in comments, here's a shortened url to copy and paste...
>> https://mypct.ca/v723 <<
Want to chat about today’s post? That’s what the comment section below is for. Scroll Down… We’d love to hear from you!
Or... if you would like to request a topic for a future post, here is the link to do that… PcT Suggestion Box
looking forward to trying this
You mention turning a zipper cane into a sheet. I’d really like to know how to make smooth sheets from cane. Thanks
There was a tutorial done on that years ago. Here is the link to more info:
Using Cane Slices To Make Pattern Backgrounds
Hi Cindy,
This is a wonderful cane. Simple yet beautiful!
Can you please do some more videos about finishing textured pieces?
Hi Aastha, I will put that on the list as a future video. Thanks for the suggestion!!
You always talk about,what we can “do” with our resulting canes, but could you then take a minute and show some examples of your resulting creativity…thank you so much for these videos!!
Hi Marilyn, I have tons of tutorials on what to make with polymer clay canes. Just put “canes” in to the search box and you should be able to find all sorts of cool projects.
Love this one! It looks so easy! Love the colors you chose, too.
Thank you Catalina, it is easy. You should make up a little pile of them and make something cool!
whoo-Hoo! Love this zipper cane! I really like the colors you used also. As usual Cindy you make it look so easy to do and one can put several of these together to have on hand when needed.
Thank you Dixie Ann! Glad you enjoyed that!
You also made it look so easy. I would have been slicing each piece and trying to stack it.
Thanks Anna! Sometimes there are ways to make things a=faster and get the same result. I try my best to find those ways, When I was a kid, teachers called me lazy… |I just figure, why do it the hard way, when you can do it the easy way? :)
Zipadeedodah,
love this zipper cane Cindy and also the new premo colours you are using. Must remember to add them to my wish list, they are so pretty…..cheers xx…..
LOL You are always so much fun Elaine!