Vol-031-3 Embedded Leaf Vein Hammered Wire Bail PcT Tutorial (Intro)
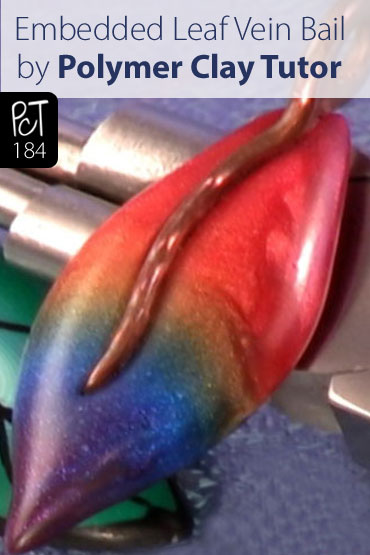
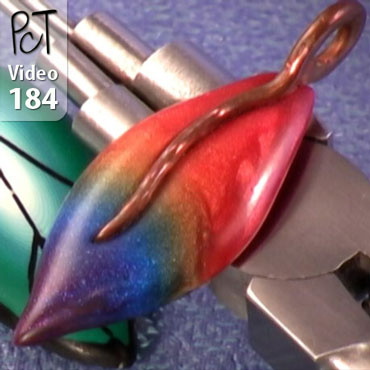
Video #184: “Beautiful Cindy. I love how the bail extends into the pendant itself.” ~Cheryl-H
More...
** This post is an introduction to one of our paid tutorials.
When I first discussed this integrated bail design concept about 6 months ago, it sparked a fair amount of interest from you guys. And since then, it has proven to be a hit with both young and old. Here is a link to the original article in case you missed it: Timeless Polymer Clay Treasures.
“Cindy, way cool pendant! I love the way you used the copper wire to accent the bead.” ~Lisa-W
“Thanks for another great idea. I love the copper piece in the clay. I just ordered more copper from my favorite copper lady so I’m definitely going to try this.” ~Bonnie-K
“I love the idea of the wire in the pendant I must try it as I love wire work as well and the two go hand in hand, another great one Cindy.” ~Ritzs
“Too much! Oh, Cindy, another winner. But, golleeeeeee, I want to try everything you post and there doesn’t seem to be enough hours in the day!” ~Carolyn-F
“YES to the bail for an upcoming metal segment for me. I would love to learn how to do this one. I don’t think you could come up with anything I wouldn’t enjoy learning. Your tutes are amazing to say the least. Thank you once again Cindy for being you!!” ~Peggy-B
“Beautiful Cindy, I can totally see how your daughter and mom in law would want one too. I would love to learn this as well, the curved metal spine is really pretty with the shape of the bead.” ~DJ
“Yes, yes, please teach us the bail!” ~Lisa-W
“
I used your technique, but had to use aluminum wire as I've lost my copper! Ok, where is that brain? Anyway, I made a sorta-leaf shaped pendant with remnants from Torn Watercolor technique (Vol-014-4) in muted Christmassy colors with the embedded bail and I think it turned out great!
Becky C
“
Wow, just watched this video and I love how elegant it looks. Thank-you Cindy!
Anne O
“
Really enjoying the videos Cindy. I'll get back to claying when I get back home. For now I have my colored pencils and I'm working on some design ideas, and taking loads of photographs while enjoying being a snowbird. Today's video was especially inspiring. Thanks.
Lawrence S
Transcript coming soon...
Transcript coming soon...
Our goal is to translate these videos into as many languages as possible. If you are interested in helping with this initiative, then please do contact us and we will figure out a way to make it worth your while :)
Shareable Images


Want to chat about today’s post? That’s what the comment section below is for. Scroll Down… We’d love to hear from you!
Or... if you would like to request a topic for a future post, here is the link to do that… PcT Suggestion Box


Where can I purchase the Weldbond glue?
@Susan Colvin: Hi Susan! Lots of places carry this glue, including craft, department, and (I think) home improvement stores. I’ve seen it most recently at Michael’s arts & crafts and Walmart. I found an older article Cindy wrote about Weldbond Glue — it has some additional info. Good luck finding it quickly…and have fun with your project! ~Kat :D
Great tutorial. I won’t be claying for a few days but will try it. It looks really neat.
Elizabeth, i bought my looping pliers from Fire Mountain Gems.
I used your technique today, Cindy, but had to use aluminum wire as I have lost my copper wire I just bought! Ok, where is that brain? I had it somewhere….oh, well. It will turn up in the fridge or someplace equally odd I imagine (the wire, not the brain).
Anyway, I made a sorta-leaf shaped pendant with remnants from Torn Watercolor technique in muted Christmasy colors with the embedded bail and I think it turned out great! I will post a pic in Facebook when I get a minute tomorrow. I would appreciate any comments or suggestions, too!
Did I mention I simply love the Torn Watercolor technique? It does indeed make such impressive looking beads or even shaped pendants and is so easy to do. I used the Betta Red, Beechwood and Succulent Green colors (lightened with a bit of pearl in all but the green–I forgot :)). Thank you, Cindy!
@Becky C.: Safety first, but, I checked the basement and found some too long copper wire rolled up as a builders insurance. If you are sure it is not charged with electricity, clip the excess and use. Also look into any cable wires laying around….inside some are copper, and you can strip it out.
Happy Holidays to all.
Very, very cool project. Would putting a very thin coat of UV resin over the piece after the wire has been glued in also help keep the wire from becoming dislodged?
@Anne o: I’m still hoping that someone from the UK will pop in here and help you out Anne. In the mean time, you can try typing words like “UK” and “England” into the search box at the top of the page to find other places on this blog where this type of thing has been discussed. I know that there are several members from the UK that follow this blog, so hopefully you will be able to find what you need. If you click the link by my name, it will take you to a post about a UK meet-up that happened last year.
@Jocelyn: Thanks Sweetie! Imaging myself having an eggnog or two in your company. Have a Merry Christmas my friend!
@Elizabeth S.: I got those Multi-Size Looping Pliers at a local place called Capilano Rock and Gem but you can get them online at Contenti. Here’s the link: contenti.com/products/pliers/370-094.html
@Kathy Bloom: Putting resin on this type of pendant would be a wonderful idea. I just wouldn’t taper the edges like I did in the tutorial, because resin does better with crisp edges which keep the resin from spilling down the sides.
@Cindy Lietz from UK Polymer Clay Meet-Up: Thanks for the link-that is a nifty tool.
Forgot to ask–where can we get the super new tool you used this week?
I think the possibilities for amazingly unique outcomes is the gift of this technique. Thank you, Cindy & Doug for giving me another push forward as a wannabe pc artist.
Hugs,
Elizabeth
Cindy, I don’t know what well you are tapping for this inspiration, but once again, unique, gorgeous, and unlimited. Never in a million years left to myself would I have ever thought of this technique. Kudos.
Thanks Doug. Sweet 11 mins.
Merry Christmas and/or Happy Holidays to all of you. I’m spending one nite with eggnog and rum. Hopefully a fireplace, too. May Santa brings you all an adult stocking full of Premo. LOL!!!
Really enjoying the videos Cindy, even though I am not claying this month. I have my colored pencils so can work on some design ideas and taking loads of photographs while enjoying being a snowbird.
Today’s video was especially inspiring.
Thanks
@Susan B: Sorry I missed your question Susan. I have never used that glue before. If someone else doesn’t pop in with an answer for you, the best thing to do is test it yourself. Make a sample polymer piece and glue something to it with your glue. Put the date on it and leave it for awhile. If after a few months, the glue is still holding with no adverse reactions, then it is polymer clay safe. Make sure to come back and let us know about your findings whenever you do an experiment like this. It is a great service to everyone working with polymer clay!
@Lawrence: Thanks Lawrence! Nice to hear from you. Get some sunshine for me and have a wonderful Christmas! Don’t drink too many Margaritas… but then again… why not! ;-)
@Cindy Lietz from Faux Druzy Tutorial: Thanks Cindy — I will have a go using Vinivil glue and report back.
am I the only one who can not open this weeks member only video
Thank you everyone! I am glad you enjoyed the tutorial. I’d be excited to see what kind of twists you guys can add to the design of this one.
@Kathy G: Sorry to hear you’re having problems watch the video today. The first thing to check is to make sure you are logged in with your username and password. And for more in depth trouble shooting tips, the link by my name will take you to some helpful info.
Can’t wait to try this, now. Oh my gosh….how do you keep coming up with these things? These tutes are just rigtht for newbies like me and I imagine give ideas for the more expierienced clayers too. WTG girl….and Doug :).
Wow these are simply lovely! I particularly like the earrings with the silver wire. Thank you Cindy. Doug, your filming is just getting better and better — thank you too!
Does anyone know if Vinivil, which is a white glue that dries transparent and sticks almost anything to anything, might work with polymer clay? I can’t get hold of Weldbond here in Italy.
Wow, just watched this video and I love how elegantit looks can’t wait to try this , thank-you Cindy! a quick question off topic, can anyone recommend good work shop I could attend here in England, if possible on a weekend! Thank you again! Anne xx
I just love these…they have such an elegant, simple line. You continue to spoil us Cindy – can’t wait! :)
My brain is already thinking up ideas for this! (And it’s almost Friday!)
Spectacular! Can’t wait for this one!
My tools are ready. C’mon Friday!
Don’t you love using wire with PC ? A match made in heaven Scraps just crying out -use me, use me !!! And now I will be able to -what a great idea!!!
Don’t know how you do it, but your brain must be on speed time LOL
Yay Cindy! Once again I can’t wait for Friday..!!
Peace, Love, & Clay,
~Lisa :)
They look pretty Cindy! I’ve been wondering about making bails recently because I’ve made some pieces using findings in a kind of dark gunmetal colour and haven’t been able to find bails in the same colour to match. If I could make my own pendant bails out of the headpins I have that would be perfect.
Can’t wait until tomorrow. This looks like a winner too!!!!
Billiant Idea Cindy! as always , I am looking forward to tomorrows tutorial.