Vol-084 Fuchsia Flower Fairy Lights PcT Tutorial (Intro)
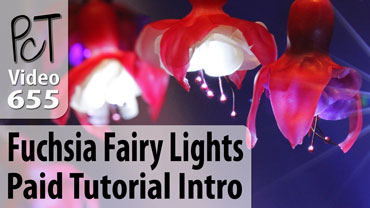
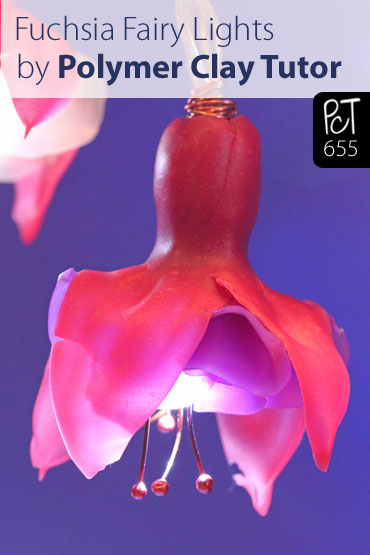
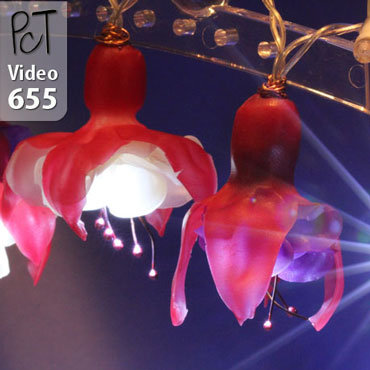
Video #655: LED light strings decorated with translucent polymer clay flowers… adding some delights to your life.
More...
** This post is an introduction to one of our paid tutorials.
Ever since this Fall, it seemed like every time I went into my local Michaels Craft Store, there were strings of mini LED Lights calling out to me. They were on display as Christmas decorations, in the Scrapbooking section (for making paper covered Marquee lights), with the floral supplies and even in the Wedding isle. So I started picking up different sets of these cute little lights, to see what I could come up with.
To me, they screamed flower fairy lights… flowers made of polymer clay, of course!
So I got to thinking about what type of flower would look great on a string of lights… something we hadn’t made yet… something that would look lovely dangling… and something that could also be made into beads, should someone prefer to make jewelry out of them. In the end, I went with Fuchsias… they are perfect for this type of project!
It took some figuring out to not only create this delicate and complex flower, but to also add them to a string of lights in a durable manner that looked natural… and so darn pretty that you’d want to hang these lights everywhere.
They look great hanging from the fireplace mantle… over a doorway… on a curtain rod… in your cubicle at work… decorating the bathroom mirror… or even draped around your computer monitor. Anywhere you need a little light and delight in your life!
So, I truly hope you enjoy this pretty Spring/Summer project as your next Polymer Clay Tutorial!
“
Unreal. Such a great idea!!! How cool is this? Morning glories. Or your Sweet Peas, climbing a trellis.
Jocelyn C
“
Fabulous, fantastic, Fuchsias looking just like a fairy ballerina. Love this tute Cindy and for once I have all the supplies including my LED lights, to start making them straight away. Fuchsias are one of my favourite flowers and come in such beautiful two tone colours. So will get conditioning my clay right now......... cheers!
Elaine F
“
Dear Cindy, Thank you soooo much for your wonderful videos!!! You are amazing. They are so easy to follow. I especially loved this one, because I have always wanted to know how to do the torch work. It is surprisingly easy to do. Thanks to you :) I am one HAPPY GIRL.
Rosalyn H
Transcript coming soon...
Transcript coming soon...
Our goal is to translate these videos into as many languages as possible. If you are interested in helping with this initiative, then please do contact us and we will figure out a way to make it worth your while :)
Shareable Images


Want to chat about today’s post? That’s what the comment section below is for. Scroll Down… We’d love to hear from you!
Or... if you would like to request a topic for a future post, here is the link to do that… PcT Suggestion Box


Ok I admit I’ve been too lazy to finish this full project (though I did buy two string of lights from Michaels) but I followed the technique to make headpins and it’s so FUN! Within minutes I had about twenty lovely rosy headpins. I tried with Argentium silver and it was even easier and so pretty! I now have several rosy headpins staring at me and willing me to go make some fushias!
That is so great Kritika! Yes the Argentium Silver is easier to ball up into head pins and they are so darn beautiful to boot! More expensive but very pretty. They make perfect ear wires as well!
Hi Cindy, I have now watched several of your excellent videos and wanted to I thank you for speaking directly to me in your videos, at least that’s the way you make me feel.
YES!!!! (punching the air) You made it!!!!! You made the fuchsia flowers!!!! I can’t say how happy I am! I wanted to know how to build this flower for years and I was always on the lookout for tutorials just in case somebody did it already. It is even better that you were the person who made it! Loooooove it! Thank you, thank you, thank you!!!!!!
Hi Brenda!
Thankfully, poly clay sticks to itself, but, when you are adding design elements that will spring off the base pendent (sp?) I’d go the extra mile and use the addition of some type of glue and cross hatch the base pendant and the base of the flower before applying.
My favorite for durability and it’s ability to hold additions at angles so it doesn’t move during the baking process is Donna Kato’s Polymer Paste glue. Never had it react other that rock solid.
Or, you could use a variety of other glues which hold during baking. Or you could bake the flowers and pendent separately and glue them at the end using something like an instant glue or E6000.
If you pop “glue” or “attaching polymer clay to clay” or similar phrases in the search box on the Home screen, you will get a huge variety of blogs, videos, and comments where all the glues are discussed and profiled.
It sounds like a lovely piece, please share of picture of it when you are done.
All best.
When adding flowers or other decorations to a pendant how do you get them to “stick”? Do they just meld when baked or do you glue them?
Hi Cindy,
I am going to make a pendant and some earings for my daughter and mother.The Fushia flower is special to us, it is our go to flower plant for mothers day and birthdays. I need to get some foam, the kind you use in the video to shape the flower petals. I don’t know what it’s called, I think you called it fun foam? When I type foam or fun foam into Michael’s or Hobby Lobby or Joannes nothing comes up, Thank you for your help.
Hugs, Nicole
I think that’s fondant shaping foam. It’s available in Michaels and Joann in the baking section.
Hi Nicole, that is wonderful to hear that the fuchsias will be such a perfect flower for you to make for the ladies in your family! Fun Foam is also called Craft Foam… and probably a few other things as well. If you type “fun foam” into Google you will find it easily. They have a huge selection of the stuff in varying thicknesses in the kids section at my Michaels store. You can probably find it at places like Walmart too. It is widely available.
Oh this is so exciting, Cindy! Thank you.
My question is this: I noticed that some of the flame dipped headpins had blackened stems. Can this “soot” be sanded off or is it permanently part of the wire now?
Maria
Hi Maria, personally I like the black on there but if you want to remove it, you can pickle your headpins either in Jeweler’s pickling solution or homemade pickle, which is just white vinegar with a ton of salt in it. After pickling, rice in water that has baking soda in it to neutralize it. Then clear water. That’s it! It is easier than sanding of and doesn’t scratch he metal.
Ah! So that’s what pickling is used for. Thank you!
Thank you Cindy! And Maria, because I was also wondering about the blackened ends on the torch dipped headpins. I was wondering if I was holding the wire in the wrong part of the flame. I like the black for some projects but want the clear bright copper for some others.
Cindy, you say “a ton of salt” in the white vinegar. How much are we talking here? A couple of tablespoons in a half cup? More? Keep stirring in salt until no more will dissolve?
How long do you leave the wires in the pickle? A few minutes? A few days? And will it affect the lovely rosy colour of the balled end?
I made a pair of bead cone earrings out of Mokume Gane made of Premo 18k Gold, Bronze, and Copper, with copper wire torch-dipped stamens and wrapped the way you showed us, Cindy. Then I added copper ear wires from another of your tutorials. They aren’t very good (I made the clay at the top of the cone too thin and one broke up when I put the wires through – glued it back together with Weld Bond, but I know the break is there), but I was so chuffed with myself for putting all of those tutorials together! :)
Hi Doreen, that is so cool about you putting those different techniques together into your own project. It doesn’t matter that it didn’t turn out very good… you figured out a process of putting things together in a way that worked… even if only partially.
Now make another one. And you’ll see it will turn out way better.The things you learned from the first go around will help you with the next version. Then keep going until you have a version you are really proud of. That’s how an inventor ends up with something great!
As far as the pickling questions… I am talking super saturated salty vinegar… like 1 cup vinegar and a 1/4 cup salt… something like that. It is not that critical the exact amounts… but it does need to be super salty.
Think minutes not days for soaking in the pickle… but there again you’ll need to play it by ear. Also it can change the rosy tips to a kind of peachy copper color… so if that rose color is important to you, you will have to not pickle and figure out a different way to remove the black. Honestly, I love the blacker ends with the rosy tips… gives a lovely color variation with each head pin. But everyone has there own taste and look that they are trying to achieve.
I didn’t have a propane torch to make the state’s for the fuchsia, I had a butane. It does work but a bit of light washing/ rubbing is needed to get rid of the fire scale. Just thought I would share.
Thank you all for such sweet comment!! After all these years I am so happy that I can bring you ideas that still delight you. I would love to see pictures of your fairy lights and any other spin off ideas you come up with. Hope you all are having a wonderful Spring!!
Hello Cindy,
I just wanted to say that I love how your videos are quick and to the point – both the beginner course lessons and the monthly video tutorials. You can get through them very quickly and start practicing the techniques.
Thank you
Nanette
I can only say WOW!!! I’ve been pondering a similar project for a while now …. so I’m super excited about this tutorial. Thank you so much, Cindy and Doug, as always!
And for anyone thinking about signing up ….. really, it’s a no-brainer! :-)
I love the Fuchsia lights! You are so creative!
Thank you so much Cindy and Doug, what a fabulous tutorial! And a special thank you for showing us how to make the ‘stamens’, I’ve always been nervous of wire work with a torch, but I’m ready now to give this a go!
Marion
Hi Cindy and Doug, This is one of the neatest tutorials and I just squealed with delight when I saw what you were using the LEDS for. Oh the possibilities! I made a whole bouquet of Fushia flowers last year but never would have thought to add these tiny little lights. Excited all over again now to make more of these flowers and several more now that will be so pretty strung in different areas of my studio! Time to run to Michaels!
Another Super Duper tute! My Dad used to grow Fuchsias They are so dainty. I do want to add other flowers too………Now to find the time to play………….Thank you so much for all your talent, time, and energy ! So glad I belong to your family………..
Very cool idea! I am not a Fuchsia fan, but I am probably going to try this with some other flowers. I think a Plumeria strand or jasmine on tiny tiny lights would be neat. Or fantasy flowers on tiny lights set around the rim of a tea cup planter with a faery world that includes a faery door …
So many ideas, not nearly enough clay, and even LESS TIME!! ARRGGHH! :)
Dear Cindy
Thank you soooo much for your wonderful videos!!! You are amazing. They are so easy to follow. I especially loved this one, because I have always wanted to know how to do the torch work. it is surprisingly easy to do. Thanks to you. :) I am one HAPPY GIRL.
Nice to hear from you Rosalyn! I am happy right along with you. Enjoy your new found skills!
Unreal. Such a great idea!!!
Thanks Jocelyn! Glad that you love the idea!
I did and do. How cool is this? Morning glories. Or your Sweet Peas, climbing a trellis….. Need lots of pymii, lol.
Fabulous, fantastic, Fuchsias looking just like a fairy ballerina. Love this tute Cindy and for once I have all the supplies including my LED lights, to start making them straight away.
Fuchsias are one of my favourite flowers and come in such beautiful two tone colours. So will get conditioning my clay right now………cheers…xx……….
That is great news Elaine! Let us know how yours turn out!
Wow Cindy,
I know how sore your fingers must feel. The strand of led faiy lights I unearthed from my box of Christms decs has 35 little lights, so glad you showed how they look strung on every OTHER one. It’s taken me two days to make the flowers (with lots of rests in between).
Now got to don my safety gear to torch 85 copper flamed torched head pins. Hope my can of Butane will last out ha ha.
When I have finished them they will adorn my stall in the marquee at Abridge Village Craft and Antiques fair. A two day event on the 6th and 7th June. Back when you showed us the parrot tulip cane I fell inlove with this cane and made the earrings. So think that idea of using these pretty flowers on fairy lights will look very special. Just hope my local store has fairy lights in their sale isle.( Think I will stick some fun foam on the handle of my ball tool and see if that helps)….cheers..xx
They are Beautiful!
Thank you Sandra!