Is Gorilla Glue Compatible With Polymer Clay?
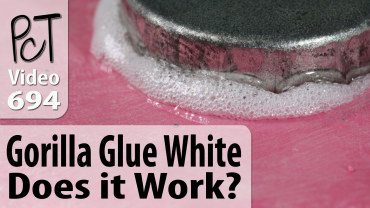
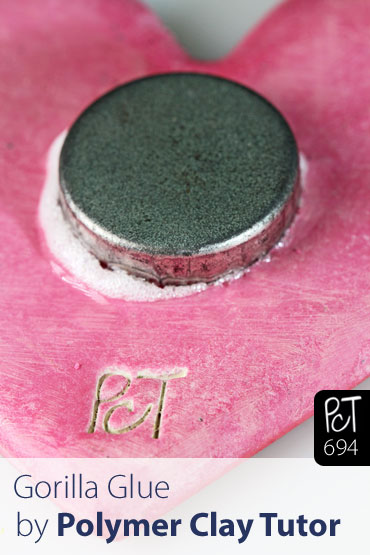
Video #694: The answer is YES… Gorilla Glue creates a super strong and long-lasting bond when attaching metal to polymer.
More...
IN THIS POST: — gorilla glue — adhesive — glues — polymer clay compatible — bond — strong — premo — street hearts — bail — metal bail — glue on bail — fridge magnets — (Topics marked with an asterisk* are discussed in the Comments Section below).
I get a lot of questions regarding which glue to use on polymer clay, especially when attaching something like a metal glue-on bail that needs a very strong bond.
I had heard that Gorilla Glue worked on polymer clay, so I decided to test it myself. Several months ago, I glued metal bails to some polymer clay heart pendants I made as samples for our Street Hearts Tutorial.
After several months, I could see they looked fine… no bad reactions or stickiness around the bail. And they appeared to be still stuck to the clay.
Today I wanted to test the strength of the bond… to be sure of it’s long term compatibility with polymer clay. I was really impressed with how strong this Gorilla Glue turned out to be, as you will see in the video.
00:00:03 –> 00:00:07 Hi guys, its Cindy Lietz, your Polymer Clay Tutor, and today in the PcT Test Lab we are
00:00:07 –> 00:00:13 testing to see if Gorilla Glue works on Polymer Clay.
00:00:13 –> 00:00:18 Now I have heard that it might, but I…and I’ve done a little bit of testing myself,
00:00:18 –> 00:00:21 but I haven’t done a strength test yet.
00:00:21 –> 00:00:29 Quite some time ago… several months ago, I made these samples for the Street Hearts
00:00:29 –> 00:00:37 tutorial, and I glued the bales on the back using Gorilla Glue.
00:00:37 –> 00:00:45 Now this is the Gorilla Glue version that is…well it’s the White one and it is 100%
00:00:45 –> 00:00:50 waterproof, and it can go on a lot of different products, wood, stone, metal, ceramic, foam,
00:00:50 –> 00:00:56 glass and more… and I’m hoping that the ‘and more’ includes Polymer Clay.
00:00:56 –> 00:01:04 Now it has interesting way it goes on, it foams up and does a few things, but it has
00:01:04 –> 00:01:11 stuck on here very well, and I wanna test to just see if it will pop off or not just
00:01:11 –> 00:01:21 by putting pressure on it, now I’m gonna push with my thumb, okay, so it’s on there really,
00:01:21 –> 00:01:27 really strong, you can even see it’s bending the piece back, so yeah, I’m happy with that
00:01:27 –> 00:01:29 as far as strength goes.
00:01:29 –> 00:01:36 I also am happy with the fact that there doesn’t seem to be any reaction, there doesn’t seem
00:01:36 –> 00:01:43 to be any stickiness or any odd behavior after several months of sitting on there, so I’m
00:01:43 –> 00:01:51 happy with that, and actually, I’m surprised it’s as strong as that…I guess it is a Gorilla.
00:01:51 –> 00:01:57 I’ll try this one as well, this is the same kind of bale, only it was in Gold, and oh,
00:01:57 –> 00:02:02 yeah look at that, how cool, I figured it was gonna work ‘cause I’d kinda lightly
00:02:02 –> 00:02:06 pressed, but I hadn’t pressed really hard to see, so that’s very good to know.
00:02:06 –> 00:02:13 So let me just show you how it works, I have another one here that I wanted to glue a magnet
00:02:13 –> 00:02:19 onto the back, so the Gorilla glue…I got this at Michaels by the way, but you can get
00:02:19 –> 00:02:25 it in a lot of different places, and it does this crazy thing where it expands and expands
00:02:25 –> 00:02:31 and expands, so be super careful with the amount that you put on, it also needs water
00:02:31 –> 00:02:38 to be activated so I just have a little mister bottle, and I’m just gonna mist the back of
00:02:38 –> 00:02:45 my piece with water, and my magnet as well…oh, it would probably help if I aimed it at the
00:02:45 –> 00:02:53 right piece, and then what I’m gonna do is just a put a little bit on the back here where
00:02:53 –> 00:03:04 I want it mounted, now, I’m gonna want this mounted right about here, and I’m also gonna
00:03:04 –> 00:03:08 scratch…I can see the little ring there, I’m gonna scratch up that area a bit.
00:03:08 –> 00:03:16 It’s always good to have a… more tooth, another spot for something to grab on to,
00:03:16 –> 00:03:23 I’m just using a little dental tool…Doug, my husband and the guy that films, his Dad
00:03:23 –> 00:03:31 was a dentist, and so I have a bunch of his old tools, which is cool, there we go it’s
00:03:31 –> 00:03:39 all scratched up and then I’m just gonna put a tiny little dot of this glue on the back,
00:03:39 –> 00:03:42 just a little bit, and we’ll set this on the back.
00:03:42 –> 00:03:49 Now, what starts to happen…and I don’t know if you’ll see it…better make sure…yeah,
00:03:49 –> 00:03:55 there’s contact there, what starts to happen is it starts to foam up…and because of the
00:03:55 –> 00:04:00 size of that and where it’s at there, it may not show around the edges in time for
00:04:00 –> 00:04:01 this video.
00:04:01 –> 00:04:06 But maybe I’ll put some on here, and see what happens…if it will foam up for you, but
00:04:06 –> 00:04:16 it starts expanding and going…it goes kinda to a solid White kinda foamy thing and I was
00:04:16 –> 00:04:21 surprised by that, so what…here, maybe I’ll show you a close up while it’s sitting here,
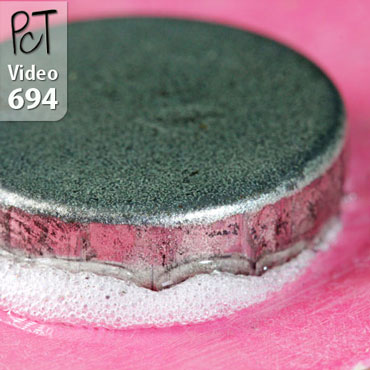
00:04:21 –> 00:04:29 if…Doug can you see in here, okay, so right in here you can see where it expanded and
00:04:29 –> 00:04:34 turned into a bit of a foam, and it filled in the gaps, and that’s part of why it works
00:04:34 –> 00:04:35 so well.
00:04:35 –> 00:04:40 But one thing that you have to do is you have to be real careful to make sure you keep wiping
00:04:40 –> 00:04:47 it out around the edges…and a little sharp tool or something like that would be good,
00:04:47 –> 00:04:51 just to make sure that you haven’t got this blobby, foamy stuff all sticking out the sides,
00:04:51 –> 00:04:56 ‘cause that’s not gonna look very professional, but you can just clean it up while it’s still
00:04:56 –> 00:05:02 foaming, and make sure to do that so that it doesn’t look messy.
00:05:02 –> 00:05:08 Let me just see if I can activate this a little bit more, I haven’t tried to do this outside
00:05:08 –> 00:05:15 of the area, but I think you get the idea, I don’t wanna spend too much time…will it
00:05:15 –> 00:05:22 do it, oh maybe it takes a bit of time to do that, but do watch for that on the back,
00:05:22 –> 00:05:27 make sure that you’re cleaning it up, and you know, every five minutes or so, just take
00:05:27 –> 00:05:32 a look and see if it’s expanded any more, clean it up while it’s still wet and you will
00:05:32 –> 00:05:37 be good to go, and as you can see, it’s very strong and works very well with Polymer Clay.
00:05:37 –> 00:05:43 I would recommend getting the White version because White foam looks better than that
00:05:43 –> 00:05:50 Yellow foam that they have in some of the older versions, so try that out and you can
00:05:50 –> 00:05:53 be sure that it will work with your Polymer Clay, alright?
00:05:53 –> 00:05:58 So I hope that was helpful for you, if it was, let us know if you liked this video.
00:05:58 –> 00:06:03 And also, if you’ve got a product that you would like me to test, make sure to put that
00:06:03 –> 00:06:05 in the comment section below.
00:06:05 –> 00:06:09 And don’t forget to check out all the videos that we have, we’ve done tons and tons and
00:06:09 –> 00:06:13 tons and there may be a video there that is perfect for you, alright?
00:06:13 –> 00:06:15 So we’ll see you next time and bye for now.
Our goal is to translate these videos into as many languages as possible. If you are interested in helping with this initiative, then please do contact us and we will figure out a way to make it worth your while :)
Resource Links:
- Related Video: Street Hearts Tutorial
- Related Article: Weldbond Craft Glue for Jewelry Making
- Related Video: Lisa Pavelka Poly Bonder Glue
- Related Article: Craft Glues for Polymer Clay Beads and Jewelry Making
- Amazon: Gorilla Glue White **
Resources marked with a double ** asterisk are affiliate links. If you click on them and decide to buy something, we may receive some compensation. This does not affect the price you pay in any way. What it does do, however, is helps us to continue providing free videos for you, here at the PcT website. Using our links to purchase your tools and supplies, is always greatly appreciated.
Sponsored Ads & Special Promotions

Shareable Images


To share this full blog post anywhere on the web that allows links in comments, here's a shortened url to copy and paste...
>> https://mypct.ca/v694 <<
Want to chat about today’s post? That’s what the comment section below is for. Scroll Down… We’d love to hear from you!
Or... if you would like to request a topic for a future post, here is the link to do that… PcT Suggestion Box

Hi Cindy,
Thank you for this! I want to make polymer clay earrings but use plastic posts. What glue is best to use for this?
Thanks
Hi Cindy – Well, I finally retired (not expired) lol, and am finally getting to spend a lot of my time creating. I love your videos, they are very informative and I love your personality. I am new to polymer clay and loving everything about it. I do have a question. I want to make a switch plate cover and wasn’t sure if I should use the typical plastic one to make a mold, or should I cover it with PC and bake the whole thing (plastic and all).
Thanks
Sheila
P.S. Do you sign your PC pieces, if so, what do you use?
Hi Shelia, Glad you’re enjoying the videos! You can actually bake directly on those plastic light switch covers, though just in case it is a different type of plastic than the usual ones, it is not a bad idea to test bake one first just to be sure it won’t melt. Most of the time it should be just fine.
If you are new to our site you may not realize we have paid tutorials and a beginner’s course. Just click the tabs at the top of the page to find posts that will give you more information on them.
Thanks for stopping by and leaving a comment! Happy claying!
Hi Cindy please help !!!
I make very small charms with alot of delicate parts to most of my creations such as ears or a nose or small flowers arms legs ect. I do try to blend the clay in but sometimes they tend to fall off or break after baking if i happen to drop it from a distance or bump it too hard
Is there a glue i could use to put on my raw clay before i bake it to help stop this from happening in the future. As well as know if I use gorilla glue on a baked piece if it can go back into the oven?
Any other help from anyone els who make delicate jewelry will be much appreciated.
Aylisha
Just a recommendation for a warning on Gorilla glue. For some reason animals love to eat gorilla glue. It’s a huge problem when they eat the liquid non hardened glue. It expands to about 100x the size of the ingested amount in the stomach and requires emergency surgery to save your pets life. I say this because, like me, a lot of my fellow crafts have pets and they like to “help” when every they can. Keep your babies safe and keep on crafting!
Just a thought, Cindy – have you tried baking this glue?
Hi Carrie, no I haven’t tried baking this glue. I could add it to the list of things to try though. Thanks for the suggestion!
I bet that’s a long list!
You have no idea!
Wow! That’s my heart!! I am still in awe at having met you and your sweet husband, Doug! We are still in Alaska. We finally have the internet! I noticed the magnetic on the back and meant to ask you about what you used to glue it on with. Now, I know!! I have made Roses and used E6000 to glue the magnets on and they eventually came off. I can see Gorilla glue works really well. I just love my own Cindy Lietz’s original piece! See, everyone? You might get something special, too, if you are ever in Cindy’s neck of the woods! Vancouver is a very beautiful place to visit and we just might be back someday!
Good eye Catalina, I wondered if you would notice that this heart was the same one I gave to you when we met. I Hope that Your Alaskan adventure is all that you dreamed it would be. It is definitely on my bucket list of things to do. I hope we meet again soon!
Yes, our trip was fantastic! We are waiting to board our plane now for home. We had one minor set back. I thought I lost my laptop! I packed it in the wrong suitcase!! I tried to get the ship’s crew to let me find my luggage before we disembarked but it was too late. Half our luggage went ahead to Anchorage while we went to Denali. So we had to wait 5 days to finally check the Anchorage lugguage!! It almost ruined the rest of our trip. But thankfully it was found!!! I had all my pics of the trip so far on it and deleted them from my camera!! I will never do that again! Put Alaska on the top of your bucket list! You won’t be sorry. Can’t wait to get home to play with my clay! Lol!!
Thank you for the video on using Gorilla Glue. It’s nice to know this type will work with polymer clay. I have not purchased this glue but did find one called Liquid Fusion which works much better than the E6000 in gluing on bails. You don’t have to wait 24 hrs for it to bond. It works much faster and is much stronger. Perhaps you would like to test it. I found it at Hobby Lobby as Michaels did not have it. It costs between $5-$6 per bottle but well worth it.
That sounds like an interesting product Dixie Ann. Thanks for letting us know. I’ll keep an eye out for it!
Hi Cindy (and Doug), You must know your videos are fun and appreciated when I found myself actually waving ‘bye’ to you at the end of the gorilla glue video. LOL
That is way too cute Maisie! :)
Hi Guys
I was wondering if you can show me something that will hold walls upright to a floor and roof on mini houses …..a glue that after it is baked and glued together can be re-baked?
Tthanks Kathay
Hi Kathay, I have not tried to do what you are talking about, but I am thinking that Kato Polypaste might be a good option for you. It is much thicker than the other liquid polymer clay so your pieces should hold together better while in the oven, and it is an oven cure glue that is meant to work with polymer clay, so you know it would be compatible. Try it and let us know how it works for you!
Hi Cindy – we got some Gorilla glue free with something else recently so it’s good to know it will work with clay and metal.
I wondered why you used the water – does it have to be applied on wet surfaces?
Thanks!
Hi Carrie, Gorilla Glue is activated by water… it needs it to work.
Oh – thanks Cindy – l hadn’t read the instructions on the glue yet, so l’d better make sure to do that!
I really hate those bubble forming when using the gorilla glue. I’m going to give another chance to Gorila after watching your video!
This was very interesting! I used Gorilla super glue a lot for gluing metal posts onto clay. It worked great at first, but I think the glue became old or something, the glue from the same bottle wasn’t working about six months later. From the video, this looks to be original Gorilla Glue, I’ll buy this now that I know it works! Thank you Cindy!