How To Make A Non-Slip Resin Doming Tray Or Mat
Video #664: To prevent your beads from sliding around like hockey pucks… all you need is a bit of spray adhesive!
More...

IN THIS POST: — resin doming tray — resin — uv resin — epoxy resin — perler bead board — hama bead board — stencil spray adhesive — spray glue — repositionable glue — repositionable adhesive — tacky — non-slip — anti-skid — epoxyjewelry.com — ultradome — resin mat — resin tray — nautical cane — anchor cane — (Topics marked with an asterisk* are discussed in the Comments Section below).
In a previous video, I showed you how to use a Hama or Perler Bead Board as a Resin Doming Tray.
One of the challenges with using a hard plastic tray for doming resin, is that the pieces can slide around on the surface, both when adding the resin, and when moving the tray into your UV Light.
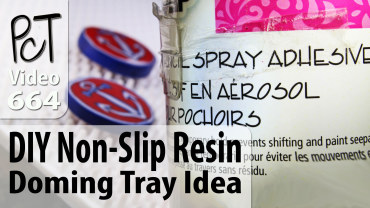
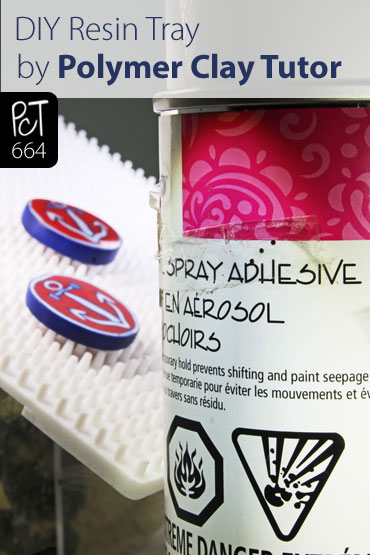
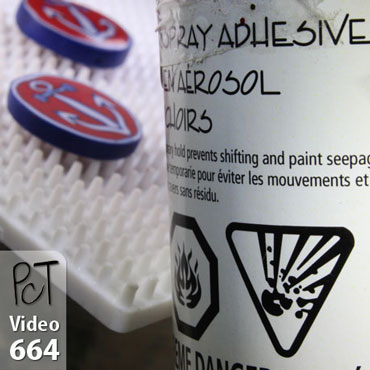
When cleaning up from the previous video, I noticed a can of stencil spray adhesive on my worktable and got an idea.
Stencil Spray adhesive is for spraying onto the back of stencils and making them sticky… the spray becomes tacky when dry and is repositionable.
Knowing these properties of Stencil Spray, I thought it may just be the perfect thing to spray onto the little pegs on the Perler Bead Boards, to keep the polymer pieces from sliding around when adding resin and moving them to the lamp
I was right… it works perfectly!
Just lightly spray the board with the stencil spray adhesive and let dry until tacky.
You can always respray the board when it loses the tackiness.
Don’t forget to turn your aerosol can upside down and spray until just air comes out of the nozzle… this will prevent the glue from clogging up the sprayer tip.
You can clean off the spray using baby oil if needed.
00:00:03 –> 00:00:12 Hi guys, its Cindy Lietz, your Polymer Clay Tutor, and today’s Studio Tip is a DIY non-slip
00:00:12 –> 00:00:14 resin doming tray.
00:00:14 –> 00:00:20 Now in the last video I did, I showed you how you could use a Hama bead or Perler bead,
00:00:20 –> 00:00:30 peg board as your resin doming tray, instead of using something like this flexible Silicone
00:00:30 –> 00:00:37 one, and when you’re doing resin… when you’re doming resin on Polymer Clay…so you’ve got
00:00:37 –> 00:00:44 it on the tray and stuff like that, you put your UV Resin… or if you use a 2-part resin,
00:00:44 –> 00:00:49 you’ll probably also use these doming trays, but you put the resin on and then you put
00:00:49 –> 00:00:53 it either in the light or you let it set out to dry.
00:00:53 –> 00:00:58 But one of the things I’ve figured out when I was getting cleaned up was… this was sitting
00:00:58 –> 00:01:06 on my desk, and it is a stencil spray adhesive, and I picked this up in the clearance section
00:01:06 –> 00:01:14 at Michaels, and what a stencil spray adhesive is, is a spray glue that you spray into the
00:01:14 –> 00:01:19 back of stencils and then you let it dry for a bit and it becomes super tacky, and then
00:01:19 –> 00:01:24 you can stick your stencil down to your piece and then remove it again because it’s repositionable
00:01:24 –> 00:01:30 glue, and when I saw the spray it gave me an idea.
00:01:30 –> 00:01:36 Now one of the challenges when you’re using any kind of doming tray, is that your pieces
00:01:36 –> 00:01:42 can slide around on there, it can slide around either in transport, moving it over, or when
00:01:42 –> 00:01:48 you’re trying to…you’ve put your resin on and then you’re trying to spread… take
00:01:48 –> 00:01:53 a little needle and you spread the resin out, and what can happen is it can scoot around
00:01:53 –> 00:01:56 on your tray a bit when you’re trying to get it out to the edges.
00:01:56 –> 00:02:03 Now if you haven’t seen how to add UV Resin, it’s a video you should check out, but when
00:02:03 –> 00:02:12 I saw this repositionable glue can sitting there, I thought of an idea and it works perfectly.
00:02:12 –> 00:02:19 Now I took…I just took a tray like this in a little box and I gave it a quick spray
00:02:19 –> 00:02:26 with the stencil spray, and I’ll just do half because I’ve already done this, but you
00:02:26 –> 00:02:33 just spray it down with this adhesive, and then… you should always turn it upside down
00:02:33 –> 00:02:37 and let it spray out…I’ll do that after the video is over, that way you clear the
00:02:37 –> 00:02:41 nozzle out ‘cause the glue will sit in the nozzle, so after the video, I’ll go do that
00:02:41 –> 00:02:42 outside.
00:02:42 –> 00:02:51 But what you do then is let the glue dry and it becomes tacky, and it’s tacky on this side,
00:02:51 –> 00:02:56 so I’ll show you what happens when you stick your piece on, it doesn’t fall off, in fact,
00:02:56 –> 00:03:03 I can even flip it upside down which means it’s going to make it way easier not only
00:03:03 –> 00:03:09 to transfer all my little pieces over to the oven, but when I go to put the resin on it’s
00:03:09 –> 00:03:14 not gonna scoot around….especially if its stuck down there, and it’s not going to scoot
00:03:14 –> 00:03:20 around, and I’m going to be able to spread it right out to the edges, and have them not
00:03:20 –> 00:03:21 slide around on me.
00:03:21 –> 00:03:26 So I thought you might really enjoy that idea, I’m excited about it myself, and it’s gonna
00:03:26 –> 00:03:30 take the hassle out of that sliding around.
00:03:30 –> 00:03:36 If you like this video, do let us know, and if you’ve got any suggestions for products
00:03:36 –> 00:03:41 that you would like me to demo, ideas that you don’t understand and you’d like me to
00:03:41 –> 00:03:46 explain for you, anything to do with Polymer Clay, there is a pretty good chance we’ve
00:03:46 –> 00:03:50 already done a video on it, ‘cause we’ve done tons, so make sure to check through those
00:03:50 –> 00:03:53 videos to see if you could find your answers there.
00:03:53 –> 00:03:57 But if not, make sure to leave a suggestion in the comment section below, and maybe we
00:03:57 –> 00:03:58 can make a video for you.
00:03:58 –> 00:04:01 Alright, so we’ll see you next time and bye for now.
Our goal is to translate these videos into as many languages as possible. If you are interested in helping with this initiative, then please do contact us and we will figure out a way to make it worth your while :)
Resource Links:
- Related Video: Perler or Hama Bead Board as a Resin Doming Tray
- Related Video: Applying Ultradome UV Epoxy Resin To Polymer Clay
- Related Article: Resin Coated Polymer Clay Butterfly Wing Pendant
- Related Article: Matching Stud Earrings With Your Polymer Clay Pendants
- Amazon: Perler or Hama Bead Mats **
- Amazon: Resin Doming Mats **
Resources marked with a double ** asterisk are affiliate links. If you click on them and decide to buy something, we may receive some compensation. This does not affect the price you pay in any way. What it does do, however, is helps us to continue providing free videos for you, here at the PcT website. Using our links to purchase your tools and supplies, is always greatly appreciated.
Sponsored Ads & Special Promotions
Shareable Images
To share this full blog post anywhere on the web that allows links in comments, here's a shortened url to copy and paste...
>> https://mypct.ca/v664 <<
Want to chat about today’s post? That’s what the comment section below is for. Scroll Down… We’d love to hear from you!
Or... if you would like to request a topic for a future post, here is the link to do that… PcT Suggestion Box
Great idea! I have a couple of those boards and beads that I bought for the grandkids to work on in case of a rainy day, but guess what? Grandma now needs them. hahahaha I don’t feel too guilty because it looks like a Toys R Us at my house and tons of other arts and crafts things for them to do. I really appreciate your tips and thanks to the other crafter that gave you the suggestion. :)
Hi Cindy! I wanted to ask about the pink UV curing light that you have on your crafting table. Is it a Besmall 36w 220v 240v nail dryer curing lamp? It looks just like one I saw online for $25.00 with free shipping. I want to make my own polymer clay doll eyes using UV resin to coat them. The UV resin says it will cure in direct sunlight, but it hasn’t hardly stopped raining where I live since last fall. (Which is highly unusual for South Texas) I’m sick & tired of waiting for some sunny days!
I got that pink lamp from Terry Morris at EpoxyJewelry.
And so that you know, I will be testing a new combo LED/UV lamp soon. It is another product from the Melody Suzie Company… so do stay tuned for that.
Just wanted to share how I use the bead board. I try to avoid getting any adhesives on polymer clay because of problems in the past. So I use the bead board and I picked up some small jewelry finding spacers that are almost the same size as the pegs. It allows me to create a sort of blocked off space to prevent the pieces from moving around and their removable.
Hi Erica. Thanks for sharing your ideas.
In regards to the adhesive… it is just tacky and does not affect the resin or polymer clay in any way. No adhesive is left behind on the clay or the resin.
I like it … this is a great tip. Thanks.