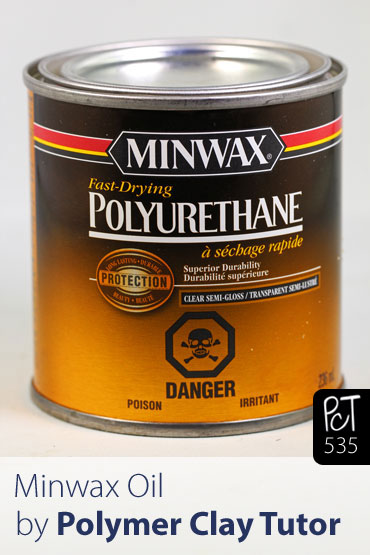
Minwax Polyurethane (Oil Based) on Polymer Clay
Video #535: Four month test results show that this varnish product is compatible with Premo Polymer Clay (so far).
More...

IN THIS POST: — minwax — polyurethane — oil based — finishes — glazes — semi-gloss — shiny — varnish — clear coat — brushing — dipping — paint thinner — mineral spirits — low odor varsol — (Topics marked with an asterisk* are discussed in the Comments Section below).
Topics Covered In This Video:
- Tested Minwax Fast-Drying Polyurethane (Oil Based) on a baked Premo Polymer Clay Bead.
- The sample was dipped and left to rest for 4 months.
- The finish has water-like consistency.
- Stir gently, never shake. Shaking can cause bubbles in the finish.
- If dipping, shake off excess varnish and use paper towel to catch and remove drips.
- Can be brushed on with little to no brush marks.
- Clean brushes with paint thinner, low odor varsol or mineral spirits.
- Fast-Drying (for an oil based product). Still tacky after 12 hours… hard, cured in 24 hrs.
- Finish is hard, thin, smooth, semi-gloss, durable, not sticky and is compatible with polymer clay.
00:00:04 –> 00:00:08 Hi guys, its Cindy Lietz, your Polymer Clay Tutor, and today in the PcT Test Lab, we are
00:00:08 –> 00:00:13 talking about Minwax Polyurethane on Polymer clay.
00:00:13 –> 00:00:19 Now, here in the Test Lab, we like to test a variety of different products to see if
00:00:19 –> 00:00:27 they’re compatible with Polymer clay, so I tested out this Minwax Fast Drying Polyurethane,
00:00:27 –> 00:00:37 it’s a clear semi-gloss and this product is actually oil-based and I tested it on a…this
00:00:37 –> 00:00:44 is a prototype bead I made from my…oh, the Crocus bead tutorial and I had it sitting
00:00:44 –> 00:00:49 around and I thought I would test it on… with the Polyurethane on there.
00:00:49 –> 00:00:57 Now I did this back in February, its June now, so it’s been several months and the
00:00:57 –> 00:01:03 finish is completely compatible, there’s no stickiness, no residue, nothing happening
00:01:03 –> 00:01:09 there that is a problem with the Polymer clay.
00:01:09 –> 00:01:15 This is a semi-gloss finish, so you can see that the shine is there, but it’s not a
00:01:15 –> 00:01:19 super high shine, so, you know, that’s the way semi-gloss works.
00:01:19 –> 00:01:26 And what I did with it was I just dipped it, and let me just show you a little bit about
00:01:26 –> 00:01:35 this product here, it is…because it’s oil-based, it is really, really thin, it’s
00:01:35 –> 00:01:40 almost like water, it looks a little bit yellowish in the can, but I noticed, it doesn’t really
00:01:40 –> 00:01:49 show yellowish on the product and there’s not really a huge need to stir it, there’s
00:01:49 –> 00:01:55 no…nothing at the bottom, but it’s not a terrible…bad idea to stir, you always
00:01:55 –> 00:02:00 wanna stir a product just in case there is anything settling on it, but you never wanna
00:02:00 –> 00:02:07 shake a varnish of any type, you’ll get trapped air bubbles in it that will show up
00:02:07 –> 00:02:14 on your product, so if you’re going to stir it, just do it gently.
00:02:14 –> 00:02:19 And with this piece here, what I did was I just actually dipped it in the Polymer…or
00:02:19 –> 00:02:27 I mean, I dipped it into the varnish like that, and you can see it’s quite watery,
00:02:27 –> 00:02:32 its gonna drip right off, so you’re gonna wanna shake off… if you do dip any pieces
00:02:32 –> 00:02:37 in a finish like this, you’re gonna wanna make sure that you shake it off and that you
00:02:37 –> 00:02:41 have a spot to hang it to dry.
00:02:41 –> 00:02:48 Now, over a little bit of time, the drips are gonna start showing up on the bottom,
00:02:48 –> 00:02:53 and you just wanna take a paper towel and gently tap the drips off so that you’re
00:02:53 –> 00:03:01 not getting a little drip mark on your piece, and especially with a flower like this that
00:03:01 –> 00:03:07 might be holding some of the finish on the inside of the bead, it will continue to drip,
00:03:07 –> 00:03:10 you’ll also wanna put some paper towels or something underneath it.
00:03:10 –> 00:03:17 Now it is a fast drying product, but because it’s oil-based fast drying with oil based
00:03:17 –> 00:03:22 means that it’s gonna take 4-6 hours or so, I found on this piece, it was still a
00:03:22 –> 00:03:31 little bit tacky even after a full 12 hours or so, but overnight, I found that it was
00:03:31 –> 00:03:35 nice and dry.
00:03:35 –> 00:03:40 You wanna use this very thinly, you don’t want to put super thick coatings on…though
00:03:40 –> 00:03:46 I doubt you could put a super thick coating on, you saw how watery that is, and you would
00:03:46 –> 00:03:51 just check on it regularly, just to make sure there’s no drips forming.
00:03:51 –> 00:03:58 Now you could also brush it on, I have a little Ranunculus bead here and I will just show
00:03:58 –> 00:04:06 you that you can brush it on, and because of the thinness of it, it will go on really
00:04:06 –> 00:04:12 nicely without any brush strokes, and you just wanna make sure you’re not causing
00:04:12 –> 00:04:19 any bubbles or anything like that, and you can just brush it right on.
00:04:19 –> 00:04:27 For clean-up, what you’re gonna need is paint thinner or mineral spirits, I have a
00:04:27 –> 00:04:34 little container here of the…this works really well, it’s called Varsol, but there’s
00:04:34 –> 00:04:36 lots of types of paint thinners and things that will work.
00:04:36 –> 00:04:43 But you will want to definitely wash your brushes out, and if you get it on to anything,
00:04:43 –> 00:04:47 you can use the paint thinner to remove it, alright?
00:04:47 –> 00:04:54 So I found it to be very tough, very durable a nice smooth finish and compatible with polymer
00:04:54 –> 00:04:55 clay.
00:04:55 –> 00:04:58 So I hope you enjoyed that, if you did, let me know.
00:04:58 –> 00:05:05 And if you have any products you would like me to test in the PcT test lab, make sure
00:05:05 –> 00:05:10 to leave those in the comment section below, and any suggestions for future tutorials,
00:05:10 –> 00:05:11 alright?
00:05:11 –> 00:05:13 So we’ll see you next time, and bye for now.
Our goal is to translate these videos into as many languages as possible. If you are interested in helping with this initiative, then please do contact us and we will figure out a way to make it worth your while :)
Resource Links:
- Related Video: Crocus Flower Bead Tutorial
- Related Video: Ranunculus Flower Tutorial
- Related Article: Polymer Clay Finishes – Which is Best?
- Related Article: Shiny Beads – 6 Tips for Getting a Polymer Clay Gloss Finish
- Amazon: Minwax Polyurethane (oil based) **
Resources marked with a double ** asterisk are affiliate links. If you click on them and decide to buy something, we may receive some compensation. This does not affect the price you pay in any way. What it does do, however, is helps us to continue providing free videos for you, here at the PcT website. Using our links to purchase your tools and supplies, is always greatly appreciated.
Sponsored Ads & Special Promotions
Shareable Images


To share this full blog post anywhere on the web that allows links in comments, here's a shortened url to copy and paste...
>> https://mypct.ca/v535 <<
Want to chat about today’s post? That’s what the comment section below is for. Scroll Down… We’d love to hear from you!
Or... if you would like to request a topic for a future post, here is the link to do that… PcT Suggestion Box
Have you tested a polyuathane that is water based? I think Min Wax makes one. It is lower in fumes and dries much faster. And of course, clean up much easier. I still like Future and have not had too many issues with it. I just ordered more UV resin from Epoxyjewelry.com. Love his stuff!!
Hi Catalina, I have not yet tested the water based Polyurethane by Minwax or any other as far as I remember. I just haven’t gotten around to it. (I have so many products to test that it is not funny…. if only there were more hours set aside for getting stuff like that done!) :)
I’m probably asking the wrong person but does anyone know if polyer thing would give off a chemical that would hurt birds if I seal my mosaic bird bath with the polyurethane. I am using plaster of Paris as my grout and I want to make sure it’s still good. does anyone know if it would hurt the birds. anxiously waiting for response from somebody please help me.
Hi Sandra!
I don’t have birds, but I just put “birds and fumes” in the search facility and came up with a lot of information on the topic, mostly in comments made by membership who own birds.
Think if you spend a minute reading through the responses, you’ll be able to establish you own comfort level. Definitely, I think I would keep the birds out of the room in which you are baking, never burn the clay, and keep ventilation levels high.
A friend of mine rehabs parrots for their next forever home, and when she crafts she rolls their cage out on her screened in porch, then uses fans to blow the air out in the opposite direction.
This is one area that you want to practice good safety for the health of your animals.
Maybe some of the readership who own birds will comment back to you in this thread and offer advise.
Good luck and all best….
Hi Sandra, I am not sure if you were worried about the fumes from baking or if you were worried about using the baked clay in a bird bath, but either way, you might want to ask this kind of question in a bird forum. Maybe ask if it is ok to use plastics in the water of a birdbath, since that is basically what it is. I know that people don’t really recommend you use polymer clay in aquariums, so I am guessing it probably wouldn’t be the best choice for birds either, but it wouldn’t hurt to ask. If you do find an answer, do be sure to come back and let us know. I bet there are others who would love to find out about that.
Hi Cindy…
Re the Minwax Polyurethane Oil Based:
I understood from other videos that you do not recommend oil based with polymer clay. But this one IS ok? Reason being, I wondered if time had changed the recommendation.
Hi Janice, I used to think it was a hard fast rule, oil with raw polymer clay, water based with baked polymer clay…. but I no longer think that. I have found with all the different formulations of products there are today, the rules kept getting broken. Sometimes a water based product would work and and sometimes not, and same thing for the oil based ones. So now I test everything first. I don’t assume it will work or fail until I know for sure. It’s safer that way… :)
Cindy,
Your test lab videos are wonderful, and I love the funky blue glasses in the pocket of your lab coat!
Thanks Julia! My mom gave me those glasses in a bunch of old stuff she had. They are real vintage glasses with clip on blue sun shades. On of the clear glass lenses are cracked, but they have such a cool steam punk scientist look, I thought they made a great accessory for my lab coat! Thanks for noticing… you’re the first one to make a comment about them!
Thanks Cindy for showing us this product. As I’ve always been a fan of Future – which seems to no longer be available – I was interested in this. I wonder if it can be bought in the UK? I’ll find out.
I’d also like to ask about your fabulous stand for hanging ‘dripping’ items on. Is this a camping accessory? i.e. for putting a pan over a fire?
Hi Marion I just wanted to let you know something I found out recently when I was looking in every store near me looking for Future floor wax. lt is now called Pledge Floor Care Multi Surface Finish by Johnson. It is the same product just a different name. Read it on one of the polymer clay sites somewhere.
Thanks Christine. I will go and check it out and let you know how it works.
Hi Christine
I found it, the ‘Pledge’ floor polish. It’s labelled ‘Pledge – with Future’. It’s not the same, it does give a shine but it’s not as good as Future used to be. Also, it can easily be washed off with water. Disappointed, yet again! But thanks for the suggestion.
Marion
Hi Marion, that metal thing I used for hanging the piece to dry on is actually for holding a glass candle holder. I have several around the house. This one I broke the glass on so use it for a variety of things in the studio. Looks like Christine answered your other question. Thanks Christine!
Thanks Cindy. I shall hunt around for a similar contraption, it looked perfect for the job!
Hi Cindy, thanks so much for testing the Minwax oil based finish. I personally don’t feel 4 months is a long enough time to rate this product. I have heard from several people in regards to using it and after a couple of years, the beads they used it on got a little sticky and one person had to replace her purchased product because of the guarantee that was placed on the sold piece. Perhaps you could check back on this about every 6 months exposing it to different environments and give us an update to see how it is doing? I love the Ren Wax and the water based Varathane which comes in both satin and gloss finishes and has been tried, tested and still looks great after 15-20 yrs.
Hi Dixie Ann,
I agree about incompatibilities not necessarily showing up after 4 months!
I was reorganising part of my studio the other day and came across some of my very early polymer clay beads from around 2007. I didn’t remember putting green in them, and some were so amazingly ugly I wondered why I didn’t bin them straight away. Then I realised that the composition metal leaf that I’d used had reacted with the clay and turned green over time.
I’d looked at those beads about 2 years after I made them and they were OK then, so it took somewhere between 2 and 7 years to show up.
Those particular beads were made with Kato (of course! :D), but I also dug out some Premo beads I made using Cindy’s super Mixed Media Art Sheet technique from 2010 that had the same composition metal leaf used, and it had gone green in those too.
The unused metal leaf from that packet is still fine, as are the few papercraft pieces I’d used it on. So it seems to just be a problem with polymer clay (Kato and Premo, anyway), and the really annoying thing about that is that the particular brand is specifically marketed for polymer clay use! It only seems to be a problem with the gold leaf — my oldest pieces with the same brand’s silver leaf are fine — so I’m looking out for a better brand for gold leaf now that won’t give me a nasty surprise a few years down the track.
Happy claying,
Sue
Thanks Sue for clueing us in on your gold leaf problem. Could you share the brand name you used? I am also testing a couple of products on some premo and after 6 months seem okay. However, because of surprises later on I am being somewhat more cautious to my time limits. One thing I did notice with the Sculpey brand of glaze that after applying it and allowing it to dry throughly, (several days) whatever was left over from my project was stored in little plastic bags that were compatible with the PC previously, turned out to be sticky some time later when I was sorting out my orphan beads. Somewhere along the way I was told Sculpey had changed it’s formula for their glaze and I don’t think it was for the better. I only use Premo so cannot tell you if if would happen with Kato or Fimo or the other brands. One of the reasons why Cindy is so adament about us testing our own brands.
I have used minwax polyurethane for years with great results.
This is an excellent discussion! It is a tricky one, because it is difficult to know exactly what is causing something to change over time. It could be something in the clay, maybe some uncured polymers slowly working their way to the surface and reacting with the finish…. or it could be something introduced to the piece sometime later, such as a perfume or body lotion that is causing the problem and not the actual piece itself.
It is important for me to do thorough testing. But obviously, I would not have time to test something for 7 years before bringing it to the market. It is the kind of think that would be important to know however, if one was creating thousand dollar pieces to put in a gallery or art collection or something.
Four to six months really should be plenty of time to know whether a piece is compatible enough, for most circumstances. That is not saying that something could not change over a long time… just as we now know that some of the oil colors that the masters used in their paintings are now known to be “fugitive” colors (disappear over time), and that some varnishes yellow with age. We can’t be afraid to try new products and test new things even if we don’t quite yet know how it will last.
One option is to avoid using finishes altogether and just sand and buff your pieces and only add a museum quality finish such as Renaissance Wax.
Sue… your problem with the imitation Gold leaf sounds like an oxidation issue. My guess the ‘gold’ is actually ‘brass’ and the green is the natural patina that brass gets as it oxidizes. Are there spots where the metal was exposed to air or maybe salt from sweat or ocean air or something? That could turn the metal green over time. Especially if the exposure was in tiny areas, in might explain why it took so long to turn color as well.
Anyway, what I am trying to say is that I will try and test for as long as possible but I won’t be able to test for much longer than 4 months or so, nor will I be able to test against every possible chemical or environmental exposures. It just would hold me back from getting the information out there. If we need to add to what I’ve learned, with the information you guys have learned in the field, then all the better. My views are never set in stone. More like in the pack sand on the beach… easily changed if new info comes along! :)
(I apologize for the few typos… I sure miss that edit button… but I think you’ll still know what I meant!)
Hi Cindy,
That’s a good point about oxidation from exposure to air or the elements, but I don’t think that was the problem in my case. The metal leaf that went green was totally enclosed, on either red or black clay with a LOT of translucent over the top in the case of the oldest beads (still on my polymer L-plates then!), and was still under a couple of thin layers of translucent in the case of the Mixed Media Art Sheet beads. Also, the oldest beads had been sealed away in a ziplock bag for most of their life, and the others had never been used in jewellery or worn, and hardly ever handled.
I’m sure you’re right about oxidation, but it’s from something else — the metal leaf that I haven’t used has been much more exposed than any of the beads and it’s still fine — and it seems to be from the polymer clay as far as I can tell. But I think I’m going to throw a whole heap of things at the unused portion to see if I can make it go green deliberately, and perhaps figure out what happened!
And you definitely shouldn’t stop testing! LOL
I love trying new things just to see what happens. Sometimes I make a great discovery, and sometimes I end up with something that looks like it came out of an Alien movie. All good fun. :D
Have a great week,
Sue
:) I was thinking Sue that maybe the oxidation (rusting) is coming from a salt or something that is in the ink. What brand of metal leaf did you use BTW? I just dug out some of my old Art Sheet beads with imitation gold leaf and they are just fine. I believe I used the Mona Lisa Brand. I also used Adirondack Inks… Did you use something different? Would be very interested in the results of your tests… of course!
There’s no ink in the oldest beads with discoloured metal leaf: just polymer clay and the metal leaf, under a thick layer of translucent clay.
The most exotic material I’d tried with polymer clay at that stage was acrylic paint, but there wasn’t any of that in the discoloured beads (and the beads that did have it are fine; no discolouration or other weirdness).
For the art sheet beads I used Adirondack alcohol inks. I’d stamped with black StazOn ink too but that was on a separate layer with translucent between it and the metal leaf.
The composition metal leaf I used was from Fire Mountain Gems. I think it might be their own brand. It refers to Kato Polyclay on the packaging but it’s not a Kato product.
This stuff: firemountaingems.com/itemdetails/h202623bs
I’ll make sure the Mona Lisa brand is in my test list, thanks! :D
Thanks so much for the info!! I love how you actually answer your fans and are thorough.
My only concern is that in over time will it, like other varnishes, “yellow”? 4 months is still pretty recent.
Hi Christine, from what I am hearing this finish will indeed yellow over time, giving the piece a warm aged patina. If that is a look that you don’t like, then you would not want to use this product, especially on light colored pieces.
hi Cindy,
FYI the minwax polyurethane does not contain a varnish in it, therefore it will not yellow over time. what they are seeing is the color of the wood seeping into the old varnish poly making it have a yellow color to it. another product i use is the water based version called polycrylic made from minwax. it works beautiful and has no smell what so ever!! and dries faster and just as hard as the oil based poly. hope this helps and by the way it goes on white and dries crystal clear
Thank you for your feedback Ernie! I really appreciate it!
Hi Cindy: Thank you for testing this out for us. So, do you prefer polyurethane to Future, then?
Hi Maria, years ago I recommended Future, but now my preferred method is sanding and buffing, and then if I really want extra shine I will use Renaissance Wax or another glaze like resin or one of these new ones I have been testing… this product is very new to me so I can’t say if it is my favorite yet, but I really loved how smooth it went on and the lovely shine it gave. It is definitely way better than the Future Floor Finish in my opinion.
Does the Polyurethane have a smell after it has dried?
It doesn’t seem to have much of a smell at all after drying Anna.
Awesome video You’re always my go to polymer clay expert :3