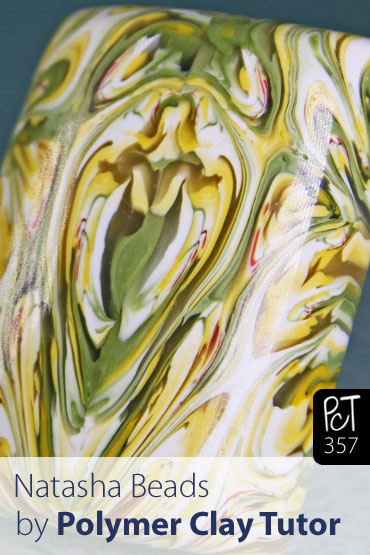
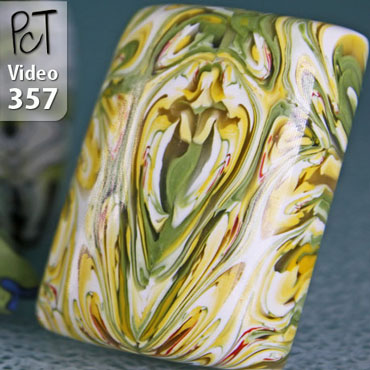
Mirror Image Scrap Cane Natasha Beads
Video #357: You never know what might appear before your very eyes. Do you see the angel?
More...
IN THIS POST: — natasha beads — mirror image — inkblot — rorschach — scrap clay — (Topics marked with an asterisk* are discussed in the Comments Section below).
Topics Covered In This Video:
- Answering the age-old question of, what to do with the waste end pieces from your polymer clay canes. Making a Scrap Cane Natasha Bead is the perfect solution!
- Samples of Scrap Cane Natasha Beads, all made from canes I made while developing the Easter Lily Cane Tutorial.
- The magical discovery I found when making a cabochon where the picture of a beautiful angel was revealed inside.
- Explanation of the Natasha Bead Technique and the other names it is called, like, Mirror Image, Ink Blot and Rorschach Techniques.
- A quick run through of how to make Scrap Cane Natasha Beads and Pendants… not a full-out tutorial… but you will learn the basics of how this technique is done.
- My unique method (I think) for making pyramid shaped Natasha Beads.
Have you ever made a Natasha Bead before? If so, have you ever tried using a cane to make one?
I look forward to hearing from you.
00:00:03 –> 00:00:07 Hi guys, its Cindy Lietz, your Polymer Clay Tutor, and today I’m gonna show you how you
00:00:07 –> 00:00:15 can use up your old scrap canes for making cool Natasha Beads.So, lots of times people
00:00:15 –> 00:00:20 have concern about wasting their cane ends, like you’ve made a Polymer Clay cane like
00:00:20 –> 00:00:28 this neat little Easter Lily Cane, and when you’ve reduced it down sometimes…depending
00:00:28 –> 00:00:33 on how good you are at reducing, you can end up with some scrap clay at the end.Well, you
00:00:33 –> 00:00:39 can take these neat pieces here, and turn them into great looking beads and pendants
00:00:39 –> 00:00:47 and cool things, let me just show you some samples.Now, when I was designing this Easter
00:00:47 –> 00:00:51 Lily Cane, I had a bunch of little sample canes that I was trying to figure out the
00:00:51 –> 00:00:56 colors and the exact design, so the canes didn’t turn out how I wanted them to, so I
00:00:56 –> 00:01:03 had different ones left over, and that’s where I made these Natasha beads.And Natasha beads
00:01:03 –> 00:01:05 are a name…
00:01:05 –> 00:01:09 I’m assuming a woman named Natasha… though I never have found her last name out, came
00:01:09 –> 00:01:16 up with this technique, but it has sort of a mirror image look to it, or an ink blot
00:01:16 –> 00:01:25 look, or Rorschach I think it’s called, anyways, it’s quite a cool look where you’ve got a
00:01:25 –> 00:01:33 mirror image on all the sides of the bead.This one was made with a scrap cane, same with
00:01:33 –> 00:01:39 this one, one of my Easter Lily Canes that didn’t quite work out.
00:01:39 –> 00:01:44 Here’s another one here using little bit different colors, and they’re… it’s just… this
00:01:44 –> 00:01:48 one’s very graphic looking, and that’s a neat thing about using a cane rather than just
00:01:48 –> 00:01:52 scrap clay like a lot of people make their Natasha beads with.
00:01:52 –> 00:01:57 And when you use a cane, you can get things like these lines in here that are consistent
00:01:57 –> 00:02:00 and quite cool looking.
00:02:00 –> 00:02:07 Here’s one that I was really excited about when I cut it open, it has a little beautiful
00:02:07 –> 00:02:13 woman in the center of it, I mean I have never seen it turn out this much like a woman, it’s
00:02:13 –> 00:02:18 got…she’s got hair and arms and a dress and if you look carefully, you can even see
00:02:18 –> 00:02:26 little wings on either side, so it’s really magical when you cut open these samples, I’ll
00:02:26 –> 00:02:32 show you how to do it in a second, but it’s…what you end up with can very magical looking.
00:02:32 –> 00:02:40 Now these 3 down here are from the cane ends of the Easter lilies that did work out, so
00:02:40 –> 00:02:47 you can see how beautiful and different these pendants and things have turned out, this
00:02:47 –> 00:02:55 one here, I mean it looks to me like a Water Lily painting or something, it’s very cool.
00:02:55 –> 00:03:02 And then here’s another one here with…similar to the other one, so it’s got all the colors
00:03:02 –> 00:03:04 that were in the cane.
00:03:04 –> 00:03:09 Now, I’m not gonna go through a full tutorial here, but I am gonna show you how these are
00:03:09 –> 00:03:13 made and how you can use up your scrap canes.
00:03:13 –> 00:03:20 Now I’m just gonna take this scrap of Easter lily, and I’m just going to kinda crush it
00:03:20 –> 00:03:29 down till I have more of a…just a log shape, and it’s getting kinda stiff, it’s been here
00:03:29 –> 00:03:36 sitting in the studio for a few weeks, and I’m just gonna warm it up and roll it out
00:03:36 –> 00:03:41 into a log.
00:03:41 –> 00:03:46 Now, like I said, some people like to use just chopped up clay, and you can get some
00:03:46 –> 00:03:53 really cool looks, but the neat thing about when you use a cane end, is that this pattern
00:03:53 –> 00:04:00 is going all the way through to the end, so when you do this technique, it can be quite
00:04:00 –> 00:04:01 neat looking.
00:04:01 –> 00:04:07 Alright, so what we’re gonna do now is just start twisting the cane.
00:04:07 –> 00:04:13 And right now, you can’t see what’s happening on the inside of it too much, we’re just gonna
00:04:13 –> 00:04:20 twist it and then kinda shorten it back up and twist it some more, and we’re just kinda
00:04:20 –> 00:04:26 twisting up those insides of that cane.
00:04:26 –> 00:04:31 And I’m gonna roll it on the surface here, kinda smooth it out, and maybe twist it some
00:04:31 –> 00:04:39 more, the more twisting you do, the finer the little lines will be and the more patterning
00:04:39 –> 00:04:40 it will get.
00:04:40 –> 00:04:46 And the more you kinda squish it and shorten it, the more it will sorta distort the inside,
00:04:46 –> 00:04:52 so there’s no set rules, there’s no set way of going about this.
00:04:52 –> 00:04:58 One thing I like to do is to get this sort of pointed look to it, you can do that by
00:04:58 –> 00:05:07 just turning this into a bit of a teardrop shape by just rubbing the ends together here,
00:05:07 –> 00:05:14 and we have a triangular piece, and I like to do that before I cut it.
00:05:14 –> 00:05:24 Also, I like to flatten it out a bit on all 4 sides, so I get a bit of a pyramid shape
00:05:24 –> 00:05:40 to it, so I’m just gonna keep going until I have these in a relatively pyramid shape,
00:05:40 –> 00:05:45 and when we cut into this, it’s just really cool what happens.
00:05:45 –> 00:05:52 I’m going to cut right down as very best I can, right down the center, so excuse my head
00:05:52 –> 00:06:00 here a sec while I try to get in here, I’m gonna cut right down the center, and then
00:06:00 –> 00:06:07 when you split it open…oh isn’t this so cool, you need to match up these sides very
00:06:07 –> 00:06:15 perfectly, as perfectly as you can, and you get this wonderful, wonderful pattern.
00:06:15 –> 00:06:22 And when you have used a cane, sometimes you get to see…like this one has quite a flowery
00:06:22 –> 00:06:25 look to it, because it was a flower on the inside of that cane.
00:06:25 –> 00:06:32 If you were to use a different type of pattern, say a checker board cane or some other type
00:06:32 –> 00:06:36 of pattern, you would see repeats of those types of patterns in there and you would get
00:06:36 –> 00:06:39 some very, very wonderful looks.
00:06:39 –> 00:06:45 You can continue on to cut it 2 more times, I’ll show you…you cut down the center of
00:06:45 –> 00:06:51 this side, so I’d probably use that as a pendant or something like that, but I can also cut
00:06:51 –> 00:07:04 down the center of this one…I’ll try not to get my head in the way, and if you open
00:07:04 –> 00:07:13 that up again, they match one more time, see that, so that whole side can match, here,
00:07:13 –> 00:07:16 I’ll just set that to the side first.
00:07:16 –> 00:07:25 Cut down this other side, the same way, and this is where you end up with the bead.
00:07:25 –> 00:07:35 Alright, so you have this…this one you open up and match on this side, like that…and
00:07:35 –> 00:07:42 I’d be more careful and picky if I had more time, and then on this other one, it will
00:07:42 –> 00:07:49 match up on both sides, it’ll match up here as well as on this other side, and you have
00:07:49 –> 00:07:53 to kinda fiddle around until you can get them all to match up perfectly.
00:07:53 –> 00:08:01 But here you end up with… if I spend a little more time, you end up with a cone shape that
00:08:01 –> 00:08:11 has a mirror image here and here and here and here, all 4 sides, then you can smooth
00:08:11 –> 00:08:15 it out and end up with a really, really unique pendant.
00:08:15 –> 00:08:19 So if you wanted to, you could cut this in different sizes, depending on the size you
00:08:19 –> 00:08:23 start off in the first place, is how big your bead is going to end up.
00:08:23 –> 00:08:30 But I just wanted to show you that; that there is never such thing as waste clay, even if
00:08:30 –> 00:08:39 it’s at the end of your beautiful cane, so you can use it up in all kinds of cool projects
00:08:39 –> 00:08:42 and come up with these beautiful, beautiful Natasha beads.
00:08:42 –> 00:08:47 So I hope you enjoyed that, make sure to press that like button if you found this helpful
00:08:47 –> 00:08:50 and fun for you.
00:08:50 –> 00:08:54 My question is, have you ever made a Natasha bead?
00:08:54 –> 00:08:59 And have you ever tried making them with a cane before?
00:08:59 –> 00:09:03 So leave that answer in the comment section below.
00:09:03 –> 00:09:07 So I enjoyed being with you today, and I will see you next time.
00:09:07 –> 00:09:08 Bye for now.
Our goal is to translate these videos into as many languages as possible. If you are interested in helping with this initiative, then please do contact us and we will figure out a way to make it worth your while :)
Resource Links:
- Related Video: Easter Lily Cane Tutorial
- Related Video: Making Natasha Beads in the Dark
- Related Video: Mirror Image Heart Beads Tutorial Intro
- Related Article: Scrap Clay Polymer Clay Projects List
Resources marked with a double ** asterisk are affiliate links. If you click on them and decide to buy something, we may receive some compensation. This does not affect the price you pay in any way. What it does do, however, is helps us to continue providing free videos for you, here at the PcT website. Using our links to purchase your tools and supplies, is always greatly appreciated.
Sponsored Ads & Special Promotions

Shareable Images


To share this full blog post anywhere on the web that allows links in comments, here's a shortened url to copy and paste...
>> https://mypct.ca/v357 <<

Want to chat about today’s post? That’s what the comment section below is for. Scroll Down… We’d love to hear from you!
Or... if you would like to request a topic for a future post, here is the link to do that… PcT Suggestion Box

Hi,
I just stumbled across your video on making mirror image cane pendants..OMG !
Amazing !! Just wanted to say thank you, I am now interested in using clay again..
I have never, ever, been so engrossed in watching anything as I was just now..
So, thank you !! Your work is gorgeous !
Have a blessed day ,
Barbara
So glad to hear that video was helpful. Thanks for letting me know! I love hearing feedback like this :-)
Just loved your tutorial on the Natasha Bead. The canes were amazing when it were done, definitely unique. Loved your Angel’s wings as well.
thank you for your tutorials. Monica
I’ve never seen anything like this, but it is truely awesome, almost heavenly. I could see so many project from this that my head is just spinning.
I tried the Stropple cane #2 as a Natasha bead and I love it! It’s even easier than the usual Natasha bead.
I bet it is Freda! Thanks for sharing!
Cindy & all… First off I adore your cane Natasha beads, looking forward to trying it out. I have a delimma, though. I guest teach an “Art Ability” class for developmentally & physically handicapped adults once a year. Last year we made “Natasha hearts” using various bright colors & the project was amazing. It was so tactile & easy & we all know how excited WE get when we cut into the bead and fit it together…just imagine how it was for them to see the amazing patterns they had created. We’ll, it’s that time again & I honestly don’t know how to top last year. Any ideas out there? I’ll teach 3 classes of 15-20 participants per class. Typically I take their creations home to bake and return the following month. Can’t wait to see what awesome ideas you come up with! Many thanks!
Hi Rachelle, have you tried doing anything with molds and or cutters? There is some neat ones you could try. Or you could try having them find items to press into the clay to see what kind of textures they can make. It is always interesting to see what different kinds of patterns you can make from items found around the house. Rubbing caulks or mica powders on the surface can bring out the design and make each piece colorful and unique.
Remember, when you’re teaching people a craft, it is not always about topping the last thing you did… but more about showing people something new and getting them to think differently about the possibilities of a medium. The more simple the idea, the more creative the student can be with the idea. Have fun! Let us know how it goes!
No, I have never made one of these beads before. You can bet I will be doing this. I thank you so much for your great tutorials. You do a wonderful job. The only one I can find online like this. Keep it up.
Thanks again Jan
I have never made a Natasha bead. I have cane? ends that I have been unsure what to do with other than scrap them. I am so excited to see what will become of the cane ends I have been holding onto. Thank you so much for sharing, love your videos.
I was inspired by your Natasha bead video and took an 8 yr old cane and beat the hell out of it and made some beautiful beads! :) thanks
Outstanding — thank you so much! I have made similar beads — never from scrap cane — your tutorial was the magical refrsher I needed — I just found you today — I will be back!
Hi Cindy I have been using my scrap canes and pieces to make what I called raw shock. Designs … Never new they had a different name …. One of mine looked like a princess’s and one looked like a wolf ….. When I do a vender show, I ask people what do they see in the pendant … You should hear the responses I get . The best one? was a pendant that looked like Moses.