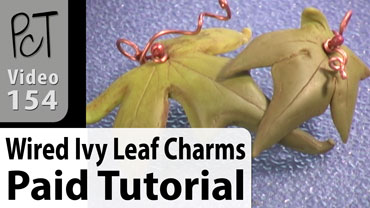
Vol-024-1 Ivy Leaf Charms PcT Tutorial (Intro)
Video #154: “So clever… I love the shape of it and the copper tendril is genius.” ~Linda-K
More...
** This post is an introduction to one of our paid tutorials.
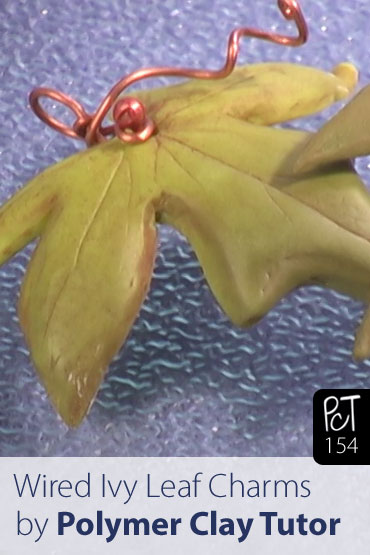
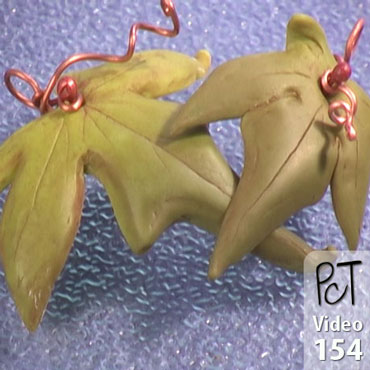
Today’s tutorial is about making an ivy leaf charm patterned from a real ivy leaf. This technique can also be adapted to work with other leaf shapes, including many of the realistic looking leaves used on silk or artificial plants.
Listed below are just a few of the comments from those of you who have already expressed an interest in wanting to learn how to make ivy leaf charms of your own.
“
Cindy – Wow, another absolutely beautiful piece of jewelry… I wish I had just half of your creativity!! Amazing!!! Not sure where I’d find an Ivy leaf to copy, but I’m game… maybe I could find some plastic ivy at the dollar store. So that would be a yes from me.
Lisa W
“
Howzat! Cindy scores again! Yes please to the Ivy Leaf Charm. Such a charming story about baby Ivy and her sister Olive and I love that you made the ivy leaf bead using a real leaf. There are so many beautiful leaves we could use in this way (I think I’ve already rhapsodized about frangipani leaves!), once Cindy shows us how.
Mary U
“
I love the idea of knowing how to do different kinds of leaves. I could make fall leaves as “welcome beads” for my next year’s class. I am so happy about all the coming tutorials.
Jill V
Transcript coming soon...
Transcript coming soon...
Our goal is to translate these videos into as many languages as possible. If you are interested in helping with this initiative, then please do contact us and we will figure out a way to make it worth your while :)
Shareable Images


Want to chat about today’s post? That’s what the comment section below is for. Scroll Down… We’d love to hear from you!
Or... if you would like to request a topic for a future post, here is the link to do that… PcT Suggestion Box


Hi Alice… you purchase back issues from the same back issue order page as before. The link by my name will take you there.
The new “Add to Cart” links will allow you to add as many back issues as you like, to the new shopping cart system, so you can purchase multiple back issues in a single transaction at the check out page.
Since I changed my payment method to not be paypal how do I purchase back videos?
NEW PHOTOS ADDED… that relate to the theme of this page… Ivy Leaf Charms. Click on the link by my name for the full story from Brenda-M.
I am sooo behind. I just now got to watch this tutorial. These are so adoreable. I really love them. I am anxious to make some.
Hi guys, sorry to take song long to pop in here.
As far as the shine on the back, just sand them with a coarse grit sandpaper like 320 or 400. That will remove the shine and make it more matte like the front. Using an antique finish like the Studio by Sculpey Antiquing Medium or even shoe polish, will minimize that shiny inside finish as well.
It crossed my mind to wonder if using the Studio clay avoids the shiny back.
@Linda K.: True! Hmmm…Cindy would know, since that’s what she used!
Cindy — did your Ivy Leaves have shiny backs from having been baked on glass? Or did the texture of the Studio clay keep their back’s matte?
I love this tut. I’m thinking of painting some grapevines and embellishing the painting with a few clay leaves to give it dimension. Still working it out in my head, but I think this technique is just what I need!!
I finally had a chance to watch the ivy leaf video and as usual I can’t wait to try the technique. Thanks Cindy & Doug!
Awesome video & technique! Thank you Cindy & Doug. This is another shining example of the extraordinary tutorials you guys make. I can’t wait to try — it seems pretty simple, and yet the results look intricate & detailed. It’s gonna be fun, experimenting with various leaves, & using different colors to antique them. I’m imagining all kinds of fun effects! Thanks again!
Great tutorial Cindy. I was wondering regarding baking on light bulbs -(which I do, BTW)- the back comes out too “plasticy” and shiny looking. If you were to use this as earrings, you can see the back. Wondering if anyone has some suggestions re making the back part look better.
@Maria: Would the Studio Satin Glaze fix the shine? I just bought some, so I haven’t experimented with it much. I did use it to seal a bead with Pearl-Ex and I think it has less shine with the glaze than without.
Cool – I’ve tried this with black clay covered in red transfer foil and a beech leaf – the ivy leaves in my garden are really small. Looking good so far, will see how it looks when it’s baked.
SUPER AWESOME TUTE -This is one of my favorites. Just love the endless possibilities with different leaves. As always you and Doug have given your best and I am looking so forward to trying this tute.
Once again have a super weekend and Happy Mother’s Day Cindy.
Uuuuuugggggs, Peggy
Love these leaves, I’m also thinking metallic, bronze would be good.Made rather alot of green recently with the jade which I am very pleased with as well. thanks Cindy
Someone mentioned putting aside some old light bulbs, as they were getting harder to find these days. I saw some new ones in the store — compact fluorescent light bulbs (CFLs) covered with a layer of glass shaped like the old incandescents! They were priced high, though I didn’t see if they had any improvements (like the ability to be used in closed fixtures or whatever.) But, as for our clay purposes, the shape was there. Good to know if we run out of our old burned-out bulbs for a project. I wonder though, how the CFLs would handle the oven heat. There’s potential danger, since the newer bulbs are low-wattage, contain mercury, and often have instructions not to be used in enclosed fixtures. Never-mind! Probably best to save those old incandescents after all!
Cindy thanks for the supply list, it is nice to have a chance to get stuff organised before Friday. looking forward to Friday.
I can’t wait for this tute also. I’m picturing a necklace with various fall colored leaves. hmmmmm
Andrea
Looks like I need to research Studio by Sclulpey quick! It’s in the local stores and I have coupons!!!
looking forwards to Friday yet again this tut will be great i must buy an old fasioned lightbulb as all ours are the new low energy bulbs.Why do they think that now we are older we need these .i would prefer more light not less (sorry abot that little moan )anyway i hope to join in the fun on Friday.
@Carole Holt: The new bulbs are kinda scary with the mercury warnings. Do you have recycling centers set up to accept these CFL bulbs there in England? Any special handling procedure, or do people just toss them in the trash like they do here in the US?
I’ll moan with you about the light. They’re different, much dimmer than the old ones. I buy 100W (equivalent) CFL’s to replace some of my 60 or 75W incandescents. It gives me brighter light, while using a little less wattage. The energy savings aren’t what they could be, though. But since I’m good about turning off lights I’m not using, I don’t regret having the brighter bulbs!
@Phaedrakat: Kat, I agree that the CFL bulbs are scary, especially if you break one and the mercury escapes. I’d definitely be afraid to put one in my clay oven. People who toss them into the trash don’t realize what they’re doing.
I really dislike the light that the CFLs give, so I have mixed feelings about using them. The biggest problem is that I already use the highest wattage allowed in my lamps. When I switch to the CFLs, I can’t go up to a higher wattage to make up for the loss of brightness.
@Linda K.: I feel the same way — the CFL lighting is so dim, it’s annoying! That’s such a pain how you’ve “maxed-out” on your bulbs. Oh, no! Pretty soon, you won’t have much choice, either — it’s getting much harder to find the incandescent bulbs lately! You’d better stock up on the ones you need for your lamps; if not, you might end up having to buy more lighting! :(
I love your idea of a painting with polymer leaves as accents. I can’t wait to see what you come up with — hopefully we’ll end up seeing it as a spotlight here at the blog, too. It would be a fun change, and yet fitting (it IS based on Cindy’s tutorials…) ~Kat
@Maria: I ran across this tip in another comment: Use acetone to tone down shine from baking on sleek surfaces, just like the backs of these leaves. Haven’t tried it yet, but if it removes fingerprints, then it must work for the shine! I imagine a gentle touch would be the best way to start, with just a little bit on a Q-tip. Then add more if needed. Let us know if this works for you, or whatever else you find works best! Thanks!
These charms look so cute, I can’t wait to learn how to make them! I’ll have to “borrow” some of my neighbor’s Ivy, but I’m ready-to-go with the Studio by Sculpey clay. (A few weeks ago, I got all of the green & several other colors on clearance at Michael’s — $0.97!) I’ve been eager to try-out my new clay, and this is the perfect project for it. One of my houseplants has some really cute, tiny leaves. I’ll probably want to recreate them with this technique, as well. I know they’d make really cute charms. Oh, this is going to be so much fun!
I’m also super-excited about the animal cane videos this month. Next week Cindy’s teaching the leopard cane, and two weeks after that — the zebra! And of course, the resin video happening the Friday in-between them~I’ve been waiting for that for so long! I feel like this is “my month” for tutes! As for anyone out there who’s on the fence about whether to become a member or not, this is a fantastic time to sign up!
Ok, this really looks interesting, and since it can be done with “other” leaves as well, makes it that much more useful, I have a question though, if I’m starting to make stock to sell, what season/holiday should I be focusing on now that it’s May?
Thank you everyone! I’m glad you’re excited!
@Koolbraider: I like to use Studio by Sculpey for these types of projects because of the suede like feel of the clay and the flexibility. But Premo, Kato and other strong clay brands will work as well.
@Ken H: I’d work on Summer stuff right now if you’re going to be selling direct to customers. If you are selling wholesale, then I would work on Fall. Usually one to two seasons ahead is the best way to go. I’ve linked to last years trend article which will help you do research on future trends.
Yay, another reason to visit Michael’s!!! (As if I needed one…) I’ve never used the Studio clay. Cindy, will you be including the reason for using Studio rather than other clays? I love greenery so can hardly wait for Friday.
I’m always up for anything leaf-shaped! I have a silver leaf pendant which I wear a lot – since my business name has “Silverleaf” in it as well I’m advertising myself subtly by wearing something cool. I’d definitely like to make one like yours in silver.
I guess I could try one of two ways – black clay with silver mica powder for a sort of “old silver” look, possibly antiqued with acrylic paint as well, or silver transfer foil. Looking forward to it!
Ivy doesn’t do well in the hot west Texas climate so I may have to go the artificial route, but no matter. I’ll figure something out and will be ready and waiting on Friday. Thanks, Cindy and Doug.
I am so looking forward to this tut, I feel it is something a little different We have just rescued a tree by striping the Ivy from it and now I am going to make some, (shuhuhu wont tell my husband ) cant wait for Friday.
Another can’t wait for FRIDAY. Got an ivy plant so I am ready. Just have to check my Studio by Sculpey clay to see if I have the right colors. If not I know I will have something in Premo that will work. Thank you again Cindy and Doug for bringing another great tute to us this Friday.
Hope you enjoyed your Sunday even though Cindy couldn’t stay away the whole day. Shame on me for not asking yesterday.
Uuuuuggggs, Peggy