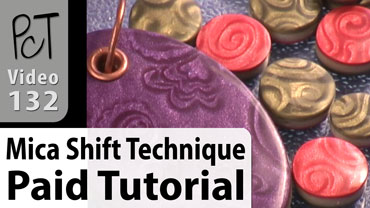
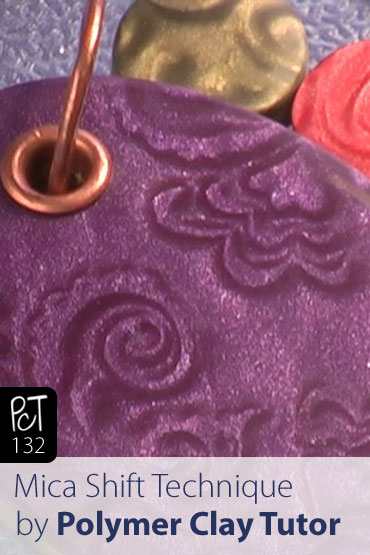
Vol-018-3 Mica Shift Technique PcT Tutorial (Intro)
Video #132: “Mica shift! You must have been reading my mind. I’ll be so happy to get your tips on it.” ~Dawn-B
More...
** This post is an introduction to one of our paid tutorials.
A new blog feature was added… thanks to Sue Werner for making the suggestion. Now you guys can count on receiving a Supplies List in advance of when the new tutorial videos are posted in the members library. This is in addition to the Intro
Clip that we will continue to provide as well.
Knowing beforehand what materials are required, means you will be able to get going on each project right away, without first having to race out and pick up stuff.
“Thank you Sue for your “supplies list” suggestion and Cindy for your response to provide us with this information. Now Fridays will have more time for the actual creation.” ~Joyce-M
“LOVE LOVE LOVE the supply list! It’s going to help out a bunch! Thanks Sue and Cindy!!” ~Phoenix-F
“I love the list of materials, too, Cindy. This site just keeps getting better and better. Love it. Clay on, everyone!!!!!!!” ~Helen-S
“I agree. Thanks for the idea Sue and Cindy you always come through for us. Just like a teacher always wanting to give the best to her students. Looking forward to Friday.” ~Peggy-B
“Mica shift! You must have been reading my mind. I’ve been playing around with this technique lately. I’ll be so happy to get your tips on it.” ~Dawn-B
“Cindy, I am excited too about the mica shift. I have read about it and tentatively tried it but it will be great to see a video demonstrating it. Thanks for all your help and for always seeming to be able to read our minds.” ~Laurel-B
“
Great video! After trying your mica shift technique, I got so excited and confident. After trying other techniques I'd feel so disappointed in the results, and remember thinking that I'd never see my dreams of making good mica shift come true. Well Cindy, your video made those dreams come true. Thanks.
Stephanie J
“
I loved the video as always. I've done the mica shift before and love doing it, but I have to admit curving the blade and skimming off the top sometimes got the best of me. Your curved bottle trick is brilliant. I learn something new every time I watch one of your videos, Cindy. Thanks for all your fantastic tips.
Peggy B
“
Great Mica Shift tutorial. I like really your idea of putting the clay on a curved bottle surface. It really does help to prevent gouging, like what happens when you have to bend your blade to make the cuts... which is what other instructors show. Thank youfor you insights!
Bonnie K
Transcript coming soon...
Transcript coming soon...
Our goal is to translate these videos into as many languages as possible. If you are interested in helping with this initiative, then please do contact us and we will figure out a way to make it worth your while :)
Shareable Images


Want to chat about today’s post? That’s what the comment section below is for. Scroll Down… We’d love to hear from you!
Or... if you would like to request a topic for a future post, here is the link to do that… PcT Suggestion Box


Played today, and had a few episodes of both deep and minimal gouging. Stupid hands, lol.
Found that if I slowly stopped in place, backed out the blade, and then gently tapped or rolled that area a little, I could go back to it afer resting, slice again, and have no evidence of the original mistake.
Woohooo!
Woohooo is right hon
What a cool tip !!!
Thanks, Sherry
I’m learning the mica shift technique and I’d like to know if you’d do a tutorial about how to use rivets for cold connections in polymer clay. Your Mica Shift video shows a lovely two sided pendant with a riveted hole and It gives a very finished look to the piece. I’d like to learn how to do the same thing. Thanks, Anne
@Anne R: Hi, Anne R – Cindy did not use a rivet … it is an eyelet … like you can find in scrapbooking sections of craft stores. She explains it a bit more above. Do a ‘find’ on this page and key in eyelet and you’ll see more. I tried it and it works great!
@Anne R: Hi Anne, I found Cindy’s comment about the eyelets, in case you didn’t feel like looking, LOL! The eyelets really DO add a lovely finished look to clay pieces.
Just in case you were looking for more, though, I wanted to mention that Cindy showed off some rivets in her Faux Metal Mokume Gane video.
There were a lot of requests for a tutorial on that topic afterwards, so perhaps Cindy will bless us with a riveting or cold connection tute some time in the future!
@carolyn: Good to see your comment here, Carolyn! Hope that you are feeling much better these days and well enough to do lots of fun stuff~
OH Boy, this is so great,to see the results of reqular peoples attempt at Mica Shift, it makes me feel I could get good at this too. Cindy I do love your TUTs. After trying the MICa shift the way you showed us I was jumping up and down with excitement. I’ve had books on polyer clay for years and after doing all the softening of the clay,then trying the techniques I’d feel so disappointed in the results, that I’d wonder if I’d ever see my dreams of prefecting the medium come true. I’d hear my critic say,you’ll never get it, or this is too difficult to understand. Well Cindy watching and following your video have given me such confidence, I’d hug you if I could. so Here is a virtual hug. thanks thanks thanks.
@stephanie jordan: Congratulations, Stephanie! I loved reading your comment; I agree Cindy really makes techniques super easy to follow in her tutes. I’m a fan — watching her videos makes all the difference, even for us ‘regular people’ ;D ! ~Kat
nope they don’t, more’s the pity. I’m from New Zealand by the way, which is to the east of Australia and down a bit. we call Aussie NZ’s west island, hehe. Loved the Aurora Borealis Technique. Am going to try that one out very soon.
Cindy, I was just wondering where you managed to get the oval shaped cutter you use in your video on mica-shift. I cannot find one. I thought I had but it turns out it is an eclipse.
Thanks
@Sandra J: I think I got that oval cutter at Michaels. It could have been in the baking section though, with the Fondant cutters. But since you are in Australia, I’m not sure if this helps you that much. As far as I know, the Michaels Store chain has not gone down under… not yet anyway.
Love this video, awesome technique and very cool effect! This question is not about Mica but about the pendant in this video. What is the finding called which is used on the purple pendant where the jump ring goes through? Thanks :)
@Rada Francis: Rada, I can’t be sure exactly what Cindy used here, but my guess is that it’s a copper grommet. You can usually find these in the scrapbooking supplies…and they come in various finishes.
@Rada Francis: Linda is correct, that is a copper grommet used for scrapbooking!
I truly am totally happy and satisfied with this piece, I like the weight and feel of it, and the burnished finish. Almost looks like wood, the knotting.
Thanks, Kat. A look that only works when it’s steaming hot, LOL! I still use my dairy farm grandmother’s treat for all us working cousins. First thing in the morning it was someones job to iron spanking white T shirts, fold them, and put them in a paper bag in the fridge or freezer. At 7 pm, those who worked “the best” that day, got to wear the popsicle. Bliss on that porch surrounded by family. And bowls of homemade coffee ice cream.
Carolyn, I wonder if I could ask that you post a pic or the link to the pic so that folks can oogle that beautiful set of jewelry I am wearing.
@Jocelyn: Beat you to it … same thought … posted on Cindy’s Facebook Gallery Page. I’m so glad you are loving it!
Carolyn!
I must simply rave about my treat. I decided to do it in the original tut. It is now midmorning, and cluckhead me is sitting in khaki capri’s, a “wife beater” and the most gorgeous jewelry, which looks fabulous. Big grin on my face too, I can feel it. LOL!
I always try to wear some spiritual necklace, a habit from childhood. This necklace with the silver chain link combined with the silver gromments and that spiral mica shift pattern (works either way…), and the cross hanging below, is just perfect. The earrings are like air in my ears, compared to how hefty they look. And also beautiful.
I cannot thank you enough for creating this work. I think I am making a long dress in the olive khaki, but to add a special touch, I’m going to use purple ribbon peek out trim on all the seams. You are an extremely talented lady and I wish you all the best.
Jocelyn
@Jocelyn: I’m trying to picture you like this—you look pretty darn happy!
Hi there, Cindy
Jewellery manufacture and design is a personal passion on many levels, and I came across your website during the course of my research. I’ve been experimenting with dichroic glass jewellery in the form of pendants and beads, and whilst looking for tips and techniques I found you.
This mica shift technique with the polymer clay really gives a great visual effect, one that can not always be consistently replicated with the real glass. Once you fire up the kiln you never quite know what exactly is going to come out once the cycle is completed.
I think it is time to get my hands dirty and to start playing around with your techniques a bit too. There is definitely great scope to expand my hobby in this manner.
Keep up the good work.
Annette Raymond
South Africa
@Annette R: Welcome, Annette! I think you’re going to enjoy getting your hands dirty with clay. It looks like you’ve been looking around — did you try the search box? There’s one at the top of every page. If you have trouble finding anything here, let us know — we’ll be glad to help (any of us!) This is a friendly group, so feel free to jump right in! Glad to have another member from S. Africa — this is quite the international community! I’m from Riverside, CA, USA, BTW. :D ~Kat
NEW PHOTOS ADDED:
Hello to Everyone,
Some new Spotlight project pictures that relate to the topic of this page (Mica shift Technique), have just been added in another post. They were submitted by Ritzs. The link by my name will take you to where you can see them, along with a bit of a write up. Hopefully they will inspire you to achieve great things with your own polymer clay projects.
Thanks Silverleaf and Caroyln!
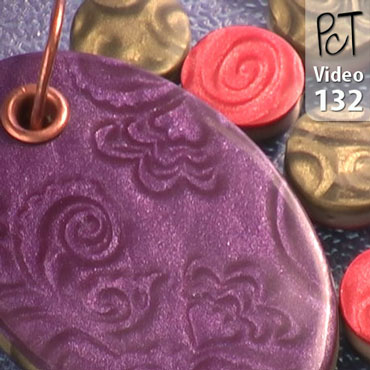
That is metal that you are referring to in the large pendant. It is actually an eyelet used for scrapbooking. I used two of them. One pushed in from the front and one from the back to make a nice clean (and strong) metal hole going through the pendant. On a thinner pendant you can just use one from the front.
I did this technique in the Butterfly Pendant Tutorial awhile back. The link by my name will take you there.
On your main mica shift pendant you have some type of ring thing at the top that your jump ring goes through. Is this some kind of metal ring or is it also made from clay. If it is clay can you tell us how you did it? If it is metal please explain that. I really like the finished look of this rather than the jump ring going through just a hole in the pendant. Thanks for your help on this. If I missed it somewhere, please let me know that also. You are great and so responsive. There is tons of stuff on the web about polymer clay but it is so good to have just this one place to find the answers and very clear instructions. Thanks!
Wow, nice work everyone. I really love that technique. :)
Well I found a spare moment to get your mica shift pics posted. Thanks so much for sending them in. Your Faux Lapis beads go nicely with the blue clay you used for your shift.
Cindy – Here are a photos of my mica shift pendants, finally.
The oval one is wrapped in copper foil (the kind you use for stained glass work) and has copper twisted jump beads hanging from it.
The heart one is accented by my “fauz Lapis” beads made with polymer clay.
I think the mica shift came out awesome in these two. I had another one that was a flop though. LOL
Laurel
@chitzngigglz – thanks for your input. I like Premo best to :-)
@Carrie – awesome shift! Great job!
Hi Cindy! I made my first attempt at mica shift a couple days ago.
I was pretty happy with the sheets I made so I got out my cutters and made some earrings! I sanded with 400, 800, 1000, and 1200 grit sandpaper and then buffed with my Dremel. I added a thin layer of Studio by Sculpey Glaze to really make the colors pop. I hope you like them! Carrie.
Wow Ritzs very pretty. I just started with the mica shift since watching the video. I tried to use the Fimo Effects and they don’t work like the Premo pearls do. Great technique and great tips Cindy.
Very nice Ritzs! It is so nice to see that you are making these techniques work for you. From the sheen in your photos, it looks like you did a great job with your sanding and finishing on the mica beads. And your copper wore work looks very fluid. I like the design.
In regards to the aging wire with an egg… this technique has been described in another comment thread (see link by my name). But feel free to add your own input. It deosn’t hurt to have the same information posted in several places. This makes it more likely that the information will be found and used by other visitors too.
Keep up the great work.