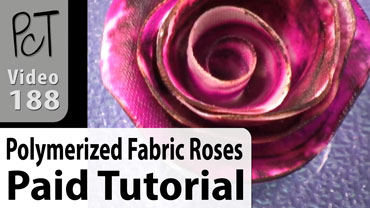
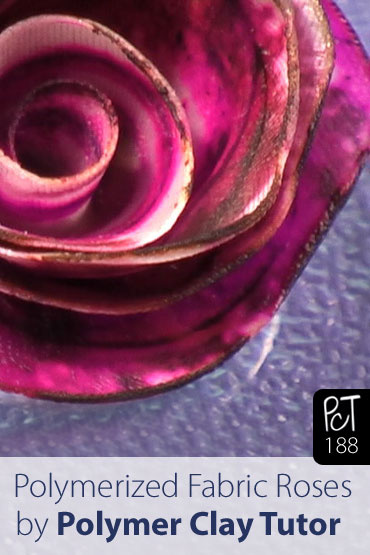
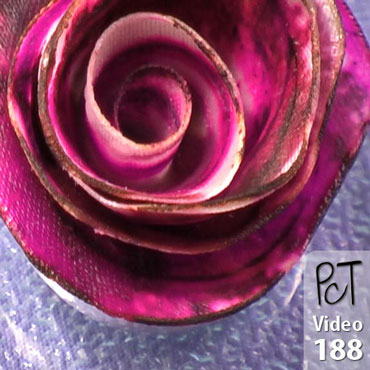
Vol-032-3 Polymerized Fabric Roses PcT Tutorial (Intro)
Video #188: A polycloth rose is huge on the WOW scale for me!” ~Linda-K
More...
** This post is an introduction to one of our paid tutorials.
According to Wikipedia, Serendipity means, “a propensity for making fortunate discoveries while looking for something unrelated.” Well… when it comes to polymer clay, this happens to me all the time.
For example, just after publishing the teaser video for my new Polymerized Cloth Technique, I came across an interesting article from Tip Junkie that showed a paper flower made out of recycled magazines. This led me to the Frugal Life Project blog, which linked to a tutorial on making paper roses that Splitcoaststampers did back in May 2010.
During this little serendipitous journey, I realized that the paper flower making technique could be easily adapted to work with polymerized cloth for making beautiful fabric roses.
“Cindy, I am really inspired by the Polymerized Fabric technique. I have been working on combining my love of fiber with my love of jewelry and polymer clay. This is the perfect marriage. Your Fabric Rose is wonderful!!” ~Heather-P
“This feeling – being passionate about something – is one I haven’t experienced in many years, and your work has played a big part. I simply cannot thank you enough. Serendipity is always such a wonderful surprise, and that’s what happened – the warm weather, the magazine, your course. I never expected any of them, but together they have set me on a course that I’m thoroughly enjoying.” ~Linda-D
“I love when something unexpected and beautiful happens! Definitely serendipity.” ~Silverleaf
“The art is in the serendipity of the process.” ~Lisa-R
“Health experts are always telling seniors (I guess being in my late 70’s qualifies me) to learn new things to keep the brain active. Your tutes are definitely keeping my brain buzzing. A polymer cloth rose next??? Wow – bring it on !!” ~Fran-R
“
Fantastic! I have tried and tried to make 'regular' clay roses and they look awful. But making them with polymerized fabric is perfect! Have to dig up my stash of fabrics (you know, that 'don't throw it out because you'll need it someday'...25 years later, stuff).
Susan D
“
Amazing creativity! I love the singed edges. I'm wondering about using decorative scissors on the edge. Adding glitter glue or shimmer paint on the edge would look cool too. Or mix Pearl Ex, Embossing Powder, etc into TLS or Bake and Bond, and pipe or paint it on the edges.
Phaedrakat
“
The roses are beautiful. I'm going to make earrings and a necklace to wear to the Rose Society meeting. Maybe someone will ask to buy some! I have told so many about your tutes, the low cost and how all of this has stretched me creatively. I am now making things I never thought I could. Thank you and Doug - hugs.
Patt W
Transcript coming soon...
Transcript coming soon...
Our goal is to translate these videos into as many languages as possible. If you are interested in helping with this initiative, then please do contact us and we will figure out a way to make it worth your while :)
Shareable Images


Want to chat about today’s post? That’s what the comment section below is for. Scroll Down… We’d love to hear from you!
Or... if you would like to request a topic for a future post, here is the link to do that… PcT Suggestion Box


Hi Cindy
Just wanted to know…. if i can bake polymerized cloth in a normal baking tray…. or is it important to bake it in a ceramic tile…… ( where can I buy a ceramic tile)
Thanks
Hi Roshin, you can bake it on a glass pan, a non-stick baking mat or parchment paper instead if you wish, but don’t bake it on paper because it will stick or on metal because it may scorch. You can easily find smooth ceramic tiles in building/hardware stores like home depot. Often you can buy one as a sample, very cheap.
I would very much like to become a member. I’m new to polymer clay and jewelry making.
@gloriela philpotts: Welcome! Myself as well as many of other members here would love for you to join this fun, supportive and friendly community :-) The link by my name just above, will provide you with information on how to get started.
Please do let everyone know what part of the country or world you are from :-) :-)
@gloriela philpotts: Welcome, Gloriela! I hope you joined up, as Cindy’s videos are fantastic, and membership is SUCH a super deal! Hope to see you join in at the blog posts, as well…
~Kat, Riverside, CA, USA (Where are you from?)
Thank you Cindy, the colour surprised me a little because the red is so prominent, when in the original cane I used equal amounts of red, green and ecru, so it gave me a good reminder of how strong the red pigments can be.
I didn’t realise that I’d been featured until I looked at my Google Analytics stats and noticed for that day my page views were way up, and I hadn’t posted on Facebook or anything that day, or listed any new pieces of jewellery. But then I found out that lots of people had got to my site through polymerionline.blogspot.com so it was a really nice surprise to see myself there! :)
WOOHOO! I just got home from my daughter’s house and couldn’t fire up the computer fast enough. LOVE, LOVE, LOVE this tut. It was the perfect homecoming gift . Thank you. Thank you.
Another tute to lOVE and thank you both for from the bottom of my heart. Not sure how you do it. I shouldn’t even ask just THANK GOD you do. The talent the two of you have and the way you blend it is just like a great marriage. Lots of hard work give a little here and there add a lot of love and respect and BOOM you have the best PC TUTE TEAM ALIVE!!!!!!!!!!!!!!!! Thank you both
Now is Friday and weekends open mic also still. I found a awesome cane I was wondering if you knew anything about you two? ?Bargello is a type of needlepoint embroidery consisting of upright flat stitches laid in a mathematical pattern to create motifs. The name originates from a series of chairs found in the Bargello palace in Florence, which have a “flame stitch” pattern. Not sure where this person found it or who first came up with it. I saw it on my facebook and fell in love with it and thought maybe you might know something about it. If so I thought maybe you might be able to do a tute on it someday soon.
Love and Uuuuuuggggs, Peggy
Thanks everyone! You are all so sweet and make me very happy with your kind comments!
@Peggy Barnes: This is the perfect place for Open Mic comments like this. I know exactly which cane design you’re talking about. I too am not sure who did it first, but you’re right in saying it is a great looking cane. I’ll have to play with it for awhile and see if I can bring anything new to the idea. It has definitely ‘been done’ but I may be able to put my own little spin on it. We’ll see.
@Cindy Lietz from Rustic Arizona Style Beads: Rustic Arizona Style Beads???? Is this a hint of something coming???
@Elizabeth S.: It wasn’t actually a hint Elizabeth, I was just linking to an older post so people wouldn’t forget about it. But you’ve got me thinking. The Arizona Beads are such great looking beads and they are quite simple to do. They would be a great thing to share in a future tutorial. Thanks for the reminder!
I made some pretty “serendipity” beads inspired by the Arizona beads.
I was trying out the extruder flower cane and because it was my first try I expected to mess it up, so I just grabbed any old colours from my work surface – a pale ecru type colour, a warm bright red and a forest green – and made the cane. It worked fine but I didn’t like it because it had too much contrast to it, so I was just about to ball it up and add to my scrap pile when I thought about the Arizona beads and decided to experiment with the idea…
… and ended up making three stripy tube beads which I really like. You can see the necklace I made from them by clicking on my name.
@Cindy Lietz from Heart Shaped beads for Valentines: Oh yeah! I remember them now and appreciate the reminder-definitely a tut I need to revisit. These senior brain farts (did she really just say that?) seem to be happening more and more regularly. It is sort of nice to have an excuse to fall back upon, though.
@Silverleaf: I meant to pop in here the other day and tell you how great your beads turned out. I love the color of them. Also wanted to congratulate you on being featured on Iris Mishly’s blog the other day. That must have felt great! I know how nice it is to get a little recognition for your work. Makes you feel appreciated!
@Elizabeth S.: We can always count on you to say something fun! That is why we love you so much! :-)
Cool tute! Thanks, Cindy…your creativity is amazing! I love the look of the singed edges; it’s a great look with certain fabrics (like your gallery necklace.) I was wondering about the use of decorative scissors on the outside edge…for more “dainty” fabrics & colors. Has anyone tried anything like that? Cindy’s idea of adding a bit of glitter glue/fabric shimmer paint on the edge would look cool, too. Or maybe mix some Pearl Ex, Embossing Powder, glitter, etc. into some TLS or Bake & Bond, and “pipe” it/paint it on the edges (to keep it completely ‘polymerized’, LOL…) I have to try this tomorrow, when I have access to my work table again, haha!
@Silverleaf: Congrat’s on the feature at Iris’ blog! Must’ve been exciting to see the increased activity and discover it “that way”. Your Etsy pieces are looking great, BTW. Congratulations again!
Off Topic: @Elizabeth S.: I’m not a senior yet, but I certainly have memory lapses. As for your brain ____’s, Manny probably prefers them to the other type? (Hmmm…too much? Yeah, I definitely shouldn’t have said that…but you started it, LOL!) Wait, I just remembered how perfect you are…there’s no such thing for you! :D
Elizabeth S. thanks for the link to Brenda’s BEAUTIFUL polimerized fabric rose.
Has anyone seen the cover of the Feb/March Step By Step Wire Jewelry? Just in time to use Cindy’s last two brilliant tutorials. My busy workload doesn’t allow me to try these until the end of Feb., but have it on my “to do” list.
Brenda’s rose is just beautiful!
I’m having trouble uploading photos to the polymer clay gallery on FB. don’t see any icon for photos anymore. Is anyone having the same problem?
Check out Brenda’s polymerized rose on facebook. It’s gorgeous!
Very neat technique Cindy. I have fallen behind in making anything new this year. I feel like I am in a “blah” state and can’t focus. But this technique I will be doing today. I will post it on your Fb site when it is complete.
Fantastic!!!
Now for a question, how tight of a woven material can you use, obviously you coldn’t use velvet due to plastering down the nap, but would satin work?
Thanks guys! The greatest thing about this technique is that you really can use almost any type of thinner fabric, even a chunk of an old shirt will work if you like. (Just don’t cut it out while you’re still wearing it… People may talk! LOL)
The best way to get out of a creative slump or even overwhelm, is to just do. Just pick something and try it. Doesn’t even matter how it turns out. Just the process of doing will get the creative juices flowing again. I am really looking forward to hearing about your Polymerized Fabric adventures!
@Ken H: Sure satin will work! I used a chunk of satin ribbon in the Polymerized Cloth Tutorial. And don’t rule out velvet. There are some thinner ones out there and the flattened nap may look really cool!
Just watched the video. The roses are beautiful, also the one on the soft flex wire necklace. I loved the pink one. Reminds me of the ribbon roses I used to make. I made some for my daughters First communion dress.
Interesting fabric is one of the things I don’t have a whole stash of! But I’ll definitely try this one if I can find something suitable – we don’t have drier sheets since we don’t have a drier, lol.
I’m thinking that little roses would look good on hair sticks.
Elizabeth…..how you could you leave home without it???
Cindy…this was a great tute. I think I’m learning too much, I can’t seem to fit it all in. I know it will come in time.
OT…My oldest grandson had to do a social studies project on King Tut. One of his ideas was to make some clay pots and treasures to put in the treasure room. We both had fun with that one. BTW he’s 11 yrs old.
Horrors! I’m traveling and forgot to bring my library password! I’ll have to wait until Sunday to watch the tut. Will I survive?
Hi Cindy!
I have to tell you that I’m so enjoying the content of all your videos. As a relative “newbie” to polymer clay, I’ve found them all so helpful and informative. I ordered the beginner course too – even though I have a basic working knowledge of this craft, it’s still nice to have an experienced clayer to learn from. Thanks for letting me “watch over your shoulder”!
Take care,
Cheryl
Fantastic! I have tried and tried to make “regular” clay roses and they look awful. But having one made from fabric would be perfect. Have to dig up my stash of fabrics (you know, that “don’t throw it out because you’ll need it someday” 25 years later stuff).
Really glad to see you did this tute.
WOOOOHOOO!
All right! Roses are my favorite flower and I was hoping a rose technique would follow the polymerized fabric technique! Can’t wait!
Wow….come on Friday!!!!