Scrap Polymer Clay Heart Shaped Beads Mini Tutorial
Video #616: Using up scraps from the Vol-080 Faux Fordite Polymer Clay Tutorial. Perfect for making a matched pair of earrings.
More...
IN THIS POST: — scrap clay — heart shaped beads — polymer clay beads — focal beads — hearts — heart beads — scrap heart beads — faux fordite — sanding polymer clay –pasta machine — (Topics marked with an asterisk* are discussed in the Comments Section below).
Topics Covered In This Video:
- I recently did a tutorial called Faux Fordite Wire Weave Pendant Tutorial (see link below video), and in that tutorial there were some leftover clay scraps. I promised to show everyone how to use those scraps to make some scrap clay heart beads, but ran out of time. So here I am making good on that promise:-)
- In the Vol-080 Faux Fordite tutorial, we created a slab of layered polymer clay. When the cabochons were cut from the slab there, were some leftover trimmings.
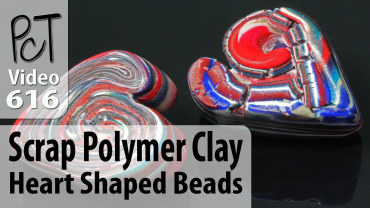
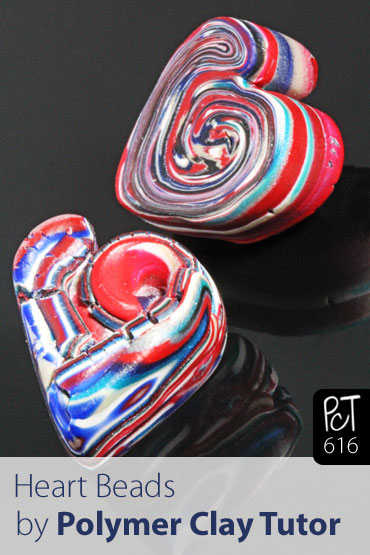
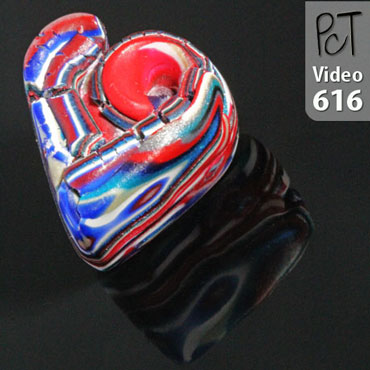
- The piece of scrap, I used in this video, is about the size of your index finger… the perfect amount for making two heart shaped beads.* I show a pair of earrings made with the scrap heart beads. They are rough on the front and very smoothly sanded on the backs.
- The back side shows a beautiful swirl pattern design.
- This technique makes two heart shaped beads that match in color, but are each different and unique.
- First, you roll the clay into a log about the size of a finger.
- Then roll the log through your pasta machine at the thickest setting (the thickest setting on my pasta machine is 8 playing cards thick), to make a beautiful striped “tape” of clay.
- Fold the tape in half and run it through your pasta machine a couple more times, to make the tape even more stripey.
- Now run your piece of clay tape through the machine at 1-2 settings thinner, until the clay is about 1 inch wide and a several inches long.
- Fold tape in half and then roll it into a spiral from the cut ends until you run out of tape.
- Where the fold is, press an indent into the top of the log to make the top crease in the heart, and pinch the bottom to make the point. The log should have a heart shape when you look at either end. Each end will also have a rough, crackled look due to the cracked edges of the tape that happened when you rolled it through the pasta machine.
- Cut the log in half to create two heart shaped beads.
- The beads should be rough on the front, and smooth with a spiral pattern on the back.
- Bake on a paper lined pan with a tinfoil lid for one hour at the temperature recommended for your brand. I used Premo Clay, so I baked at 275F for one hour. Use an oven thermometer to make sure your oven temp is correct.
- Sand, buff and wax the sides and back of your heart beads.
- Drill a hole as needed, by hand, using a drill bit in a pin vise.
- Then use the beads for whatever type of jewelry project you like.
00:00:03 –> 00:00:08 Hi guys, its Cindy Lietz, your Polymer Clay Tutor, and in today’s PcT Mini Tute, I’m gonna
00:00:08 –> 00:00:13 show you how to make a Scrap Clay Heart Bead.
00:00:13 –> 00:00:21 Now recently, I just did a tutorial on Faux Fordite, and here’s one of the pieces from
00:00:21 –> 00:00:27 that, and in that tutorial, there is some scrap, and I had mentioned to everyone in
00:00:27 –> 00:00:32 the tutorial that I was gonna show them how to do a Heart Bead tutorial with the scrap,
00:00:32 –> 00:00:38 and then I ran out of time, so I promised I would do it here, and so all of you get
00:00:38 –> 00:00:42 to have… get to see it too, even those of you that didn’t see the tutorial.
00:00:42 –> 00:00:49 Alright, so from the scraps, we had a slab and we cut some cabochons and things from
00:00:49 –> 00:00:56 the slab, and some of the trimmings ended up in a piece like this here, and you could
00:00:56 –> 00:01:01 do this with any kind of scraps with multiple colors, and it works really well if they’re
00:01:01 –> 00:01:04 kinda stripey.
00:01:04 –> 00:01:09 But what you’ll need is about the amount of one of your fingers,…I’m just looking
00:01:09 –> 00:01:14 at this amount and it’s perfect, it’ll make two Heart shaped beads, and you make two at
00:01:14 –> 00:01:19 a time with this technique, so you want the amount of clay that it’ll take to make just
00:01:19 –> 00:01:20 two beads.
00:01:20 –> 00:01:26 Oh, and let me show you the beads first, I’ve got a pair of earrings here of… that I made
00:01:26 –> 00:01:32 out of the one set of Heart shaped beads, and you can see on the front side of them,
00:01:32 –> 00:01:40 they’re very rustic looking, and then on the back side, they have a really cool multicolored
00:01:40 –> 00:01:48 swirl in them, and both of them were from the same set, so they’ll automatically go
00:01:48 –> 00:01:55 together, but they won’t look the same, alright, and I have another couple of small guys here,
00:01:55 –> 00:01:56 same sort of idea.
00:01:56 –> 00:02:04 So what I’m gonna do is take my piece of scrap clay, and I’ve just kinda bundled it into
00:02:04 –> 00:02:10 a log, and you want it…you know around the size of your finger, ‘cause when we run
00:02:10 –> 00:02:17 it through the pasta machine, and we’re gonna do this at the thickest setting, we are going
00:02:17 –> 00:02:23 to need it to be not too much wider than this to start off with, so we’re gonna just run
00:02:23 –> 00:02:30 it through at the thickest setting, and then what we’re gonna do is we’re gonna fold it
00:02:30 –> 00:02:33 in half and run it through again.
00:02:33 –> 00:02:40 And what this will do is…I’ll just try and keep them together there, this will make
00:02:40 –> 00:02:46 a section of clay that is quite stripey and cool, but the edges are all rough.
00:02:46 –> 00:02:55 We’re gonna do it another time here, just until it gets a little bit wider, one more
00:02:55 –> 00:02:59 time, and the stripes look really good, so I like these other stripes a little better,
00:02:59 –> 00:03:05 so I’m just gonna fold that to the inside and run it through one more time, alright
00:03:05 –> 00:03:06 so that should do it.
00:03:06 –> 00:03:15 I’m gonna now go to a little bit thinner setting, number 2 on this one is about 6 playing cards
00:03:15 –> 00:03:20 thick, I folded it in half, run it through again, and I’ll do a little bit thinner setting
00:03:20 –> 00:03:25 which is 3, which is 4 playing cards thick, we’re just stretching it out a little bit
00:03:25 –> 00:03:28 and making it a little bit thinner.
00:03:28 –> 00:03:37 Now, we’ve got this cool stripedy piece of clay, it’s like a tape, and it’s crackly on
00:03:37 –> 00:03:38 both sides.
00:03:38 –> 00:03:48 Now what we’re gonna do is we’re gonna fold that in half, and then we’re going to roll
00:03:48 –> 00:04:01 up the other side, just roll it right up till we get right to the end here.
00:04:01 –> 00:04:08 And right where this fold is, I’m gonna take a tool…doesn’t really matter what kind,
00:04:08 –> 00:04:13 you could use a knitting needle or anything you like, this is a Pearl and Etch tool, and
00:04:13 –> 00:04:19 I’m just gonna press right into that spot where that curve is, and I’m gonna point the
00:04:19 –> 00:04:30 bottom, so we’re turning this into a heart shape…so this is gonna curve around, roll
00:04:30 –> 00:04:36 in a bit here and we’re gonna make it sharp at the bottom.
00:04:36 –> 00:04:44 Now, depending on the type of clay you used and the colors you used, it’ll look quite
00:04:44 –> 00:04:50 stripey here…or it won’t, and it depends, so each one will look a little bit different.
00:04:50 –> 00:04:55 But the thing is these two beads will look… they’ll go together because they’re of the
00:04:55 –> 00:04:56 same set.
00:04:56 –> 00:05:02 So then I’m gonna take a clay blade and cut it in half, I’ll just kinda use this guide
00:05:02 –> 00:05:11 here, cut it in half, and now I have…oh and these colors are quite dark on this one,
00:05:11 –> 00:05:17 so you can’t… may be not be able to see the swirlies that well on this one, but you
00:05:17 –> 00:05:25 will when you sand it, now there’s a swirl on the back side and a rustic looking heart
00:05:25 –> 00:05:26 on the front side.
00:05:26 –> 00:05:37 Now what you do is you bake them on your tray, you bake them on your tray with a piece of
00:05:37 –> 00:05:42 paper at the bottom, make sure to put the cut side down so it stays nice and flat, put
00:05:42 –> 00:05:45 a tin foil tent on the top.
00:05:45 –> 00:05:49 Make sure that you are baking it with an oven thermometer at the correct temperature for
00:05:49 –> 00:05:51 your brand, this is Premo!
00:05:51 –> 00:05:59 Clay so we would bake at 275F on the thermometer, and then we’re gonna bake for one hour.
00:05:59 –> 00:06:03 I would make up a whole bunch of them before I started baking them, not just the two, and
00:06:03 –> 00:06:10 then when you’re done, you will take them out and you’ll give the back a nice sanding
00:06:10 –> 00:06:13 and the sides, and when you sand them…
00:06:13 –> 00:06:18 now this one has a lot of White in it, so the colors really pop, but when you sand those
00:06:18 –> 00:06:23 edges… here’s one here that was unsanded, and see how quite stripey it is, and this
00:06:23 –> 00:06:28 one’s sanded and all those other layers will start to be revealed underneath and it looks
00:06:28 –> 00:06:35 quite cool, then the sanding…when you sand the back, it looks really lovely and shiny.
00:06:35 –> 00:06:42 I rubbed these with some Renaissance Wax just to finish them off, and then if you want to,
00:06:42 –> 00:06:50 you can drill it by hand with a drill, drill through the top, drill through the bottom,
00:06:50 –> 00:06:58 or you can just put a screw into the top, you can drill a little hole and put a screw
00:06:58 –> 00:07:02 eye in the top, and you can use that, that way or you can drill through the side, however
00:07:02 –> 00:07:04 you wanna use the bead.
00:07:04 –> 00:07:09 Alright, so I just thought I would show you how to make a little Scrap Heart Bead out
00:07:09 –> 00:07:12 of any kind of scraps of Polymer Clay.
00:07:12 –> 00:07:16 So I hope you liked that, if you did, do let us know.
00:07:16 –> 00:07:21 And if you’ve got suggestions for future tutorials, products you’d like me to demo, things like
00:07:21 –> 00:07:25 that, let me know in the comment section below as well.
00:07:25 –> 00:07:31 And don’t forget about our great resource over at PolymerClayTutor.com where you can
00:07:31 –> 00:07:35 use the search box to find answers to all of your Polymer Clay questions.
00:07:35 –> 00:07:37 We’ll see you next time and bye for now.
Our goal is to translate these videos into as many languages as possible. If you are interested in helping with this initiative, then please do contact us and we will figure out a way to make it worth your while :)
Resource Links:
- Related Video: Faux Fordite Polymer Clay Tutorial
- Related Video: Foil Pan Lids Protect Your Polymer Clay In The Oven
- Related Video: Atlas 150 Brand Pasta Machine
- Related Article: Wet Sanding Polymer Clay Tutorial
Resources marked with a double ** asterisk are affiliate links. If you click on them and decide to buy something, we may receive some compensation. This does not affect the price you pay in any way. What it does do, however, is helps us to continue providing free videos for you, here at the PcT website. Using our links to purchase your tools and supplies, is always greatly appreciated.
Sponsored Ads & Special Promotions

Shareable Images


To share this full blog post anywhere on the web that allows links in comments, here's a shortened url to copy and paste...
>> https://mypct.ca/v616 <<

Want to chat about today’s post? That’s what the comment section below is for. Scroll Down… We’d love to hear from you!
Or... if you would like to request a topic for a future post, here is the link to do that… PcT Suggestion Box

Cindy thanks for taking the time to make some scrap fordite earrings. You know me I am always wanting earrings to match and this turned out just wonderful! I am so anxious to make the Fordite Pendant and have gotten somewhat behind with the holidays and all. My son bought me a new top of the line Samsung 30 X camera which takes marvelous pictures so am learning how to use it also. I am so looking forward to another year of great tutorials from you and Doug so here is wishing the Leitz family a wonderful 2015!
Thanks for saying that Dixie Ann. :) That is wonderful about your new camera. I can’t wait to see some of your new photos!
You can see the first picture I took of the Dragon on a wine bottle which was part of the FB Polymer Clay Challenge going on now. Your making a little sculptress out of me!
You have made a faux fordite enthusiast of me!! What a wonderful and interesting tutorial – thanks! You mention on the video page that there are “shopping” links provided for the tools and supplies we might need, but I can’t find where they are. Can you help me? I really like the supplies you use and would like to purchase some things. BTW, you are a great teacher (after 40 years of elementary teaching, I can tell when someone has that innate ability to teach!)
Hi Susan, for every tutorial there is a corresponding blog post. In that post we put together a list of supplies. The ones that are available on Amazon will be listed in a box called an Amazon Widget (blue colored box with rounded corners). You don’t have to buy them there, but they will give you an idea what is needed in the tutorial. If I can’t find them on Amazon, I will list them in a list called Other Supplies. Here is the link to the Faux Fordite Tutorial. I am happy that you are now an enthusiast!