New Sculpey Flexible Texture Sheets for 2013
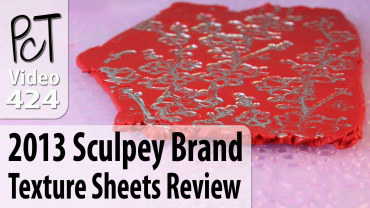
Video #424: Introducing Sculpey’s two new texture sheet sets… The Edgy and Landscape Series.
More...
IN THIS POST: — sculpey — texture sheets — texture plates — 2013 — polyform — (Topics marked with an asterisk* are discussed in the Comments Section below).
Topics Covered In This Video:
- A little while ago, I got a box of all the new Sculpey and Premo products for 2013 sent to me from Polyform.
- In the box were two new Sculpey Flexible Textures Sheets sets: Edgy and Landscape.
- Each set contains two texture sheets, one with six small pattern designs on it and the other is a full sheet with a larger design on it.
- Edgy contains these designs: Snakeskin, City Map, Copper Ceiling, River Rocks, Fishnet, Cheetah, Graphic Flower.
- Landscape contains these designs: Floral, Paver Brick, Leaf Vein, Honey Comb, Dandelion, Cherry Blossoms, Tree Bark.
- These new purple Sculpey Flexible Texture Sheets are different from the old green Sculpey Texture Makers. They are bigger and the right thickness and width to be used in a pasta machine.
- I show an example of how I used the City Map patterned sheet on the back of one of my Micro Mosaic Head Brooch from my tutorial, and the Fishnet pattern on the back of a Micro Mosaic Crown Pin.
- I also do a quick demo on how to use the texture sheets by rolling the clay by hand with a brayer, using inks on the texture plates and running the sheets through your pasta machine.
00:00:04 –> 00:00:09 Hi guys, its Cindy Lietz, your Polymer Clay Tutor, and today’s PCT Product Demo, I’m going
00:00:09 –> 00:00:14 to be showing you the Sculpey Flexible Texture sheets.
00:00:14 –> 00:00:22 Now a little while ago, I got a box of all the new products from Polyform for 2013, and
00:00:22 –> 00:00:27 I got in there all kinds of neat things, I’ve shown you some of them already, but what was
00:00:27 –> 00:00:34 in there was their new texture plates or texture sheets, they’re calling them, and they’ve
00:00:34 –> 00:00:40 got 2 different sets now and they’re quite cool, and I’ll show you how they work in a
00:00:40 –> 00:00:41 sec.
00:00:41 –> 00:00:49 The first set is called Edgy and it’s got 2 plates in there, one with small sections
00:00:49 –> 00:00:54 on it; there’s 6 designs on here, and then one larger one.
00:00:54 –> 00:01:00 The Edgy set has some kind of neat things like the Snake Skin and on this one here it’s
00:01:00 –> 00:01:05 got like a road ramp section and different neat patterns.
00:01:05 –> 00:01:14 And then they’ve got the Landscape set, and this one has the same sorta idea with the
00:01:14 –> 00:01:21 6 smaller patterns, and there’s things like dandelion fluffs and bark and honeycomb and
00:01:21 –> 00:01:27 things, and then on the other one…it has a large one as well, and it has roses and
00:01:27 –> 00:01:31 things, so it’s all kind of floral based.
00:01:31 –> 00:01:33 Now these are a lot different…oh, just a sec.
00:01:33 –> 00:01:37 I put ‘em over here, they’re quite a bit different than…or not a lot different but
00:01:37 –> 00:01:40 a little bit different than what they used to carry as texture sheets.
00:01:40 –> 00:01:46 These are the old texture sheets that Sculpey used to carry, as you can see, the new ones
00:01:46 –> 00:01:52 are quite a bit bigger, and they also are designed… they’re the right thickness and
00:01:52 –> 00:01:57 the right width to fit into your pasta machine which is kind of a neat thing, you can use
00:01:57 –> 00:02:02 it for that, and I’ll quickly show you how they work.
00:02:02 –> 00:02:14 Now I’ve used the texture pattern with the street view on the back of this Micro Mosaic
00:02:14 –> 00:02:22 pin from one of my tutorials, and it has a great look to it, kind of an…I don’t know,
00:02:22 –> 00:02:24 an industrial sort of look to it.
00:02:24 –> 00:02:30 And then I used this pattern here on the back, it’s a diamond type pattern on the back of
00:02:30 –> 00:02:39 this crown pin, and it’s also a Micro Mosaic pin.
00:02:39 –> 00:02:43 And I just…so I just wanted to show you that so that you can see how they were being
00:02:43 –> 00:02:44 used once they’re baked.
00:02:44 –> 00:02:49 And I’ll just grab one of these texture plates here, there’s a couple of different ways that
00:02:49 –> 00:02:55 you can use them, you can use them with clay and just roll on the top of the surface…
00:02:55 –> 00:02:58 put your clay on top and use an acrylic roller.
00:02:58 –> 00:03:04 But I wanted to show you a neat little trick that you can do, because the way these are
00:03:04 –> 00:03:13 quite… they’re deep embossed, you can actually use something like ink here, so I’ve got some
00:03:13 –> 00:03:22 Brilliance, fast drying pigment ink and I’m just going to ink up the surface here of this
00:03:22 –> 00:03:27 stamp, and there’s just so many different things you can do with texture plates, but
00:03:27 –> 00:03:33 I just thought I’d show this one, ‘cause you might not have thought of it, then we
00:03:33 –> 00:03:39 can take our piece of clay and we can set it on top and just…now you’ve…actually
00:03:39 –> 00:03:43 we’re gonna do it the other way around, we’re gonna put it and press into it so we can see
00:03:43 –> 00:03:50 it without smudging it around, I’m gonna lay it down on top, press it into the clay,
00:03:50 –> 00:03:58 now you can use a roller like this on top, and the nice thing about the way these plates
00:03:58 –> 00:04:03 are designed…or sheets, is that you can really see through it, so you can see how
00:04:03 –> 00:04:08 well the image is embossing.
00:04:08 –> 00:04:11 If the color of the clay is showing really well, then that means that you’re getting
00:04:11 –> 00:04:18 a good impression, and if it’s all milky looking then it’s not good enough, so there we go,
00:04:18 –> 00:04:20 see, isn’t that neat?
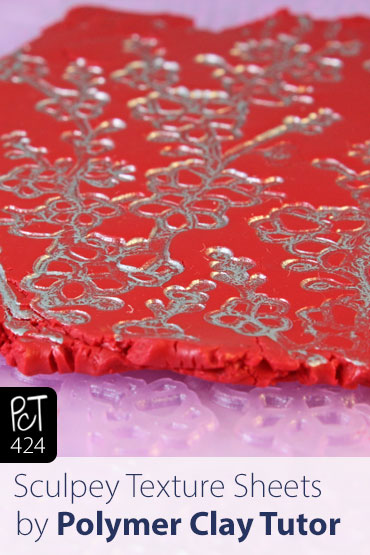
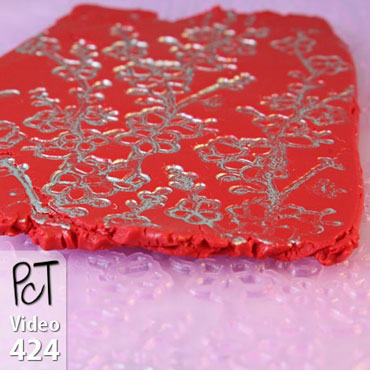
00:04:20 –> 00:04:28 So we’ve got… you’ve got the…you’ve got the ink right down into the pattern, like
00:04:28 –> 00:04:34 that, and then you can cut it out, you could cut it into a pendant or whatever you like,
00:04:34 –> 00:04:37 so that’s one neat way of using it besides just your regular way.
00:04:37 –> 00:04:43 And then to put it through the pasta machine, what you’re gonna wanna do… here I would
00:04:43 –> 00:04:50 just wipe that off first, you wanna use a little bit of water on your texture plate,
00:04:50 –> 00:04:54 or you can put it on the clay, it doesn’t really matter which way and we’re just gonna
00:04:54 –> 00:05:01 make sure that it’s misted on there well, and it keeps the clay from sticking in there
00:05:01 –> 00:05:04 too much, the ink worked that way too.
00:05:04 –> 00:05:07 Now I’ve rolled out a sheet at the thickest setting, but I’m gonna roll it a little bit
00:05:07 –> 00:05:15 thinner because once you get it…once you have your texture plate added as well and
00:05:15 –> 00:05:21 everything, you’re gonna have it too bulky if it’s at the thickest setting, so I’m gonna
00:05:21 –> 00:05:28 roll it down a couple of settings, maybe 2 or 3, it’s up to you, but a few would be best.
00:05:28 –> 00:05:36 Then what we’re gonna do is I’m just going to set this here kind of to rest, and hold
00:05:36 –> 00:05:41 this where I’m gonna put it, and if you kinda hold it away from there, I find it works a
00:05:41 –> 00:05:46 little easier, and then you’ll always need to open up the machine to the biggest setting
00:05:46 –> 00:05:49 again, ‘cause you need everything to fit through.
00:05:49 –> 00:05:57 So now what I’m gonna do is just start running this through, now I find it catches down here
00:05:57 –> 00:06:07 a little bit, but we’ll just pop that through, it’ll just roll right on, and then you get
00:06:07 –> 00:06:14 this beautiful, deep texture that looks absolutely fantastic, then your whole sheet is also the
00:06:14 –> 00:06:19 same thickness, so being able to run it through the pasta machine is really, really nice.
00:06:19 –> 00:06:24 Now you can…you always wanna blot off your water first before you do too much with it,
00:06:24 –> 00:06:28 you can do things like…you know, leave it as is, you can put paint in there, you can
00:06:28 –> 00:06:37 rub inks on the top, you can just bake it and then because it’s such a nice deep texture,
00:06:37 –> 00:06:43 you can still sand and polish it on the top, like I did on the pins, and get a nice finish
00:06:43 –> 00:06:45 without losing the texture on there.
00:06:45 –> 00:06:52 So I hope you enjoyed that, and you might wanna go check them out the next time you
00:06:52 –> 00:06:54 see them.
00:06:54 –> 00:06:59 If you did like that, make sure to click that like button, I really appreciate it.
00:06:59 –> 00:07:06 And my question for you today is, have you seen these Sculpey Texture Plates or Texture
00:07:06 –> 00:07:11 Sheets out there yet, and are you gonna go try them.
00:07:11 –> 00:07:20 Leave your answers in the comment section below and don’t forget to subscribe, we have
00:07:20 –> 00:07:24 new videos that come out every week and you’re not gonna wanna miss a thing.
00:07:24 –> 00:07:27 We’ll see you next time and bye for now.
Our goal is to translate these videos into as many languages as possible. If you are interested in helping with this initiative, then please do contact us and we will figure out a way to make it worth your while :)
Resource Links:
- Related Video: Micro Mosaic Pins Tutorial Vol-062
- Related Video: Polymer Clay Texture Stamps by My Mandarin Ducky
- Related Article: 40 Texture Ideas for Polymer Clay Projects and Sculpey Bead Making
- Related Video: An Easier Way To Do Polymer Clay Mica Shifts
- Amazon: Sculpey Texture Sheet (Edgy) **
- Amazon: Sculpey Texture Sheet (Landscape) **
- Amazon: Polymer Clay Texture Sheets **
- Amazon: Tsukineko 4-Pack Brilliance Dew Drop Inkpads (Planetarium) **
Resources marked with a double ** asterisk are affiliate links. If you click on them and decide to buy something, we may receive some compensation. This does not affect the price you pay in any way. What it does do, however, is helps us to continue providing free videos for you, here at the PcT website. Using our links to purchase your tools and supplies, is always greatly appreciated.
Sponsored Ads & Special Promotions

Shareable Images


To share this full blog post anywhere on the web that allows links in comments, here's a shortened url to copy and paste...
>> https://mypct.ca/v424 <<
Want to chat about today’s post? That’s what the comment section below is for. Scroll Down… We’d love to hear from you!
Or... if you would like to request a topic for a future post, here is the link to do that… PcT Suggestion Box

Hey everyone thanks for all the response, I have just finished playing with some of the texture sheets and the results were just great, can’t wait to get into some fun stuff and then try the ink after I get some. Thanks again everyone.
Cindy hank you very much for all the additional info. This is the best information I have yet found. Being retired I need to fill in my time with something challenging as I was a stained glass artist recently and have found that it needed me to be on my feet to do alot of the work. Polymer clay I can do sitting down. I once again thank you.
Robert
Hi Robert! I use Tim Holtz Adirondack Alcohol Ink. MisterArt has tons of colors.
Passed clay through the pasta machine, then ran the color down the middle
of the clay. Let the alcohol evaporate before working with clay, otherwise
you’ll have ink all over your hands, pasta machine, etc. I just finished
making beads with dried flower petal and clay. My first attempt and the color is
beautiful! Have Fun!
Thank you Mary Anne and Dixie Ann for popping in and sharing your tips with Robert. I appreciate the help!
I was watching your video on textureing clay as I am new to this I was wondering where I can get the ink that you used and hopefully many colors im sure.
Thanks
Bob
Hi Bob, welcome to our blog. Alcohol Inks come in several different brands. Pinata, Adirondack, etc;
They can be purchased at MIchaels, JoAnns, MisterArts, Dick Blicks, and from many online retailers. If you do a google search for alcohol inks I’m sure you will find many links. Also, at the top of this blog is a Search window in which you can find just about any answers to your questions. I personally like the Adirondack Inks but I also have made my own from Sharpie Markers. This gives me a huge range of colors but you can also mix colors if needed. Cindys video will show you how to use and dry these inks with polymer clay. I hope this helps you, don’t forget the search feature and lots of luck and enjoyment working with clay. ?
Hi Robert, the ink I used in this video was Brilliance Fast Drying Pigment Ink by Tsukineko. I bought it at Michaels. It comes in many colors and can be bought in sets as well. As you see, it works beautifully with polymer clay.
I just bought these texture sheets today! So glad to find your video!
Your tutorials are so helpful!
I bought the landscape set awhile back and have played with them some. This video was a huge help! I’ll be trying the ink… it’s just the type of technique I was looking for! Thanks, Cindy!
Cindy,
Thanks for the great tips! I bought the Edgy sheet when I first picked up my Premo a few weeks ago, but I have yet to try it. Now that you did the math for me on how to get it through the pasta machine by putting it on a thinner setting, plus doing the ink trick on the sheet, I find myself now wanting the landscape sheet for the flowers! You make me smile and make what started out as a horrible day much better. I enjoy your videos, please keep making the world smile ;)
I bought one after watching your micro mosaic tutorial… but I haven’t used it yet. I love the ink idea!
I agree, you can never have too many texture sheet. These look great and I so appreciate it when Cindy demonstrates new products for us. I am definitely going to pick these up as soon as Michaels or Joanns gets them in. I see a lot of potential in using them in my designs. Thanks again Cindy and Polyform!
Just like Sue F I make my own texture sheets and hope Cindy will one day do a tute for photopolymer plates. Will probably put these on my Christmas wish list…cheers xx
I feel like you deserve way more then 6,000 subscribers on YouTube for some reason.
Dear Cindy! Thank you for your tutorials, I’ve learnt many tricks from them! I love them! Respect from Hungary!
Great timing on this video Cindy – I just had those texture sheets in my hand at Michael’s but put them back because I already had too many things in my cart as usual. I think I will pick them up next time. Thank you for the video!
Thanks. It’s great to know the texture sheets will go in the pasta machine. I wasn’t going to purchase one, but I have now changed my mind. Love your videos!
Cindy I look forward to your videos all the time. The little tips and tricks you gave has made my charms so much better. Because of your tips I will be able to open a small charm shop soon! Thank you so much for everything you have done!
You can never have too many texture sheets, in my opinion! :)
I have some of the older green versions, but don’t have any of the new type yet.
I make my own texture sheets from scrap clay sometimes, which is a nice way of getting something fairly unique. I’d love to try the photopolymer method too but haven’t got my hands on the requisite materials yet.