UPDATE – Distress Crackle Paint on Polymer Clay
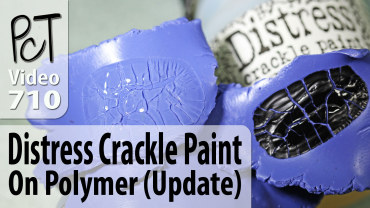
Video #710: See how this product went from a round one “Fail” … to a very cool “Yes” … in today’s Polymer Clay Tutor Test Lab.
More...
IN THIS POST: — distress crackle paint — ranger — tim holtz — crackle finish — clear rock candy — black soot — street hearts — (Topics marked with an asterisk* are discussed in the Comments Section below).
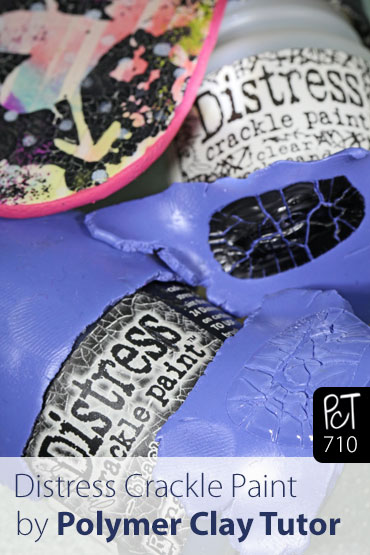
Today in the PcT Test Lab we are doing an update on using Tim Holtz Distress Crackle Paint on Polymer Clay.
Some time ago, I did a test lab video on using the Distress Crackle Paint by Ranger in the colors, Clear Rocky Candy and Black Soot.
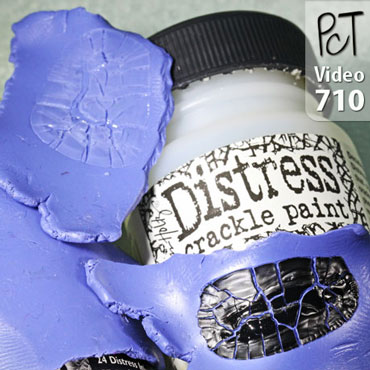
When I did that test, I used the paint on baked samples of Premo Polymer Clay and found that the paint did not adhere to the clay and easily flaked off. But I have learned since then, if you use the Distress Crackle Paint on raw polymer clay, and then bake it, it bonds very well to the polymer, making it a permanent finish, which IS in fact compatible with the clay.
I show some examples of the Street Heart Tutorial, which uses the Distress Crackle product on raw clay. I also show that if you try to scratch the paint on the baked sample, you can not get it off, making it a very durable finish.
To use the paint, you shake or stir it, and apply with the brush included. Thin layers create fine crackles and thick layers make deep crackles. Make sure the paint is dry before baking to avoid getting bubbles in your paint. Crackle paint crackles best when left to air dry. But once the paint begins to crackle, you can speed up the process with a blow-dryer. But be careful not to accidentally cure your clay with the heat.
00:00:03 –> 00:00:08 Hi guys, its Cindy Lietz, your Polymer Clay Tutor, and today’s PcT Test Lab, we’re gonna
00:00:08 –> 00:00:14 do an update on using Distress Crackle Paint on Polymer Clay.
00:00:14 –> 00:00:25 Now, sometime ago I did a Test Lab video on using the Distress Crackle Paint by Ranger…and
00:00:25 –> 00:00:33 I’ve got a couple examples here, I’ve got the Clear Rock Candy and the Black Soot, and
00:00:33 –> 00:00:40 when I did that test…and I’ve got the old test chip here, I had some of the Rock
00:00:40 –> 00:00:44 Candy on…okay this was a baked piece of Premo!
00:00:44 –> 00:00:53 Polymer Clay, and then I put some of the Rock Candy on there and I put the Black Soot, and
00:00:53 –> 00:00:59 you can see there’s almost no Black Soot left, it flaked right off and you can still flake
00:00:59 –> 00:01:05 off and… like this paint here, and you can see it really didn’t stick and wasn’t compatible,
00:01:05 –> 00:01:09 when you use it on baked clay.
00:01:09 –> 00:01:14 But I have learned since then… and I’ve done some tutorials actually using the product,
00:01:14 –> 00:01:24 if you put the paint onto a raw piece of Polymer Clay, then let it dry like I have here, and
00:01:24 –> 00:01:31 you can see it’s all crackled, but you can also see that the clay isn’t baked yet, then
00:01:31 –> 00:01:40 you bake your piece, the crackle paint will bond to the Polymer Clay really, really well
00:01:40 –> 00:01:43 and stay permanent on there.
00:01:43 –> 00:01:50 Now, I’ll show you some of the examples where I used it, there’s a couple of examples here,
00:01:50 –> 00:01:57 the Black paint here that I stenciled on to one of these hearts from my…what was it
00:01:57 –> 00:01:58 called…
00:01:58 –> 00:02:07 Street Hearts Tutorial, is the Black crackle paint, and it was put onto the raw clay and
00:02:07 –> 00:02:12 baked, and you can see…and same with the Black in this area here, and I’ll just scrape
00:02:12 –> 00:02:18 it for you, and you cannot get it off, so it really bonds well as long as you put it
00:02:18 –> 00:02:25 on to the raw clay first and then bake it, isn’t that cool, so when I thought it wasn’t
00:02:25 –> 00:02:30 going to work, I see that it will…as long as it’s used that way.
00:02:30 –> 00:02:35 Now let me just show you what it looks like in the jar, you wanna shake it up the best
00:02:35 –> 00:02:42 you can, though it’s a very, very thick paint, and these little bottles come with
00:02:42 –> 00:02:48 a brush on the end, and it’s a very, very thick paint, and the size of the crackles
00:02:48 –> 00:02:53 will really depend on how thick you put it on, if you put it on really, really thin,
00:02:53 –> 00:03:00 the crackling will be fine, and if you put it on thick…like I did here, and this sample
00:03:00 –> 00:03:07 here where it’s dried already, the crackles will be quite thick and deep crackles…large
00:03:07 –> 00:03:12 crackles, I’ll show you the Black as well, ‘cause I have these two colors here, and
00:03:12 –> 00:03:17 you just wanna put it on however you’re gonna use it like in the other tutorial…the
00:03:17 –> 00:03:23 Street Hearts tutorial, we used it in a stencil and things.
00:03:23 –> 00:03:30 But the one thing is you want to make sure it dries first before you put it in the oven,
00:03:30 –> 00:03:38 if you put any paint in the oven when it’s wet still, what will happen is, the moisture
00:03:38 –> 00:03:44 that’s in the paint will bubble up while it’s baking, and will give you unsightly bubbles,
00:03:44 –> 00:03:52 unless of course that’s what you want, but I would always let your paint…whether it’s
00:03:52 –> 00:03:59 a crackle paint like this one or an acrylic paint, let it dry first before you bake it.
00:03:59 –> 00:04:06 Now with crackle paints, you also wanna let them air dry, you can…once they start crackling
00:04:06 –> 00:04:12 a little bit, you can speed it up a little bit with a blow dryer, but try not to speed
00:04:12 –> 00:04:18 it up at the beginning because it needs time to crackle out, otherwise it won’t get that
00:04:18 –> 00:04:21 really great crackle effect.
00:04:21 –> 00:04:25 So I hope that information was helpful for you, you should be able to do some really
00:04:25 –> 00:04:31 cool projects now with your Distress Crackle Paint on your Polymer Clay as long as you
00:04:31 –> 00:04:34 use it on raw clay and then cure it after.
00:04:34 –> 00:04:39 Alright, so I hope it was helpful, if it was, do let us know if you liked this video.
00:04:39 –> 00:04:46 And if you’ve got a product you’d like us to test, and you haven’t seen it in any of
00:04:46 –> 00:04:50 the previous videos we’ve done, then make sure to leave a suggestion in the comment
00:04:50 –> 00:04:54 section below, and we’ll see if we can do a video on it in the future.
00:04:54 –> 00:05:00 We have tons and tons of videos, so make sure to check through and see if there is the answers
00:05:00 –> 00:05:02 to your questions, alright?
00:05:02 –> 00:05:05 So we’ll see you next time and bye for now.
Our goal is to translate these videos into as many languages as possible. If you are interested in helping with this initiative, then please do contact us and we will figure out a way to make it worth your while :)
Resource Links:
- Related Video: Distress Crackle Paint Test Round One Test Lab
- Related Video: Graffiti Style Street Hearts Polymer Clay Tutorial
- Related Video: Make Your Own Crackle Paints
- Related Video: Rustic Textures Inspire Polymer Clay Creativity
Resources marked with a double ** asterisk are affiliate links. If you click on them and decide to buy something, we may receive some compensation. This does not affect the price you pay in any way. What it does do, however, is helps us to continue providing free videos for you, here at the PcT website. Using our links to purchase your tools and supplies, is always greatly appreciated.
Sponsored Ads & Special Promotions

Shareable Images


To share this full blog post anywhere on the web that allows links in comments, here's a shortened url to copy and paste...
>> https://mypct.ca/v710 <<
Want to chat about today’s post? That’s what the comment section below is for. Scroll Down… We’d love to hear from you!
Or... if you would like to request a topic for a future post, here is the link to do that… PcT Suggestion Box

Thank you so much Cindy.
4-ever Grateful!
Robin
Hi Cindy,
I’m very new to polymer clay and want to take this opportunity to thank you so very much for all of your tutorials – many I have watched three or more times. The information you provide is so valuable – especially to us newbies.
I do have a couple of questions if you don’t mind. First, I have a piece planned on art canvas – the flat type – My question is – do you know if the polymer clay can be applied to the canvas and the whole piece baked in the oven? This is to be a continuation piece where the clay overlaps with hand formed pieces on the top, sort of like Briana Lucero’s pieces shown on you tube.
My second question concerns the same type piece but done on a wooden frame – I’m wanting to do an ocean themed piece to go in our beach house. My ultimate goal is to have the entire frame covered in clay and it would be much easier to fit the pieces directly on the frame prior to baking.
If you have any insight that you could provide on this I would be forever grateful.
Continue on with your great work.
Thank you,
Robin
Hi Robin, thank you for your lovely comments! I am glad that the information you are learning is helping you. As far as the questions you asked, both of the surfaces you spoke of, the canvas and the wood, can have polymer clay added to them. The techniques for them have been covered thoroughly in these two paid tutorials that you may want to check out:
Polymer Clay Landscape Paintings | Tutorial Vol-083
Laser Cut Wood Ornaments | Polymer Clay Tutes Vol-066
Thanks for all the tutorials you are sending to your subscribes . Hope have a great NEW YEAR”.
Hi Cindy,
Quick question…do we have a date for when the projects are coming back?
Thanks, Teresa
Sorry… no firm date yet. Still working (very hard) on this. It is proving to be quite the undertaking.