
UV Cure Jewelry Resin – UltraDome Product Test Results [Vote]
“Resin is pretty versatile. You can use it for so many things beyond clay too. Can’t wait to find out the outcome of your tests Cindy!” ~DJ
More...

Back in January, I posted some initial thoughts about a UV curing epoxy resin called UltraDome. As a result of the positive feedback and encouragement you guys provided at that time, I have since continued to test the product with various polymer clay jewelry projects.
Well, this is interesting – something totally new to me. Is the purpose to protect the finish of the polymer when using powders, inks foils, etc? ~Rose-M
Sounds likes the stuff they use when I get my nails done… they are called “gel nails” but really when it’s cured under a UV light it’s a very strong clear plastic. The gel-like material it painted onto the nails in coats and then cured under the UV light after each coat… it’s sandable, very shiny, and very durable. I actually wonder if the material would be compatible with polymer clay every time I get my nails done. ~Melinda-H
Neat, looking forward to seeing what you find out. I’ve been wondering lately if resin-coating polymer clay roses would make them more durable. Mine seem to be prone to breakage. ~Katie-C
Great, Cindy! I can’t until you figure this out for us.
~Catalina
With the goal of keeping the equipment costs as low as possible for you guys, my testing has been done with an inexpensive Judikins Soliel UV Lamp that I purchased online from JoAnn’s using a 50% off coupon.
Even though this lamp is compact, the pass through design does allow you to work with larger pieces as well. However, its 9 watt light source (single bulb) is really far too small… because it takes over an hour to properly cure the Ultradome UV resin with it.
There is also a larger 36 watt lamp unit available (4 x 9 watt bulbs). Although more expensive, it is a much better option since it reduces the curing time down to a reasonable 20 minutes.
Terry Morris, the owner of the UltraDome UV Resin Company, recently sent me an email about the new UV oven that he is just now starting to market to crafters and jewelry makers…
terry m
Our UltraDome lights are the lowest cost for what they are… industrial lights meant to be used every day in a production environment. And they will last a lifetime. Our nearest competitor starts at $2,000 and up. Our new light sells for $69 and comes with 4 – 9 watt bulbs. It will cure the epoxy in the 20 minute time.
Anyway, other than having a slow lamp right now, I have to say that I LOVE Terry’s UltraDome resin product!

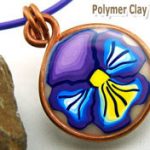
Just look how pretty it makes that simple Johnny Jump-Up Pansy Cane slice look in this pendant. From working with this stuff, I found UltraDome UV Resin to be:
- Easy to work with.
- Has no bad smells.
- Gives you tons of open working time so that you can get everything set just right.
- There are very few bubbles.
- Bubbles are easy to pop with a torch or a lighter.
- Doesn’t pull from the sides.
- Domes beautifully.
- Cures quickly with a 36 watt lamp.
- Is crystal clear.
- Compatible with polymer clay.
- Less expensive than competitive products.
- Makes your jewelry pieces look awesome!
Really I can’t say enough good things about it! And no… Terry did not pay me to say that. But he was kind enough to send me a sample bottle of his Ultradome resin for testing purposes.
He also gave me a squeeze applicator bottle and a UV protected storage container. I love the applicator. It makes it super easy to put on the resin. Way nicer than trying to drizzle on with a pop sickle stick!
There are actually several jewelry resin products on the market today. Some of them require a UV Light for curing (no mixing required), which is how the UltraDome product works.
Others use a two-part epoxy mixing process for initiating the hardening process. Unfortunately I have not yet had the opportunity to test any of the other brands yet.
But… I am ready to teach you what I have learned so far… about applying beautifully smooth and glossy layers of uv cured resin over polymer clay, using the UltraDome product.
So… as long as the general consensus is still positive (please let me know in the comment section below), the UV Resin tutorial will be included in the May, Vol-024 video line up at the members library next month.
I’m going to wait for Cindy’s tests to be done, though. I know when her video comes out, it will show me how to use resin in the simplest way (you know how she “makes the mistakes, so we don’t have to…”). ~Phaedrakat
Looking forward to hearing about this UltraDome Product, Cindy. I played with resin last year, but I was not happy with it. I even tried to make a well to hold it from going down the sides, but it only puddled along the sides of the well. If this UltraDome works well, that would be awesome. ~Lupe-M
I tried another resin brand and was disappointed with my results. I also found the resin likes to collect in the center and it’s hard to get a smooth coating without bubbles and unfilled valleys. I need to save my money and get a UV lamp. ~Maria-C
I sure hope this product works well. No mixing is so appealing. I’d love to see different ways to combine it with clay. Resin is pretty versatile You can use it for so many things beyond clay too. Can’t wait to find out the outcome of your tests Cindy! ~DJ
Updated Schedule for the 4-part, May-2010, Volume-024 series:
(1) Cane Making: Leopard Print Cane [confirmed] (2) Bead Shapes: Ivy Leaf Charm [confirmed]
(3) Clay Techniques: UV Resin Technique [proposed]
(4) Special Projects: [to be determined]
Sponsored Ads & Special Promotions
Want to chat about today’s post? That’s what the comment section below is for. Scroll Down… We’d love to hear from you!
Or... if you would like to request a topic for a future post, here is the link to do that… PcT Suggestion Box
I have been claying and try a new glos, i am using magic gloss for extra gloss but I have an issue, when applying magic glos of lisa pavelka the uv gel tears apart from my clay charm some parts have gel and others not, also when applying a second layer does the same. I had previously cleaned with acetone my charms ans does the same. Does somebody knows why this happens?
Hi Elizabeth!
Just pop “magic gloss” into the search box in the upper right corner and you’ll find all the mysteries of Magic Gloss revealed, including a few great tips.
This is a known issue, and Lisa Pavelka has videos on her site especially addressing how to work around this issue. It produces a lovely gloss coat, so is well worth the extra effort, in my opinion.
Though due to Cindy’s collaboration with Terry Morris, I am more partial to his products and methods. If you want clear gloss, you get great results the first time.
All best.
Cindy I want to thank you for recommending Terry Morris’ epoxy jewelry site. The difference between 9 and 36 watts for curing UV resin is like comparing an E-Z bake oven to a Viking range. His bezels are well-priced, too. Sometimes value is more important than cheap. I’m glad I saved up and got the 36 watt. Keep up the great work!
@Elizabeth G: you are going to love it! The 36 watt light will make things so easy! The light I got had the two minute timer and my sweet hubby was able to disconnect it so now I just use a timer. My Art Director, Princess Daisy, she is a Maltese, thinks the timer bell is the Mailman and will bark like crazy!!
I haven’t tried his bezels yet. I will soon since they will make nice focal pendants. Oh, and the Simple Silicone is great, too! I shop not only for things I can cover with clay, but what I can make molds of! S
So fun!!
@Terry Morris. I’m thinking about trying to “cast” the Ultradome UV resin in a thin brass stamping, so that the Resin will separate from the metal mold. What would be the best type of a resist for this, and any other material you don’t want the Ultradome to adhere to??
@Tina M.: Pretty much anything that I can think of that would prevent the epoxy from sticking may also prevent it from fully curing.
Not sure what you want to accomplish but there may be a better way. If you are trying to make resin shapes then you would be better off making a master with polymer clay by pressing it into the stamping then baking it, remove it then using Simple-Silicone putty to make a mold of the clay piece.
This would make a mold that could be cast in resin over an over.
Just remember the resins first job is to harden as a dome and second is to act like a glue.
You can apply it with a brush to get a thin coating
Is it possible to apply this as a thin (no doming) protective varnish (like Future or varathane) to a baked polymer clay piece to protect an image transferred? If so, how would you apply it (syringes, applicators vs. q-tips, brushes)? Sealing the image was also mentioned – would that mean TLS or PYM2 or Future?
After having the UV resin demo done at the Mile High PC guild retreat, there is another reason why our instructor, Peg Harper, recommended the 36W lamp. The “bottom” of the 36W lamps are removable, which allow you to slide your work on the worksurface (like a small tile) directly underneath the lamp, without having to pick it up and try to keep it steady while moving outside, or onto the very narrow bottom ledge of the 9W lamp.
Silly me, i didnt read the comments well enough….i guess 9W is ok but needs a l;onger curing time, 36W is better as it cures quicker, but if youre not in a rush 9W qill do for all brands of UV resin? I seem to remember seeing a video on youtube about magic glos that needed 36 W to cure. But than, ive seen and read so much lately that maybe i gotthe info all mixed up.
@Marion K: Good job and finding the info. There is a lot of stuff here at this blog, but you will soon learn your way around it.
I have both a 9W and a 36W and can tell you the 36W is WAY better! It not only cures faster and harder but there is more space inside to work with for larger pendants and multiple pieces. If you are going to use UV Resin in your work, don’t bother with the 9W and go straight to the 36W. You won’t be sorry.
Im reading about uv lamps, there are 9W,18W and 4x9W lamps.
The ones i saw were all about the same price. Is it better to have 4x9W or doesnt it matter how many Watts it has?
In case anyone is interested, I use uv cure resin alot. I have found that the blacklight tubes and light fixtures (48 inch) from the halloween store will work just fine. I have also a uv light curing station for exposing screen print templates, alot like the yUDU system – this cures them faster. You can just buy the lights and stick them into your own fixture – but the lights are more expensive. There is a product called suncure for surfboards which is way cheaper and will dome if handled carefully, but is absolutely perfect for beads and sculpture coating. After 6 months your resin can become thick and lumpy, so get small amounts. A 1 quart can did alittle more than a card table worth of surface even after I eliminated the goof ups! UV light comes in 3 different flavors, UVA, UVB, and the genric UV – Right off the top of my head, I get the A and B mixed up, but the general gist is generic is a mix of both A and B but a little lower on the one you need for the resin, some lights like plant lights concentrate on the other UV spectrum that you do not need for the resin either, but is beneficial to plants. The kind of UV you need is like what reptile lights put out, except they really don’t have a high enough wattage to go fast, but is a good cheap set up for the impatient. The tshirt industry uv tubes are better as they concentrate on the proper part of the UV spectrum needed and the price is kept down. But is you really want to get creative, UV tanning lamps, pond sanitizers, and music DJ equipment are all options to try. I did try a nail station, but it was just too small, I had to take it apart and make the enclosure bigger. The small wattage lamps took a bit longer too. One other thing to remember (actually two) is that this type of UV needed for the resin causes skin cancer and is bad for your eyes, so limit the exposure. This is easy, physical distance from the bulb and simple pane of glass can block uv rays. One other thing I did not know until way into my research is that UV lights take time to warm up and put out the full strength of light, and the light output will degrade (whigh means the wattage output will become less and less) as they are used. What uses them up the most is turning them on and off repeatedly. If you are going to use your UV light off and on for a couple of hours, just leave it on.
Well sorry for the long post, but thanks for reading!
@Ippy: That’s a great question! You can seal your prints with PYMII (Preserve Your Memories II) It is a spray that works well with all kinds of matierials including injet prints, resins and polymer clay. (I’ve linked to it by my name.) Or you can try Terry Morris the UltraDome guy’s new product called InkSeal. I haven’t tried it yet but he sells it at epoxyjewelry.com and it sounds very promising.
@Stella: Never apologize for for writing such long and informative posts! This is awesome information and helpful for everyone who comes here. You taught me a lot about UV light that I knew nothing about. Thank you very much for sharing your knowledge with us!
@Stella: Loads of great info Stella, thanks so much for sharing!
Ok, this site is such a wealth of info!! My question is what is the best thing to use to coat paper that an image was printed on? You are not supposed to use Mod Podge with the Magic Gloss. I am expirimenting with spraying clear enamel on both sides. Any advice?
Thanks
@Ippy: Although this isn’t a spray coating, I read recently that clear packing tape can be used for coating dried items safely (use a piece on the front and on the back, with the item stuck in the middle). I would imagine it could work well with paper too. The suggestion was meant for use with Ice Resin. I haven’t tested it out myself yet, but it sounds like an inexpensive, simple way to solve this problem. It might be worth experimenting with different brands to see if this method works with other products too.
Phaedrakat, thank you. I wasn’t even thinking about ebay, but it may be a good idea. I don’t have a lamp yet, so I was just looking at options for a cheaper one. Good point about a timer! And thank you for the search tip :)
@ Carolyn – Thanks Carolyn, I wasn’t exactly sure, but I remembered in the Tute Video Cindy using a smaller lamp and her saying it would take longer, I eventually brought the one Cindy did, the “pink” one on the sister ultradome site. Like I said in another comment, I haven’t had the ime to make something to try it out yet, all the supplies are sitting on the dinning room table calling to me to “come play”.
@Rada: Hi Rada, I’m glad you got your question answered. I noticed someone else asked that same question further up this page, and got a reply. The ‘UV Nail Light’ question is very popular — I believe it’s been asked on nearly every resin thread, and others, LOL! Did you find one in a shop, or are you thinking of purchasing online?
Lots of members are buying nail lights to cure their UV resin, because they can get them so much cheaper on eBay. Be sure to find one without a timer (or one with a bypass switch.) Otherwise, it will turn off every 2 – 3 minutes! One of our members just bought a light like that, but fortunately, her husband knows electronics…& was able to bypass the timer switch.
FYI: When you want to search the blog for information, try using the search box at the top of the page. And if you want to quickly search through a long thread of comments, use your browser’s “find” function (or try CNTRL + F.) Then type in “nail” or whatever info you’re looking for.
Best of luck…and have fun! ~Kat
Carolyn, yes I was referring to the nail salon kind of uv light. Those are at 36 watts. Thank you Cindy and Carolyn for the answers =o)
@Rada – Do you really mean nail polish, or are you referring to the UV lights that are used for artificial nails. The one for artificial nails will work.
@Ken – The 36 watt lamp (at least the ones that Terry Morris of Ultra Dome sells) take 20 minutes to cure. I’ve done lots and love his product and his lamp.
@ Rada – I think it should work, but the curing time will be longer, the cure time depends on the total wattage of the lamp, I forget how long it takes for the lower wattage lamp to cure, (it’s mentioned int the tutorial I believe), the one I brought from the site that sells the resin has four bulbs and I think is 36w (9w x 4 bulbs), haven’t had a chance to try it yet to know how long this lamp will take.
Cindy,
Not sure if anyone asked this before, but would the UV lamp for nail polish curing do the same job as what Lisa’s UV light does?
Thanks.
Thanks Sue, and Kat! So glad I could find a source for that paste, thanks to you both for bringing to my attention.
Folks here are the best when it comes to help, for sure.
@Sue F.: Thanks for finding the Poly Paste, Sue! I just saw this link, so I thought I’d thank you and “bump” this…just in case Jocelyn missed your helpful link when 1st posted… ;D
Kat, did a little online investigating on the tile backer. Lorrie’s description is perfect, it’s a netting that the pebbles, tiles, or whatnot is attached to so that everything remains in place. The netting is applied directly to the mastic or glue on the wall, and helps hold everything up and even. This approach allows you to put up a lot of pieces without buttering and applying each one.
A second method is used by glass tile folks, who instead of connecting their pieces to a netting in the back, use a paste to apply a paper backing in the front of the tiles. Mostly it keeps them from scratching during installation. Once the tiles are firm in the backing, you soak the paper with a sponge to dissolve the glue and it peels right off.
Think for the small amount of tiles I plan to use, an old onion bag would work great as the web in the back. Little hesitant to use anything on the front of the tile, not sure how the finish would react to the glue.
Lorrie also makes another critical point about grout, you really do not want the type with sand or particles in it, as it would scratch the surface of the tile.
Kato’s PolyPaste is the product I meant, but, I have only seen it on her site and not for sale. Watched a free video there, and the stuff is the bomb as a glue….it will hold objects in place at odd angles and such until it’s baked.
If anyone knows of a source and pricing for the product, please let me know here. Thanks! And I very much appreciate the help and advice.
@Lorrie: Oh yeah, I know the stuff! I bought some 2″ x 2″ tiles to make small “tile sandwiches” for baking clay; they had that mesh/netting on back. I cut them apart & used ’em to back clay. But they were too light to make ‘proper’ sandwiches — live and learn! ;D
@Jocelyn: Kato Poly Paste does sound ‘the bomb’! It’s described as “a special production run of pure Polymer Clay,” and “supplies are limited.” Prairiecraft.com says it’s “Sold Out”, but to check back later. But that message may have been there quite a while…
They also have Poly Glue; 1st time I heard of that, too. Then again, I haven’t used Kato clay yet — except for Kato Liquid Polyclay, or ‘Clear Medium’. That stuff is amazing! So versatile, and it leaves such a clear & shiny finish (unlike TLS.) I wish I could play with the newer Colored Liquid Clays, too, but they make you buy it (of all the nerve!) ;D
~Kat
@Jocelyn: Shades of Clay has Kato PolyPaste listed at CAD $4.99:
shadesofclay.com/products/Clays/PolyClay%20Supplies/PolyClay%20Supplies.htm#Kato_Poly_Paste_
I put 3rd layer or Ultra-dome and cured it. It domed, slightly. I had sanded the sides to make sure it was 90 degree, leveled the container, and cured for 20 min -hard as a rock. So I will try a 4th time -I WILL NEVER GIVE UP !!!
This thing will not get the best of me–darn it……..
Thanks Terry for the reply. A watch won’t work on me – it runs backwards ! Maybe the ULTA-DOME is the same sort of thing. But I will keep trying LOL
Terry, is this finish safe for food items to rest on or against?
@Jocelyn: When cured the epoxy is basically a plastic. That being said I would not allow hot foods or acidic foods to rest against the epoxy. So something like an orange or lemon might not be good but a cracker or other cold non acidic food would be OK.
Interesting! I wonder what the acid does to the resin—does it sort of “etch” it? I wonder if you could do some kind of Faux Etched Glass look with lemons! Could be fun…LOL! ;D
@Phaedrakat: Dear Kat I’m trying to figure out if you need more sleep or just have an amazing thought process…….lol.
Andrea
@Phaedrakat: I was actually thinking more of it leaching chemicals out with acid. You could probably etch the surface with Armor Etch acid paste. Never tried it but it might work.
@pollyanna: More sleep—4 sure! ;D
@Jocelyn: Oooh, I agree. I’ve been thinking about lots of ideas for this, too. I love yours about the spoon rest & “tile-like” app’s. I am also very intrigued by Jeanne’s multi-layer idea. Lots of ways to expand on that and create awesome effects. I didn’t understand her initial question, so I’m glad Cindy hit me V-8 style with her reply. Now I can’t wait to play with it…
@Terry Morris: Thanks, Terry!
@Jocelyn: I’d be inclined to treat PC coated with UltraDome like any other PC … keep it away from food. But if you are using the UltraDome on some other product, it might be a different story. What is it that you have in mind, Jocelyn?
@carolyn: Probably a good general idea.
@carolyn: Carolyn, I’m thinking tiles for a kitchen backsplash or vanity surface. It would be sooo pretty, and the metallics would glow in soft light. To start, Cindy’s big square made me think of a great spoon rest, and my mind’s been going since, LOL!
Thank you Terry for your prompt response.
Jeanne C, that multiple layer stamp idea is great! Can’t wait to see the effects you get with that idea.
@Jocelyn:
I have seen clay and glass pieces used for a backsplash. It is beat to apply it to a loose woven stiff fabric to be able to “play” with the design. Once the design is decided, glue the pieces to the stiff material. Then the entire section can be adhered to the wall easily with the design intact. I cannot think of a better way to describe the woven material, almost like a rug backing. PC coated with resin could work very well for this. Once on the wall, non sanded grout would have less of a chance of scratching the resin. Lines can also be made in the PC to accept the grout and sort of make a “faux” mosaic look.
@Lorrie:
Oooops, that is “best to apply” not beat. sorry.
@Lorrie: Great tips, Lorrie. In a way, you treat it like the pebbles, mosaics, or glass tiles…plus that layer acts as protection while you are installing it.
To avoid scratch marks, I’d only use the tile on a wall, not on a surface. Perfect jewelry to adorn your home.
Kato has a new product that acts as a heavy glue or as a grout. Ideal for this application, I would think.
Hello,
I just got back from a trade show about an hour ago and I think I answered all those that emailed me, if not let me know.
As for humidity, it ‘may’ cause bubbles but I have never heard of it causing the epoxy not to cure. Almost every cure problem can be traced back to chemicals on the surface of the item being domed.
We don’t realize it but everything is touched by chemicals during manufacture and the epoxy is a little sensitive to some of them. Most items can simply be wiped clean with rubbing alcohol (isopropyl) and then domed. If this does not work then it is possible the particular item cannot be domed due to it’s chemical makeup. But our Q&A section on UltraDome.com shows how to test to find the exact cause.
Patt, I am not sure what you mean when you say it won’t dome. What happens when you add the epoxy? Does it run off the edge or something? You do know you add it until the liquid is a dome and then cure it. It does not expand or anything like that. You actually make a liquid dome.
The epoxy has a high surface tension that keeps it from running off of a sharp edge, this allows us to build up a dome, then when ready you expose it to the UV light and the dome will harden.
Hope this helps. If not please contact me by email through any of my sites and give me as much detail as you can. We can find a solution for almost any problems.
Thanks!
BTW – I left my ultra-dome on another piece out in the sun. Boy I’ll never do that again !! It was 103 today (Tucson). The glass was so hot I had to move it into the shade – too hot to pick up. I will definitely just cure in the morning . Hey Lupe – ever had that happen ?……….Live and learn LOL
I could also use help on resins. I just used ultradome on a type of paper, cured it in Lisa Pavelka’s light for a LONG time. It is days later and still sticky. Could it be the high heat and humidity in Florida? Magic Glos was also sticky but eventually hardened after I brought it into the air conditioning for a day or two. It did dome a small amount and looks great if I can just get it to harden.
@Lorrie: What type of paper? Was the paper on clay? Was there any moisture besides the humidity? Terry @ UltraDome could probably help but would most likely need the answers to these Qs. Also, which of Lisa’s lights do you have? The 9 watt really doesn’t work for UltraDome … the 36 watt works great.
@carolyn:
I used a signage metallic paper called Gem Lights available at Sign makers.. Terry has a sample of this coated with Ultradome on his business cards. It is a very cool look. I am using a 4 bulb light but I notice that it is no longer for sale on Lisa’s website. It was the larger, more expensive light. I also just put the samples out in the sun and it is still sticky. There is no other moisture but there is a tropical weather system going on here so it is highly humid. Anyone else have a problem curing in this type of weather?
@Lorrie: Sorry, I can’t help with humid factors … I live in dry Nevada!
@Lorrie:
Terry suggested I clean the surface of the material with alcohol before applying resin. The material I used was a sign makers vinyl that looks like glistening metal. Tried again and it worked beautifully! If added to some PC jewelry, one could achieve some great looks with this stuff.
@Lorrie: So glad your resin/paper project worked the 2nd time around! Re: the material/fabric, are you talking about burlap? Just wondering. I like these ideas you two are tossing about!
Also, Jocelyn, what new Kato product did you mean? Are you talking about Poly Paste? I hadn’t heard of it before, although they’re saying it’s been out for a couple years. Not much on the web about it, though, so I’m intrigued!
No Kat, the material is stiffer than burlap. Check out a square of small tiles at Home Depot that you would apply to a wall and look at the backing. It is a type of netting. Sorry I don’t have aname for it. It is very stiff. You would basically glue your finished PC pieces on to this, leaving space for grout lines. Once affixed to the wall and dried, you can grout it as you would any tile squares. I agree that a counter top would not be a great idea but a backsplash would work fine. @Phaedrakat:
I need help ! I used Ultradome for the first time. IT DID NOT dome. Can I add another layer ? Also, I only cured in the sun for 20 min .Terry adv 1 hr. And advise would help…..thanks
BTW: Magic-Gloss cured in 15 min and domed.
I do think BOTH resins have their place.
@pattw: You can add additional layers. With the UltraDome, apply starting on the outside. If I’m not mistaken Lisa’s gets applied from the inside out. As far as not doming, you might not have used enough UltraDome. Was you piece perfectly flat, or did it dip in the middle? I have found when the UltraDome has to fill in low areas that sometimes it does not end up doming on the first application.
@carolyn: Opps ! I should have included you in the remarks -sorry. Sure didn’t mean to leave you out….hugs
@pattw: Not a problem! And I guess it is good that we like different products, otherwise some would go out of business.
@pattw: Yes, you can do multiple layers. Sometimes it is necessary, at least for me, because I want a thicker layer. Tension is what helps the uv resin to “dome”. And if you move it too fast or bump it while placing under the uv light it could spill. So, multiple layers might be better. The light I got is a 36w and it works in 20 minutes. But, I need to get a timer because I left a piece in it for an hour and a half! Over exposure won’t hurt but you just waste electricity.
@Catalina: I did put another layer -guess not enough -it still didn’t dome. The piece is flat with straight sides. I sanded it on the sides after the 2nd coat. I will try again. The bubbles I pulled out with a glass dropper -worked just great. I will probably order some more Magic-glos – I really liked that better. But, as I said, they both have their uses. Thanks to all for the info………….
Anyone know why my UV cured Magic Glos is still a little sticky?
@Lorrie: Are you sure it’s completely cured? Your UV lights could be going out, or maybe you added something in your resin that blocked the UV light? How did you cure the Glos, lamp or outside?
All you Magic Glos pros, any other ideas?
I can’t wait for this one… Do you have to use a uv light for this? or can it dry on its own?
@Brenda: No it won’t dry on it’s own Brenda. You will need either an UV Lamp or good strong direct sunlight. You will see in the tutorial.
@Cindy Lietz from UV Epoxy Resin Tutorial: Sunlight I have! Just have to figure out a way to keep the dust particles off.
@Brenda: In a previous comment above (click link by my name), Catalina talks about using a thin saran wrap cover to keep dust from settling on your pieces.
Oh my gosh – I can hardly wait for the video on UV Cure Jewelry Resin!! This is so much fun. I love working with clay and Cindy you are the best teacher ever!!
Thankyou everyone for your support and your love. This community is so wonderful I’ve really come to rely upon all of you. I know you re all there with your warmth and support. I had lost my Aunt just a year ago in India – a medical mistake, so losing my close friend who was so much more a brother was really hard to take. Thanks once again. i love you all.
Honey & Cheryl, I’m so sorry for your losses. You and your families are in my prayers.
One thing to be sure of before you buy a lamp. Ask if it can be turned on without being timed. The reason is that some of the ones sold for doing fingernails have a 2 minute timer. And you need it to be on for 20 minutes. Some have the option of solid on or timer, just be sure to find out before you buy.
@Terry Morris: I found a bulb that is a grow bulb for plants. My husband thought it emits uv rays and would work as a way to cure the uv resin. Would it work? It is a 50w bulb. If so, how long do you think I should expose the resin to cure it?
I had trouble with curing the resin outside. I left it outside for 6 hours. It was sunny at first then it got a little cloudy. I kept checking it and made a test piece along side my actual piece so I could test it for hardness. I had to keep adding more time and it really didn’t cure completely. You could see bubbles trapped under a the harden top layer when you pressed on it.
Was it the lack of pure sunlight (I thought even clouds let uv rays through) or high humidity? It was very hot like 95 and above that day.
@Catalina: It’s funny, Ken just asked the same question a few days ago in the original UltraDome thread. Here was my reply:
Sorry but a grow light will not work.
Even though it is UV light, all UV light is not the same. It is the wavelength that is important and our epoxy requires 365nm or close to that. Grow lights are more in the 680nm to 700nm range and will not start the reaction in the epoxy.
Just found a 36W lamp on eBay for £21, which seems like a bargain. Now if I can find a decent UK supplier of UV resin, I might even think about buying it.
Sigh. How come all the good stuff’s easier to get in the US/Canada?? And cheaper too, since it doesn’t have to be shipped halfway around the world.
Hi all- I posted a report on my hands-on experiences with Magic Glos, Gel du Soleil and Ultradome on my blog. It’s linking to this thread which I think is a treasure trove of info!
Cheers!
gera
Cheryl and Honey, I too apologize for not coming in here sooner and supporting you through your loss. My heart goes out to you both.
Thank you to everyone who has shown interest in the UV Resin Tutorial. It is going to be a fun one!
@Gera Scott Chandler: Thanks for doing such an excellent review of the different resins and for giving a link back here. I really appreciate that. I love your tip for not using a heat gun or embossing gun to pop the bubbles on the UltraDome. I use a BBQ Lighter myself which works really well, so I didn’t know that the heat gun would cause the resin to ‘pop’ and run over the sides! Boy, now you’re making the mistakes so I don’t have to! :-) UV Resin sure makes polymer clay gorgeous eh? I am so excited about the possibilities, I can hardly stand it! Just coated a thin slice of a butterfly wing cane with the UltraDome and it looks like a shimmering wing trapped in glass. I just love it!
@Cindy L.: Oooh, your butterfly wing sounds so pretty! Can’t wait for the tute! Should we be stocking up on the resin now, since the tute has now been “voted in?” And what about the UV light — do we need the 36-watt unit, or is the 9W okay? You mentioned that the 9W you tried cured too slowly. Will it work if you’re the patient type, who wants to save $$?
@Phaedrakat: To be honest Phaedrakat, I regret not getting a better lamp from the beginning. Mine will work, but it is small, takes too long and I really want a better one already. It is kind of like buying a crappy pair of jewelry pliers and then turning around and buying a better pair shortly after. Didn’t really save money in the end. I think that this resin is such an enhancement to polymer clay that it is worth it. But of course it is up to you. It is possible to make a small 9 Watt lamp work.
@Cindy Lietz from Beaded Lanyards: Same with extruders – I got a cheapo plunger type originally thinking that the Makins one was too expensive, and hardly every used it because it hurt my hands so much. So of course I ended up getting a Makins as well, so it cost me more than if I’d just gone for the good one to start with!
That said, my inexpensive jewellery pliers are doing fine. Will probably get better ones at some point though, because it’s always better to buy the best tools you can afford.
@Cindy L: Absolutely agree! Thanks for letting me know. I’d rather get the good one, if it makes that much difference. I’m gonna try to shop around for the best price on a 36-watter.
@Silverleaf: I did the same thing with the extruders!
If anyone finds a great deal on the UV lamps, please post it here! Right now the Ultradome (EpoxyJewelry.com) site has their 36 watt light for $69. Lisa P.’s site still shows the $52.50 price on her 36W lamp — has anyone purchased this? (I’m curious why the cure time for Magic Glos is the same for Lisa’s 9W & her 36W lights. It seems like it would take longer to cure using the smaller wattage light.) Are there any other/better deals out there? Of course, I’m trying to get the best deal I can, just like everyone else!
Cheryl and Honey, I apologize for not reading this sooner. You are both in my prayers and thoughts. I have been blessed and not loss anyone close to me. My father passed away 6 years ago but we did not know each other that well. I can only imagine what you are going through. I am glad you have your clay and this blog to turn to. Something we all have in common. God Bless you both.
Too many people are so excited for the Resin tute and have already purchased all the stuff needed, so I’m changing my vote to YES. Thank you so much Cheryl, Silverleaf and Phaedrakat for the kind words. That’s what I love about this community, everyone is just so great. I love this place!!!! I don’t like letting people down and everyone is so excited. I’ll be happy just reading and seeing what people make and I’ll catch all their excitement. GO CLAYERS, GO!!!!!!! GO CINDY, GO. DO YOUR MAGIC!!!!!! Luv You Guys,,,,,,,Honey
@Honey & Cheryl: I am sorry to hear about the loss of your brother & friend. That’s so, so hard, and I know words aren’t much help. But know that we are thinking of you, and mourning with you, since you’re part of this family, this community Cindy’s built. I’ll keep you in my thoughts and prayers. Thanks Honey, I know you know what I’m going through. Unfortunately, we’ve got a lot of people in pain here. It’s nice to know that others know what you’re going through, but it’s a shame so many people are troubled by such bad pain! Bless you both, ladies!