Square Cane Slices on Round Polymer Clay Beads
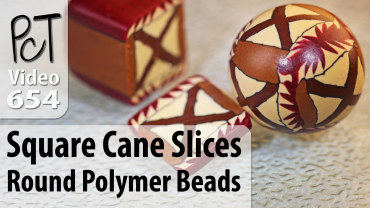
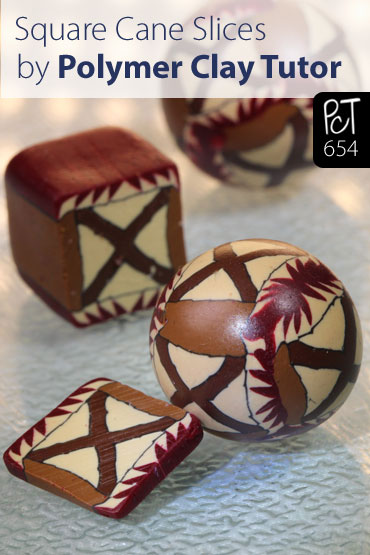
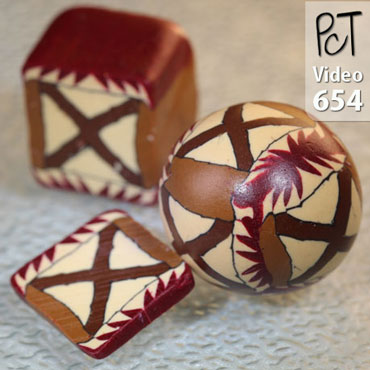
Video #654: There’s an easy way to add square slices to round beads… and a hard way. I’m all about quick and easy.
More...
IN THIS POST: — square canes — round beads — cane — canes — canework — millefiori — polymer clay beads — polymer clay canes — bead making — (Topics marked with an asterisk* are discussed in the Comments Section below).
Topics Covered In This Video:
How to put square cane slices on round polymer clay beads.
A little while ago, I showed you how to add round slices to round polymer clay beads.
It’s not that it is terribly hard… but there are some little tricks.
I’ve got an example of a small square cane from the Tribal Cane Tutorial, and I take 6 thick slices to add to scrap clay.
The scrap clay core is shaped into a cube approximately the same size as the cane.
I show little tips and tricks for adding the square slices to the square bead core and shaping it into a round bead from there.
Thicker cane slices are better than thin slices because the image will then be thick enough to sand and remove any flaws.
Once the canes have been added to the cube, you can then shape it into a round bead.
You can also square up round canes to fit them onto square beads if you choose.
00:00:03 –> 00:00:08 Hi guys, its Cindy Lietz, your Polymer Clay Tutor, and today’s PcT Mini Tute is how to
00:00:08 –> 00:00:15 put square cane slices on a round Polymer Clay Bead.
00:00:15 –> 00:00:21 So, a little while ago, I showed you how to put round slices on a round bead, and this
00:00:21 –> 00:00:26 time I’m gonna show you how to put square slices on, it’s not that it’s terribly hard,
00:00:26 –> 00:00:29 but it’s…there are some little tricks.
00:00:29 –> 00:00:35 So you’ve got a square cane like this, and I’m running low on this one… it’s getting
00:00:35 –> 00:00:42 down, it’s an old Tribal cane that I have from an old tutorial, and I want to put it
00:00:42 –> 00:00:51 onto a round bead like this one here, and it’s hard to know how to do that and how to
00:00:51 –> 00:00:55 evenly place it, but there is a really cool little trick.
00:00:55 –> 00:01:01 So what you wanna do is you can either manipulate the size of the cane or the size of your core
00:01:01 –> 00:01:06 bead, but I’ve got some scrap clay here in the same kind of colors, it doesn’t matter
00:01:06 –> 00:01:12 that much but just in case some background shows through, you wanna go with something
00:01:12 –> 00:01:13 similar.
00:01:13 –> 00:01:18 Alright, so what I’m gonna do is I’m going to… instead of manipulating the cane, I’m
00:01:18 –> 00:01:25 going to manipulate the core, and I’m gonna try to make it about the same height and the
00:01:25 –> 00:01:32 same… approximately the same size, so that when I take slices off of this cane, I can
00:01:32 –> 00:01:40 add them to a square bead, so I’m just gonna…I’ve got it the general size of that other cane,
00:01:40 –> 00:01:43 and then I’m gonna cut a square bead from that.
00:01:43 –> 00:01:47 Now you could cut a whole bunch of them so that they’re exactly the same size, and you
00:01:47 –> 00:01:52 can measure that out, and I have videos and things on that, but…so here I have a little
00:01:52 –> 00:01:57 square cube, and then what I’m gonna do…and you’re probably wondering why I’m doing
00:01:57 –> 00:02:01 squares when I was talking about round beads, we’ll we’re gonna add the canes to a square
00:02:01 –> 00:02:04 bead first, and then round it off.
00:02:04 –> 00:02:10 So here I go, I’ve got my little square cube of scrap clay and I’m gonna take a slice of
00:02:10 –> 00:02:17 the square cane and put that on, and I’m gonna need 6, so I’ve already cut 4, you could cut
00:02:17 –> 00:02:22 them by hand, use any of the machines I’ve shown you before, whatever you need to do,
00:02:22 –> 00:02:25 I’m just gonna cut a couple of them.
00:02:25 –> 00:02:30 I always go a little thicker than you might think, people try to stretch their canes too
00:02:30 –> 00:02:35 far, but if you make the slices too thin, then you can’t sand the bead later, or you
00:02:35 –> 00:02:38 can’t, you know, take off any imperfections.
00:02:38 –> 00:02:45 Okay, so now I’ve got one slice on there, and I’m gonna put slices around each side,
00:02:45 –> 00:02:55 so I’m gonna go around the middle first, and then I’m going to put the last one there,
00:02:55 –> 00:03:00 and then I need one on the top and the bottom…sometimes it gets a little bit out of shape, so you
00:03:00 –> 00:03:09 can just manipulate it a little bit, and add another one to the top, and I’ll do the
00:03:09 –> 00:03:13 same to the side, like that.
00:03:13 –> 00:03:20 Now, you still will have a few little gaps and things around where the edges are, so
00:03:20 –> 00:03:25 what we’re gonna do is we’re gonna take a round knitting needle or one of these Pearl
00:03:25 –> 00:03:31 and Etch tools, and we’re just gonna roll those edges toward each other…so if you’ve
00:03:31 –> 00:03:39 got quite a thick slice then you can do that quite easily, you have enough material to
00:03:39 –> 00:03:45 stretch in around and we’re just gonna roll those towards each other and erase that little
00:03:45 –> 00:03:49 seam, do that some more.
00:03:49 –> 00:03:57 Now, say you’ve got piece like this where this background is showing through, you can
00:03:57 –> 00:04:03 either use like a pointed tool like this or a needle if it’s a really skinny area, just
00:04:03 –> 00:04:08 like a pin or something, and you just sorta press down in that spot to push it out of
00:04:08 –> 00:04:15 the way, so that the top area has more room to stretch over.
00:04:15 –> 00:04:24 So we can do that, seal that one up, do that one here, I’m gonna push that in a little
00:04:24 –> 00:04:30 and stretch that one around, now I’ve gone around all…around the four sides, now I’d
00:04:30 –> 00:04:38 need to go around all the top, once you’ve done this and sealed up all those edges, then
00:04:38 –> 00:04:46 you have a nice little cube bead that looks decent, and then you can either leave it as
00:04:46 –> 00:04:55 a cube, but I wanted to show you that you can do it as a round bead as well, so as soon
00:04:55 –> 00:05:04 as I’m done this, I will start rolling it in my hands…I’ll get this edge, oh, I
00:05:04 –> 00:05:08 could have been a little more gentle with that edge, it’s a little squished, but I’m
00:05:08 –> 00:05:10 trying to hurry here.
00:05:10 –> 00:05:18 Alright so, now we have a little cube, we could either square it up, and make it into
00:05:18 –> 00:05:21 a little cube bead, which is quite cute or you can make it round.
00:05:21 –> 00:05:28 So the best way to make it round, is to kinda just push in the corners a bit, so that it’s
00:05:28 –> 00:05:36 already becoming kind of rounded, and you’re not gonna fold over any of those pointy corners,
00:05:36 –> 00:05:38 and then you just roll it in your hands.
00:05:38 –> 00:05:43 So keep this one steady, press hard on the top one, go back and forth and back and forth
00:05:43 –> 00:05:48 and back and forth in little tiny circles, if you do big ones, they’ll turn into a football
00:05:48 –> 00:05:54 shape so you don’t wanna do that, just little ones, press hard and it erases those little
00:05:54 –> 00:06:03 creases in the corner, and now you have square canes evenly distributed on a round bead,
00:06:03 –> 00:06:04 alright?
00:06:04 –> 00:06:12 Now you can do a similar trick like this if you had a round cane….now do I have something
00:06:12 –> 00:06:13 handy?
00:06:13 –> 00:06:22 Let’s see…oh it’s not that easy to get at, here’s something, okay, but if you had
00:06:22 –> 00:06:30 a round cane for example, you could also put it on a square cane by squaring it up, so
00:06:30 –> 00:06:36 you could square up your round cane, take slices of it, and put it on a square bead,
00:06:36 –> 00:06:41 if you know what I mean, and you could end up with round canes on square beads, or whatever
00:06:41 –> 00:06:44 you want there, so I just thought I’d point that out as well.
00:06:44 –> 00:06:50 So I hope that was a helpful tip for you, and if it was, do make sure to let us know
00:06:50 –> 00:06:52 if you like this video.
00:06:52 –> 00:06:58 And also, if you have any questions about Polymer Clay, techniques, things you’d like
00:06:58 –> 00:07:05 us to test, products you’d like us to demo, whatever, what you can do is look through
00:07:05 –> 00:07:09 the videos that we have, because the chances are we’ve probably already done a video
00:07:09 –> 00:07:13 on it, and if we haven’t, you can leave your suggestions in the comment section below,
00:07:13 –> 00:07:17 and we’ll see if we can make a video for you, alright?
00:07:17 –> 00:07:18 So we’ll see you next time and bye for now.
Our goal is to translate these videos into as many languages as possible. If you are interested in helping with this initiative, then please do contact us and we will figure out a way to make it worth your while :)
Resource Links:
- Related Video: Polymer Clay Tribal Cane Tutorial
- Related Video: Adding Round Polymer Canes To Round Beads
- Related Video: Rolling Round Polymer Clay Beads By Hand
- Related Video: How To Make Same Sized and Graduated Round Beads
Resources marked with a double ** asterisk are affiliate links. If you click on them and decide to buy something, we may receive some compensation. This does not affect the price you pay in any way. What it does do, however, is helps us to continue providing free videos for you, here at the PcT website. Using our links to purchase your tools and supplies, is always greatly appreciated.
Sponsored Ads & Special Promotions

Shareable Images


To share this full blog post anywhere on the web that allows links in comments, here's a shortened url to copy and paste...
>> https://mypct.ca/v654 <<
Want to chat about today’s post? That’s what the comment section below is for. Scroll Down… We’d love to hear from you!
Or... if you would like to request a topic for a future post, here is the link to do that… PcT Suggestion Box

Wanted to let you know that I have now been able to access the Tornado and Torpedo Videos I purchased. Wow they are great! Thank you so much for your patience in helping me.
Also, have you done a YouTube video on the Precise A Slice Cane Slicer that Polymer Express Sells? What do you think of it? I saw the one on the Lucy Slicer and it was great.
The review videos you do on new products are so helpful. To actually see you using the product makes all the difference to me. Thanks again.
That’s great to hear that you have been able to access your Vol-076 Back Issue now… thanks for letting me know, and glad to hear that you enjoyed that series :-)
I don’t have the Precise A Slice Cane Slicer in my Studio yet, but now that you have mentioned it, I will keep it in the radar.
When or if you are talking with the friendly folks over at Polymer Clay Express, be sure to request that they send me samples of the products you are interested in seeing featured in our upcoming demo video. When companies send out those samples, Doug and I are usually able to get the reviews filmed and published on YouTube fairly quickly.
Thanks so much Cindy, Canes are something new I’m trying to master… :) Love your videos…
OMG! I swear you’re a mind reader. You always seem to share the info I need exactly when I need it!
So simple but I wouldn’t have thought of it. :) :) :)
Cindy, as you well know, I am forever grateful for this site, and all the energy and excellence you and Doug pour into it.
Without you, my polymer clay would have remained packed away in storage. Because of your intro series, and all the blogs, tutes, and videos that followed, I found I could use my crippled painful hands to produce surprisingly acceptable works (plus all the fun involved in conditioning all that old crumbly clay, lol). And I love every single second of it.
Aha moments continuously occur, since I can watch and listen, yet still not learn. Today’s moment was the reason for my magnificent football shaped beads! Thank goodness many of these are not yet baked, so they can be corrected.
You specifically state and show how to rotate the bead to get a circle using a flat palm then quick clockwise and counterclockwise rotations with the top hand. You have showed this technique many times, yet, I was locked into an old pattern, and continued to use the same one direction rotation I learned from my Play-Doh days.
AHA!!!
Thank you so much.