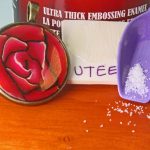
UTEE Ultra Thick Embossing Enamel on Polymer Clay
Video #425: A shiny resin-like coating that works on polymer clay under the right conditions.
More...

IN THIS POST: — utee — ultra thick embossing enamel — embossing powder — glaze — resin — ranger industries — (Topics marked with an asterisk* are discussed in the Comments Section below).
Topics Covered In This Video:
- Testing Ultra Thick Embossing Enamel (aka UTEE) by Ranger Industries on polymer clay.
- UTEE is a crystalline embossing powder that is very thick and clear when melted and has a resin or enamel like appearance. It is used by scrap bookers and mixed media artists in a variety of techniques.
- I tested it on a baked piece of Premo Polymer Clay to see if it was compatible, which it is. There are no adverse reactions over several months. I did find however that it is a softer surface than resin and can be scratched and dented relatively easily. It also cracked when I bent the piece back, so it would not be ideal for flexible surfaces, though it stuck well and did not flake off, even after cracking.
- I also tested the powder on a raw slice of my Shaded Rose Cane of Premo polymer clay, and baked the whole thing in the oven for 1 hour at 265F. It did well, with only a few bubbles showing up. The bubbles were easily popped with a pin, and they completely disappeared, when the UTEE was hot.
- It took several coats of the UTEE to achieve a domed effect, and the color darkened a bit. But over all, I would consider this test as a success. UTEE is a suitable product to cover a solid, non-flexible bezel, since the chance of wearing and scratching the surface would be minimal. However, I would not recommend the UTEE for use on high wear items like bracelets or keychains.
00:00:04 –> 00:00:07 Hi guys, its Cindy Lietz, your Polymer Clay Tutor, and today in the PCT Test Lab we are
00:00:08 –> 00:00:17 talking about Ultra Thick Embossing Enamel also known as UT by Ranger.
00:00:17 –> 00:00:23 And we’re gonna be using it on Polymer Clay, now, I’ve got a couple of samples here, now
00:00:23 –> 00:00:28 oh…probably I should explain to you…some of you already know what this is, but UT is
00:00:28 –> 00:00:34 a crystalline kind of embossing powder, but it’s Ultra Thick so when it melts, it leaves
00:00:34 –> 00:00:40 a very thick coating, and for scrapbookers and all kinds of mixed media people, it’s
00:00:40 –> 00:00:42 quite a neat product.
00:00:42 –> 00:00:47 And what it does is when you put it on a surface of something, when you get it hot, it melts
00:00:47 –> 00:00:52 and then becomes like a glossy, glassy enamel type surface.
00:00:52 –> 00:00:59 Now, I did a couple of…I wanted to test it on Polymer Clay to see its compatibility,
00:00:59 –> 00:01:04 and I did some… here’s a piece of baked Premo!
00:01:04 –> 00:01:11 Polymer Clay, and I put the UT on there, now this powder will blow all around, so you can’t
00:01:11 –> 00:01:17 just put a heat gun on it without sticking it down some way, so I just put a little pile
00:01:17 –> 00:01:23 of the powder onto my test sample and then set it back into the oven to warm up, I put
00:01:23 –> 00:01:30 it at about 250F- 265F something like that, what I normally bake it at…my Polymer Clay
00:01:30 –> 00:01:36 at, then it melted into a puddle of clear material.
00:01:36 –> 00:01:42 Now it is Polymer Clay safe, I know…it’s been on here for several months now, and it’s
00:01:42 –> 00:01:49 not causing any kind of weird reaction or anything, but you may be able to see in this
00:01:49 –> 00:01:54 sample here that it has a few cracks, that happened actually just a few minutes ago,
00:01:54 –> 00:02:00 I was sorta playing with it and I bent it a bit and the surface of it cracked.
00:02:00 –> 00:02:05 So that’s gonna be something that you’re gonna need to keep in mind if you were to use it
00:02:05 –> 00:02:11 on a… something that was flexible, it would crack.
00:02:11 –> 00:02:21 Now, the surface of the UT is quite firm, it’s a lot like a resin, but with playing
00:02:21 –> 00:02:26 around with it and stuff, I’ve noticed that the surface is not near shiny as it was when
00:02:26 –> 00:02:32 I originally put it on there, so I have a feeling it scratches and it gets dull after
00:02:32 –> 00:02:34 a while if it’s getting rubbed all the time.
00:02:34 –> 00:02:40 I can also… probably the camera won’t pick it up, but I can press my fingernail… if
00:02:40 –> 00:02:45 I press into it really hard, I can leave a permanent mark in there, so for some jewelry
00:02:45 –> 00:02:49 situations, it’s not gonna be the most ideal.
00:02:49 –> 00:02:56 Now another thing I tried was I took a…you know, one of these bezels and I laid a raw
00:02:56 –> 00:03:07 slice of one of my background-less dimensional Rose Canes in there, and I put a slice in
00:03:07 –> 00:03:14 raw, pressed it in to the base and then sprinkled some UT on top of it, then popped it in the
00:03:14 –> 00:03:15 oven.
00:03:15 –> 00:03:25 I wanted to see how the UT acted with raw clay, and it baked up really nice, I actually
00:03:25 –> 00:03:31 had to put several layers back on after, it darkened a bit, I don’t know if that was my
00:03:31 –> 00:03:37 oven or if it was the UT being on there or what happened, and what also happened was
00:03:37 –> 00:03:43 there were several bubbles, but what I noticed what I could do, is when it was still hot
00:03:43 –> 00:03:48 and liquid-y, I could poke those bubbles with my…with just a little pin, and then they
00:03:48 –> 00:03:53 would melt back…and then I put it back in the oven and it melted back flat.
00:03:53 –> 00:04:02 Now I was able to get quite a bit of a dome on here, quite a nice shiny dome on here,
00:04:02 –> 00:04:09 similar to the way resin looks, just by adding new layers and putting more in, popping it
00:04:09 –> 00:04:11 back in the oven.
00:04:11 –> 00:04:17 Now the neat thing about this is that you can always melt it again, so you could…if
00:04:17 –> 00:04:22 it didn’t turn out nice or if it was bubbling over the side, you could always put it back
00:04:22 –> 00:04:28 in the oven, warm it up or it heat it up with your heat gun, and scrape away some or add
00:04:28 –> 00:04:34 some and that kind of thing, so you can always rework it.
00:04:34 –> 00:04:38 So I found that quite interesting that it worked in the raw clay without a problem.
00:04:38 –> 00:04:43 Now because of this sample here though, I wouldn’t use it on a piece where the back…
00:04:43 –> 00:04:47 like this is a good location to use it in because it’s on the front, it’s not gonna
00:04:47 –> 00:04:52 get a whole lotta wear, but on a bracelet or somewhere where it might rub, it probably
00:04:52 –> 00:04:57 would get kinda scratched and foggy and a little dented up over time.
00:04:57 –> 00:05:05 So that is interesting to me, I hope it was to you, if it was, make sure to click that
00:05:05 –> 00:05:07 like button that would be great.
00:05:07 –> 00:05:14 And my question for you today is, have you used UT product on Polymer Clay before?
00:05:14 –> 00:05:15 And what’s your experience with that?
00:05:15 –> 00:05:21 If you could leave your answers in the comment section below, that would be great as well.
00:05:21 –> 00:05:24 And don’t forget to subscribe, we have new videos that come out every week and you’re
00:05:24 –> 00:05:26 not gonna wanna miss a thing.
00:05:26 –> 00:05:29 We’ll see you next time, bye for now.
Our goal is to translate these videos into as many languages as possible. If you are interested in helping with this initiative, then please do contact us and we will figure out a way to make it worth your while :)
Resource Links:
- Related Video: Shaded Rose Cane Tutorial Intro
- Related Video: Backgroundless Shaded Rose Cane Polymer Clay Tutorial Intro
- Related Video: UV Epoxy Resin UltraDome Tutorial Intro
- Related Video: Applying Ultradome UV Epoxy Resin To Polymer Clay
- Related Video: Test Tim Holtz Distress Embossing Powder on Polymer
- Related Video: Triple Thick Gloss Glaze Compatible or Not?
- Amazon: Ultra Thick Embossing Enamel **
Resources marked with a double ** asterisk are affiliate links. If you click on them and decide to buy something, we may receive some compensation. This does not affect the price you pay in any way. What it does do, however, is helps us to continue providing free videos for you, here at the PcT website. Using our links to purchase your tools and supplies, is always greatly appreciated.
Sponsored Ads & Special Promotions
Shareable Images


To share this full blog post anywhere on the web that allows links in comments, here's a shortened url to copy and paste...
>> https://mypct.ca/v425 <<
Want to chat about today’s post? That’s what the comment section below is for. Scroll Down… We’d love to hear from you!
Or... if you would like to request a topic for a future post, here is the link to do that… PcT Suggestion Box
I love utee.. I just discovered it last month, it beats kato glaze for application, great for glazing pendants but not so great appearance if you use a glue that isn’t clear.. Get embossing ink, gloss medium works well without causing clouding but pva caused my beautifully inked paper bracelet to go opaque.. I went back next day hit it w heat gun and went mostly clear. My polymer pieces showed up all their mica when coated with utee the colours go way more vibrant. I always finish pieces off with the heat gun as oven temp needed for utee to melt really darkens my polymer pieces. Great video, thanks for taking the time!
There’s a video on youtube done by Vintaj where they also made the UTEE into a matte finish by using ultra fine steel wool and rubbing the surface of the UTEE in a circular motion. You can see what I am talking about at the 10:04 mark.
Thank you Samantha for coming back and letting us know about this matte finish technique. That is very cool! I’m going to have to try that. Matte finishes are very popular right now.
UTEE is wonderful stuff. I’ve been using it for years, so long that I’ve actually started kind of liking it when I get a hot drop of two on my fingers! (That was humor!) In fact I’ve become close friends with Suze Weinberg, the person who first devised the line of UTEE before she retired and sold it to Ranger. She’s done some demos using UTEE with PC over the years that I wish I had readily available because they would be very helpful. The two medias are a natural match just so one goes about it correctly. Suze is a real nice lady, I will tell her about this site and see if she doesn’t mind me sharing her methods with you all.
That was a GREAT video with LOTS of important information for polymer clay users to know. Often we hear about a product, but not the adverse issues. I use the clear liquid resins that come in little bottles with a narrow pointed tip that dry/heal with UV (sunlight) and they stay nice and hard with none of the issues you found here, Got one at Joanne’s and another at my local bead store. marilyn
Thanks so much for the summation Cindy – and yep, I really appreciated Karen’s help. I was going crazy trying to figure out what to use when. I will save your notes to reference in the future.
I actually think I can help Sylvia – Future is now Pledge with Future Shine premium floor finish – by SC Johnson. I had it to stiffen up beaded Xmas ornaments. Unless it has changed names again……
Thanks a lot
Beth
Thank you Beth!
I’ve tried to purchase Future floor polish with no success. I’ve even tried in the city. Does it go by another name now?
Hi Sylvia, Beth gave you a good answer below. As far as using Future Floor Finish however, I have new favorite finishes that I much prefer over the Future. (See my comment to Beth up above with my top 3). If you want to learn more about those products, just type them into the search box at the top of the page and you will find links to more info. Hope that helps!
Hi Beth W,
You’re welcome! Cindy has in the past used Future floor finish so you would be safe ising that. The varathane comes in various brands and Diamond wood finish gloss is its old name. I use Varathane brand Polyurethane and yes, interior water based is correct. The oil based products don’t work. If you google Varathane Polyurethane you’ll get a photo of the can. On mine, Varathane is written in cursive. I have various types of varathane finishes but mostly now use the gloss finish and use it for when I want a shiny surface. Most of the pieces I would use with this are flat or near flat so I use very thin coats and paint it on. I’ve also, in the past, dipped it into it but then you have to worry about drips and that’s just no fun. I’m intrigued by the spray and might try that sometime as well.
Once you get it sorted out it won’t seem so confusing. I’ve been there! Some days I feel like I’m still there! Oh, and I think I got my Varathane at Lowes or Menards. One of them carried it but the other one didn’t so you might want to call first. Good luck!
Thank you Karen for helping out Beth like you did! I really appreciate the help. It can get very busy around here and it is nice to know I can count on the wonderful members here to be helpful to others when I can’t get in here to help as fast as I would like to! :)
Hi Karen,
Thanks SO much. Everything I read is conflicting. I’m getting ready to order some PYM II, but the varathane is a challenge. Apparently it is a mystery in the Southeast USA because everyone looks at me like I’m nuts (oh, I am, sigh). I have a tutorial that says use “varathane diamond wood finish gloss” in both the spray and the liquid. I can’t even find that to order online by that name. I’m wondering if the name has changed – seems like Rust-oleum has come into the picture. I just don’t want to get the wrong thing – especially since I have to order it – and end up ruining pieces.
All the hardware stores want to sell me poly – even water based, but I don’t think we are talking about the same thing. Is there a US source for what all of you use? Am I making this harder than it is?
I was concerned about the ren. wax and the mica powders. Thanks for confirming that that won’t work. I do have some Future floor polish from several years ago for my Xmas beaded ornaments – talk about a blast from the past!!
Thanks so much for the help – and one day I’ll venture into the resin wars too.
Beth
Hi Beth, isn’t it wonderful of Karen to come in here and help you? She did a great job explaining things to you.
Yes it can be a little confusing when you look back through the history of an art medium like polymer clay. There are always so many advancements and improvements on products or products that disappear in the marketplace, that what was best then, is always the best now.
However, Karen is right in saying that if a product was recommended by me at one time and it is still available now, then it is safe to say that it will still work now. (That is if the formula hasn’t changed.) I try to keep most of the information on this blog as ‘Evergreen’ as possible, but from time to time, some stuff does become out dated.
My current favorite finishes for polymer clay are:
#1: Sanding and Buffing – for smooth surfaces
#2: Renaissance Wax – for smooth sanded and buffed surfaces, lighted textured surfaces, sculptures, painted surfaces, metal, etc (not the best for mica powders or gilders paste finished pieces)
#3: PYMII Spray – perfect for sculpted pieces, highly textured pieces, metals and pieces with mica powders, inks, glazes and other surfaces that the Ren Wax won’t work for. Also wonderful for waterproofing fabrics, cords, paper etc.
Hi Beth W,
Welcome to the forum! There’s no need to be sorry – everyone is very nice here. I was a “newbie” not that long ago and felt bad for asking questions but in this environment it’s really encouraged. I always figure – if I have that question someone else probably does too. :-)
There are a few options you have. Ren Wax is a good choice, though it doesn’t work well on baked pieces that have mica powders on them (that’s my experience any, if someone else has had success can you speak up?). I use mica powders/surface colors of some sort on most of my pieces. What I do currently is spray a coat of PYM II on it (Preserve Your Memories II, orderable online) first to “set” the colors (mica powders or transfers). This stuff is awesome. It dries in just a few minutes and really secures the powders/paste. If I want a shiny glaze, I will “paint” light coats of varathane coating, maybe 2-3 coats.
Good luck and keep posting questions! Let us know how your projects turn out! Oh, and Cyndy will probably respond at some point as well, with other tips so keep checking back if you haven’t subscribed to this post.
Karen
Hi Everyone, I hate to take a step backwards, but the more I dig into past articles and other books and information, the more confused I get.
As of TODAY – what is the best way to finish a piece of polymer clay if you want a shine for example? What is the best product to use if you are trying to protect the mica powders? What about if you use image transfers or inks? Basically, can somebody give me a summary of what I’m supposed to use when please???
I have ordered the renaissance wax, but I can’t figure out how much of the surface “stuff” it will protect if we get wild and crazy with powders, paint and image transfers.
Sorry to be a newbie, but I have also heard the horror stories, and I want to get it right.
Thanks so much
Beth
I use UTEE on some of my pieces. I use embosing liquid on my piece of baked clay then sprinkly the UTEE on it and use my heat gun, it works well enough. I will now try using it in the oven. I may even try using it as an inclusion and see how that looks.
I made some disc with Premo polymer and baked them. They were tooooo dull and dark and I didn’t like them. Later put several layers of UTEE on them with heat gun and love them. That was Spring of 2012 and they are holding up good in a neck less .
I love Ranger products. Now that that is established, I do not recommend UTEE for polymer clay. I have used it on a handful of jewelry….and a larger flat 8″ square clay quilt piece (no wear and tear issues) and it yellowed, dulled, could be scratched easily and cracked so much that my entire clay cracked with it. my piece is now in pieces itself. While It is great for paper projects etc. I do not use it on polymer clay.
Really good idea for encased pendants, have you tried melting the powder first and then pouring it on baked clay?
I’ve used various colours of UTEE in polymer clay as inclusions, but I’ve never tried it as a coating. Since I have both 2-part and UV-curing resin I’ll probably stick to those (and Kato Clear Medium) when I want clear coatings, but it was definitely interesting to see the results of Cindy’s testing.
I have a container of UTEE that is quite lonely. I don’t do rubber stamping, but I bought a container at Michaels several years ago, because I wanted to try it with polymer clay.
I tried it on a small piece, and I’m lucky that it was only a small piece. I’m using a convection oven (and an old one at that), that does not have a control to turn off the fan. You can imagine what happened! Perhaps I should have given the item (it was a flat pendant with a raised frame) a thin coating of TLS. After all, stampers use inks with embossing powders to keep the powder from “blowing away.”
Oh, well!
It puts a very thin coat on the clay. The product is called Pro-Tec paint powder, it is made to put a water proof seal on fishing lures. You can find it at Bass Pro Shop or Cabella’s. It comes in about 12 colors, the only place I could find clear was on e-bay.
Have not used it, but heard the “UTEE” before and had no idea what it was. So thank so much for the tutorial. I have purchased another product called Amazing Glaze by Judi Kins that I am assuming is similar. Much smaller jar, 2 fl. oz., but have not tried it yet. Any experience anyone else has had with this product would be grateful appreciated. I intended to use it covering paper/pictures in bezels, but have been preoccupied with making canes. I never thought to try it on polymer clay.
Cindy, I always look forward to your videos, both on Mondays and Fridays, whether the project or technique is something I want to do or not. They are all so well done and professional… and interesting!
I might try this as an alternative to resin. I find resin to be such a pain to work with.
I have used Utee several times and found it did not work well on baked polymer. I had better luck making glazed flower pendants by cutting out the bottom of plastic bottles and dipping them in the Utee pot. Now that I have seen your video Cindy I am going to try it on raw polymer. Thanks for the great tip.
Thanks for this lesson Cindy.
I have been experimenting with this embossing enamel lately and looking at the label on your jar, I think it’s the same that I use (Melt Art). For me it is too soft after baking. You can easily leave indents with your fingernail and it gets scratch marks very soon if you live and wear your piece frequently. I like epoxy resin or magic gloss better because it’s more durable.
I’ve used it a few times on raw polymer clay. Was good.
Instead of putting the UTEE on the item as a powder in doing it in layers,you can melt the UTEE in a cup or something and pour it onto your project like resin which is probably best for doming etc.
Interesting test lab experiment. i have not see UTEE in the store. When I first saw this test lab video I thought you were going to be testing a different product. I have used a clear fishing lure powder on raw clay. The powder is made to waterproof hand made lures. I will try and find out the name and maybe you can do a test lab video.
That fishing lure powder sounds very interesting Anna! DO make sure and let me know the name of it. It would be fun to do a PcT Test Lab on it!
I think it’s Powder Coat or Powder paint. Same thing lots of parts are coated with like BBQ grills and bikes. They use it for DIY fishing lures.
It’s a light powder, on metal you heat the metal, dip it in the powder and this causes some to stick, you then heat it again and with will smooth out. Alternatively you could use it like you did.
It’s made for sticking to metal so not sure how well it will stick to polymer clay.
Hi Terry, Nice to hear from you, its been a while! How are you?Thanks for passing this info along. Still selling lot of UV Resin? I still want to see what can be done with the UV sensitive powder you sent. Didn’t mix with the polymer quite like I wanted it to, but nothing a little more playtime couldn’t figure out. Anything new and cool in your shop?
Thanks for the test but I tried it years ago and the biggest problem is if you or someone else touches the surface it will get dull or dirty and the only way I could find to bring the shine back was to melt it again. Myself I do not care for it with polymer clay. Sanding and buffing makes a much better shine and to keep it just buff it with a cloth or on your jeans for a few seconds and wa la your shine is back.”