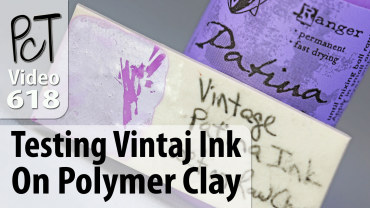
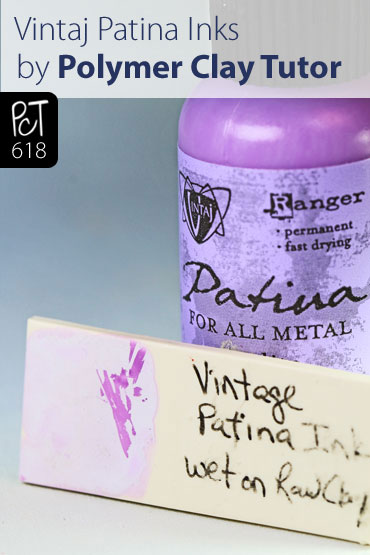
Vintaj Patina Ink on Raw Polymer Clay… Does it Work?
Video #618: My tests with Patina Vintage inks on both baked and raw polymer clay… neither one worked out very well.
More...
IN THIS POST: — vintaj inks — inks — patina — ranger — compatibility — incompatibility — raw polymer clay — stickiness — sticky — (Topics marked with an asterisk* are discussed in the Comments Section below).
Topics Covered In This Video:
- Today we are testing Vintaj Patina Ink on Polymer Clay.
- This time we are applying wet Vintaj ink on raw Premo Polymer clay.
- Some time ago, I tested Vintaj Patina ink on baked polymer clay and found that it was not compatible and got sticky over time. To see that testing video, see link just below today’s video.
- The same sample chip, from that testing done a couple of years ago, seems fine when you first touch it but gets sticky very quickly with handling.
- I promised back then that I would do a test with the same inks on raw polymer clay (basically heat setting it), to see if that made a difference. So here are my results.
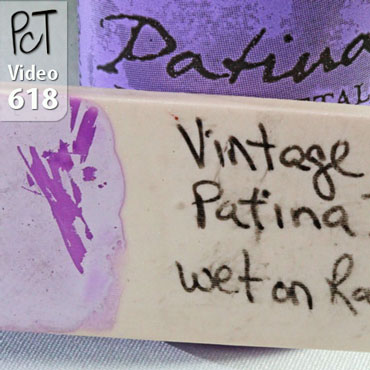
- The color used was Opalite Vintaj Patina on raw Premo Polymer Clay.
- Vintaj Patina ink is a specialty ink used for putting on metal.
- It comes in many beautiful colors, that have a chalky type opaque finish.
- The patina ink will settle after sitting and needs to be shaken well before using. Shake until you hear the metal ball moving within the bottle.
- The sample was coated in the ink and baked at 275F for 1 hour.
- After coming out of the oven, the ink was hard and shiny, though the color seemed to be somewhat hidden under a chalky layer.
- I let the sample sit for a few months.
- The sample seemed to be fine when first touched, but after handling for only a short while, it too became sticky.
- I am not sure if it is the warmth… the moisture… or the oils on your hand… but once you start touching it, the surface becomes quite sticky.
- The chalkiness seems to come to the surface during baking and the color seems to almost disappear.
- When the chalky surface is scratched, however, the chalk comes off and the color is revealed underneath.
- Perhaps it is the chalky materials in the inks that cause that stickiness… not sure?
- I know there are polymer clay instructors that use Vintaj Patina Inks on polymer clay in their tutorials, but so far with both of my tests… using it on baked polymer clay and on raw polymer clay… I am still not getting positive results.
- So at this point, I will avoid using this ink on polymer clay and keep it for my metal, where it works beautifully. Might as well use it, where it works best!
00:00:03 –> 00:00:08 Hi guys, its Cindy Lietz, your Polymer Clay Tutor, and today in the PcT Test Lab, we are
00:00:08 –> 00:00:12 testing Vintaj Patina Ink on Polymer Clay.
00:00:12 –> 00:00:20 Now this time we are actually testing wet ink on raw Polymer Clay, in the past, in a
00:00:20 –> 00:00:22 video quite some time ago…
00:00:22 –> 00:00:29 I think it was almost a couple of years ago, we did some Polymer Clay compatibility testing,
00:00:29 –> 00:00:38 and I did test the Vintaj Patina Inks on baked Polymer Clay, and I found it to be quite sticky
00:00:38 –> 00:00:44 after spending some time on there, and this sample…which is a couple of years old, is
00:00:44 –> 00:00:50 actually… if I play with it for a little bit, it starts getting sticky again, now the
00:00:50 –> 00:00:56 ink itself seems to be okay on the Polymer Clay, but as soon as you start touching it,
00:00:56 –> 00:00:58 it starts getting sticky.
00:00:58 –> 00:01:07 So I promised way back then that I would test it on raw Polymer Clay, and have it heat set
00:01:07 –> 00:01:12 and to see if that would make any difference, now, when I took it out of the oven, it seemed
00:01:12 –> 00:01:19 perfectly fine, it sat around for a few months, and here is actually the Vintaj… here’s
00:01:19 –> 00:01:26 the sample here, and I used this particular color, it’s called Opalite, and Vintaj Patina
00:01:26 –> 00:01:33 Ink is an unusual ink, it’s meant for using on metals and it’s really a beautiful ink,
00:01:33 –> 00:01:36 I’ve got a whole bunch of different colors of it.
00:01:36 –> 00:01:41 And one of the things you’ll notice is if sits for a bit, it kinda settles down to the
00:01:41 –> 00:01:47 bottom and it has this sort of chalky kinda look to it and it’s part of the look of the
00:01:47 –> 00:01:53 patina, and so you really have to mix them up really well, and in fact, at first, it
00:01:53 –> 00:01:58 just sounds like water moving around, and if you keep going, you’ll hear a little…there’s
00:01:58 –> 00:02:03 a little metal ball in there, and once you start hearing that, that means that it’s kinda
00:02:03 –> 00:02:07 loosened up, and you can start shaking it properly.
00:02:07 –> 00:02:13 Anyway, I did the test, it came out of the oven, and a couple of interesting things I
00:02:13 –> 00:02:18 want to point out to you, at first, it felt just fine, and in fact, when you first touch
00:02:18 –> 00:02:21 it, it doesn’t feel that sticky.
00:02:21 –> 00:02:25 But when you start to play with it…and I don’t know if it’s the warmth of your hand,
00:02:25 –> 00:02:33 if it’s the oils in your hand or what, but even this ink that was on the raw clay and
00:02:33 –> 00:02:36 heat set for a full hour…this is on Premo!
00:02:36 –> 00:02:44 Clay by the way, it was heat set for… it was baked for 1 hour at 275F, it still is
00:02:44 –> 00:02:54 kinda sticky, and it also…the ink…that chalkiness to the ink, it kinda raised to
00:02:54 –> 00:02:58 the surface, so you can barely see that Purple-y color.
00:02:58 –> 00:03:02 I wanted to do a couple of little things, I wanted to see if it would… what it was
00:03:02 –> 00:03:12 like for chipping off, now I can scratch at it and underneath, it is scratching up a bit,
00:03:12 –> 00:03:19 though not very easily, but with something else stiffer, I think it would scratch, yeah,
00:03:19 –> 00:03:23 that chalkiness is coming up, maybe it’s the chalky part that’s reacting with the clay,
00:03:23 –> 00:03:30 or making it feel sticky, so there’s the Purple underneath and that chalky on top.
00:03:30 –> 00:03:37 I know there are people that do techniques with the Vintaj Ink on Polymer Clay, but so
00:03:37 –> 00:03:43 far with both of the tests… using it on baked clay and raw clay, I am still not really
00:03:43 –> 00:03:49 getting very good results, so I think I’ll just avoid it altogether on my Polymer Clay,
00:03:49 –> 00:03:57 keep it for my metal, it works beautifully on there, and I might as well use it where
00:03:57 –> 00:03:58 it works the best.
00:03:58 –> 00:04:04 So I hope that was helpful for you, if it was do let us know if you like this video.
00:04:04 –> 00:04:11 And if you have suggestions for products you’d like me to test, ideas that you don’t quite
00:04:11 –> 00:04:15 understand, or anything to do with Polymer Clay, and other products that work with Polymer
00:04:15 –> 00:04:18 Clay, leave those in the comment section below.
00:04:18 –> 00:04:24 And don’t forget we have a great resource over at PolymerClayTutor.com where you can
00:04:24 –> 00:04:29 use the search box and you can find answers to all of your Polymer Clay questions.
00:04:29 –> 00:04:31 We’ll see you next time and bye for now.
Our goal is to translate these videos into as many languages as possible. If you are interested in helping with this initiative, then please do contact us and we will figure out a way to make it worth your while :)
Resource Links:
- Related Video: Is It Compatible With Polymer Clay? Always Test!
- Related Video: Embossed Metal Jewelry Findings
- Related Article: 5 Ways To Use Alcohol Ink on Polymer Clay
- Related Article: Using Alcohol Ink With Polymer Clay
- Amazon: Vintaj Patina Ink **
Resources marked with a double ** asterisk are affiliate links. If you click on them and decide to buy something, we may receive some compensation. This does not affect the price you pay in any way. What it does do, however, is helps us to continue providing free videos for you, here at the PcT website. Using our links to purchase your tools and supplies, is always greatly appreciated.
Sponsored Ads & Special Promotions

Shareable Images


To share this full blog post anywhere on the web that allows links in comments, here's a shortened url to copy and paste...
>> https://mypct.ca/v618 <<
Want to chat about today’s post? That’s what the comment section below is for. Scroll Down… We’d love to hear from you!
Or... if you would like to request a topic for a future post, here is the link to do that… PcT Suggestion Box

I know that Cindy has already mentioned this, and maybe it doesn’t mean much because I’m so new here, but those of you who are looking to save money by NOT buying Vintaj Patina inks, I hope you’ll reconsider. I’ve painted with the Vintaj inks on metal and absolutely love the results. The colors are stunning and vibrant. They combine well. The results have lasted well for me – in other words, nothing that I’ve painted with the Vintaj Patina inks has faded. And it has been possibly two years or more since I first began painting with them (since whenever they first came out actually).
I also love the Vintaj metal “natural brass” blanks, and those are what I’ve painted on, but my understanding is that they may work on other metals too, provided of course that they don’t have cheapo, or fake, finishes that flake off or something.
Anyway, just wanted to put my two cents in. They are too lovely to pass up! Enjoy!
Oh, for what it’s worth, I’ve found them for ages at Hobby Lobby. And more recently at JoAnns.
Cindy wonder if a couple coats of Varathane would work.
A couple of coats of a varnish might work Janice for sealing in a paint like this, however, the bond between this paint/ink and the clay will never be that great, so the varnish could separate and peel or scratch off quite easily. I think it would be a good idea to just skip using it on polymer clay. There are many other products that would just as cool a look, that are more compatible than this ink is.
You just posted this and at the same time on The Daily Polymer Arts blog they posted a great pic of testing Vintaj Patina Inks on Polymer Clay done by Amy Crawley.
Perhaps people should have a look at that before giving up on the Vintaj Ink.
Hi Aims, That article that Amy did was a long time ago. It was only just mentioned again on the Polymer Arts. Amy doesn’t mention anything about it being on there for any length of time or whether or not it will get sticky if handled. The product definitely looks cool… but whether or not it works with polymer in the long run… I have not been able to prove yet. Looks like more testing needs to be done to be sure.
I wonder what would happen if you sanded off the chalky top. Would it still be sticky?
It might work Susan, but then there wouldn’t be much use using it, since that is kind of one of features of the paint/ink. Just using alcohol ink or paint instead would be less of a hassle.
You just saved me a lot of money! Seeing info on different products sure helps a lot. Although it eliminates some, the rest of the products “pass”. TY for you testing lab……..
I still think it is an excellent product for metals and perhaps other materials as well, Patt. It is just the polymer that I haven’t had success with it yet.
I appreciate that everything you touch doesn’t automatically turn to magic. It gives the rest of us hope. (;
You have no idea Lena how many things I do that don’t work out! :) It is all part of the learning process!
The magic of the internet and only sharing what you want. LOL.
Hi Cindy, I have used vintaj inks on my polymer baked pieces for a year now with no problems. I don’t experience the sticky issues you describe. However I have to say that for my finished product I cover the piece with resin so that effectively seals the color and eliminates the sticky problem you are having. The colors and technique I use are nor achievable with any other material (that I’m a are of). But, any pieces that I have not sealed are still ok even after time. I have not tried raw clay as what I am doing works best on baked clay. So, as with anything, be cognizant of what has been done but try it yourself!
Linda
Hi Linda, thanks for sharing your results! It sounds like you have found a way that works for you, though I wonder whether there is a chance that the ink could still cause you problems down the road? I am not saying it will… just that it is a possibility. Let’s say the ink is not fully cured under the resin and continues to react with the clay while trapped under the protective resin. I could see some separation happening between the layers over time, since the one layer would never truly be bonded to the other layer.
This may not be the case should my problem with sticky ink be created by moisture in my environment coming from the outside and softening the ink after a few days. (Remember mine seemed fine when it came out of the oven.) If the ink was dry after coming out of the oven and then was covered with resin right away, this may never become an issue.
All the more reason for doing long term tests…
Thank you I apprecited that info. Won’t buy the stuff!
You can still buy it for metal Hermine. It is an excellent product for that!