A Sanding Trick For Gripping Small Polymer Clay Beads
Video #725: Low tech solutions are often the best way to go… as you will see in today’s polymer clay sanding demo.
More...
IN THIS POST: — sanding polymer clay beads — hollow lentil beads — scotch tape handle — finishing — sanding trick — tools — make sanding easier — (Topics marked with an asterick* are discussed in the Comments Section below).
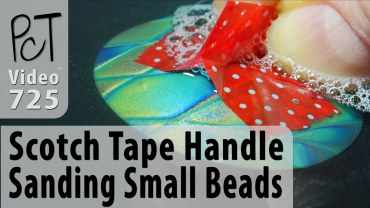
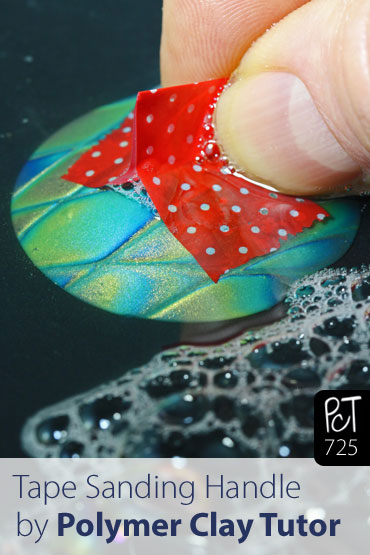
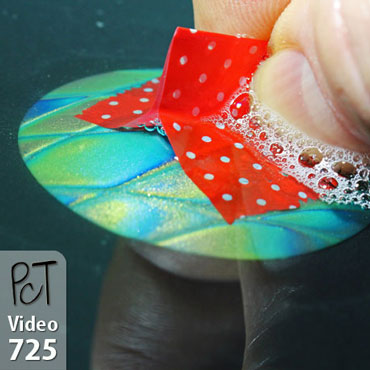
In today’s video I’ll show you a neat little tip for making a tape handle for sanding small items that are difficult to hold onto by themselves.
This idea will work for sanding all kinds of small or awkward shaped pieces… but for this demo, we are specifically talking about sanding polymer clay beads.
Sanding polymer clay has many benefits. Sometimes you may want to sand to give your pieces a nice shape and feel to enhance the look with a rich shiny finish. Other times the reason may be more structural in nature. Both of these use cases apply when making Hollow Lentil beads like the ones I am working with in today’s demo.
I show an example of a hollow lentil bead that has one side sanded and buffed, with the other side unsanded, so you can see the difference.
Sanding not only improves the look and feel of the hollow lentil bead, but is also necessary for the construction of the bead. The bead is made up of two halves that need to be sanded before they are positioned together, so that they fit nicely and look professional.
I have a paid tutorial (Reptile Pattern Hollow Lentil Neckwire – See link below video), that goes through the entire process of creating one of these hollow lentil beads. Starting with making the Reptile Pattern Cane, through to the construction and finishing of the hollow lentil bead itself, and then onto making the neckwire to add the beads to. It has been one of the more popular tutorials in our PcT Library if you have been thinking about trying out one of the paid lesson ;-)
One of the tips that I share in the Hollow Lentil Bead Tutorial, is how to use a piece of scotch tape to make a handle for holding onto your lentil bead shapes while your are sanding them.
Sanding the larger lentil bead shapes aren’t too hard, but as you can imagine, the tiny little ones are very difficult because your fingers get in the way. Adding a small piece of scotch tape to a DRY bead before sanding, gives you a simple little handle to hold onto… even if you’re sanding your piece under water.
Check out the video and you will see what I mean.
00:00:03 –> 00:00:07 Hi guys, this is Cindy Lietz, your Polymer Clay Tutor and today’s Studio Tip, I’m going to show
00:00:07 –> 00:00:13 you a neat little tip for making a tape handle when you’re sanding small items.
00:00:13 –> 00:00:18 Now, this tip could be used for sanding any kind of small item but we’re going to be talking
00:00:18 –> 00:00:24 specifically about sanding polymer clay or– and polymer clay beads.
00:00:24 –> 00:00:32 So I’m now– you may know that sanding can really benefit several types of polymer clay projects.
00:00:32 –> 00:00:38 Sometimes it’s for the look, for example, I’ll show you on this bead here, I’ve got
00:00:38 –> 00:00:45 a Hollow Lentil Bead that has been sanded on one side and not on the other so that I
00:00:45 –> 00:00:49 could show you the difference between sanded and unsanded.
00:00:49 –> 00:00:55 So this is unsanded this is sanded and you can really see the sanded one is not only
00:00:55 –> 00:01:04 a shiny and polished and everything but it feels smooth, the colors look richer and especially
00:01:04 –> 00:01:11 this particular technique that has a lot of Mica Particled Pearl Clays in it, it really
00:01:11 –> 00:01:17 gives a lot more depth to it than the unsanded side but then there’s other cases where you
00:01:17 –> 00:01:23 need the sanding for a structural reason and that’s also the case with these hollow lentil beads.
00:01:23 –> 00:01:35 In this case, the– the bead is made in two halves and then you need to sand the inside
00:01:35 –> 00:01:40 area here so that the two halves sit together nicely.
00:01:40 –> 00:01:46 If you don’t sand them, you get gaps and bumps and a very unprofessional looking fit.
00:01:46 –> 00:01:52 Now, actually this is a technique that I teach in a one of my Paid Tutorials, I’ll leave
00:01:52 –> 00:02:00 a link for it it’s called the Reptile Hollow Lentil Bead Neck Wire Tutorial where you actually,
00:02:00 –> 00:02:07 I will show you right from the beginning how to make the cane that this Reptile Cane here
00:02:07 –> 00:02:11 I’m– you can do it in different colors but I’ve got it in a green gold and kind of blue
00:02:11 –> 00:02:17 color combination and then I’ll show you how to make the lentil beads which are all baked
00:02:17 –> 00:02:25 on to one of these hollow bead makers that Sculpey has designed and then when those pieces
00:02:25 –> 00:02:30 are baked, you sand them and I’m going to show you a little sanding tip here and then
00:02:30 –> 00:02:33 it’s– it’s all put together and I’ll even show you how to make the neck wire.
00:02:33 –> 00:02:37 So that’s a very cool tutorial but one of the little tips that I have in that tutorial
00:02:37 –> 00:02:42 is for when you need to go sand these tiny little pieces.
00:02:42 –> 00:02:48 Now, you can imagine I mean that these larger ones aren’t too bad but when you go to sand
00:02:48 –> 00:02:53 some of these tiny little pieces like this and try to get that flat side on this side,
00:02:53 –> 00:02:59 your fingers are in the way it’s very tricky to do so a neat little tip is to take a piece
00:02:59 –> 00:03:06 of tape, now, I’ve got some pretty a bright-colored scotch tape.
00:03:06 –> 00:03:12 It– I chose this one because it was easier for you to see but you want to use any kind
00:03:12 –> 00:03:15 of scotch tape, something that can handle going into the water because you’re going
00:03:15 –> 00:03:22 to be sanding in the water and this one here is a little bit wide for this tiny little
00:03:22 –> 00:03:27 piece if I try to put it on there so I’m just going to rip it down the length ways.
00:03:27 –> 00:03:30 Hopefully I’ll be able to rip it, I did before.
00:03:30 –> 00:03:35 Yeah there we go, then what i can do is take this.
00:03:35 –> 00:03:39 Now I want to sand the underside, so I’m just going to make a little handle.
00:03:39 –> 00:03:44 You want to do this on your bead when it’s dry and this could work for any kind of shape
00:03:44 –> 00:03:48 that you were working on and then I’ll just making a little loop here and I’m going to
00:03:48 –> 00:03:50 pinch it together so I have something to grab onto.
00:03:50 –> 00:03:55 Now, if your bead is really dry then you can stick the tape to it quite nicely.
00:03:55 –> 00:03:59 Washi tape isn’t going to be your best bet for this because Washi tape first of all doesn’t
00:03:59 –> 00:04:05 have a very strong glue and another thing is that it’s often made the tissue paper so
00:04:05 –> 00:04:10 it will probably fall apart in the water but you can make little handles like that now
00:04:10 –> 00:04:16 I’m going to make it a little bit bigger one for the– for the bigger ones to show you
00:04:16 –> 00:04:20 the sands so that you can see it better it’s going to be tricky if I– if I show you on
00:04:20 –> 00:04:23 that little guy my fingers will be in the way.
00:04:23 –> 00:04:28 So you can just make a little handle like this, stick it on your piece, have something
00:04:28 –> 00:04:33 to grab onto so this would also be work– work if you were going to use to stand some
00:04:33 –> 00:04:35 little wooden pieces and things too.
00:04:35 –> 00:04:38 It’s a neat little trick.
00:04:38 –> 00:04:43 Now, as far as sanding goes, I’ve talked about this lots of times there’s lots of power methods
00:04:43 –> 00:04:49 of sanding but there’s also great just hand sanding techniques.
00:04:49 –> 00:04:55 Now, these are sandpapers that I got in the automotive section and you can usually see–
00:04:55 –> 00:05:00 on some of these even have a pictures of cars and stuff on them.
00:05:00 –> 00:05:04 I got mine at Canadian Tire but that’s because I’m in Canada.
00:05:04 –> 00:05:10 Many of you are not, so wherever you would buy a body work you’re standing supplies sometimes
00:05:10 –> 00:05:15 at Walmart in all kinds of places but I’ve got them in lots of different grits have got
00:05:15 –> 00:05:28 220 grit which is the coarser grit then I’ve got 400, 600, 800 and 1000 and if you can
00:05:28 –> 00:05:35 get it– you can sometimes get up to 2000 and 3000 grit but the higher the number this
00:05:35 –> 00:05:40 the finer the grit but I’m going to use a little piece of the 400 grit.
00:05:40 –> 00:05:46 Just throw it into my water here I put a shallow one that you could see into it and I’m going
00:05:46 –> 00:05:56 to put a drop of dish soap in the water and that will help with the sanding it helps get
00:05:56 –> 00:06:05 the dust away from the– from the sandpaper and it helps keep it cleaner.
00:06:05 –> 00:06:12 And then I just take my little piece where with the little handle and this sand under the water.
00:06:12 –> 00:06:20 And you can do this really quite quickly just back and forth, sanding away you can you don’t
00:06:20 –> 00:06:27 have to do our wet sanding but it’s much nicer for polymer clay ’cause the polymer clay gets
00:06:27 –> 00:06:34 right into the little– the little grits of sandpaper and can clog it up really fast because
00:06:34 –> 00:06:39 it’s such a fine powder but that’s how– that’s my little tip for I’m holding onto small items
00:06:39 –> 00:06:45 this would work for a little round beads, any kind of small item that you need to sand
00:06:45 –> 00:06:49 and it’s even– if you it has to get wet, this will still work.
00:06:49 –> 00:06:55 Alrighty, so I hope that was helpful for you, if it was, do let us know if you like this
00:06:55 –> 00:07:02 video and if you have a technique you don’t understand a product you would like to learn
00:07:02 –> 00:07:10 more about, or any kind of polymer clay related question, then and make sure to check all
00:07:10 –> 00:07:14 of our videos because we’ve got hundreds of videos so that we may have done a video on
00:07:14 –> 00:07:20 it already for you but if not, make a suggestion and we’ll see what we can do about making
00:07:20 –> 00:07:21 a video for you.
00:07:21 –> 00:07:25 Alright, so we’ll see you next time and bye for now.
Our goal is to translate these videos into as many languages as possible. If you are interested in helping with this initiative, then please do contact us and we will figure out a way to make it worth your while :)
Resource Links:
- Related Video: Reptile Hollow Lentil Bead Vol-074 Intro
- Related Video: It’s Definitely Worth It To Sand and Buff
- Related Video: Understanding Polymer Clay Mica Shifts
- Related Video: Polishing Papers For Sanding Polymer Clay Beads
- Related Video: Micromesh Sanding Abrasives
Resources marked with a double ** asterisk are affiliate links. If you click on them and decide to buy something, we may receive some compensation. This does not affect the price you pay in any way. What it does do, however, is helps us to continue providing free videos for you, here at the PcT website. Using our links to purchase your tools and supplies, is always greatly appreciated.
Sponsored Ads & Special Promotions

Shareable Images


To share this full blog post anywhere on the web that allows links in comments, here's a shortened url to copy and paste...
>> https://mypct.ca/v725 <<
Want to chat about today’s post? That’s what the comment section below is for. Scroll Down… We’d love to hear from you!
Or... if you would like to request a topic for a future post, here is the link to do that… PcT Suggestion Box

Thank you for responding to my question. I go down to 1200 as that is the highest number I can find. So I spent most of the day experimenting on wet sanding and applying the oil. I found that when I sand with the object in the water (not just soaking the sand paper in soap water) with better results. I have also found that applying the oil improves the look too. Is there any reason not to use mineral oil? Or is it possible to wash out the partials?
Thank you again,
Kristine Dier
Hello I have watched many of your polymer clay videos and you have been very helpful. I am having trouble with sanding, acetone and buffing black FIMO polymer clay. The clay looks grey after sanding or using acetone. Can I use mineral oil to get the color back? I don’t want it to be shinny, I like the natural may finish of the clay. Any help would be appreciated.
Thank you,
Kristine Dier
Hi Kristine, The reason why your black clay is turning gray when sanded, is because there is dust caught in the minute scratches that were created by the sandpaper you used. This means that you need to use a finer sandpaper so that the scratches are so fine that the dust is imperceptible. You may need to go as high as 2000 grit or higher. If you still want the matte finish, just don’t buff it. Adding oil will not fix the problem. You could use a matte varnish instead if you didn’t want to spend as much time sanding. Just type Matte Varnish into the search box to learn more about that.
Ha! I was just struggling yesterday to hold onto some little lentil beads while sanding – I think my fingers were abraded more than the clay was – and here’s my answer! Thanks!
You are more than welcome Jen! Sometimes it is the simplest things that make all the difference!
Awesome tip Cindy! I just love your videos. They are so helpful.
I work a lot with PMC also. I wonder if the tape would hold on the
dried, unfired clay?
Thank you again!
Hi Vicki, I haven’t worked with PMC so I don’t know for sure. Isn’t it quite fragile when dry but not fired? If so, you would need to be very gentle with it I would think. I am guessing it would stick and hold just fine, but I am wondering if it might pull some of the surface off when you try and remove the tape? This is something that you may want to test on a scrap piece… if there is such a thing with PMC, since it is such an expensive clay. DO let us know if you end up trying it. You now have me curious…
“What a neat trick Cindy” You always come up with the best ideas and turn a hard job into something a lot simpler to handle. After seeing this necklace again, I just got the urge to make another one in the dark blue. It’s such a stunner! Thanks Doll.
Thanks Dixie Ann! I would love to see your dark blue lentils when you get done!